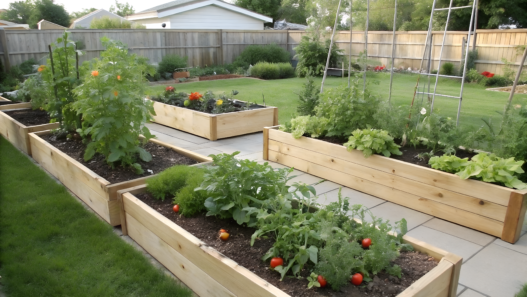
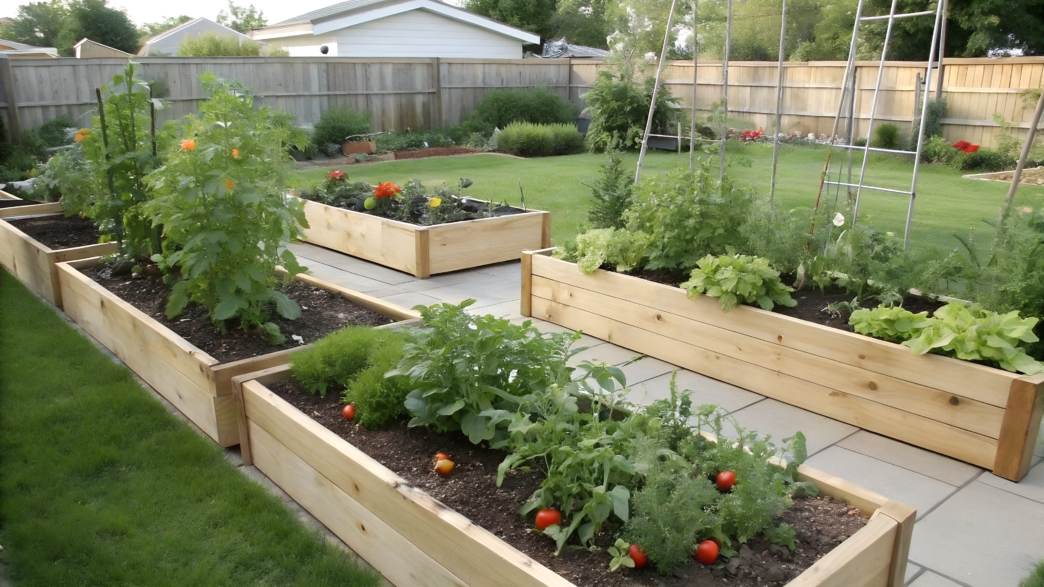
At first glance, a raised bed seems simple and pretty easy to understand: build the box, add soil, sow the seeds. And then you realize it would have been really helpful to think about spacing, supports, repeat sowing, soil mix, and so on.
Lindy and I have reworked the plantings on our small plot in Idaho more than once. Something was always a little off — some plants were too crowded, some supports went in too late… And little by little, we ended up with the layouts we started using in our own garden.
Here are 10 Raised Bed Garden Layout Ideas for Beginners. Choose one layout, plant your crops, and watch how it behaves in your own space.
1. The First Week Planting Plan for Raised Beds
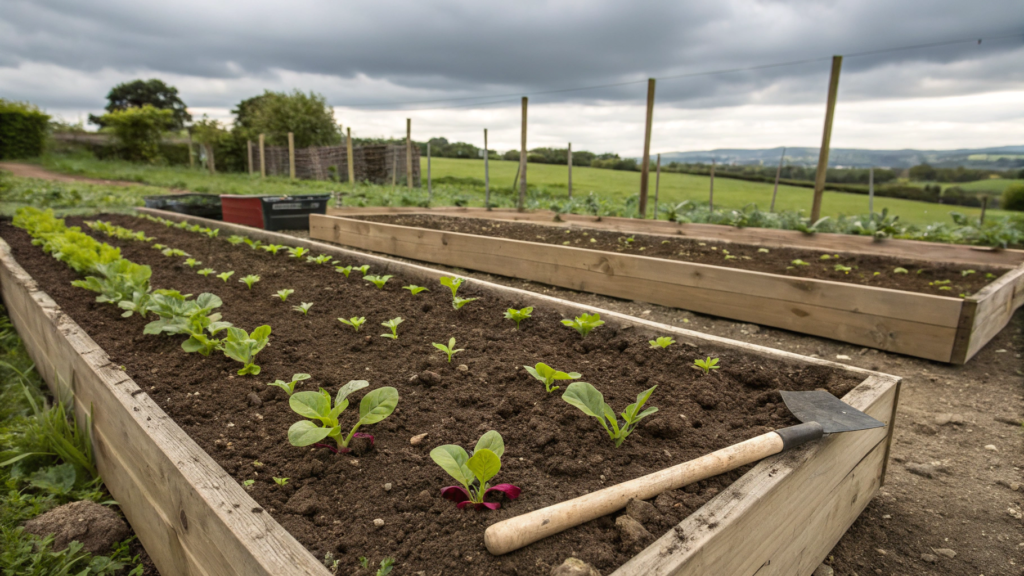
You know that feeling when you want to plant everything at once: tomatoes, basil, lettuce, zucchini, flowers, and a few more peppers? It looks like there is enough space. Lindy and I thought so too. And then the bed suddenly turned out to be not that big after all.
For your first planting, it is better to take one 4 by 8 foot raised bed (about 1.2 by 2.4 m) and start with fast-growing crops. This way, you will not overload the space, and in just a few weeks you will see your first harvest. For a beginner, that matters. When the first radish or lettuce comes up from the soil, your confidence grows like crazy.
What to Plant in the First Week
I think it is better to plant crops that sprout quickly, are easy to thin, and do not make you wait until the end of the season.
For the first bed, these will work well:
- radishes;
- leaf lettuce;
- arugula;
- spinach;
- green onions;
- peas on the north side of the bed;
- calendula or nasturtium in the corners, if it is already warm.
Radishes will give you a quick result. Leafy greens will fill the bed without much fuss. Peas can grow up a support, so they do not take over the middle. And green onions are easy to snip a little at a time without pulling out the whole plant.
What You Need for the First Week
You will need:
- a 4 by 8 foot raised bed (about 1.2 by 2.4 m);
- ready-made soil mix for raised beds;
- compost;
- a watering can or hose with a gentle spray setting;
- seeds of radishes, lettuce, arugula, spinach, green onions, and peas;
- simple garden markers;
- a small support for peas;
- organic fertilizer, if the soil mix is poor, for example Espoma Organic Garden-Tone 3-4-4 Organic Fertilizer for Cool & Warm Season Vegetables and Herbs.
Write down the sowing date right away. Because later, all the rows start to look almost the same, and you find yourself standing over the bed with the face of a person who was pretty sure they remembered where the arugula was.
A Simple 7-Day Plan
| Day | What to Do | What to Plant or Check |
| Day 1 | Fill the bed with soil mix, level it, and water it well | Do not sow anything yet. The soil needs to soak up water first |
| Day 2 | Check how much the soil has settled. If needed, add 1–2 inches (2.5–5 cm) of mix | Mark out rows or squares |
| Day 3 | Sow fast-growing crops | Radishes, arugula, leaf lettuce, spinach |
| Day 4 | Set up a simple support on the north side of the bed | Sow peas along the support |
| Day 5 | Check moisture about 1 inch (2.5 cm) deep | Water gently if the top layer has dried out |
| Day 6 | In heat or wind, add a thin layer of mulch between the rows | Do not cover the seeds themselves |
| Day 7 | See where the bed dries out faster and where it gets more sun | Leave space for a second round of sowing |
Once the order of steps is clear, you can divide the bed into zones. This makes it easier to understand right away where everything will grow.
How to Place Plants in a 4 by 8 Foot Bed
Divide the bed into a few clear zones.
- Set up a support along the long north side and plant peas there. This way, they will grow upward and shade the rest of the bed less. Watch how the sun moves across your own space.
- Plant lettuce and spinach in front of the peas. Once the seedlings come up, thin lettuce to 6–8 inches (15–20 cm), and spinach to 4–6 inches (10–15 cm). The tiny seedlings can go into a salad.
- Plant radishes and arugula closer to the front edge. They are easy to harvest from the edge without reaching into the middle of the bed. Radishes are often ready to harvest in about 3–4 weeks if the weather is cool and the soil does not dry out.
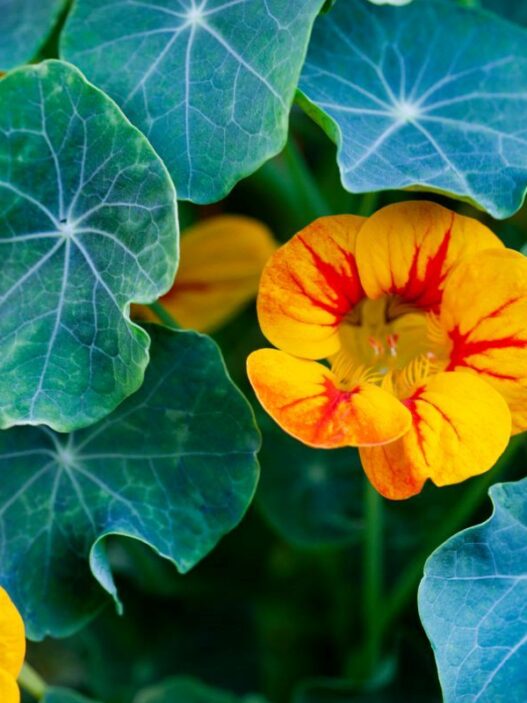
- Add calendula or nasturtium in the corners. One or two plants are enough.
Nasturtium can spread wider than the seed packet makes it sound. Ours tried more than once to take over half the free space. - Keep the soil loose, but not wet and heavy. Add 1–2 inches (2.5–5 cm) of compost into the top layer of the ready-made raised bed mix. The soil should hold moisture, but not settle into dense wet clumps.
- Water gently, especially after sowing. Seeds need steady moisture in the top layer of soil. Check the soil with your finger about 1 inch (2.5 cm) deep: if it is dry, water; if it feels sticky and heavy, wait. A strong stream of water can wash out the rows and move seeds to places where you definitely did not plan to see them.
Your garden will not become perfect in one day. And neither will your first bed. But it should make sense to you: how to fill it, water it, sow fast crops, and set up a support. Then, watch what changes every day.
And enjoy the moment when the first tiny row of green sprouts appears.
2. The Cut and Come Again Bed for Lettuce, Arugula, and Spinach
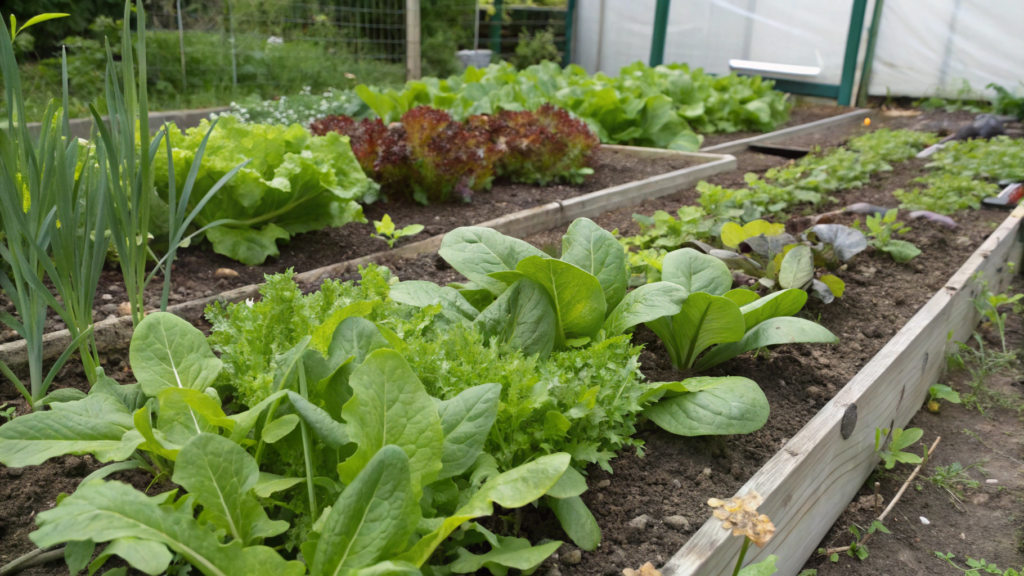
A cut-and-come-again greens bed helped us understand that the most useful harvest is not always a big basket of vegetables at the end of summer, but fresh leaves you can harvest little by little for several weeks in a row.
You grow leafy greens, cut part of the leaves, and let the plants grow back again.
What to Plant
For this kind of bed, it is better to choose leafy crops, not heading varieties, because you can harvest them as young leaves.
Good options are:
- leaf lettuce;
- arugula;
- spinach;
- a little red leaf lettuce for variety;
- green onions along the edge, if there is still room.
Here, the approach is different: plant the greens fairly close together, but not randomly, and then cut the leaves regularly so the plants can keep growing.
What You Need
You will need:
- a 3 by 6 foot or 4 by 8 foot raised bed (about 0.9 by 1.8 m or 1.2 by 2.4 m);
- loose soil mix for raised beds;
- compost;
- seeds of lettuce, arugula, and spinach;
- garden markers;
- a watering can or hose with a gentle spray setting;
- small garden scissors (If you pull the leaves by hand, you can accidentally pull a young plant out by the roots. A clean cut damages the greens less, especially when the plantings are still small.
- a thin cover for sun or cold protection if the weather changes suddenly.
How to Plant and Harvest
The greens should not grow so thickly that it becomes hard to reach them by hand.
- Plant lettuce in the main strip closer to the middle. After the seedlings come up, thin the plants to about 6–8 inches (15–20 cm) apart. If the seedlings come up thicker, you can carefully cut the extras and use them as baby greens in salads.
- Place arugula closer to the edge. It grows leaves quickly, and it is easy to cut first. In hot weather, arugula can bolt faster and taste sharper, so it does not need the central spot.
- Plant spinach where it stays cooler. If part of the bed gets light shade after lunch, spinach will have an easier time there. It does better in the cool season than under hot summer sun.
- Leave a little free space for access. Do not sow every last inch of the surface. You will need to cut leaves regularly without breaking the neighboring plants.
- Cut above the growing point. When the leaves reach about 4–8 inches (10–20 cm), you can start harvesting. Cut the outer leaves or the top part of the plant, leaving about 1 inch (2.5 cm) above the soil. After this kind of cut, the greens can give another harvest in about 25–30 days.
- Do not clear the whole bed at once. It is better to cut greens in sections: a little lettuce today, arugula in a few days, then part of the spinach. This keeps the plants growing longer, and the bed does not empty out after one harvest.
Care After Cutting
After harvesting, check the top layer of soil. If it is dry about 1 inch (2.5 cm) deep, water gently. If the soil is still moist, you can skip watering.
Every couple of weeks, you can add a thin layer of compost between the rows. Do not cover the center of the plants or pile compost around the stems. For this kind of greens, moderate feeding is better.
During hot hours, the bed can be lightly shaded. Lettuce and spinach get tough quickly in the heat, and arugula can bolt earlier than you want. If you have a hot summer, this bed will usually do better in spring, early summer, or closer to fall.
Tip. Do not sow all the greens at once. Sow small sections every 2–3 weeks. Then the bed will have plants of different ages, and the harvest will not end with one big cutting.
A bed with lettuce, arugula, and spinach shows results quickly. The first leaves appear early, and the main thing here is not to cut too low, not to let the soil dry out, and not to plant so thickly that everything turns into a green carpet.
For a first raised bed, this is a good choice: fast harvest, simple layout, and several waves of fresh greens instead of one short harvest at the end of the season, when you do not know what to do with all that produce.
3. The Tomato Basil Layout Inspired by Italian Courtyard Gardens
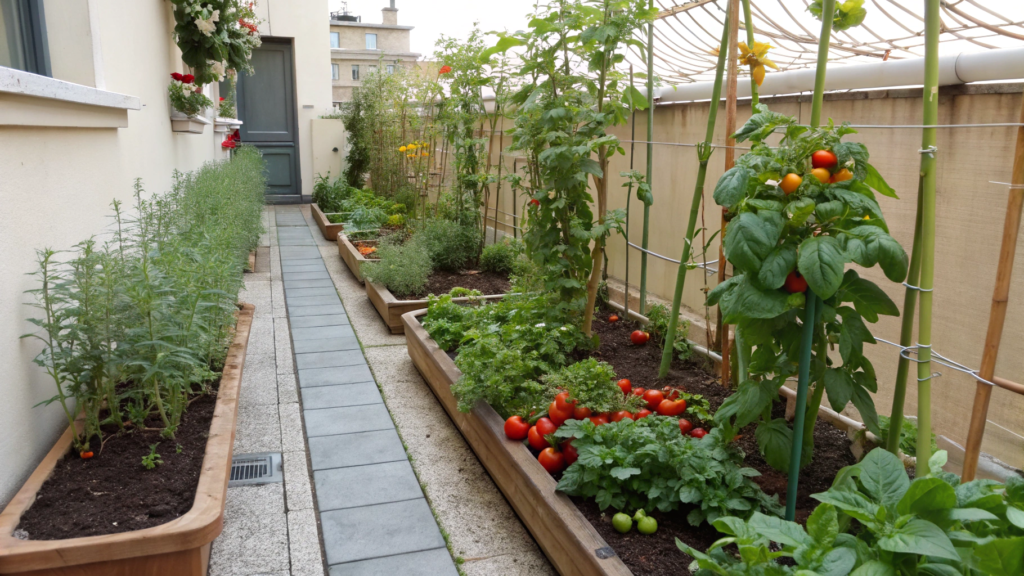
This bed is inspired by small Italian courtyard gardens, where food grows almost right next to the table: tomatoes on supports, basil within reach, a few flowers along the edges, and a path that makes it easy to get to the plants. Not a huge vegetable garden. A compact, living bed that looks like it is part of the kitchen.
What to Plant
For a 4 by 8 foot bed (about 1.2 by 2.4 m), I would take:
- 2–3 tomato plants;
- 4–6 basil plants;
- calendula or nasturtium in the corners;
- a little parsley or green onion along the edge, if there is still room.
Tomatoes should not be planted too closely. In a small bed, the plants can close in on each other, air moves through less easily, and the lower leaves stay wet longer after watering or rain.
What You Need
You will need:
- a 4 by 8 foot raised bed (about 1.2 by 2.4 m);
- loose soil mix and compost;
- tomato seedlings;
- basil seedlings;
- strong supports for tomatoes;
- mulch: straw, shredded leaves, or fine wood chips;
- a watering can or hose with a gentle spray setting;
- garden scissors for basil and tying plants.
It is better to set up the supports right when you plant. Later, when the roots spread out, pushing stakes into the soil near the plant will be less convenient.
How to Place the Plants
- Plant tomatoes closer to the back or north side of the bed. Leave about 18–24 inches (45–60 cm) between plants if the variety is compact. Larger tall varieties need more space. This way, the tomatoes will grow upward and will not block the sun from the basil.
- Place basil in front of the tomatoes. Leave about 10–12 inches (25–30 cm) between basil plants. Basil loves warmth, but in strong heat it may do better near tomatoes, where it gets a little cover from the midday sun.
- Plant flowers in the corners or along the edge. Calendula and nasturtium will give the bed that small courtyard feeling: not strict rows, but a neat planting where vegetables, herbs, and flowers grow together. Just do not give nasturtium too much space. It quickly takes over free spots.
- Leave easy access to the tomatoes. You will need to tie the stems, remove lower leaves, and harvest the fruit. If basil or flowers block access to the plants, this bed will quickly become inconvenient.
- Mulch the open soil. A layer of mulch about 1–2 inches (2.5–5 cm) helps hold moisture and reduces soil splashing onto the lower tomato leaves during watering.
Tomato Care
Tomatoes in this bed are the main vertical layer. They need support, air, and steady watering. Tie the stems as they grow, especially if the variety is tall. Lower leaves that touch the soil or sit too close to the mulch are better removed. This keeps the plant neater, and air can move more freely around the base.
Water tomatoes at the base, not over the leaves. It is better to let the water go deeper into the soil than to lightly wet the surface every day. In hot weather, check the soil with your finger: if the top 1–2 inches (2.5–5 cm) are dry, it is time to water.
You can harvest tomatoes when they are fully colored and slightly soft to the touch. If the weather is too hot, too humid, or a heavy rain is coming, you can pick some tomatoes a little earlier and let them ripen indoors.
Basil Care
It is better not to pick basil from the bottom one leaf at a time. Cut the top of the stem just above the spot where two leaves grow from it. After that cut, the plant starts branching and becomes fuller.
Do not remove more than a third of the plant at once, especially if the basil is still young. And do not let it flower for too long if you want more leaves. When flower stems appear, it is better to pinch them off.
I love these beds for their simplicity. You do not need many crops or complicated combinations. Tomatoes add height, basil grows near the path, flowers soften the edges, and mulch covers the bare soil. It becomes more than just a vegetable planting. It becomes a small kitchen garden you actually want to walk up to before dinner.
And just imagine: bread, salt, basil, and a warm tomato from the bed. Tasty?
4. The Salsa Bed Plan With Peppers, Cilantro, and Onions
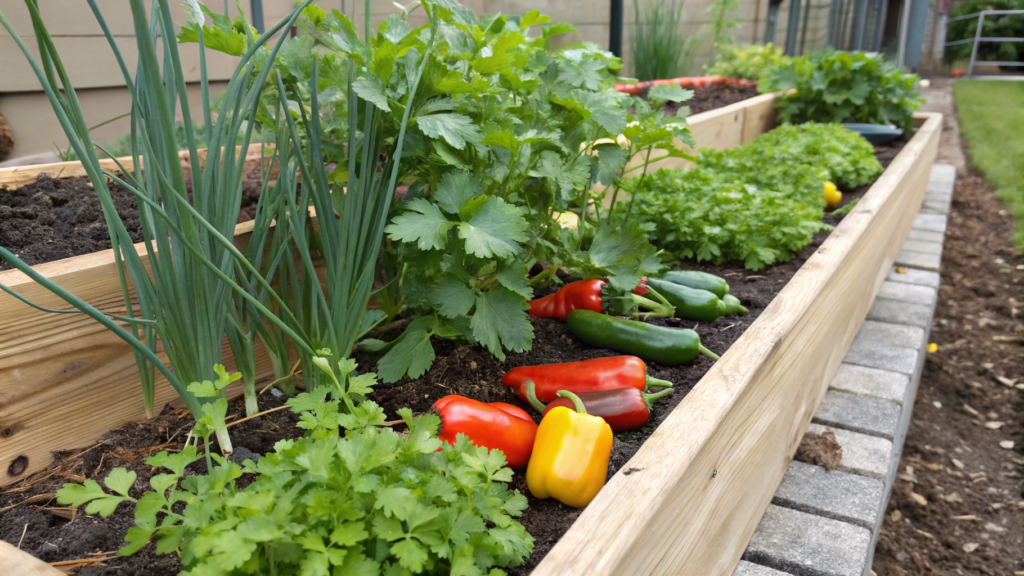
Here, you are not just planting separate vegetables. You are planting a set for fresh homemade salsa. Peppers, cilantro, green onions — a quick harvest along the edges. If tomatoes are already growing in a nearby bed, this planting will make a great match for them.
What to Plant
For a 4 by 8 foot bed (about 1.2 by 2.4 m), I would take:
- 3–4 sweet or hot pepper plants;
- cilantro in small sections;
- green onions or bunching onions along the edge;
- calendula or marigolds in the corners;
- one compact tomato at the edge of the bed, if it will not block light from the other plants.
Do not plant peppers too tightly. They need air, sun, and room to branch. Cilantro, on the other hand, is better sown not in one big patch, but in small repeat sections. It grows quickly, but in heat it can bolt.
If you add a tomato, plant it at the edge and set up a support right away. Do not plant it in front of the cilantro and onions: in a few weeks, the plant will get wider and may block their light.
What You Need
You will need:
- a 4 by 8 foot raised bed (about 1.2 by 2.4 m);
- loose soil mix and compost;
- pepper seedlings;
- cilantro seeds;
- green onions, onion sets, or bunching onion seeds;
- garden markers;
- small supports for peppers;
- mulch for open soil;
- a watering can or hose with a gentle spray setting.
It is better to set up the pepper supports right away. Young plants look sturdy, but once fruit appears, the branches can start leaning to the sides.
How to Place the Plants
- Plant peppers closer to the center or back edge of the bed. Leave about 18–24 inches (45–60 cm) between plants. This gives them room to grow, and it will be easier for you to water and harvest the fruit.
- Place cilantro closer to the front edge. You will cut it often, so it should be easy to reach. Sow cilantro every 2–3 weeks to get fresh leaves for longer, especially if the weather warms up quickly.
- Plant onions along the edge of the bed. Green onions do not take up much space and fit well in a narrow line along the side. You can snip them little by little while the peppers are still getting established.
- Add flowers in the corners. Marigolds or calendula should not take over the center of the bed. Their job is to fill the edge, add color, and draw pollinators closer to the planting.
- Leave space to reach the peppers. Do not sow cilantro over every open spot. When the peppers start producing, you will need to reach the plants easily without breaking the greens around them.
Bed Care
Plant peppers outside only after the risk of frost has passed and the nights are warmer. According to the University of Minnesota, peppers are best transplanted outdoors when nighttime temperatures stay above 50°F (10°C).
Give cilantro a little protection from strong heat. If the peppers have already grown larger, their light shade can help in the afternoon. In hot, humid weather, cilantro bolts quickly, so repeat sowing matters more here than trying to keep one plant going for the whole season.
Water at the base of the plants. Peppers need deeper watering, while cilantro needs steady moisture in the top layer of soil. After planting, you can add a layer of mulch about 1–2 inches (2.5–5 cm) thick so the soil does not dry out too quickly.
Tip. Do not sow all the cilantro at once. Leave a small section and sow a new batch every 2–3 weeks. This way, you will have fresh herbs instead of one short harvest that ends right when you need it most.
In this layout, peppers take the main layer and give a later harvest. Cilantro gives quick cuttings. Onions grow along the edge and do not need much space. This bed does not sit empty while the peppers are still developing. That is why I like it. It is easier to care for this kind of bed when you can already picture how you will use the first pepper.
5. The Cool Season Starter Bed for Peas, Radishes, and Greens
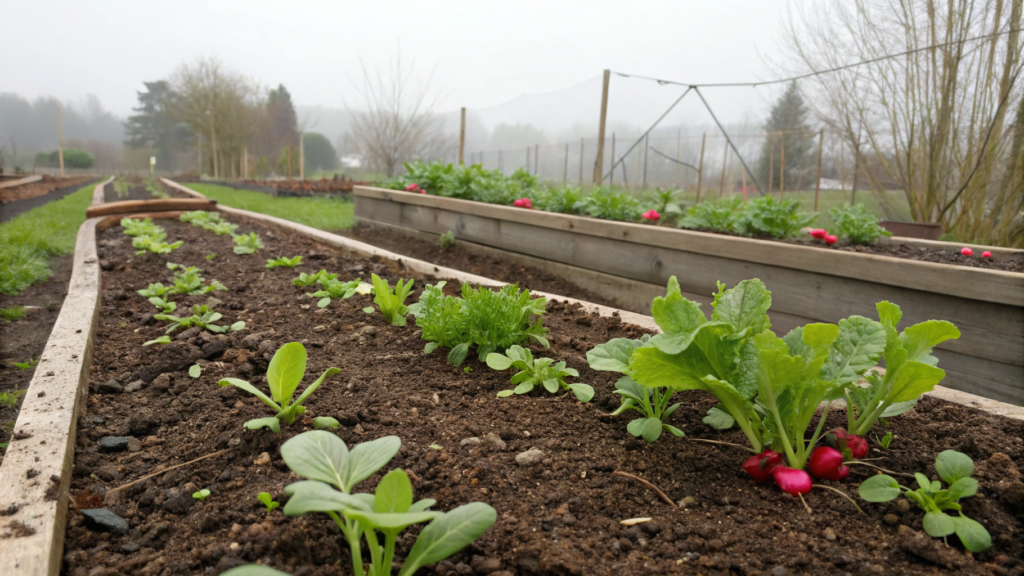
In early spring, I usually start with more cold-tolerant crops: peas, radishes, and the first greens. They grow well in cool weather, and you can feel like the season has finally started.
According to the University of Minnesota, peas, spinach, lettuce, and radishes can be sown directly in the bed when the soil temperature stays around 40–50°F (4–10°C). That is why this kind of planting works well in early spring, before it is time to transplant tomatoes and peppers.
What to Plant
For a 4 by 8 foot bed (about 1.2 by 2.4 m), I would take:
- peas along one long side;
- radishes closer to the front edge;
- spinach or leaf lettuce in the middle;
- a little arugula or Asian greens, if you like a sharper flavor;
- green onions along the edge, if there is still room.
Do not try to pack the bed completely full, even if you really want to. Peas need a support, radishes need loose soil, and greens need room for cutting. If you sow everything too thickly, the harvest will be weaker.
What You Need
You will need:
- a 4 by 8 foot raised bed (about 1.2 by 2.4 m);
- loose soil mix;
- compost;
- seeds of peas, radishes, and greens;
- a simple support for peas;
- garden markers;
- a watering can or hose with a gentle spray setting;
- a thin cover for cold nights, for example Agfabric Floating Row Cover.
You do not need to use the cover all season. But in early spring, it can really help, especially when the weather jumps around: it feels like spring during the day, but at night the plants can still get damaged by cold.
How to Place the Plants
- Plant peas on the north or back side of the bed. Set up the support right away. This way, the peas will grow upward and will not take over the middle. The seeds are usually planted about 1 inch (2.5 cm) deep, but it is better to check the instructions on the packet for your specific variety.
- Sow radishes closer to the front edge. They grow well in short rows, where you can easily thin the seedlings and harvest quickly. After thinning, leave about 2–3 inches (5–7.5 cm) between plants.
- Place greens in the middle section. Spinach, lettuce, or arugula are better sown in strips, not in one dense patch. This makes it easier to thin, cut leaves, and see where the soil dries out faster.
- Leave a small open area. In a couple of weeks, you can sow more radishes or lettuce there. That is better than getting the whole harvest at once and then looking at an empty spot.
- Water gently after sowing. Seeds need moist soil, but not washed-out rows. If the top 1 inch (2.5 cm) of soil is dry, water. If the soil is still moist and cold, do not add water just out of habit.
Early Season Care
The main thing with this bed is to sow peas, radishes, and greens while the weather is still mild. These crops grow better without summer heat. If spring warms up quickly, radishes can get tough, and lettuce, spinach, and arugula can bolt faster.
Help peas reach the support while the plants are still small. Usually, it is enough to gently guide the stems toward the netting or twine. Radishes should not stay in the ground too long: once the roots have sized up, it is better to harvest them. Overgrown radishes often get tough.
Tip. Sow radishes and greens in small batches every 10–14 days while the weather stays cool. This way, the harvest stretches over several weeks instead of all coming at once.
When the radishes have been harvested and the first leafy greens start growing worse because of the heat, you can give the open space to summer crops. Bush beans, basil, a cucumber on a support, or one compact pepper can work well if the bed gets enough sun.
First, the bed gives you an early harvest. Then it moves into summer planting without a pause. On a small plot, that matters a lot. The same bed does not sit empty, but keeps producing.
6. The Square Foot Raised Bed Layout for Maximum Variety
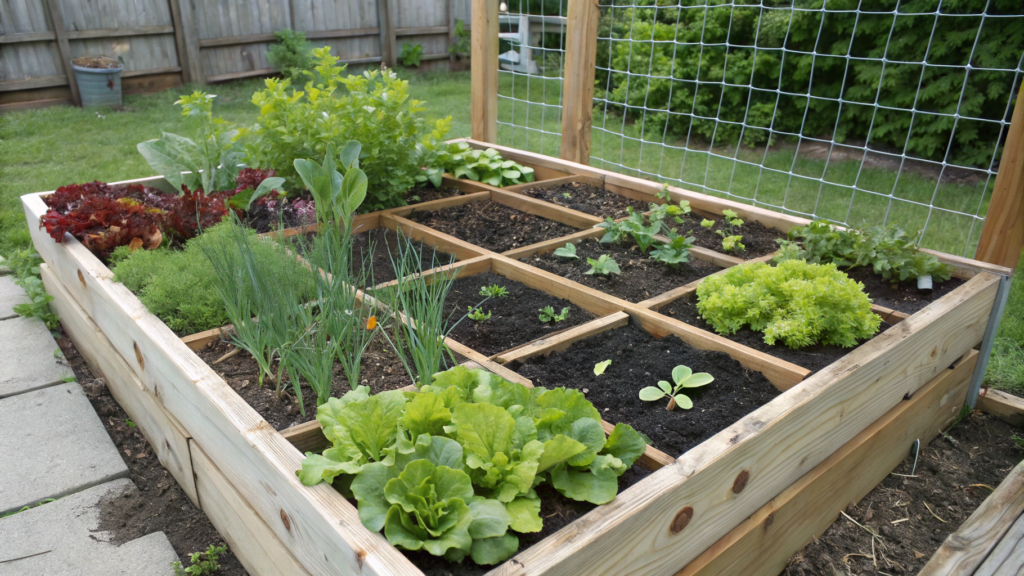
The square foot method lets you plant not just one or two crops in a bed, but a little bit of everything: lettuce, radishes, carrots, onions, greens, herbs, and flowers. For a beginner, this is a good way not to get lost. The bed is divided into 1 by 1 foot squares (about 30 by 30 cm), and each square gets its own small job.
What to Plant
For a 4 by 4 foot bed (about 1.2 by 1.2 m), you will get 16 squares. For the first time, I would not choose large plants like zucchini or sprawling tomatoes. They quickly take up more space than it seems.
It is better to start with crops that are easy to manage:
- leaf lettuce;
- radishes;
- carrots;
- spinach;
- green onions;
- parsley;
- basil;
- calendula or marigolds in the corners.
This kind of bed will not give you a huge harvest of one crop, but it will show you what you actually like growing. You may think you want a lot of spinach, and then realize that you reach for parsley and lettuce most often.
What You Need
You will need:
- a 4 by 4 foot or 4 by 8 foot raised bed (about 1.2 by 1.2 m or 1.2 by 2.4 m);
- loose soil mix and compost;
- a tape measure;
- thin wooden slats, twine, or garden marking lines;
- seeds of the crops you chose;
- garden markers;
- a watering can or hose with a gentle spray setting;
- a hand trowel.
It is better to make the grid right away. You can stretch twine every 1 foot (30 cm), or you can lay thin slats across the bed. I like slats more: the squares stay visible all season, and you do not have to keep remembering where the border was.
How Many Plants Go in One Square
In the square foot method, plants are placed closer together than in regular long rows. The University of Florida explains that this approach helps you get more harvest from a small space. But it is important not to overdo it: leaves can lightly touch, but it is better to avoid crowding, poor airflow, and constant competition for light.
| Crop | How Many to Plant in 1 Square |
| Large pepper or compact tomato | 1 plant |
| Leaf lettuce | 4 plants |
| Parsley or basil | 4 plants |
| Spinach | 9 plants |
| Radishes | 16 plants |
| Carrots | 16 plants |
| Green onions | 16 plants |
These numbers are a starting guide, not a strict rule for the whole season. Varieties are different, and plants do not always grow exactly the way the seed packet promises. If the summer is humid, leave a little more air between the plantings.
How to Place the Plants
- Plant taller crops so they do not block light from shorter ones. If you add a compact tomato, pepper, or tall basil, do not plant them in front of lettuce, radishes, and greens. It is better to give them the far edge of the bed or the side where their shade will not fall over the other squares.
- Plant fast crops closer to the edge. Radishes, lettuce, and green onions are easy to harvest from the outside of the bed. You do not need to reach across the whole planting and crush nearby plants.
- Carrots and green onions can go in neighboring squares. They do not take up much space above the soil, so they fit well into small 1 square foot sections. Carrots should definitely be thinned later, or the roots will stay thin.
- Keep herbs in their own squares. Parsley, basil, and cilantro are easier to manage when each crop has its own section. This makes it easier to cut the greens and not mix up the seedlings.
- Plant flowers in the corners. Calendula or marigolds add color and do not get in the way of harvesting if you do not give them the center squares.
How Not to Overload the Bed
The mistake is planting too many different crops just because the squares look neat. On paper, everything fits. But in real life, plants grow, leaves close in, and you still need to water, thin, and harvest.
For a first bed, I would choose 5–6 crops, not more. For example: lettuce, radishes, carrots, green onions, parsley, and calendula. That is already enough to make the bed varied without turning it into a mess.
Tip. Leave 1–2 squares open for repeat sowing. In a couple of weeks, you can sow radishes, lettuce, or spinach there again. This way, the bed will keep producing longer, instead of giving one short wave of harvest.
A square foot bed helps you see the plantings right away. Where the lettuce is, where the radishes are, where the carrots are, where the herbs are. For a beginner, that matters, especially when the seedlings are still small and everything looks almost the same.
You can always see that one crop in one square grew really well, another dries out faster, and in the third square the lettuce clearly needs more room. These small observations help you make the next season’s plantings smarter and more practical.
7. The Container Backup Plan for Overflow Seedlings
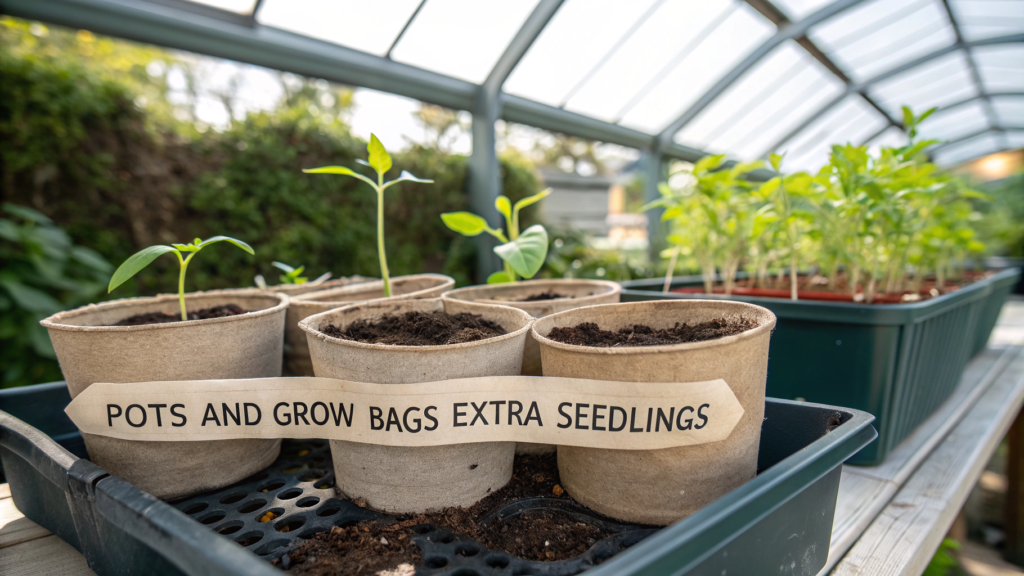
Extra seedlings are almost always left over. Even if you promised yourself you would plant “just a couple of seeds.” It feels bad to throw them away. For these cases, I always have a container backup plan for seedlings.
It is just a few pots, grow bags, or boxes where you can move the extra plants and still get a harvest.
What You Can Plant in Containers
Not every seedling does equally well in containers. For a backup plan, it is better to choose crops that do not need a huge amount of space.
Good options are:
- basil;
- leaf lettuce;
- parsley;
- green onions;
- dwarf tomatoes;
- peppers;
- calendula;
- nasturtium;
- strawberries, if you have the right container.
But large zucchini, pumpkins, or tall tomatoes are better not forced into a place where they will not have enough food or water.
What You Need
You will need:
- containers with drainage holes;
- loose soil mix for containers;
- compost;
- trays, if the containers are on a terrace or patio;
- a watering can or hose with a gentle spray setting;
- garden markers;
- fabric grow bags for larger plants.
For herbs and lettuce, you can use smaller containers. For peppers and dwarf tomatoes, it is better to give them more space right away: about 3–5 gallons (11–19 l) per plant. This way, the soil will not dry out too quickly, and the roots will have room to grow.
How to Divide Up Extra Seedlings
- Start with the strongest plants. If a seedling is stretched out, yellowing, or looks weak, you do not need to rescue it. Containers are better used for plants with a decent stem, healthy leaves, and a real chance to start growing quickly.
- Do not mix too many crops in one pot. Basil and parsley can still grow together if the container is wide. But peppers are better given their own space. They do not like having too many competitors nearby.
- Place containers closer to water. Soil in containers dries out faster than soil in raised beds. If you put containers far from water, watering will start to get annoying fast.
- Keep herbs closer to the kitchen. Basil, parsley, and green onions are especially convenient in containers if they are easy to reach before cooking. Our pots like that always “moved” closer to the kitchen door. And it was always really convenient.
- Do not put every container in the hottest spot. Lettuce and parsley can struggle in strong heat. They are better with morning sun and a little protection from it in the afternoon. Peppers and tomatoes, on the other hand, like more light.
Watering and Care
Containers need to be checked more often than raised beds. In hot weather, the top layer can dry out in a day. Check the soil with your finger about 1 inch (2.5 cm) deep, and if it is dry, water.
Water until it starts coming out through the drainage holes. This way, you know the moisture reached more than just the top layer. But do not leave containers sitting in water all the time, especially if they are herbs or peppers.
A couple of weeks after transplanting, you can add a little compost on top or use a gentle organic fertilizer according to the instructions. In a container, the food supply is limited, so plants show faster when something is missing.
Tip. Label the containers right away. Basil, pepper, and some flower seedlings can look less obvious than you would like in the first few days after transplanting. And then the guessing game begins: what is growing where?
A container backup plan for seedlings helps you avoid overloading the main beds. Instead of squeezing extra seedlings between crops that are already planted, you give them their own place. It is neater, easier, and often more productive.
These plantings are easy to move. If lettuce is too hot, you can move the container. If basil needs to be closer to the kitchen — great, let it be closer. So I think this kind of small mobile garden bed is a very convenient option.
8. The Soil Mix Layering Plan That Avoids Soggy Roots
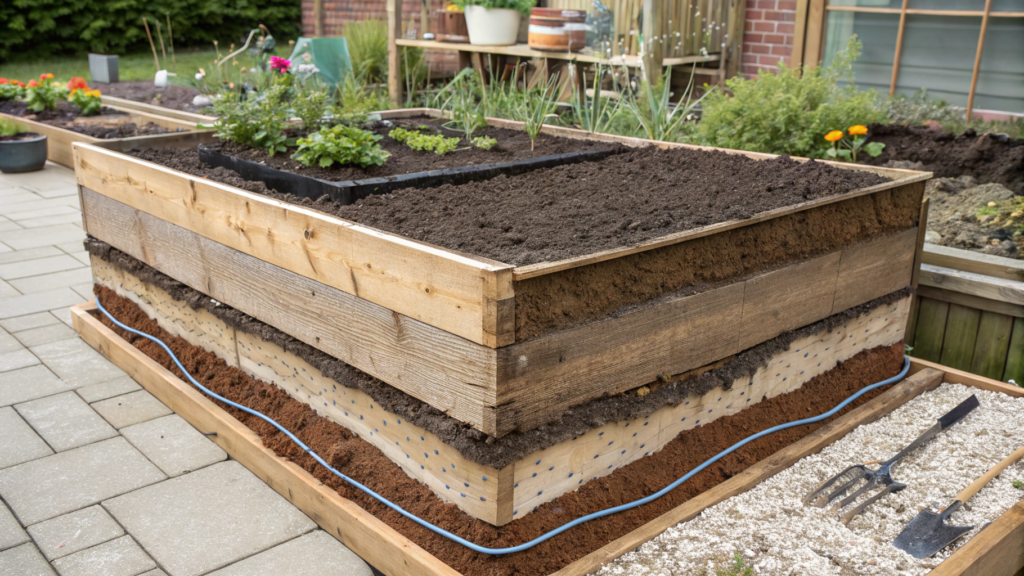
Most people think that if a raised bed sits above the ground, the water will definitely drain on its own. But unfortunately, that is not always how it goes. If you fill the bed with heavy soil, too much compost, or a mix that packs down after the first rains, the roots can quickly end up crowded and wet.
Lindy and I learned this the hard way too. And that is when we started paying more attention not only to feeding the plants, but also to the soil structure.
What You Need
You will need:
- a raised bed at least 10–12 inches (25–30 cm) deep;
- ready-made raised bed mix or good-quality topsoil;
- mature compost;
- coconut coir or a peat-based component, if the mix dries out too quickly;
- perlite for looseness;
- mulch: straw, shredded leaves, or fine wood chips;
- a watering can or hose with a gentle spray setting.
You do not need to buy ten different amendments. For a normal bed, the important thing is not a “secret ingredient,” but balance: the soil should hold moisture without turning into a heavy wet clump.
How to Fill the Bed in Layers
- Do not add gravel or crushed stone to the bottom for drainage. If the soil mix is heavy and stays wet for a long time, gravel at the bottom will not fix that. The mix itself matters more: it should be loose, nutritious, and able to let water pass through.
- If the bed is deep, you can fill the lower part with rough organic matter. This is not a drainage layer. It is a way to take up extra depth and slowly add organic matter to the bed. Small branches, dry stems, leaves, and partly broken-down plant material can work. Do not add fresh kitchen scraps, diseased plants, or large pieces of wood that will get in the way of planting.
- Make the main root zone from a loose mix. The top 8–12 inches (20–30 cm) should be the highest-quality part, because that is where most vegetable and herb roots will grow. Mix a soil base with compost, but do not fill the whole bed with compost alone.
- Add perlite if the mix is heavy. It helps the soil stay looser after watering. This is especially useful if the mix packs down quickly and forms a crust on top.
- Add a thin layer of compost on top. About 1–2 inches (2.5–5 cm) is enough. You can lightly mix it into the top layer instead of leaving it as a dense “cap.”
- After planting, mulch the open soil. A layer of mulch about 1–2 inches (2.5–5 cm) helps the soil avoid drying out too quickly and protects the surface from crusting after watering.
What Kind of Mix You Need
For most vegetables, the mix should not be too heavy or compost-rich. Compost helps hold moisture and nutrients, but if there is too much of it, the soil can stay wet longer after watering.
The University of Maryland recommends making the top 8 inches (20 cm) of a raised bed especially good quality: mixing a soil base with compost or a ready-made substrate. This is the part of the bed where roots will be most active, so it should be loose, nutritious, and free of heavy wet clumps.
If the mix feels sticky, stays wet for a long time, and does not crumble well in your hand, add more of a loose component. If water runs through immediately and the soil dries out every day, add more compost or coconut coir.
How to Check Moisture
The simplest test is with your hand. Take a handful of soil after watering and gently squeeze it.
- If it holds its shape but crumbles easily when touched, the mix is good.
- If it turns into a sticky lump, it is too heavy.
- If it falls apart right away into dry dust, it does not hold enough moisture.
After planting, check the top 1–2 inches (2.5–5 cm). If it is dry, water. If the soil is still moist, do not add water just out of habit. Wet roots usually suffer not from one deep watering, but from constant dampness without air. Roots need more than water and nutrients. They need air. When the soil is too dense and wet, roots develop worse, and plants look weak even in a bed that seems “good” at first glance.
Even on a small plot, you always need to think about where the water will go, where the roots will grow, and where the surface needs to be covered with mulch. A good mix does not make the garden perfect. But it keeps plants from sitting in wet heavy soil and helps them start growing normally.
9. The Trellis Side Layout That Doubles Climbing Space
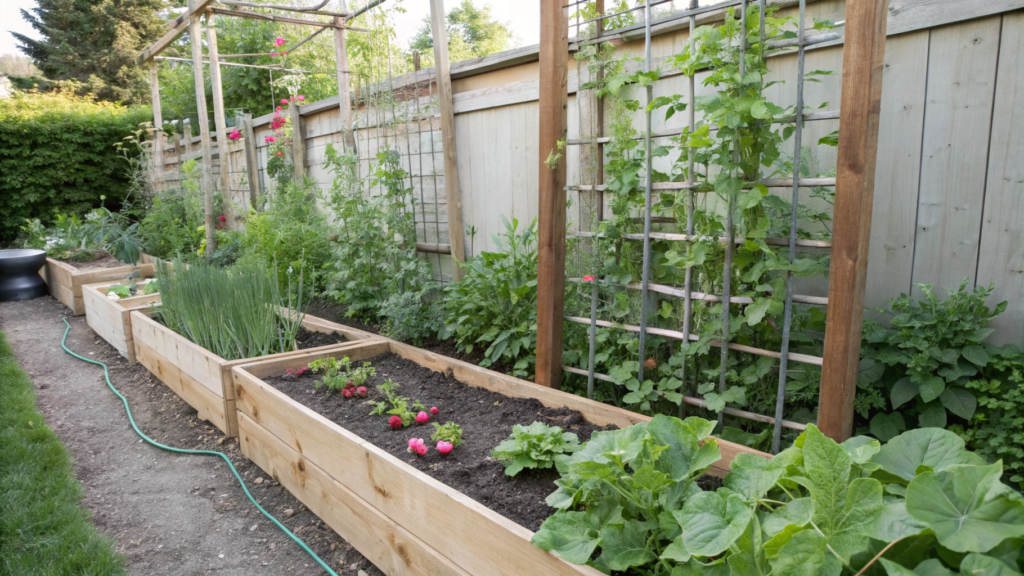
When space is limited, you start looking not only at the length and width of a bed, but also at its height. The fastest way to get more planting space is not to make the bed wider, but to use vertical growing. A side trellis lets you train peas, beans, cucumbers, or nasturtium upward, while keeping the middle of the bed open for greens, radishes, onions, or herbs.
What to Plant
For a 4 by 8 foot bed (about 1.2 by 2.4 m), I would choose one main climbing crop, not everything at once.
Good options are:
- peas for early spring;
- beans for warm weather;
- cucumbers on a net;
- nasturtium, if you want more greens and flowers;
- small squash only if you have a strong support and a roomy bed.
For a beginner, it is easiest to start with peas or beans. They are easy to guide onto a support, and they start climbing the netting or twine pretty quickly. They also do not need as much support as large squash or heavy cucumber vines.
What You Need
You will need:
- a 4 by 8 foot raised bed;
- a strong side trellis or garden netting;
- seeds of peas, beans, or cucumbers;
- twine or soft plant ties;
- compost;
- mulch;
- a watering can or hose with a gentle spray setting;
- garden netting for climbing plants.
It is better to set up the trellis before sowing or transplanting. Later, when the plants are already up, it is easy to damage the roots or accidentally break the young stems.
How to Place the Plants
- Set the trellis along one long side of the bed. It is better to choose the side where the shadow from the climbing plants will not block the lower crops. If you are not sure, check during the day where the shadow from a fence, house, or the bed itself falls.
- Sow the climbing plants along the trellis. Peas and beans can be sown in a line, leaving about 3–4 inches (7.5–10 cm) between plants, unless the seed packet says otherwise. Cucumbers need more space — usually about 12 inches (30 cm) between plants.
- Leave the middle of the bed for lower crops. Lettuce, spinach, radishes, green onions, basil, or parsley all fit well there. They will not compete with the climbing plants for height, and the bed will stay easy to harvest.
- Do not plant large crops right at the base of the trellis. Zucchini, large tomatoes, and sprawling herbs can quickly block access to the netting. After that, it becomes harder to guide the vines and harvest the crop.
- Guide the stems early on. Young plants do not always grab the support exactly where you want them to. Gently bring them to the netting or twine. There is no need to tie them tightly — soft support is usually enough.
- Leave room for harvesting. The trellis should not turn the bed into a wall you cannot reach. If the plants are growing too thickly, it is better to remove the extra weak seedlings early.
Care
Climbing plants on a trellis dry out faster in hot weather, because there are more leaves while the roots stay in the same bed. Check the soil at the base of the plants. If the top 1–2 inches (2.5–5 cm) are dry, water more deeply instead of just wetting the surface.
A layer of mulch about 1–2 inches (2.5–5 cm) thick helps hold moisture and protects the soil from crusting. Just do not press the mulch right up against the stems.
If you are growing cucumbers, harvest them often. Overgrown fruit takes energy from the plant, and new fruit sets less often. The same goes for peas and beans: regular harvesting helps the crop keep growing longer.
A side trellis adds another level to the bed. Greens and root crops grow below, climbing plants rise along the side, and the middle does not turn into a dense tangle. That is especially useful on a small plot. It is also easier to care for: the vines are not lying on the ground, the harvest is easier to see, and the leaves dry faster after rain or watering.
10. The Mistake Proof Rotation Plan to Keep Beds Productive
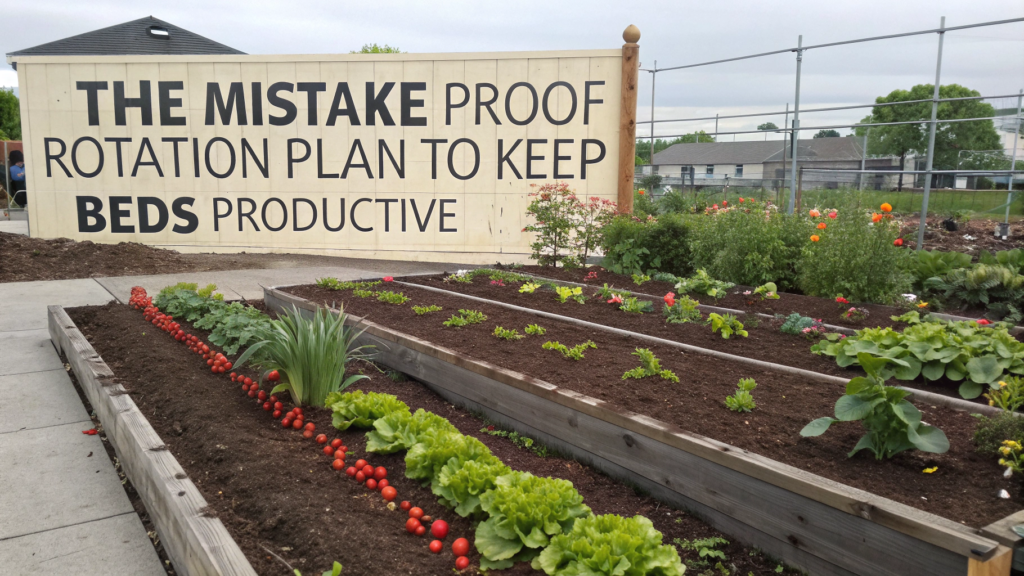
Crop rotation is useful in a small garden too. Especially in raised beds, where we often grow the same favorite plants again and again: tomatoes, peppers, lettuce, radishes, beans, cucumbers.
If you plant the same crop in the same place every year, the soil will lose the same nutrients again and again, and the pests and diseases connected to that crop can stay in the bed longer.
For a beginner, one simple rule is enough: do not plant the same group of plants in the same place two seasons in a row.
The easiest way is to divide crops into a few clear groups:
| Group | What Belongs Here |
| Fruiting crops | tomatoes, peppers, eggplants, cucumbers, zucchini |
| Leafy crops | lettuce, spinach, arugula, cabbage, Swiss chard |
| Root crops and onions | carrots, radishes, beets, onions, garlic |
| Legumes | peas, beans |
This table helps you quickly understand what exactly you are moving around the beds each season.
What You Need
You will need:
- 2–4 raised beds, or at least one bed divided into zones;
- garden markers;
- a simple notebook or note on your phone;
- seeds and seedlings for the next season;
- a pencil for quick notes;
- long-lasting garden labels, for example KINGLAKE Plastic Plant T-Type Tags.
The most important thing is to write down what grew where. In fall, it feels like you will definitely remember. By spring, that confidence somehow disappears.
How to Keep Rotation Simple
- Divide the beds into groups. If you have four beds, you can give each one its own group: fruiting crops, leafy crops, root crops with onions, and legumes. If you have one bed, divide it into 3–4 zones.
- Move the groups to a new place each season. Where tomatoes and peppers grew last year, plant greens, beans, or root crops next season. Do not plant the same group in the same spot.
- Do not mix up crops just by how the harvest looks. Tomatoes and peppers look different, but they belong to the same large nightshade group. So it is better not to replace tomatoes with peppers in the same place and count that as real rotation.
- Add compost after heavy-feeding crops. Tomatoes, peppers, cucumbers, and cabbage take a lot of nutrients from the soil. After them, I usually add 1–2 inches (2.5–5 cm) of compost on top and lightly mix it into the upper layer.
- Use legumes as a break for the bed. Peas and beans are easy to place in rotation after more demanding crops. And when the season ends, healthy plant leftovers can be cut at soil level and sent to the compost.
Example for 4 Beds
If you have four beds, the plan can be very simple:
- Bed 1: tomatoes and peppers;
- Bed 2: lettuce, spinach, cabbage, greens;
- Bed 3: carrots, radishes, beets, onions;
- Bed 4: peas and beans.
Next season, move everything one bed forward. Fruiting crops go where the legumes were. Leafy crops go where the fruiting crops were. Root crops go where the greens were. Legumes go where the root crops were.
If that sounds too complicated, just draw four rectangles and arrows. Lindy and I did it exactly that way, so we would not stand over the beds in spring trying to remember where the tomatoes grew last year.
If You Only Have One Bed
You can still rotate plantings with just one bed. Divide it into zones and move the groups inside it. For example, in a 4 by 8 foot bed (about 1.2 by 2.4 m), you can make four sections of 2 by 4 feet (about 60 cm by 1.2 m).
This year, tomatoes grow in the first zone, greens in the second, root crops in the third, and beans in the fourth. Next season, switch them around. Yes, it is not as convenient as having several separate beds. But it is still better than planting tomatoes in the same corner every year.
Do Not Make It Hard on Yourself
Crop rotation should not turn into a headache. If you have a small bed with lettuce, basil, and a few flowers, you do not need to build a five-year system. Just write down the main crops and do not repeat the most problematic groups in the same place.
I would pay the most attention to tomatoes, peppers, cucumbers, zucchini, and cabbage. These crops often stay in the bed for a long time, make a lot of plant growth, and have a more noticeable effect on the soil.
Crop rotation lowers the risk that the same pests and diseases will build up in one place. It also helps avoid taking the same nutrients from the soil season after season. Different crops have different needs: tomatoes, greens, root crops, and beans take nutrients in different ways and develop roots at different depths.
I have notes, a simple layout, and a clear idea of where to plant tomatoes and where to plant early greens.
A Convenient Layout
I would choose the layout that fits the weather, the size of the bed, and what we actually like to eat. In early spring, you can start with peas, radishes, and greens. In warm weather, you can plant tomatoes with basil or a salsa bed.
Lindy and I have changed plans more than once after planting. Some plants were too crowded, some supports were needed earlier… That is normal garden experience: plant, see what happens, and make it a little more convenient next time.
Write in the comments what kind of bed you have: the size, how much sun it gets, and what you want to plant first. With those details, it is easier to suggest which layout will fit best.