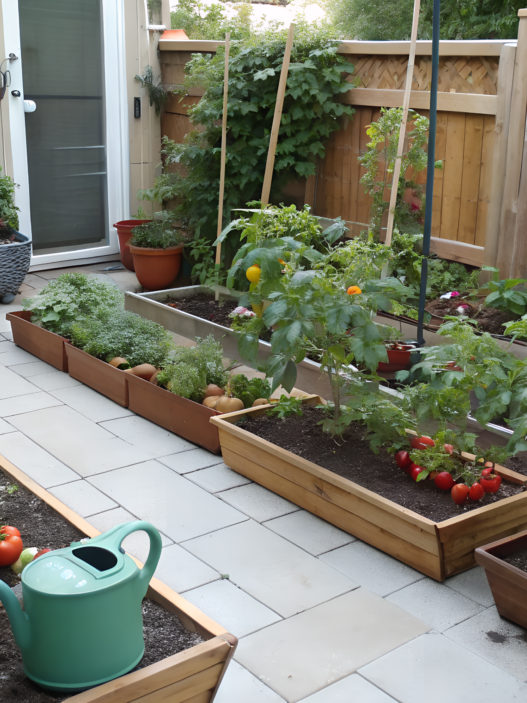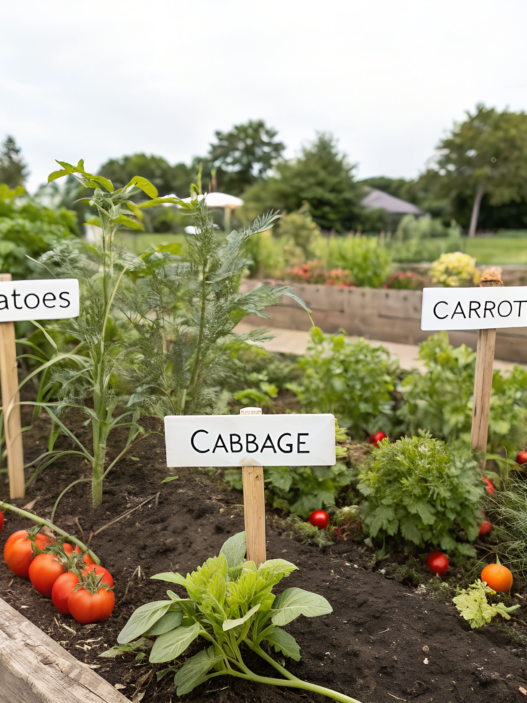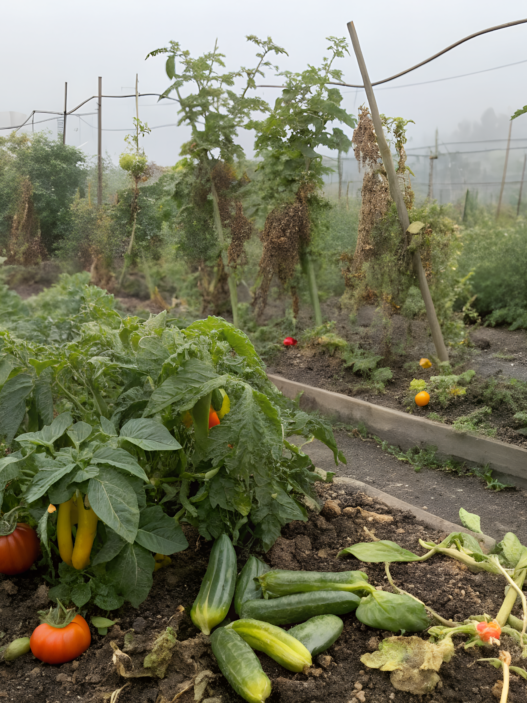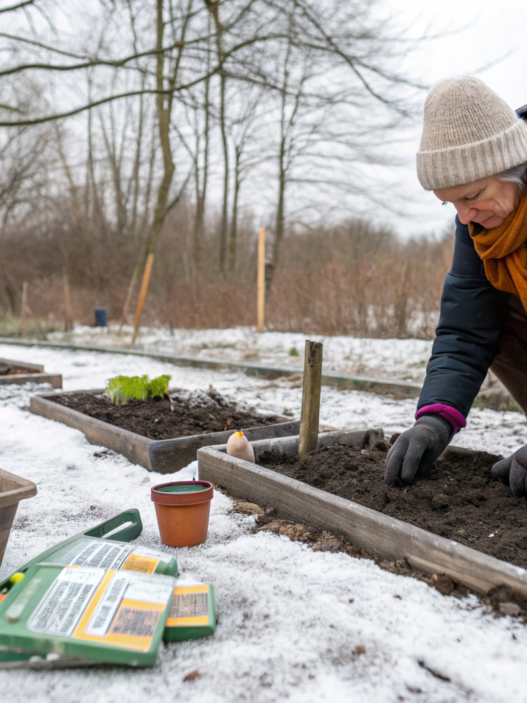
Personally, I really understand the desire to plant something simple in your garden, something clear and easy, then walk out to the plot a couple of weeks later and see that it is actually already growing. And that is such a good feeling.
Because a real garden does not have to mean a lot of space, a lot of time, or a lot of knowledge. From my own experience, I already know this: even a small plot can give you a lot if you choose plants wisely. Not the pickiest ones. Not the ones that need constant attention and care. But the ones that give you a quick result, do not ask for too much, and can be used to make a good lunch or dinner.
Here, we will talk about vegetables and greens that I often use in regular home cooking. They do not ask for much, and they are simple for beginner gardeners: sow, water, cut, harvest, add to dinner.
1. Radishes That Finish Before You Get Impatient
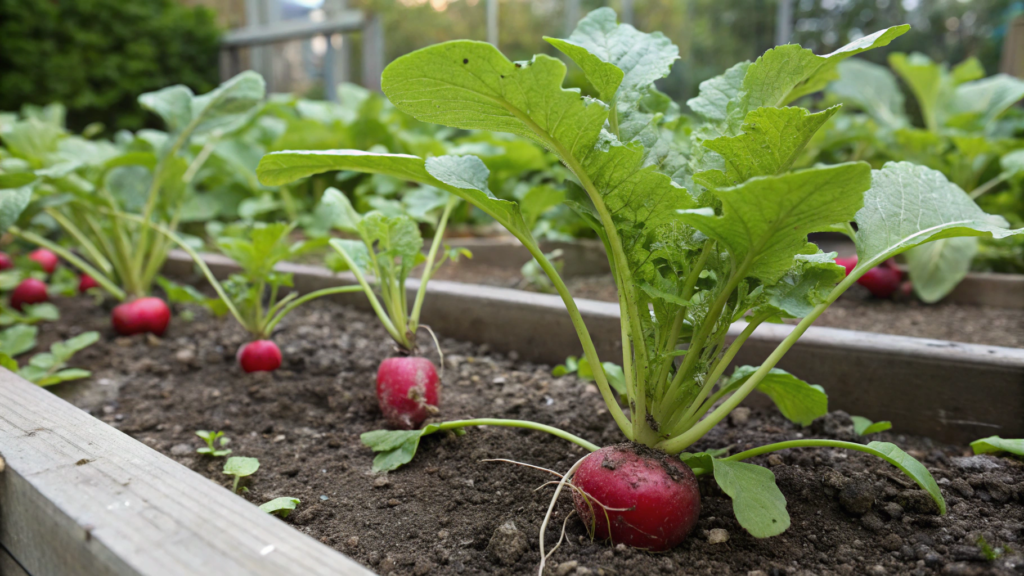
Radishes sprout quickly, do not need much space, and give you the first juicy harvest when the other crops are still just waking up. But you do need to know and follow a few rules.
1. Early Variety
Many early spring radish varieties are ready to harvest about 3–5 weeks after sowing. Michigan State University Extension gives a general radish harvest window of 20 to 60 days, because small spring varieties mature faster, while larger and winter varieties take longer.
So if you want a quick result, choose early spring varieties. Not daikon, not winter radish, not large varieties for long storage. Here, you want classic early varieties like Burpee Cherry Belle Radish Seeds. They fit nicely into a regular garden bed or a container.
2. Cool Weather
Spring and fall are the best times for radishes to grow. In hot weather, they get tough faster, taste sharper, and may bolt. And once radishes start flowering, you should not expect a good root anymore.
I sow radishes when the soil is already loose, but summer heat has not arrived yet. The best soil for them is light, loose soil without large clumps or stones. If the soil is heavy, add a little compost and loosen the top few inches (about 8–10 cm) so the roots can grow more easily.
The ground should not feel like wet clay. If you can loosen the top layer easily with your hand or a small hoe, you can start.
Radishes are especially useful in a small garden. You can sow them where tomatoes, peppers, or beans will grow later. They will have time to grow and free up the space.
3. Shallow Sowing
Radish seeds do not need to be buried deeply. About ¼–½ inch (0.6–1.2 cm) is enough. I make a thin furrow, water it lightly, spread out the seeds, and cover them with loose soil.
Do not sow the seeds too densely. If radishes are crowded, they often grow a lot of leaves and a weak root. Leave about 1–2 inches (2.5–5 cm) between plants. If the seedlings come up too thick, thin them out. Radishes need space to grow good roots.
4. Even Watering
Radishes need even watering. If the soil dries out and then suddenly gets too much water, the roots may crack, turn tough, or taste too sharp.
The soil should be lightly moist, but not wet. I check it simply: if the top layer is dry about 1 inch (2.5 cm) down, it is time to water.
This is especially important in containers, because the soil dries out faster there, especially if the pot is in the sun, near a wall, or on a deck.
5. Harvesting
Radishes do not get better if you leave them in the ground “just a little longer.” Often, the opposite happens: they get tough, hollow inside, or too spicy.
Start checking the harvest about 3 weeks after sowing if the variety is early. Move the soil aside at the base of the leaves. If the root has rounded out and looks like a normal size, harvest it.
I harvest radishes in small batches: a few for breakfast, a few for a salad, a few more for dinner. That way, they do not sit in the fridge too long and stay juicy.
6. Succession Sowing
Do not sow the whole packet at once. Otherwise, you will get one big batch of radishes that needs to be eaten quickly.
It is better to sow small rows every 7–10 days while the weather is cool. One row now, a second one next week, a third one a little later. That way, the harvest comes in gradually.
This is convenient for a small garden. Radishes can go along the edge of a bed, between slow-growing crops, or in an empty corner. They take up space quickly, give a harvest quickly, and do not get in the way of the next planting.
Radishes will not fill the pantry, and they will not replace potatoes. But they give you the first quick harvest and the feeling that the growing year has really started. Radishes are nice with salt, herbs, eggs, potatoes, fresh bread, or cream cheese. They add freshness and a little sharpness to a dish.
2. Loose Leaf Lettuce You Can Harvest All Season
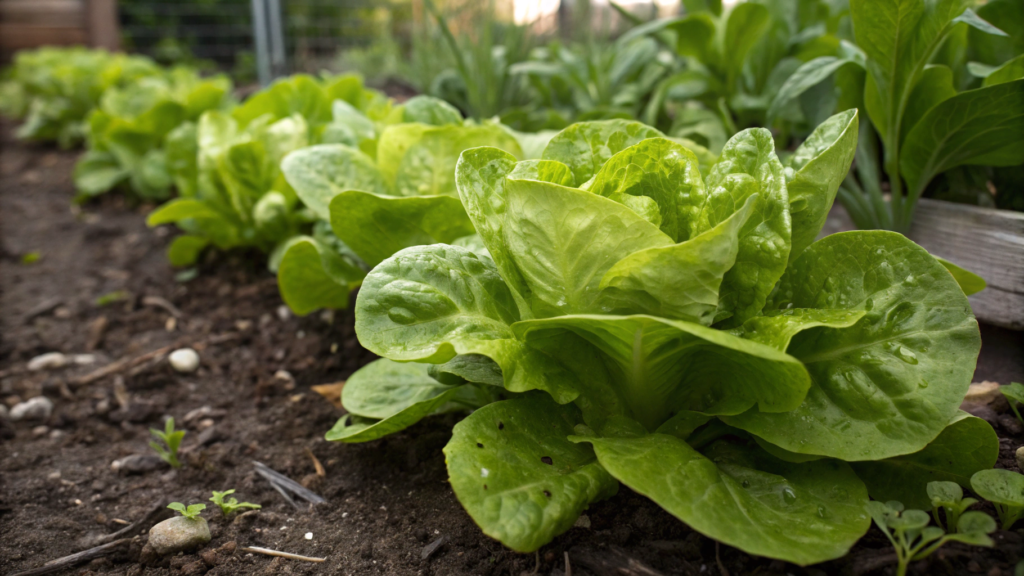
I think you’ll want to know that loose leaf lettuce is much more convenient than head lettuce, especially in a small garden. You can cut it little by little, leave the center of the plant alive, and then new leaves keep growing back, so you always have fresh greens for the table.
1. Loose Leaf Varieties
As I already said, choose loose leaf lettuce, not dense head lettuce. It gives greens faster and is better suited for partial harvesting.
Varieties with an open rosette have proven useful: oakleaf lettuce, red varieties, green varieties, and mixed lettuce blends. They do not need a perfect shape.
2. Cool Season
Lettuce loves cool weather. In spring, it grows quickly, stays tender, and does not get that extra bitterness. Fall is also good, if you manage to sow it before serious cold weather arrives.
In the heat, lettuce starts to rush: it stretches, gets tougher, and may bolt. After that, the leaves often turn bitter. Not dangerous, just not as tasty anymore.
I try to sow lettuce where there is light shade during the hottest hours. Not full darkness, of course. But if taller crops are growing nearby, that can help lettuce last longer.
3. Small Batches
Do not sow the whole packet at once. It is better to sow lettuce in small batches: a little now, then again in 10–14 days, then one more time if the weather allows.
Lettuce does best in loose, fertile soil that holds moisture but does not turn into mud. Before sowing, you can add a little compost and smooth the top layer so the tiny seeds land more evenly.
That way, you will not get one huge wave of greens that you suddenly need to eat right away. Instead, lettuce will come in gradually.
In a small garden, this is especially useful. You can sow it along the edge of a bed, in a container near the kitchen, or between crops that are still sizing up. We often used empty spaces this way when we were learning how to get more from less than an acre.
4. Outer Leaf Harvest
Cut the outer leaves and leave the middle. That is where the plant will keep growing from. You do not need to pull the whole lettuce plant out by the root if you want to harvest it longer. Take garden scissors, cut a few larger leaves from the outside, and leave the young leaves in the center.
I like harvesting leaves this way because you do not need to wait for the perfect moment. You see good leaves, you take them for dinner. A few days later, the plant is ready to give you a couple more leaves.
5. Steady Watering
Lettuce reacts quickly when it does not get enough water. If the soil dries out often, the leaves get tougher, and the flavor can suffer.
Keep the soil lightly moist, but not wet. This is especially important in containers, because the soil dries out faster there than in a regular garden bed.
I check with my finger. If the top layer is dry about 1 inch (2.5 cm) down, it is time to water. Simple, but effective.
6. Heat Protection
If you want to harvest lettuce longer, help it get through hot days. The simplest option is to plant it where there is partial shade after lunch.
You can also use a light shade cloth. You just need to reduce overheating during the harshest hours.
In a hot climate, lettuce will not always grow all summer. Sometimes it is better to pause and sow it again closer to fall than to push the plants through the heat and end up eating bitter leaves.
Young leaves can go into sandwiches, bowls, tacos, homemade burgers, or just a small bowl for dinner. Loose leaf lettuce does not store for months, but it gives you fresh greens almost every day while the weather is on its side. And for a small garden, that is a very real result.
3. Bush Beans That Don’t Need Trellises or Fuss
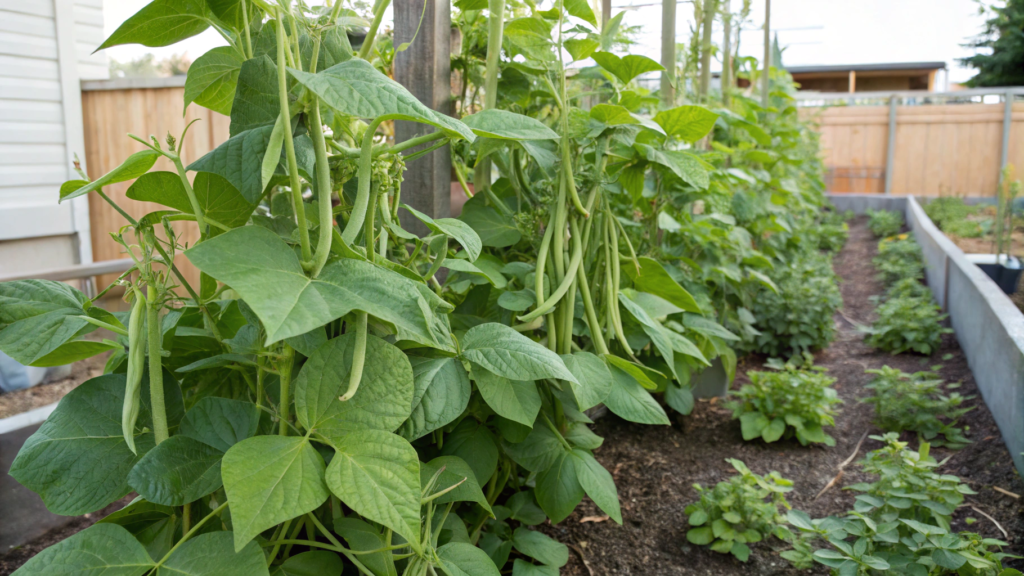
Bush beans grow compactly, give a harvest fairly quickly, and fit nicely even into a small garden.
1. Bush Type
If you do not want to build supports, stretch strings, and then untangle plants all season, choose bush beans, not pole beans. Pole beans need a trellis, netting, or stakes. Bush beans grow lower and hold their shape on their own.
The seed packet usually says clearly that it is a bush variety. Look for that note if you do not want to suddenly figure out where to place a support. For a small bed or container, these varieties are more convenient than beans that climb upward.
2. Soil
Beans should not be sown too early. They like warm soil and do not handle cold well. If the ground is still wet and cold, the seeds may sprout poorly or simply rot.
Bush beans grow best in loose, well-drained soil. If your soil is heavy, add a little compost before sowing and loosen the top layer. Beans do not need overly rich soil, but the roots need air, and water needs a normal way to drain.
I sow beans after the danger of frost has passed, when the bed has warmed up well. Not on the first day, but when the soil is already warm and does not stick together in heavy clumps.
According to University of Florida IFAS, bush beans are usually ready to harvest in about 50–60 days. So you will not have to wait the whole season.
3. Sowing
Beans are easy to sow directly in the ground. Seedlings are usually not grown for them: bean roots do not like unnecessary transplanting.
Plant the seeds about 1 inch (2.5 cm) deep. Leave about 3–6 inches (7.5–15 cm) between plants, depending on the variety and planting layout.
I recommend keeping the row from getting too dense. When plants have enough air, they are easier to manage, the pods are easier to harvest, and there are fewer problems with dampness inside the planting.
4. No-Support Spot
The advantage of bush beans is that they do not need a trellis. This is convenient if the bed is small or you do not want to add another structure to the garden.
They need a sunny spot, loose soil, and easy access for harvesting. Do not tuck beans somewhere that will be hard to reach later. Once the pods start ripening, you will be checking them often.
Bush beans settle in nicely along bed edges, in separate rows, and even in large containers. Just make sure the container is wide enough so the plants are not packed into a tight clump.
5. Water at the Base
Beans like normal watering, but they do not like wet leaves. It is better to water at the base of the plants, not over the tops of the bushes.
This is especially important once the planting gets dense. Extra moisture on the leaves can create problems, and we need beans for food, not for experiments with plant diseases.
The soil should be moderately moist, without drying out and without turning swampy. If the top layer is dry about 1 inch (2.5 cm) down, you can water.
6. Young Pod Harvest
Green beans are best harvested while the pods are still young and tender. If you wait too long, the seeds inside start to swell, and the pods themselves become tougher.
Check the plants often. Beans can produce pods quickly. I usually take a small bowl and go row by row. It does not take much time, and it is better to do it regularly.
The more often you pick the ready pods, the longer the plant keeps trying to produce new ones. Do not leave overgrown beans hanging there for no reason.
7. Batch Sowing
Bush beans tend to give a harvest all at once. That is convenient if you want to freeze some of the pods, but not always convenient for everyday cooking.
To stretch out the harvest, sow beans in batches. For example, one row now, a second row in 2–3 weeks, if the season allows. This approach really helps on a small plot. One row is already starting to give a harvest, the second is just gaining strength, and the third can be sown later. No trellises, no extra structures.
These beans do not need a pretty arch, complicated tying, or constant checking. Everything is simple: you pick a bowl of pods, rinse them, trim the ends, and you already have an ingredient for dinner.
Bush green beans pair nicely in dishes with potatoes, eggs, chicken, garlic, herbs, or butter. You can quickly sauté them in a pan, add them to soup, or freeze them in small portions.
4. Zucchini That Produces Like a Backyard Legend
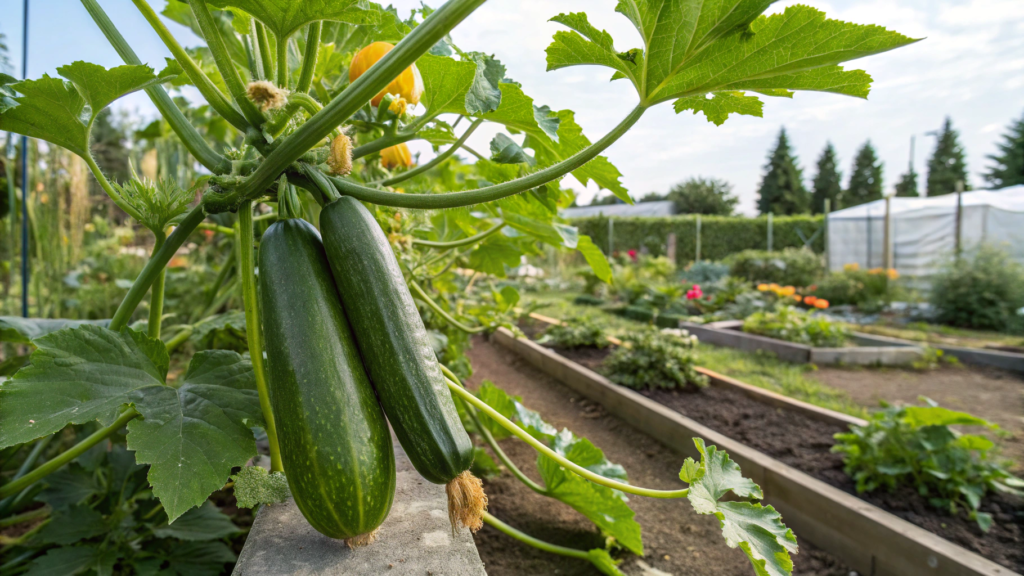
Zucchini is one of those crops that can quickly turn one modest plant into a steady flow of harvest. You plant it kind of “just for yourself,” and then you are already looking for someone to give a couple more zucchini to.
1. Compact Variety
For a small plot, it is better to choose bush zucchini varieties. They take up less space than long-vining types, and they are easier to keep within the garden bed.
On the seed packet, look for notes about bush growth or a compact plant type. This is especially important if the zucchini will grow in a raised bed or a large container.
2. Warm Bed
Zucchini loves warmth. It is not worth planting it too early, when the soil is still cold and the nights keep jumping around.
Plant after the danger of frost has passed, when the ground has already warmed up. Zucchini can be sown directly into the ground or planted as seedlings if the season is short.
Summer zucchini can be harvested about 55 days after planting. It gives a harvest fairly quickly.
3. Plenty of Sun
Zucchini needs a sunny spot. If you plant it in shade, the plant may grow leaves, but the fruit will be worse.
Give the plant enough room. Zucchini has large leaves, and it quickly covers the ground around it. If you plant it too close to other crops, it will start crowding them out.
On a small plot, I would not plant more than one or two plants unless you plan to feed zucchini to neighbors, friends, and random people by the fence.
4. Water at the Base
Zucchini needs regular watering, especially when it is flowering and starting to fill out its fruit. It is better to water at the base, not over the leaves.
Large leaves hold moisture for a long time. If the planting is dense, wet leaves can make fungal problems worse.
The soil should be nutritious, loose, and moist deeper down, not just wet on top. If the top layer has dried out about 1 inch (2.5 cm) down, check the soil deeper. If it is dry there too, water slowly so the water reaches the roots.
5. Bees and Flowers
Zucchini needs pollination. It has male and female flowers. A female flower is easy to recognize: there is already a tiny future zucchini at the base.
If the fruit starts to grow, then turns yellow, shrivels, and falls off, weak pollination is often the reason. This happens at the beginning of the season, when there are still not many bees and other pollinators, but the zucchini flowers are already opening.
Flowers near the bed help: calendula, nasturtiums, dill, basil, and borage. We are always thinking about these kinds of pairings, because on a small plot, each plant can do more than one job.
6. Harvesting
Zucchini is best picked young. For most long varieties, a good size is about 6–8 inches (15–20 cm). At this size, they are more tender, the seeds are small, and the skin is not rough yet.
Do not wait until the zucchini gets huge. Yes, a big fruit looks impressive. But in the kitchen, it is often less useful: watery, with large seeds and a rough center.
Regular harvesting helps the plant keep producing new fruit. If you leave large zucchini hanging on the plant, it spends energy on them instead of putting it into new harvest.
7. Check Every Day
When zucchini starts producing, check the plant every day or every other day. This is not an exaggeration. The fruit can grow very quickly, especially in warm weather.
I lift the leaves and look at the base of the plant. Zucchini loves to hide. Miss one, and in a couple of days, instead of a tender young zucchini, you already have a large overgrown one that is better used for fritters or baking.
Cut the fruit with a knife or pruners, leaving a small stem. Do not pull or twist it off, because that can damage the plant.
Zucchini likes being watered on time, well pollinated, and harvested often. Give it that, and it will quickly become the plant you remember every time you carry another full bowl of harvest into the kitchen.
5. Cherry Tomatoes That Forgive Missed Watering
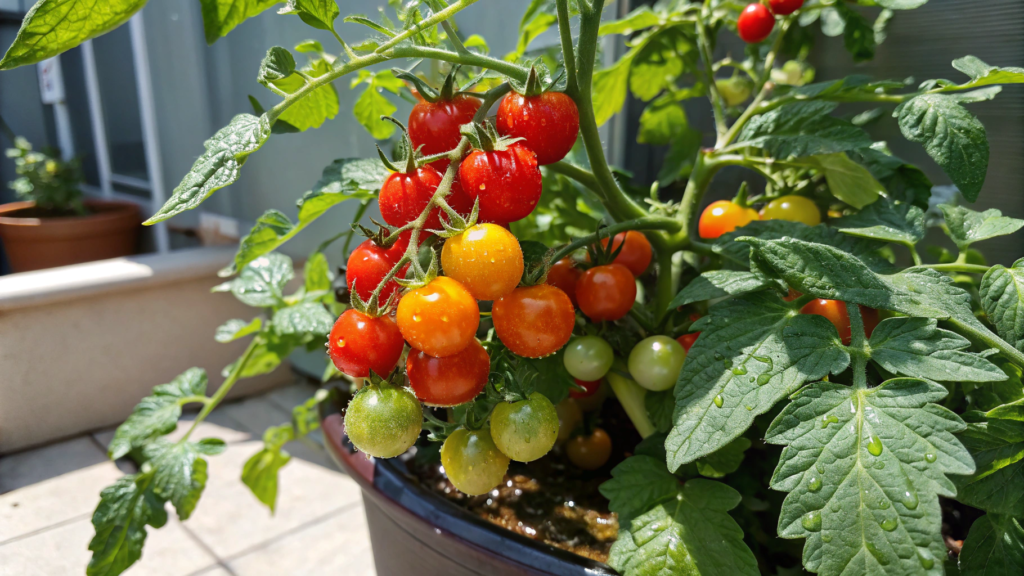
Cherry tomatoes are a great choice for me personally. I used to dream about big tomatoes, beautiful and heavy… But cherry tomatoes turned out to be much easier. Not without care, of course. But with them, it is easier to get lots of small fruits, even if something does not go perfectly.
1. Small Fruits
For this idea, choose cherry tomatoes, not large beefsteak varieties. The bigger the fruit, the longer it takes to fill out, and the more noticeable watering mistakes become.
Cherry tomatoes usually ripen faster and give a harvest in batches. This is more convenient: you are not waiting three weeks for one huge tomato, but picking a handful of ripe fruits almost every day.
For a home garden, these small-fruited varieties are often easier than large tomatoes.
2. Sunny Spot
Tomatoes need a lot of sun. If you plant cherry tomatoes in partial shade, the bush may still grow, but the harvest will be weaker, and the fruits will be more sour and smaller.
It is better to choose a spot where the plant gets at least 6–8 hours of sun a day. Especially if you are growing in a container: there, the plant already depends on you more.
On a small plot, cherry tomatoes are convenient to train along a support, fence, or the edge of a garden bed. Just do not put them somewhere that will be hard to reach later. When the fruits start ripening, you will be coming over to them often.
3. Support
Even small tomatoes can grow into large plants. Many cherry tomato varieties are tall, and without support, they quickly fall over, tangle, and cover their neighbors.
Put in a cage, stake, or trellis right when planting. Later, when the roots spread out, pushing a support into the soil next to the bush is less convenient. Do not wait until the plant has already started falling over.
4. Even Watering
Cherry tomatoes can survive one forgotten watering, but they do not like the “dry-dry-dry, then a bucket of water” routine. From those swings, the fruits can crack, especially when they are almost ripe.
It is better to water less often, but more deeply. The soil should get wet not only on top. If the top layer is dry about 1 inch (2.5 cm) down, check deeper and give it a proper watering.
Watch containers more carefully. The soil there dries out faster than in a garden bed. On a hot day, a pot near a wall can dry out very quickly.
5. Mulch Around the Plant
Mulch helps a lot if you do not always manage to water on time. It covers the soil, reduces evaporation, and helps the roots get through a hot day without sharp moisture swings.
Straw, dry leaves, shredded bark, or compost will work. Leave a little space around the stem, and do not press the mulch right against it.
Mulch helps when you cannot water exactly on schedule. If watering gets pushed to the evening, the soil under mulch usually stays moist longer and overheats less.
6. Harvesting
Cherry tomatoes are best picked when they are fully colored and come off the cluster easily. You do not need to keep them on the plant too long “for sweetness.” Overripe fruits crack and fall more often.
Check the plant every day or every other day, especially in warm weather. Cherry tomatoes quickly move from “almost ready” to “I should have picked these already.”
I pick them almost every day. A few fruits for a salad, a few in Lindy’s hands, a few just to eat right by the garden bed.
Cherry tomatoes do not cancel out normal watering. But they make growing tomatoes easier and simpler. Plant a couple of bushes, give them sun, support, mulch, and water without sharp swings — and they will give you harvest in small portions, but very generously.
Cherry tomatoes can be added to salads, roasted on a sheet pan, or tossed into a skillet at the very end of cooking. If the harvest is big, cut the fruits in half, add salt, garlic, and herbs, and roast them. You will get a simple base for pasta, toast, or warm vegetable bowls.
6. Green Onions Regrown From Kitchen Scraps
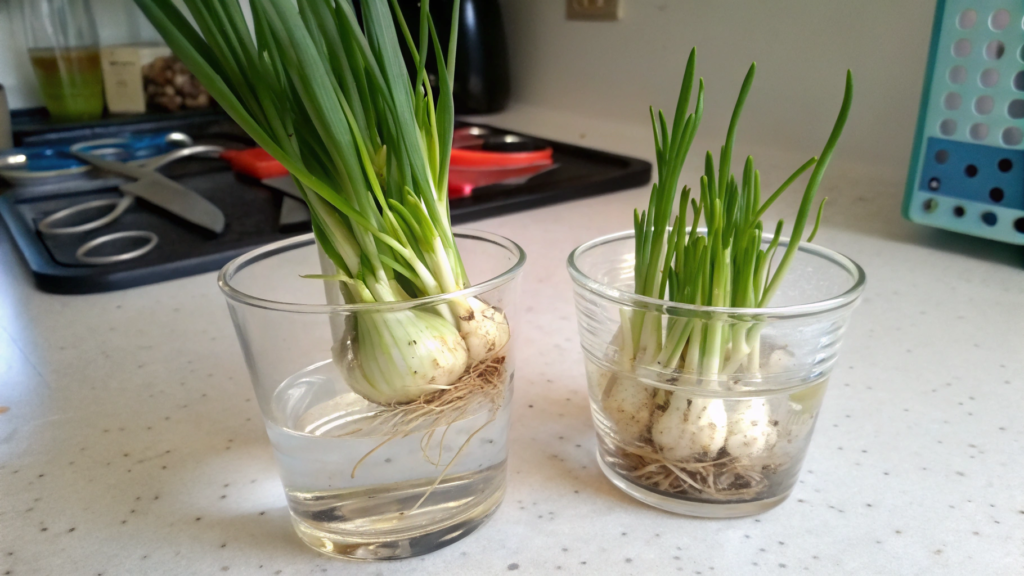
Green onions can be regrown from the part you usually throw away after cooking. This can give you quick kitchen greens without extra cost.
1. Base With Roots
For regrowing, you need the base of the stems with roots. Leave about 1–2 inches (2.5–5 cm) of stem above the roots.
If you cut too low, it will be harder for the onion to start growing again. If the roots are alive and not dried out, new greens usually appear faster.
I simply cut the top part for food and set the bases aside right away.
2. Start in Water
Place the onion bases in a small glass or jar. The water should cover the roots, but not come too high up the stems. If the onion sits too deep in water, it can start to soften.
Put the jar on a bright windowsill. After a few days, new greens usually begin to rise from the center. But water is only a quick start. For stronger growth, it is better to give the onion soil.
3. Clean Water
It is better to change the water every 1–2 days. It gets cloudy quickly, especially if several stems are sitting in the jar at once.
If there is a bad smell, slime, or soft spots, it is better to throw those bases away. This is not the kind of planting you need to save at any cost.
It is also worth rinsing the jar. This helps the onion stay healthy and regrow normally.
4. Move to Soil
When new greens appear and the roots look alive, move the onion into a pot with soil or to the edge of a garden bed. In water, it starts growing quickly, but over time it gets weaker because there is almost no nutrition there.
Plant it so the roots are in the soil, while the top part of the base stays above the surface. The soil should be loose, without constant wetness.
For a windowsill, a small pot with a drainage hole will do. The main thing is that extra water can drain out.
5. Light for Greens
Green onions need good light. Without it, the shoots will be thin, pale, and weak.
The best spot is a kitchen windowsill or another bright window. That way, the onion stays close at hand: you are making soup, eggs, or potatoes, and you can cut a little fresh green onion right away.
Outside, you can plant it along the edge of a bed, in a container, or near other greens. Just do not put it in constant shade or soil that stays too wet.
6. Harvest a Little at a Time
Do not cut all the greens down to nothing right after the first regrowth. It is better to take a few shoots, leaving the plant enough strength for new growth.
Cut with garden scissors. If the onion grows in a pot, you can get several small harvests from it.
But it is important not to expect an endless harvest from one store-bought bunch. Over time, the old bases get weaker, and it is easier to replace them with new ones.
I grow this kind of onion on the kitchen windowsill. Not for a huge harvest, but for convenience. Making harvest, but for convenience. Making soup — cut a little. Frying eggs — add some on top. Cooking potatoes — the greens are already close by. It adds a fresh onion flavor to the dish, but does not overpower the other ingredients.
7. Swiss Chard That Acts Like a Perennial in Mild Weather
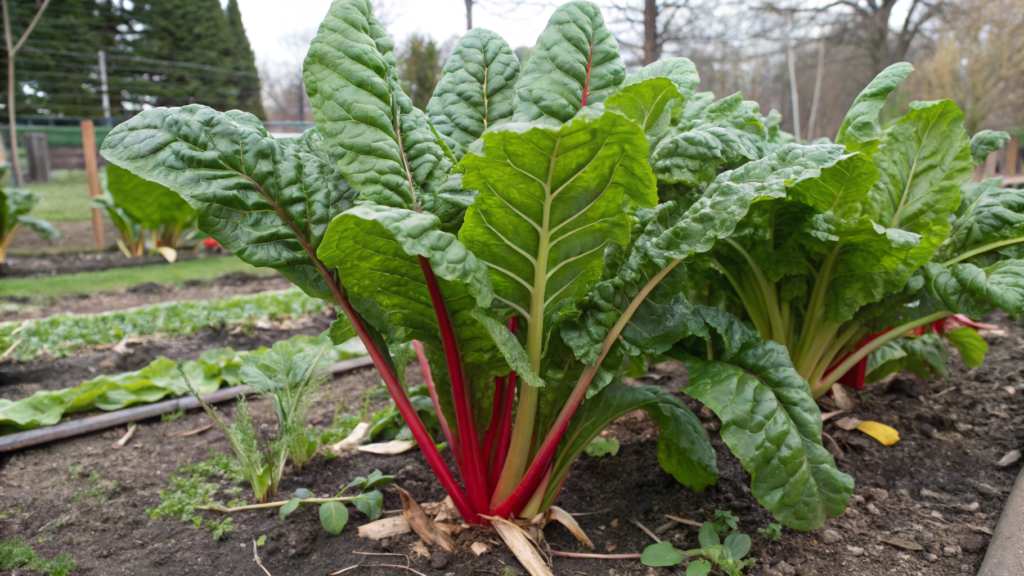
Swiss chard is usually grown as an annual green, although by nature it is biennial. In the first year, it gives leaves, and in the second year, it may go to flower.
In a mild climate, Swiss chard can survive a winter without hard freezes and give new greens again in spring. And if you harvest the leaves gradually, it keeps growing new greens after cutting.
1. Strong-Leaved Variety
Choose varieties with large leaves and sturdy stems. Green, red, yellow, rainbow — here you can choose by taste and by how you want the bed to look.
Rainbow chard looks beautiful, but the main thing is that the plant regrows well after cutting. In a small garden, Swiss chard is also convenient because it does not give just one harvest, but many cuttings from one spot.
2. Seeds or Seedlings
Swiss chard can be sown directly into the garden bed or grown from seedlings. If spring is cold and slow, seedlings help you gain a little time.
Sow the seeds shallowly, about ½ inch (1.2 cm) deep. Leave about 8–12 inches (20–30 cm) between mature plants so the leaves have enough room.
Do not sow it as a dense wall if you want large leaves. For baby greens, you can sow more thickly, but for a longer harvest, it is better to give the plants space to grow.
3. Light and Light Shade
Swiss chard loves sun, but in hot months, light partial shade can help the leaves stay tender longer.
If you have a mild climate, plant it where it will not stand under the hottest sun all day, especially if your summer is dry and hot.
On our small plot, Lindy and I always think about where a plant will feel better a month later. This helps a lot with planting plans.
4. Outer Leaf Harvest
I have already repeated this many times: cut the outer leaves and leave the center untouched. If you damage the middle, the plant will not keep growing as well.
Cut the leaves at the base with a garden knife or scissors. Do not pull out the whole plant if you want to harvest Swiss chard longer.
You can start harvesting the leaves when they have grown enough, taking just a few at a time. This is very convenient for home cooking, because you always have fresh greens close at hand.
5. Watering
Swiss chard does not like dry soil. The leaves get tougher, and the plant grows more slowly. The soil should stay lightly moist, especially after cutting. The plant needs strength to grow new leaves.
Mulch helps a lot here. Straw, dry leaves, or compost around the plant hold moisture and protect the soil from overheating. In a mild winter, mulch also gives the roots a little protection from sudden cold snaps.
6. Protection in Cool Weather
If the weather is mild, Swiss chard can stay in the garden bed for a long time. During light cold snaps, mulch and simple cover can help.
If you are worried and the nights feel too cold, use a light row cover, such as Agribon AG-19 Floating Row Cover. It helps soften temperature swings.
But Swiss chard is not a crop that can handle any winter. So if you get hard freezes, do not expect miracles.
Swiss chard does not promise an instant harvest like radishes. But you get greens from one planting for a long time. Cut the outer leaves, leave the center, water it, give it the right light — and after a while, there is something to bring back to the kitchen again.
Swiss chard is nice with eggs, potatoes, beans, rice, chicken, garlic, and soups. Young leaves can go into salads, while larger leaves are better quickly sautéed in a pan.
8. Cucumbers That Thrive With a Simple Stake
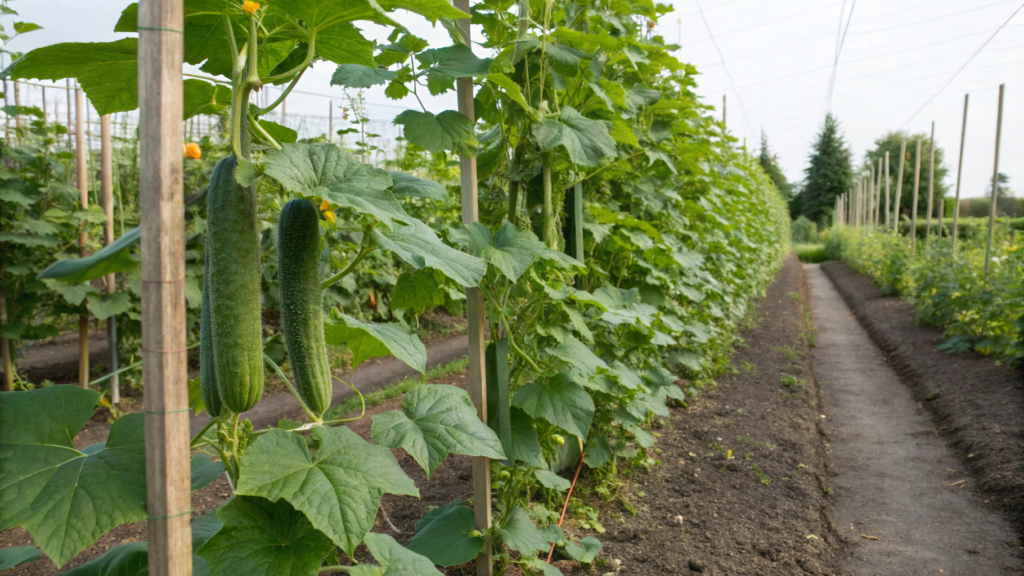
Cucumbers do not always need a large trellis, and if you choose the right variety and set up support right away, the vines are easier to guide upward instead of untangling them later all over the bed. I learned this from my own experience: this makes it easier to water, harvest the fruit, and not step where you really did not want to step.
1. Right Variety
For a simple support, it is better to choose vining varieties that can be guided upward. Bush cucumbers are convenient too, but they usually grow as a compact bush and are not always as well suited for tying up.
Look at the growth description on the seed packet. If the variety is very vigorous and strongly vining, one support may not be enough. Then it is better to add netting, string, or a second support.
For a small garden, choose varieties that are suited for vertical growing.
2. Warm Soil
Cucumbers love warmth. Do not sow them too early, when the ground is still cold. The seeds may sprout poorly, and the plants may sit there for a long time without growing.
Plant after the danger of frost has passed, when the soil has warmed to about 60–70°F (15–21°C). If spring is cold, you can start with seedlings. Just transplant carefully: cucumbers do not like having their roots disturbed too much.
3. Support at Planting
It is better to set up the support on planting day, not later, when the plant has already grown. This lowers the risk of damaging the roots.
For one plant, a sturdy vertical support about 5–6 feet (1.5–1.8 m) tall will work. It needs to be secured well in the ground so it does not fall over under the weight of the vines and fruit. By the way, you can look at Gardener’s Blue Ribbon Bamboo Plant Stakes. Bamboo supports are lightweight, but for cucumbers, it is better not to choose the thinnest ones.
4. Soft Ties
Cucumbers grab on with tendrils, but they often need help growing upward. Tie the main stem with soft tape, twine, or garden clips.
Do not tie it too tightly. The stem will thicken, and a stiff tie can pinch it.
Check the plant every few days. New vines quickly move off to the side, especially after rain or a warm night. It is better to guide them right away than to untangle the whole planting later.
5. Water at the Base
Cucumbers need regular watering, especially when flowers and fruits appear. If the soil dries out often, the fruit may grow worse and become more bitter.
Water at the base, not over the leaves. This leaves less extra moisture on the plant, especially if the planting is dense. The soil should be moist deeper down, not just on top. If the top layer is dry about 1 inch (2.5 cm) down, check deeper and water properly.
6. Mulch at the Base
Mulch helps hold moisture and keeps the soil from overheating too quickly. For cucumbers, this matters because they react quickly to drying out.
Straw, dry leaves, compost, or shredded bark will work. Do not press the mulch right up against the stem; leave a little air around the base.
In a small garden, mulch also helps keep the fruit cleaner if some of the vines still touch the ground. Not perfect, but already better than cucumbers lying right on wet soil.
7. Harvest Without Delay
Cucumbers are best picked young, while the skin is tender and the seeds inside are small. The size depends on the variety, but many slicing cucumbers are picked at about 6–8 inches (15–20 cm).
Cucumbers are usually ready to harvest in about 50–70 days, and frequent picking helps the vines keep producing.
Do not leave overgrown fruit hanging on the plant; the flavor often gets worse. Check the planting every day or every other day once the cucumbers have started producing.
Cucumbers do not need much. Warm soil, a sturdy support, soft ties, normal watering, and regular harvesting are enough. We love slicing them into salad, adding them to sandwiches, or quick-pickling them with vinegar, salt, and dill. They are also nice with potatoes, eggs, chicken, beans, rice, herbs, cream cheese, and homemade flatbreads.
Sounds delicious!
9. Kale That Improves After a Cool Night
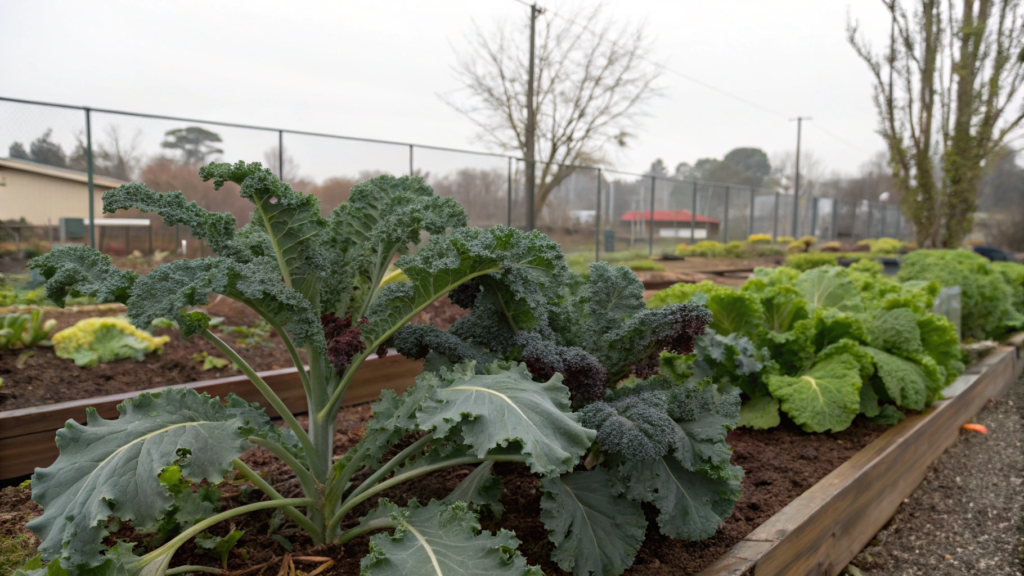
Kale loves cool weather. After a cold night, its leaves often become softer in flavor and more pleasant for cooking. When I understood this, it changed how I felt about it.
For a fall harvest, choose varieties that handle cool weather well: curly kale, Tuscan kale, and Red Russian kale. They have different textures, but all of them are suitable for a home garden.
Curly kale holds its shape nicely in soups and stews. Tuscan kale is softer in cooking. Red Russian kale is often more tender, especially when the leaves are young.
For a small bed, compact varieties are more convenient than huge plants that take up half a row.
1. Planting
As I already mentioned, kale loves the cooler time of year. You can grow it in spring, but in fall it often tastes better and is easier to care for.
In hot weather, the leaves get tougher faster, and there are usually more pests. So for a good fall harvest, it is better to sow kale ahead of time, so the plant has already grown enough leaves by the time cool nights arrive.
Kale is good for repeat plantings, loves cool weather, tolerates frost, and usually matures in about 40–65 days.
2. Sunny Spot
Kale needs sun, especially in cooler weather. If there is not enough light, growth will be weaker, and the leaves will be smaller.
In warm regions, light afternoon shade can help it in spring. But in fall, it is better to give it more light because the days get shorter.
In a small garden, kale is convenient to plant along the edge of a bed or near crops that will soon free up space. It can stay in the bed for a long time and give repeated cuttings.
3. Lower Leaf Harvest
Harvest the lower outer leaves and leave the top in place. That way, the plant will keep growing and producing new leaves.
Do not cut the whole plant at once if you want to harvest kale longer. Take a few large leaves for dinner, and leave the center untouched.
Kale does not require one big harvest. You can take a few leaves when you need them for cooking, and the plant will keep growing and producing.
4. Watering and Mulch
Kale does not like dry soil. If there is not enough moisture, the leaves grow more slowly and can become tougher. It is better for the soil to stay lightly moist, especially after planting and after a heavy cutting. Mulch helps hold moisture and protects the roots from temperature swings.
Straw, dry leaves, compost, or shredded bark will work. Do not press the mulch right against the stem; leave a little air around the base.
5. Pest Protection
Unfortunately, we are not the only ones who like eating kale. Cabbage worms, aphids, and slugs also find this green quickly, especially when the leaves are young and tender.
Check the undersides of the leaves. Eggs, tiny caterpillars, and aphids often hide there. The earlier you notice the problem, the easier it is to remove it by hand or rinse it off with a strong stream of water.
For protection, you can use a light row cover. It works as a barrier: it keeps butterflies and some other pests from reaching the leaves and laying eggs on them. It is better to cover the plants right after planting, while they are still clean and small.
6. Cold Effect
After a light frost, kale often becomes softer and a little sweeter in flavor: Michigan State University Extension explains that cold helps leafy crops like these build up more sugars.
If the leaves are still slightly frozen in the morning, do not cut them right away. Let them thaw before harvesting. That way, they break less and keep a better texture.
Plant kale closer to fall, harvest the outer leaves, and keep the soil lightly moist — then it will keep giving greens even when many summer crops have already stopped producing.
10. Herbs That Count as Vegetables in Everyday Cooking
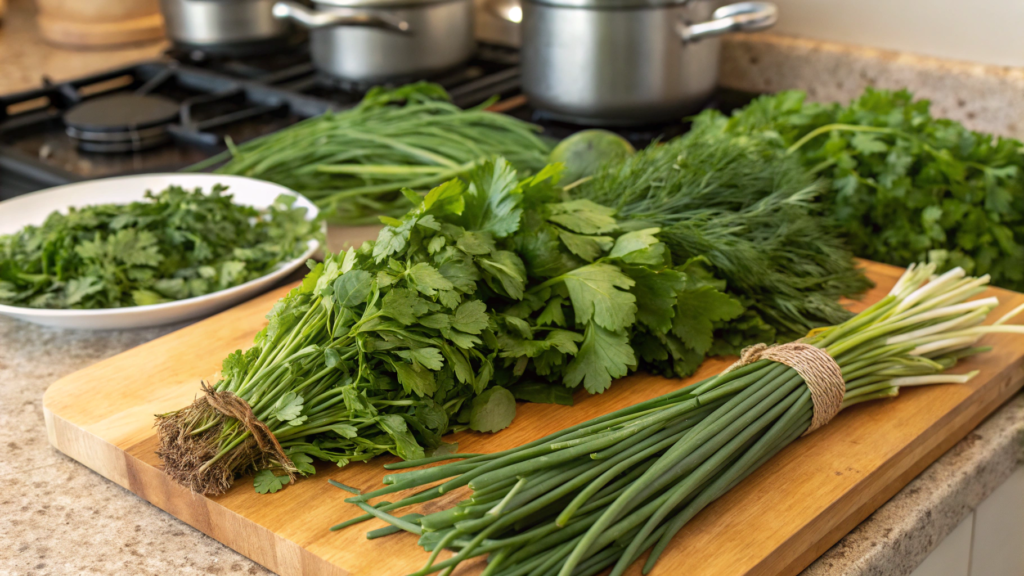
When you have a lot of fresh herbs in the kitchen and they are practically close by, you start cooking differently. An omelet is no longer just an omelet, potatoes do not feel as heavy, and soup tastes fresher. And you can make a salad even when there are not many regular vegetables left. Yes, herbs can be a real part of the dish, not just a pinch on top for smell.
For this idea, it is better to plant herbs you can use by the big handful, not just a couple of leaves at a time. Parsley, cilantro, dill, basil, chives, green onions, and mint are good choices.
Rosemary, thyme, and sage are useful too, but you usually add less of them. Their flavor is stronger, and a whole bowl of that kind of “salad” would already be too much.
If you are buying seeds, check what is inside the mix: it is better if it includes parsley, basil, dill, and cilantro, not only strong herbs for tiny additions.
1. Planting Spot
Most kitchen herbs need plenty of light and soil without standing water. Most herbs need at least 6 hours of direct sun a day, and the soil should be well-drained.
But not all herbs like the same conditions. Basil loves warmth. Parsley and cilantro feel better in cooler weather. Mint can spread too aggressively, so it is more convenient to keep it in a separate pot.
In a small garden, it is better to plant herbs closer to the kitchen or near a path. If you have to walk across the whole plot for dill, you will use it less often. I learned that from my own experience.
2. Pots and Beds
Herbs can be grown in a garden bed, in containers, or on a windowsill. But make sure they get enough light and that extra water does not sit around the roots.
Small pots with drainage holes are convenient for the kitchen. These pots are good for basil, parsley, chives, and mint.
In the garden bed, herbs are good along the edges of plantings. They fill empty spaces, attract insects when they bloom, and stay close at hand when you need to quickly cut a little greenery.
3. Frequent Cutting
Herbs are better cut regularly, instead of waiting until they overgrow. The more often you take small portions, the easier it is for the plant to give new greens.
Cut with garden scissors. With basil, it is better to remove the top of the stem, leaving a few pairs of leaves below. Then the plant starts branching better. With parsley and cilantro, take the outer stems, and with dill, cut young tender sprigs before they get tough.
4. Before Flowering
Many herbs are better harvested before flowering. At that point, the leaves are usually more tender, and the flavor is cleaner. When the plant sends up flower stalks, it starts spending energy on something other than greens.
This is especially noticeable with cilantro and basil. Cilantro quickly stretches and blooms in hot weather, and the leaves get tougher. With basil, it is also better to remove flowers early if you want to keep harvesting soft leaves longer.
Check the plants every few days. If you see small flower stalks, simply pinch them off. That way, the plant will keep giving greens for your kitchen needs longer.
6. In Everyday Cooking
Herbs can be added to food more generously than we often do. Not just a couple of leaves on top, but a real handful in the dish, if the flavor fits.
Parsley belongs in potatoes, beans, rice, salads, and soups. Cilantro is especially good with beans, eggs, and warm vegetables. Dill can be added to cucumbers, potatoes, fish, eggs, and yogurt sauces. Basil belongs with tomatoes, pasta, roasted vegetables, and soft cheese.
With soft herbs, you do not always have to throw away the stems. Parsley, cilantro, dill, and basil stems can be finely chopped and added where they will warm through a little: into soup, sauce, an omelet, beans, or rice. For salads, it is better to keep the more tender leaves.
That way, herbs become a noticeable part of home cooking. And when the greens grew in your garden bed or on your windowsill, you no longer want to throw away half the bunch just out of habit.
Herbs will not replace carrots, potatoes, or cabbage. But in regular home cooking, they can do much more than we may imagine. Plant the herbs you actually eat often, cut them little by little — and your dishes will become more interesting, fresher, and more alive without new complicated recipes.
Your Favorite Garden
Your home garden does not have to be perfect at all. Somewhere, the radishes should have been harvested yesterday. Somewhere, a zucchini is hiding under a leaf… You get a chance to learn as you go. But you grew all of it yourself and actually use it in your kitchen. That is something to be proud of.
If you have a vegetable or herb you plant every year, write it in the comments. And what do you prefer more — a garden bed or a container?