It’s already привычно that garden walls usually just exist. But once you start working with them, the space begins to look different.
10 garden wall designs that turn blank fences into showstoppers will help you rethink fences. And it doesn’t take much. Somewhere it’s enough to add light, somewhere — color, somewhere — slightly change the structure or add greenery.
Here are 10 ideas you can actually DIY. Clear, practical, and without major сложности.
1. Mediterranean Courtyard Wash Using Two Paint Colors
Mediterranean courtyard wash using two paint colors is something you can реально do yourself, even if you have no experience.
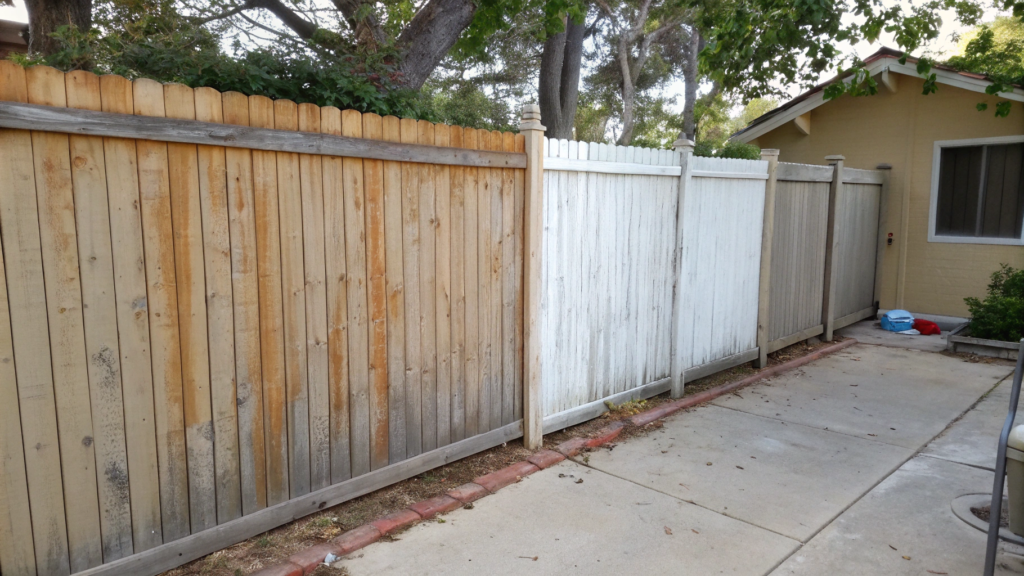
We experimented on an old wooden fence that was gray, faded, and cracked in places. Lindy said: “Let’s do it like in Italy, remember that courtyard with the uneven wall?” And we did it, even though we had zero experience.
The idea is that you use two close shades (for example, warm beige and whitewashed terracotta) and apply them not perfectly evenly, but with a slight “mess” — in layers, semi-transparent, sometimes letting the base color show through.
This approach imitates natural aging of the surface. And natural textures and “imperfect” surfaces are perceived by the brain as more comfortable and “alive.”
That’s why this kind of wall immediately feels not like something foreign, but like part of the space.
What You’ll Need
- two shades of exterior paint (matte), for example, base warm white and accent sand or terracotta
- wide brush (4–6 inches / 10–15 cm)
- sponge or cloth for blending
- bucket of water
- painter’s tape
- primer (if the surface is old)
- medium grit sandpaper
How to Do a Mediterranean Wash
- Prepare the surface
Remove dust, dirt, and old peeling paint. Go over it with sandpaper and apply primer if needed — this helps the paint go on evenly and avoids stains. - Apply the base color
Cover the wall with an even layer of the main paint (warm white or light beige). Let it dry completely — it’s better to wait about 24 hours than rush. - Dilute the second color with water
Mix the second shade with water at about a 1:1 ratio to get a semi-transparent layer. This is the wash effect that creates depth. - Apply paint in a random way
Work in small sections of 2–3 ft (60–90 cm). Apply color with a brush, then immediately blend it with a sponge or cloth. Don’t aim for perfection — unevenness is the effect here. - Add depth if needed
If you want a richer look, go over it with another light layer or add a third shade. The key is to keep transparency and soft transitions.
Small details that affect the result
These nuances don’t stand out right away, but they’re exactly what separates “just painted” from the feeling of a real Mediterranean wall. We didn’t get them right on the first try either — and the difference was noticeable.
- Work in soft lighting — morning or evening light helps you see transitions and not overdo the color
- Take breaks and step back 10–15 ft (3–4.5 m) — from a distance you can see if there’s depth
- Don’t try to finish everything in one go — your hand gets tired and starts making things too even
And then the wall starts to look not like a project, but like part of the space. Calm, like it was always meant to be that way.
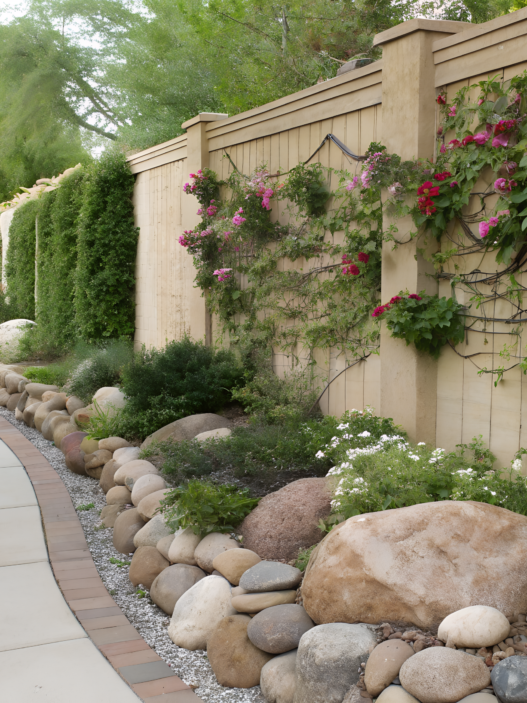
This effect works best along a seating area, next to wooden furniture, under a pergola, or behind a group of potted plants. It works well as a background and makes the space feel more cohesive. And now this wall has become a place that’s simply nice to look at.
2. Cinder Block Garden Wall With Hidden LED Strip Channel
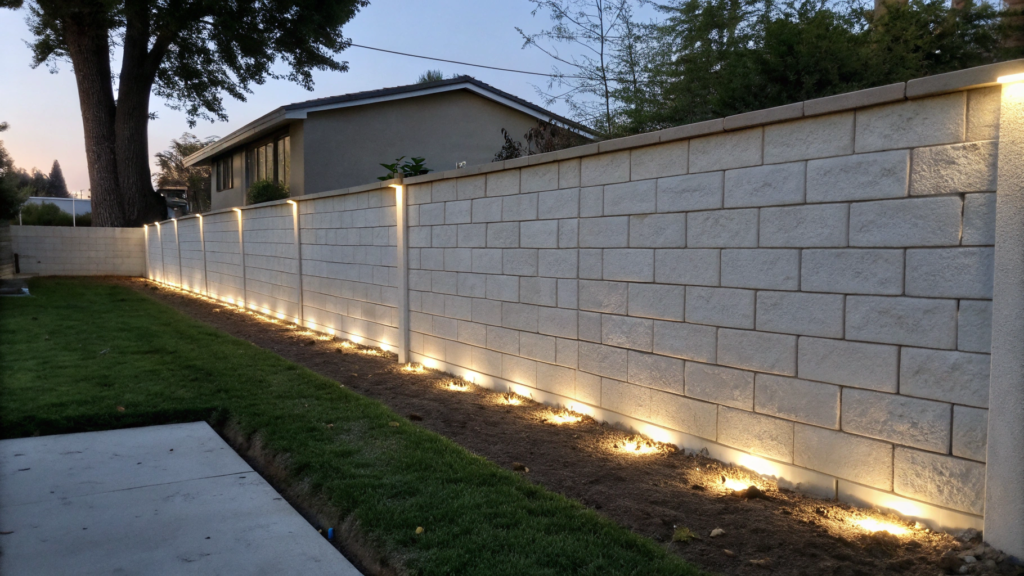
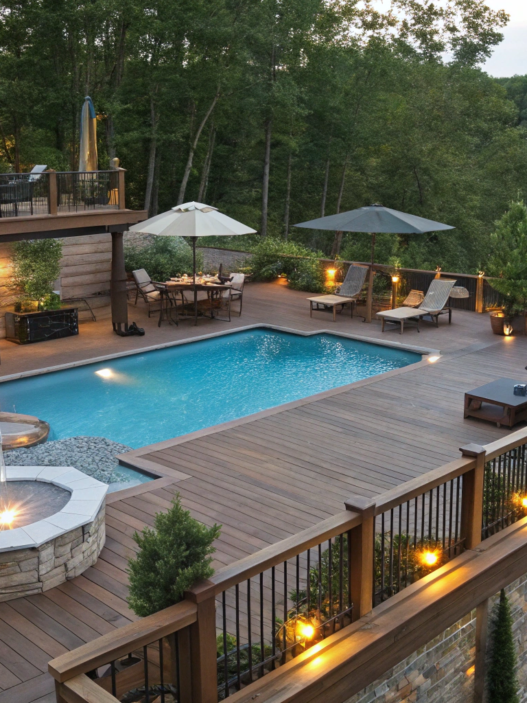
Here you create a wall from cinder blocks (concrete blocks) and заранее plan a channel where the LED strip is hidden. The light isn’t visible directly — it “slides” along the surface and creates a hidden lighting effect. During the day — a clean, minimalist structure. At night — a soft glow that literally changes how the whole yard feels.
What You’ll Need
- standard size concrete blocks 16×8×8 inches (40×20×20 cm)
- mortar for masonry or construction adhesive
- level
- measuring tape
- outdoor LED strip (waterproof, IP65 or higher)
- power supply and cables
- plastic or aluminum channel for wiring
- protective sealant
From LED, we used DAYBETTER Waterproof LED Strip Lights Outdoor, because they have stable light and solid moisture protection.
How to Make a Wall With Lighting
- Mark the area and prepare the base
Mark the wall line, level the ground, and if needed make a simple base (for example, a layer of gravel). This is important so the wall doesn’t shift over time. - Plan the light channel in advance
Decide where the LED strip will go — usually along the top or inner edge of the wall. Leave space for the channel before starting the build. - Start laying the blocks
Lay the first row as evenly as possible using a level. The entire wall geometry depends on it. - Leave a ниша for the LED channel
In one of the rows, leave a gap or embed a channel where the strip will be placed later. It should be hidden so the light reflects instead of shining directly into your eyes. - Run the wiring
Carefully route the cables inside the wall or behind it. It’s better to plan the connection to the power source right away. - Install the LED strip
Fix the strip inside the channel, test it, and make sure the light spreads evenly. - Close and secure the structure
If needed, cover the channel with a protective layer and seal it to protect from moisture.
Details That Improve the Result
If you take care of a few details in advance, you’ll get a much stronger effect.
- Hide the light source completely — if you can see the strip, the effect is lost
- Use warm white light (around 2700–3000K) — it feels softer and more natural
- Direct the light onto the surface, not into open space
After that, the wall starts to “glow” instead of just being lit. And those are two different things.
This looks especially good in places where you spend time in the evening — along a seating area, near an outdoor table, or next to a path leading to the house. The light shouldn’t be the main element — it supports the atmosphere and makes the space feel more cohesive.
3. Paris Bistro Garden Wall Lights Using Simple Sconces
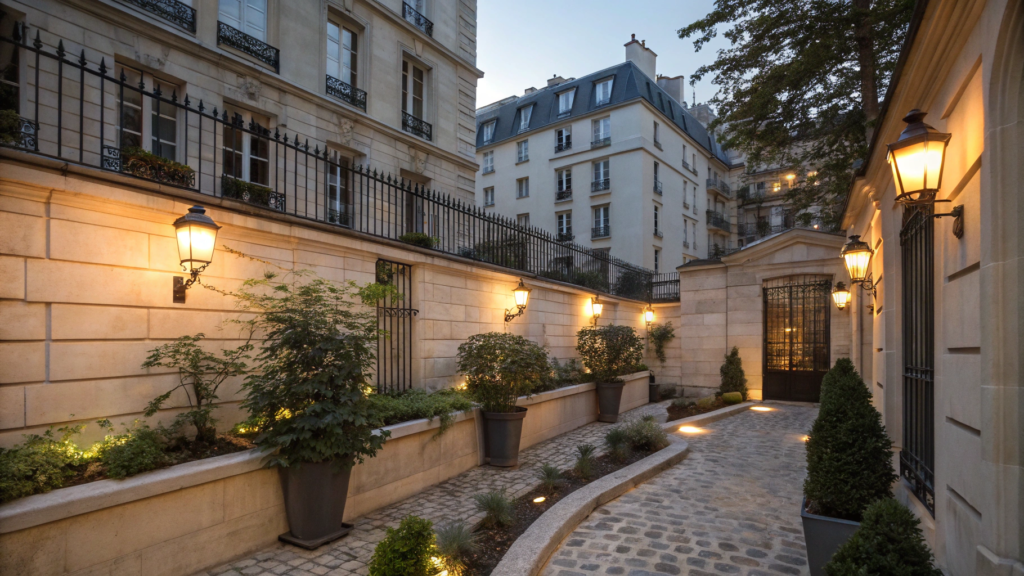
Paris bistro garden wall lights using simple sconces give a soft evening light that makes the space feel more alive.
The key here is not the fixtures themselves, but how they give light. In Paris courtyards, there is almost never bright lighting. It’s soft, directional light that highlights the wall and a bit of the space around it.
In lighting practice, it’s long been noticed that warm localized light feels calmer and softer than bright overhead light. That’s why these fixtures are often used in relaxation and social areas — it’s simply more comfortable to be around them.
What You’ll Need
- outdoor wall sconces
- mounts and anchors for your wall type
- level
- drill
- cable and access to power or solar models
How to Install Wall Sconces
- Determine the mounting height
Usually this is 60–72 inches (150–180 cm) from the ground. Adjust depending on the situation: near a table — a bit lower, for a walkway — a bit higher. The main thing is that the light doesn’t hit your eyes or create harsh shadows at face level. - Mark the mounting points
Mark with a pencil and check with a level. If installing two sconces — step back a few steps and see how they look together. Sometimes on the wall everything is “level”, but visually it’s not. - Prepare the holes
Drill holes and install anchors based on your wall type. For concrete or brick — anchors, for wood — simpler. Try to keep the drill straight so there’s no tilt. - Connect the power
If they are wired — run the cable in advance and make sure the length is enough without tension. Make connections аккуратно and insulate them. If using solar — choose a spot where there’s at least a few hours of direct sunlight per day, otherwise they will be dim in the evening. - Mount the sconces
Attach the fixture to the mounts and tighten screws so it holds firmly without tilt. Check by hand — nothing should wobble. Pay attention to the direction of the shade: even a small angle can сильно change how the light falls. - Seal the connections
Apply sealant around mounting points and cable entry. This protects from moisture and extends lifespan. You don’t need much — a thin аккуратный layer is enough. - Test the light in the evening
Turn on the light in the dark and look at the wall from a distance. Check for harsh spots or overly bright areas. Sometimes just switching to a lower wattage or warmer bulb makes the light softer and more pleasant.
What Makes the Light “Right”
At this stage, it’s easy to stop at “it works, it lights up.” But the difference between just light and atmosphere is in the details.
- choose warm light (2700–3000K) instead of cold
- avoid overly bright bulbs — softness matters more here
- leave part of the wall in shadow to create contrast
And that’s when the feeling of depth appears. Not everything is lit, and that has its own logic.
These sconces work best near places where you spend time in the evening — an outdoor table, a bench area, a small terrace, or just a section of wall near the entrance. They create that effect where you don’t want to go inside in the evening. You just sit a little longer than you planned.
4. Garden Wall Art Made From Oversized Vintage Tool Shapes
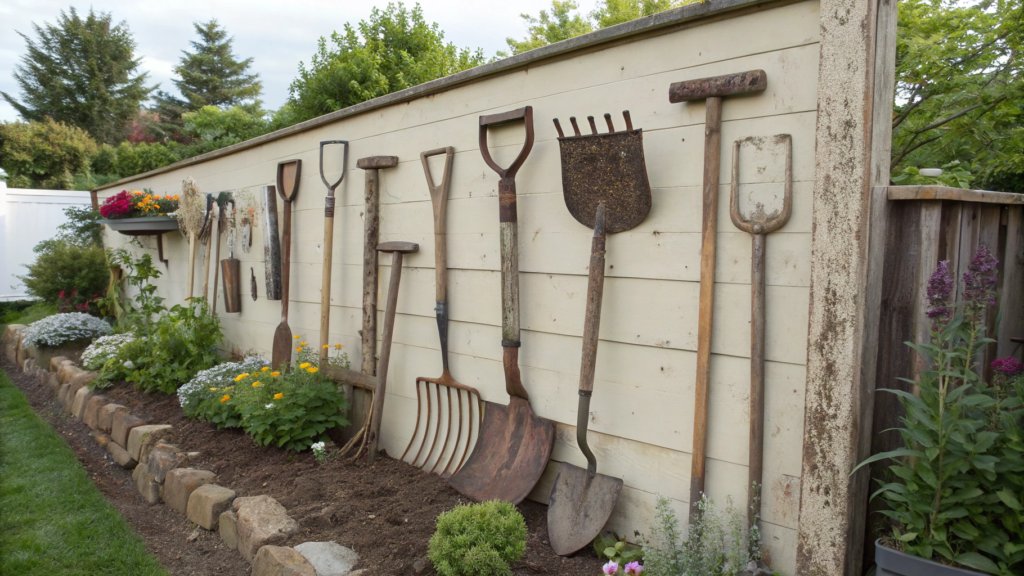
Garden wall art made from oversized vintage tool shapes is that rare case where imperfection works better than ideal. Old rakes, a shovel, garden tools… At some point, the wall already looks like a composition, not a random set of things.
And when these are tools with history, they create a feeling of space you can’t buy in a store.
When you use old or familiar вещи in the garden, the space starts to feel closer and more “yours.” You notice it, and guests feel it too. It creates the sense that the wall starts to tell something.
What You’ll Need
- old garden tools or their large silhouettes
- sheet of metal or wood (if you’ll cut shapes)
- outdoor paint
- mounts (screws, anchors)
- drill
- sandpaper
How to Create a Composition
- Define the overall scale
First decide how big the elements will be. Small items get lost, so it’s better to go for large shapes — from 24 inches (60 cm) and up. Even one big silhouette works stronger than five small ones. - Prepare tools or shapes
If you use real tools — clean off dirt and lightly sand them. Rust can be partially left — it adds texture. If you’re making shapes yourself — cut them from wood or metal and slightly “age” the surface. - Choose color or keep the natural look
You can paint everything one color (for example, matte black or whitewashed gray) to unify the composition. Or leave it as is — with wear and different tones. We tried both, and honestly… the natural look feels more alive. - Lay out the composition on the ground
Before mounting, place everything on the ground and try different layouts. Moving something by a few inches (5–7 cm) can seriously change the perception. It’s better to spend 10 minutes here than redo it on the wall later. - Transfer the layout to the wall
Mark mounting points with a pencil. Check distances and level, especially if elements follow a line or repeat a rhythm. - Mount the elements
Use mounts suitable for your wall type. Fix them securely but without excessive pressure to avoid damage. If an item is heavy — add an extra mounting point. - Step back and look from a distance
After installing, step back 10–15 ft (3–4.5 m). See how the composition reads as a whole. Sometimes you’ll want to slightly rotate or shift one element — and that’s normal.
What Makes This Wall Really Stand Out
It’s easy to turn this into “just hang everything randomly.” But there are a few things that keep the composition balanced and make it feel intentional.
- limit the number of elements — 3–5 large shapes work better than an overloaded wall
- keep a consistent style — either all aged and textured, or all painted
- leave space between elements so they can “breathe”
When you follow these, it’s no longer a random set, but a thought-out story.
This kind of wall works well near a garden, greenhouse, or a space where you work with your hands. It naturally continues what’s happening around it — not like decoration, but like a part of life already there.
5. Garden Wallpaper Aesthetic Feature Using Removable Vinyl Panels
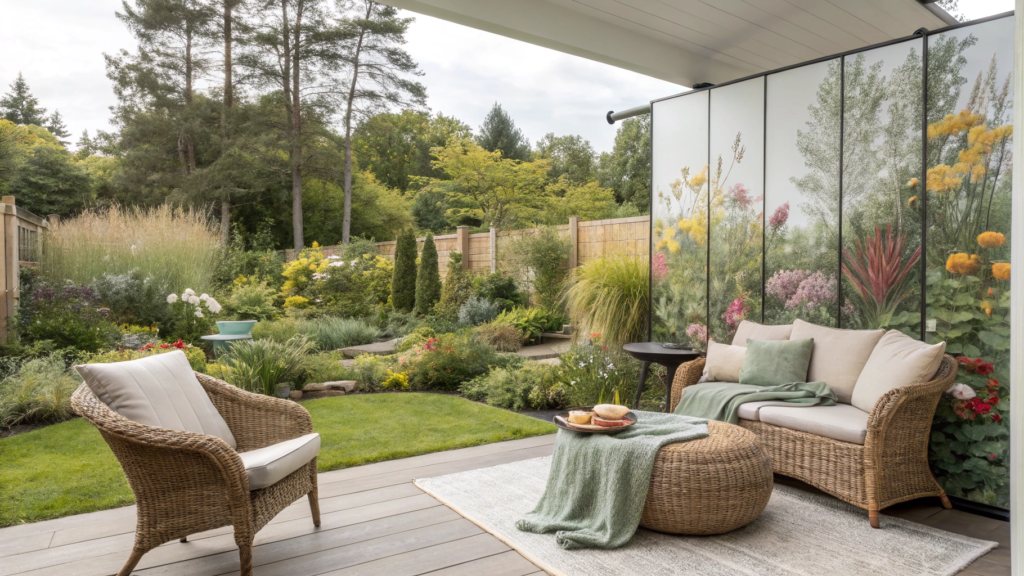
Garden wallpaper aesthetic feature using removable vinyl panels — here vinyl panels create a clean visual background that highlights everything in front of it — plants, furniture, textures. This works on the level of perception.
And it’s important that you can change it at any moment.
What You’ll Need
- removable vinyl panels (removable vinyl)
- clean, dry wall surface
- level
- soft scraper or plastic card
- trimming knife
- measuring tape
We tried panels like RoomMates Peel and Stick Wallpaper Panels — they’re convenient because you can reapply them without marks if something goes wrong.
How to Create a Vinyl “Wall”
- Prepare the surface
The wall should be dry, clean, and relatively even. Dust and grease prevent adhesion, so it’s better to quickly wipe it with a damp cloth and let it dry. - Make markings
Mark a vertical line with a level — this will be the guide for the first panel. If the first one goes crooked, everything else will follow. - Start from the top corner
Remove the backing gradually, not all at once. Apply the panel and carefully smooth it downward to avoid bubbles. - Smooth the surface
Use a soft scraper or just a dry cloth to push out air. Move from the center to the edges — this makes the surface even. - Align panels carefully
Watch the pattern if there is one. Even a small shift can be noticeable, especially with geometric designs. - Trim the edges
If the panel goes beyond the wall or niche, carefully trim it with a knife. Do it slowly to avoid tearing the edge. - Check the result from a distance
Step back a few steps and see how the whole surface looks. Sometimes you’ll want to slightly adjust a seam or smooth a section — that’s normal.
Details That Make the Effect Cleaner and More Premium
Here it’s easy to get either a clean result or the feeling of “something temporary stuck on.” The difference is in the details.
- choose calm patterns or textures, not overloaded prints
- avoid overly glossy surfaces — matte looks more natural
- don’t cover the entire wall, leave part “clean” for balance
When everything is done neatly, the panels start to look like part of the structure, not a separate layer.
This technique works best in small zones — near a bench, at the entrance, or around groups of potted plants. The wall becomes a background for greenery, and the feeling from it changes. Simply because context appears.
6. Moroccan Tile Stencil Border That Hides Old Cracks
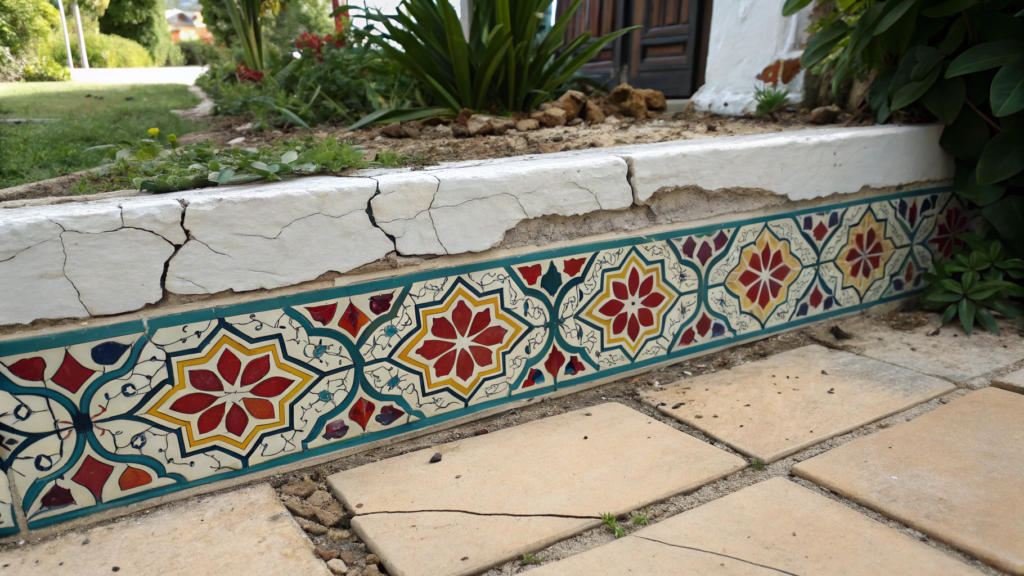
Moroccan tile stencil border that hides old cracks — this technique allows you not to hide cracks, chips, and uneven areas, but to turn them into part of the pattern.
When a surface is smooth and uniform, the eye immediately notices defects. But once a repeating ornament appears, attention shifts to the structure. And in a garden, this works especially well.
What You’ll Need
- Moroccan tile stencil (tile stencil)
- exterior paint (matte is better)
- brush or stencil roller
- painter’s tape
- level
- pencil
- primer (if the wall is сильно damaged)
How to Make a Decorative Border
- Assess cracks and prepare the wall
First check where the cracks are. If some are deep — it’s better to lightly fill them, but small ones can be left. Clean the wall from dust and apply primer if needed so the paint goes on evenly and doesn’t absorb in patches. - Define the border level
Decide where the pattern will go — usually a strip 8–16 inches (20–40 cm) wide. Draw a horizontal line with a level. If the border shifts, it will be noticeable, especially on a long wall. - Fix the stencil
Place the stencil on the wall and secure it with painter’s tape. It’s important that it sits tightly, especially along the edges of the pattern, otherwise the paint may bleed. - Apply paint in layers
Don’t load too much paint on the brush or roller. It’s better to do several light passes than one heavy one. Work almost with a “dry” brush — this gives a clean pattern without smudging. - Move the stencil along the line
After each imprint, carefully remove the stencil and align it using the pattern marks. Don’t rush here: even a small shift of 0.5 inch (1–1.5 cm) is noticeable in the rhythm. - Work along the full length of the wall
Move gradually, section by section. It’s better to work in smaller parts to keep accuracy and avoid fatigue. - Check and refine details
When the full line is done, look over the border. In some places you can slightly adjust edges with a brush or enhance the color if it looks uneven.
What Affects the Clean Look and Perception of the Pattern
Here the result strongly depends on technique. Even a good stencil won’t help if you rush.
- use minimal paint — excess immediately creates bleeding
- keep consistent pressure on the brush or roller
- step back regularly and look at the pattern from a distance
When everything is done evenly, it feels like the pattern is built into the wall, not just applied on top.
This technique works well along long walls, fences, near paths or garden beds. It creates a line and brings the space together, especially if there are different textures and materials around. And most importantly — cracks stop bothering you.
7. Vertical Succulent Frames With Drip Line Watering
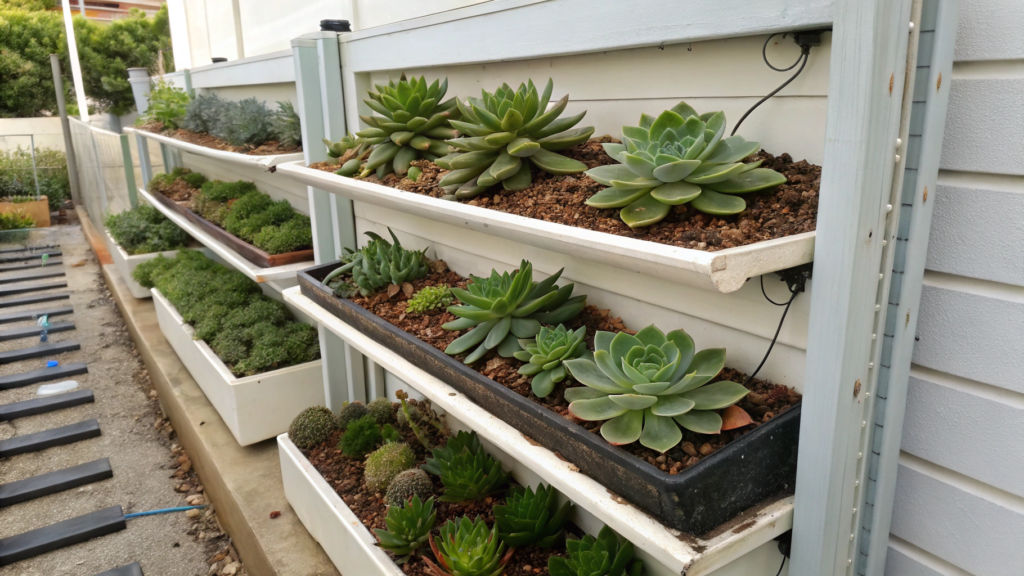
Vertical succulent frames with drip line watering — this is not a garden bed, not pots, but a vertical layer of plants that looks neat and at the same time works on its own.
Succulents are naturally adapted to conditions with limited water and soil. They have thick leaves that store water and a compact root system. They can handle periods without watering better than most decorative plants.
What You’ll Need
- wooden or metal frame with a depth of 2–4 inches (5–10 cm)
- moisture-resistant backing (for example, coconut fiber or geotextile)
- mesh or grid to hold plants in place
- succulents (different types for texture)
- succulent soil mix
- drip line (drip line)
- connectors and hose
- irrigation timer
- wall mounts
For watering, it’s convenient to use something like Raindrip Drip Irrigation Kit for Containers and Hanging Baskets — it already includes a basic setup for connection.
How to Make a Vertical Frame
- Build the frame base
The frame should be deep enough — minimum 2 inches (5 cm), ideally closer to 3–4 inches (7–10 cm), so roots have space to grow. Inside, fix the backing and mesh that will hold the plants in place. - Prepare the soil and filling
Use a light succulent soil mix — it drains well and doesn’t hold excess water. Fill the frame firmly, but not compacted “like concrete,” so roots can develop. - Place the plants
Insert succulents through the mesh, starting with larger forms and gradually adding smaller ones. Try to alternate textures and shades — this creates depth. No need for perfect symmetry, slight “chaos” looks more natural here. - Install the drip line
Lay the drip line along the top of the frame or in a zigzag inside the structure. It’s important that water is distributed evenly, not poured in one spot. Secure the tubing so it doesn’t shift over time. - Connect the irrigation system
Connect the drip line to a hose and add a timer. This allows you to set watering, for example, 5–10 minutes a few times per week, depending on climate. - Mount the frame on the wall
Use reliable mounts — a frame with wet soil weighs more than it seems. Make sure it hangs evenly and has no wobble. - Let the plants adapt
For the first 1–2 weeks, don’t turn on watering too actively. Let the plants root. After that, you can start the system and observe how they respond.
What Affects Stability and the Look of the Composition
Vertical planting depends on a few key things. Without them, everything starts to “shift” — visually and literally.
- use different types of succulents, not just one — this adds volume
- don’t overwater — excess water breaks the structure faster than lack of it
- fix plants firmly at the beginning until they root
When everything is set up correctly, the composition looks dense, without gaps or empty areas.
These frames work especially well on small wall sections where you want greenery but don’t have space for beds or large containers — near the entrance, next to a seating area, or along a narrow passage.
We installed them on the wall near the kitchen exit. And now it’s the first thing you see when you step outside. Just a living surface that slowly changes on its own.
8. Black Fence to Green Glow Ombre Garden Wall Painting
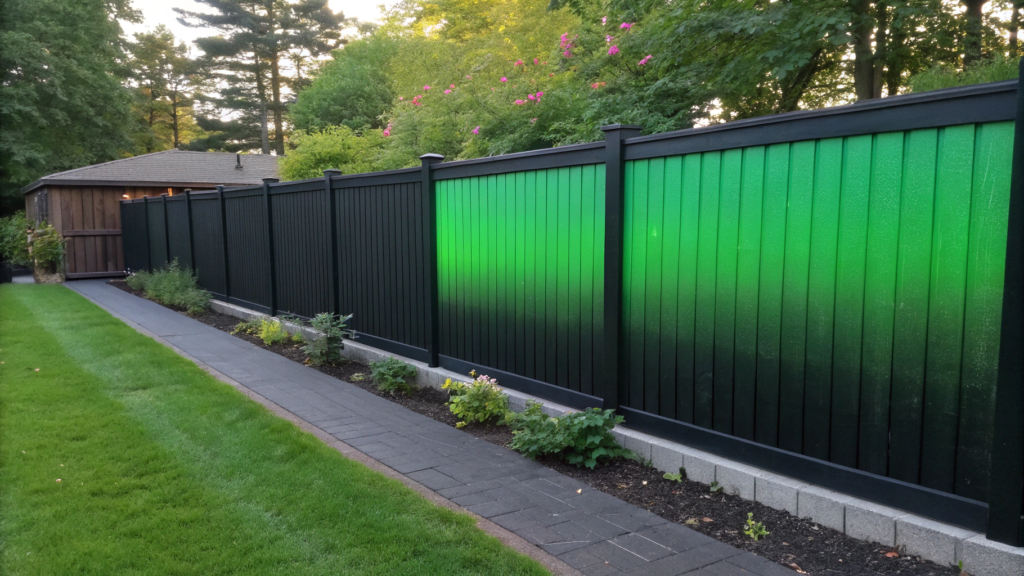
Black fence to green glow ombre garden wall painting — here it’s just paint and the right color transition.
A sharp color is always a boundary. But a gradient softens it. When a dark color gradually shifts into something lighter and more “alive,” the eye stops focusing on the fence line. It starts воспринимать it as part of the environment.
What You’ll Need
- exterior paint: black or dark graphite
- 1–2 shades of green (olive, mossy, muted)
- roller
- wide brush
- sponge or cloth for blending
- paint tray
- painter’s tape
- primer (if the surface is old)
How to Create an Ombre Transition
- Prepare the surface
Clean the fence from dust, dirt, and old peeling paint. If the surface is faded or patchy — apply primer. This helps the colors go on evenly. - Apply the base dark color
Cover the lower part of the fence (about halfway or slightly higher) with black or graphite paint. Use a roller to get an even layer without streaks. - Add the middle transition shade
Above the base layer, start adding the first green shade. Apply it with a roller or brush, but don’t make it fully opaque — let some of the lower color show through. - Blend the boundary between colors
While the paint is still wet, take a sponge or dry brush and gently blend the transition between dark and green. Movements should be light — the goal is not to erase, but to mix. - Apply the top light green layer
Cover the upper part of the fence with a lighter or more muted green. It shouldn’t be bright — natural, calm shades work better. - Smooth the transition across the full height
Go back to the transition area and softly blend again with a sponge or brush to remove harsh lines. Sometimes you need a second pass to get the softness right. - Evaluate the result from a distance
Step back 10–15 ft (3–4.5 m) and see how the gradient reads. If it feels too sharp — add more blending or an intermediate tone.
What Makes the Gradient Feel “Alive”
At this stage, it’s easy to end up with just two colors on a wall. The effect appears when the transition is truly soft.
- choose muted greens, not bright ones
- avoid creating a clear line between colors
- work on wet paint so colors blend naturally
When it works, the fence looks calmer and more cohesive, without sharp transitions.
This gradient looks especially good where there are plants — along garden beds, near shrubs, behind a seating area. The green top starts to blend with the foliage, and the fence almost disappears into the background.
9. Hanging Pot Rail Wall With Adjustable Spacing
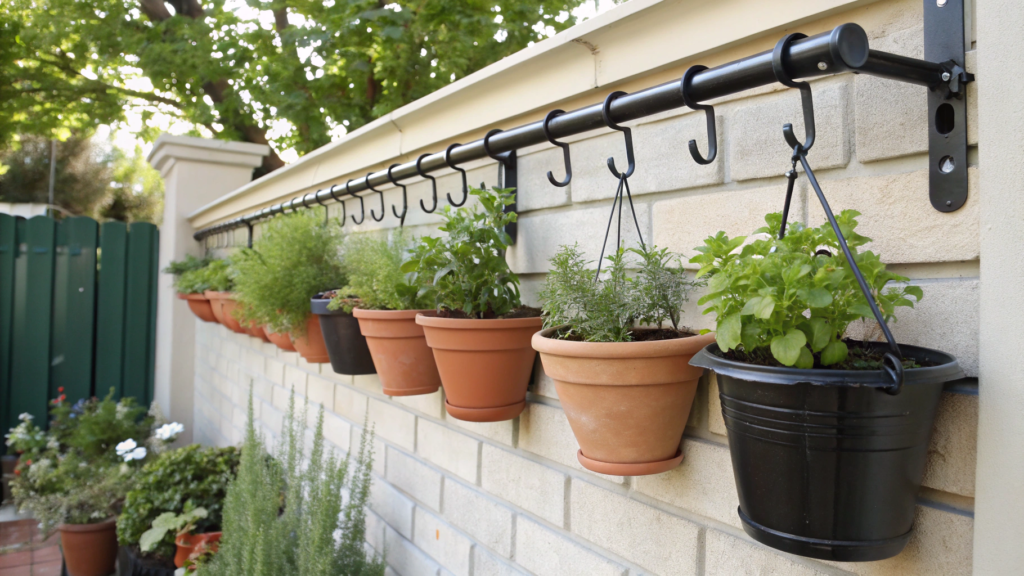
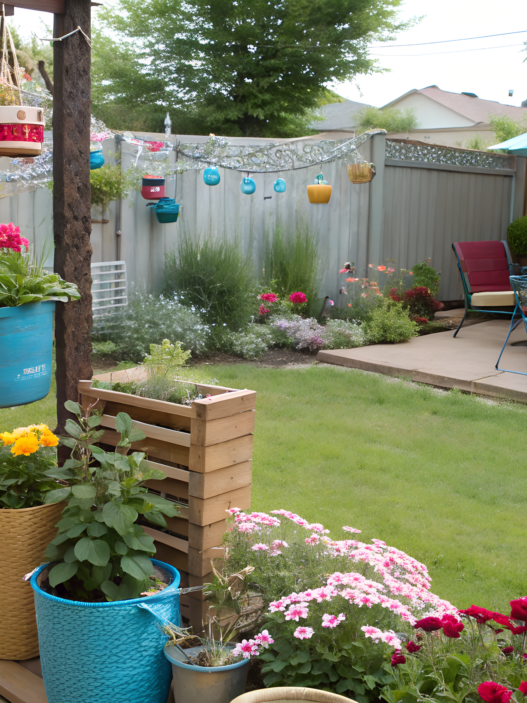
Hanging pot rail wall with adjustable spacing — everything hangs on the wall, easy to remove, move, and rearrange. Today you have herbs, tomorrow — flowers.
When hooks or holders are fixed in place, you quickly hit limitations. Here — it’s the opposite. Adjustable spacing lets you adapt the wall to different plants and pot sizes.
And it’s not just convenience. In garden practice, it’s well known that proper distribution of plants by height and spacing improves access to light and air, reducing the risk of fungal problems. So it’s also about plant health.
What You’ll Need
- metal or wooden rail (or several)
- wall mounts (anchors or plugs)
- S-hooks or adjustable holders
- pots with hanging holes
- drill
- level
- measuring tape
How to Build a Hanging Pot System
- Define the height and length of the rail
Decide where the system will go. Usually it’s around 50–70 inches (125–175 cm) from the ground. Keep in mind the pots will hang lower — it should be easy to reach them. - Mark the mounting points
Place the rail against the wall and mark the mounting spots. Check with a level — if the rail is angled, it will be noticeable, especially with multiple pots. - Prepare holes and mounts
Drill holes and install anchors or plugs. For brick and concrete — use reinforced mounts, because the weight with water and soil increases. - Attach the rail to the wall
Screw the rail in place and make sure it sits tight without movement. Pull it slightly downward — it shouldn’t “move” at all. - Add movable hooks
Place S-hooks or holders along the rail. Don’t fix them rigidly — the whole idea is to be able to change spacing between pots. - Hang pots and adjust spacing
Start with larger pots, then add smaller ones. Move them until you find balance. Usually spacing is 4–8 inches (10–20 cm), but it’s better to adjust by eye. - Check usability and access
Step up and try removing and placing a pot. If something feels off — now is the best moment to fix it. Once plants root, it’s harder to change.
What Makes This System Comfortable
You can hang pots, but real convenience comes when everything is designed for use.
- leave extra space between pots
- don’t overload one rail — better two lines than one crowded
- consider plant growth — they quickly take more space
When the system “breathes,” it’s easy and pleasant to use — without constant adjustments.
This setup works best where you regularly use plants — near the kitchen, by the entrance, or around an outdoor cooking area. You don’t need to go to the garden just to pick a few leaves. You just reach out. And these small things are what make the space truly convenient.
10. Nighttime Mural Reveal Using Solar Spot Uplights
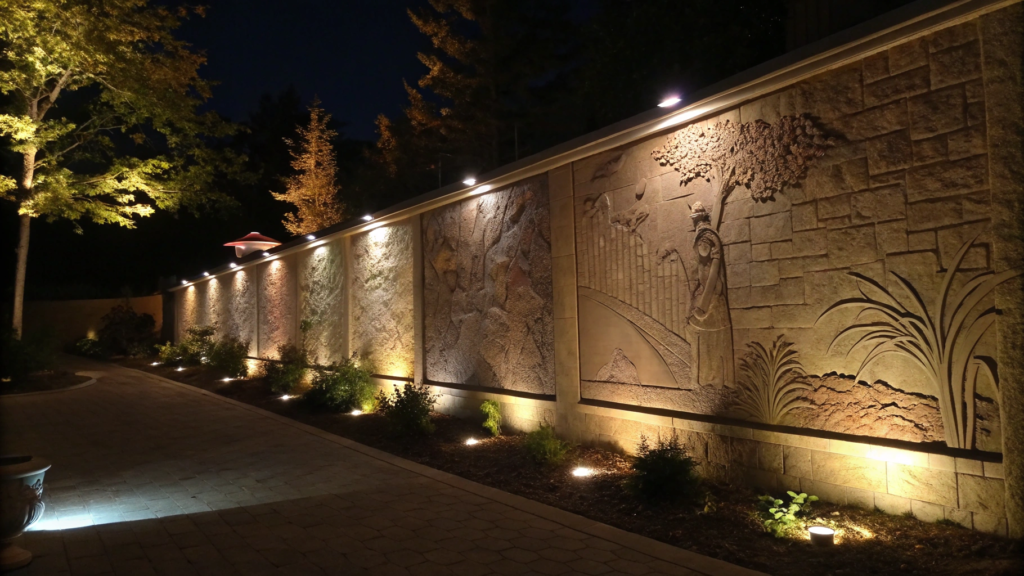
Nighttime mural reveal using solar spot uplights — here the light matters more than the image itself.
When light goes from bottom to top (uplight), it highlights the wall texture and creates soft shadows. Unlike top lighting, which “flattens” the surface, this creates depth.
According to lighting design research, uplighting enhances texture perception and makes the surface visually deeper, especially on uneven or painted walls. And this works even with simple drawings.
What You’ll Need
- solar spotlights
- mounts or stakes for installation
- measuring tape
- level (optional)
- cable (if the model is hybrid)
We used InnoGear Solar Lights Outdoor Waterproof Spotlight, because they have an adjustable angle and good brightness without overexposure.
How to Create Evening Lighting
- Define key areas of the mural
Look at the wall and decide which elements you want to highlight. These can be lines, textures, or the center of the composition. No need to light everything — choose 2–3 accents. - Choose light placement points
Place lights about 12–24 inches (30–60 cm) from the wall. Too close — harsh spots appear, too far — the effect is lost. - Check the angle
Direct the light upward at an angle so it “slides” along the wall. Try a few options — sometimes a small adjustment changes everything. - Install the lights in the ground or mounts
Secure them so they don’t shift. If using stakes — make sure they stand straight and don’t wobble. - Make sure panels get sunlight
Solar models need at least a few hours of direct sunlight per day. If they’re in shade, the evening effect will be weak. - Test the light at night
Wait until it’s dark and evaluate the result. Look at where shadows appear, if the light is too bright, or if parts of the mural get lost. - Adjust placement if needed
Move lights a few inches (5–10 cm), change the angle — this is normal. Final tuning almost always happens at night.
What Makes the Lighting Expressive
The difference between “it lights” and “it works” is in the details.
- don’t point light directly into the eyes — it should run along the wall
- use warm or neutral light, not cold
- leave part of the wall in shadow for contrast
When everything is set up right, the mural looks much more expressive and dynamic.
This type of lighting works well on walls with texture, patterns, or even just uneven surfaces. Especially near places where you spend evenings — seating areas, tables, paths. During the day — just a background, but in the evening it becomes a completely different story.
Real Backyard
We didn’t do all of this at once. One wall, one evening, one experiment. And over time, you start to see how the space changes not because of big renovations, but because of these small, precise decisions.
Sometimes it’s enough to add light, to soften a harsh color. Sometimes — to hang something that was already there, just in a different context.If you try something from this — share in the comments what you chose. It’s really interesting to see which ideas work best and how they look in real backyards, not just in pictures.