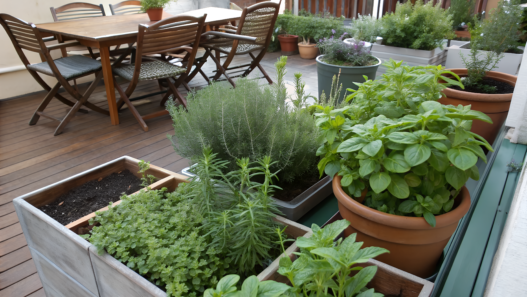
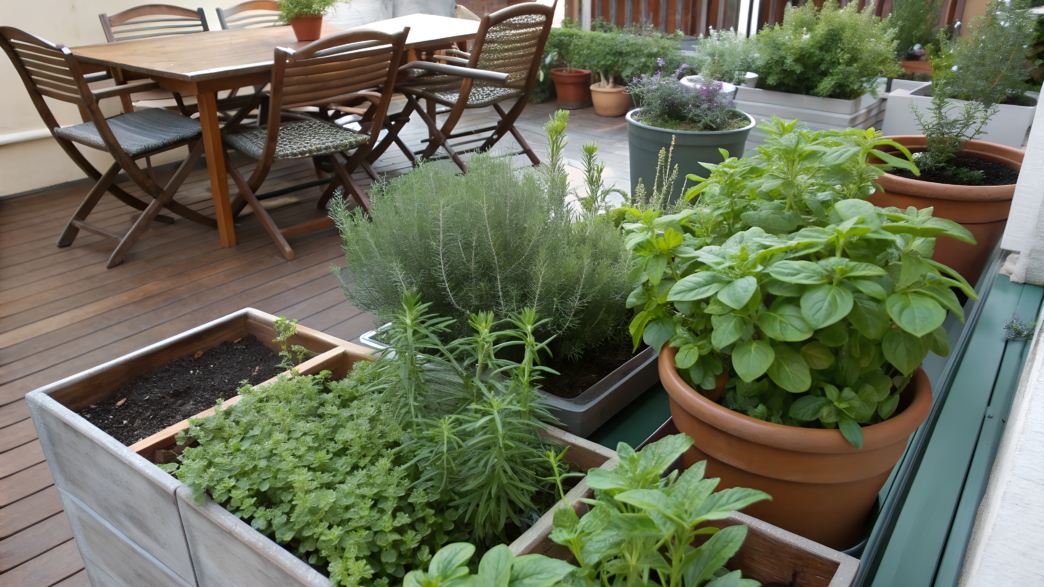
We, like many of you, started very simply. A couple of pots, a bit of basil, mint — and a huge desire to cook at home just a little more tasty.
But pretty quickly we realized that it’s not about the number of plants, but about how they are placed, how you use them, and how easy it is to reach them at the right moment. When herbs are within reach, you start adding them to almost every dish without even thinking.
Here we tried to pick the simplest options, where each herb grows in the right conditions, doesn’t interfere with neighbors, and at the same time gives a good harvest. Somewhere it’s important to cut correctly, somewhere — not to overwater, somewhere — just to place the pot in the right spot. And all of this together can be repeated even in a small space.
1. One pot Italian herb trio basil oregano parsley
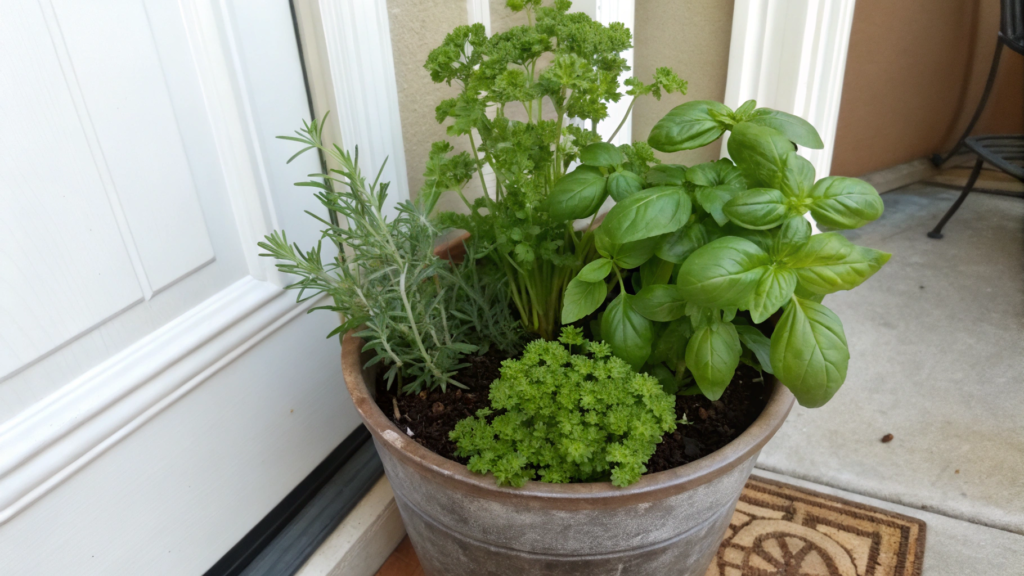
One container, three herbs — and you’re already picking fresh basil right before serving pasta. At the same time, no long preparation and no special beds are needed.
We just placed one pot by the door. After a couple of weeks, we already had greens.
The combination of basil + oregano + parsley is not random. In cooking, this is a classic base, and in growing they also get along well with each other. They have similar requirements for light and watering, and at the same time they don’t suppress each other.
What you’ll need
- Pot with a diameter of 12–14 inches (30–35 cm), depth at least 10 inches (25 cm)
- Drainage (expanded clay or gravel)
- Light soil for containers
- basil — 1–2 plants
- oregano — 1 plant
- parsley — 1–2 plants
- Watering can with a soft spout
How to do it
- Prepare the pot
At the bottom — a layer of drainage about 1–1.5 inches (3–4 cm). This removes excess water and saves the roots from rotting. Without this, it’s easy to get a swamp in the container after a couple of waterings. - Fill with soil to 70–80%
Not to the edges. Leave space to plant and then add more. The soil should be light, loose — if it clumps, add a bit of perlite. - Place the plants with logic
basil — closer to the center
oregano — on the edge (it likes a bit more freedom and can slightly hang over)
parsley — between them
This way they won’t interfere with each other’s growth and look neat. - Carefully straighten the roots
If the roots are strongly twisted (often happens from store pots), slightly loosen them with your hands. Don’t tear, just give them direction outward. - Add soil and lightly press
Remove air pockets, but don’t compact everything too much. - First watering — slow and abundant
Water so that water comes out from the bottom. This shows the entire soil volume is moistened. After that, focus on the top layer. - Place in the sun
At least 5–6 hours of light per day. On a patio, this is usually the south or west side. Without light, basil starts stretching and loses aroma.
Small details
Don’t cut too much at once. Especially basil. Better often, but a little — then it starts branching and gives more leaves. Oregano can be slightly trimmed on the edges — it grows back quickly and becomes denser.
Parsley likes consistency. If you forget about watering, it will be the first to show it — the leaves become limp.
If you have even one such pot by the kitchen door, you start adding fresh herbs to food more often, simply because they are right in front of your eyes. I assure you, then a second pot appears, and you’re already looking for a place for the next one.
2. Leaning ladder herb wall for mint thyme and chives
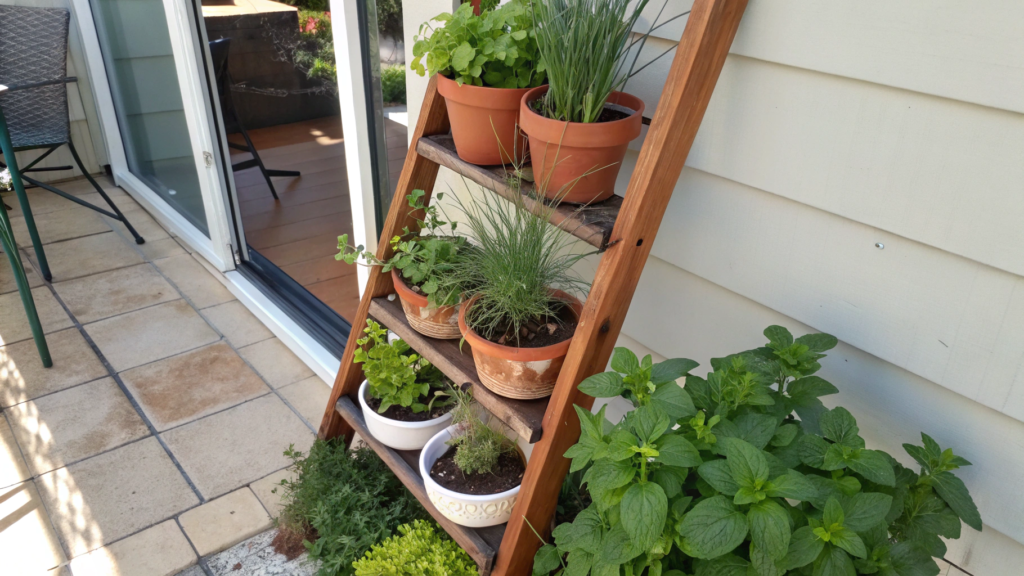
Vertical placement is not just herbs within reach, it gives more light to each plant and makes harvesting convenient right from the patio. And imagine: fresh thyme in potatoes, mint in drinks, chives in an omelet. Even while writing this, I can feel the aroma of the dishes.
For example, for us it was like this: we placed a ladder, added pots — and within a week it became the most used area. Mint slightly hangs down, thyme keeps a dense shape, chives grow in neat bunches.
With proper lighting and spacing between pots, air flows freely, leaves dry faster after watering, so there is less risk of fungal problems.
What you’ll need
- Leaning ladder (wooden or metal, 4–5 steps)
- Pots 6–8 inches (15–20 cm) — one per plant
- Light soil for containers
- Mint — 1 plant
- Thyme — 1 plant
- Chives — 1 plant
- Fasteners or stoppers (if pots are unstable)
- Watering can with a narrow spout
- Ready soil, for example Miracle-Gro Potting Mix 8 qt on Amazon
- Stable ladder
How to do it
- Choose a place with enough light
You need at least 4–6 hours of sun. With less light, thyme slows growth and loses aroma intensity, mint becomes more watery. - Set the ladder at an angle and secure it
Check that it doesn’t slide. On tile or concrete, it’s better to use rubber pads or press the structure tighter against a wall. - Distribute plants by levels
Thyme — at the top, where there is more light and it’s drier.
Chives — in the middle.
Mint — at the bottom, where it’s slightly cooler and moisture lasts longer. - Fill the pots with soil
Leave about 1 inch (2–3 cm) of free space at the top. This makes watering easier and prevents overflow. - Plant without burying too deep
The base of the stem should stay at soil level. Planting too deep especially affects thyme. - Do the first watering
Water slowly until water starts coming out of the drainage holes. This ensures even moisture throughout the soil. - Check stability after watering
Wet soil increases weight. Make sure the ladder doesn’t tilt and the pots stay stable.
Practical tips
Keep mint in a separate pot. It spreads quickly and easily takes space from neighbors, and in a separate container it’s easier to control.
Always place thyme higher than other herbs, because it needs more light, less moisture, and good drainage. If it constantly stays in wet soil, the bush becomes sparse.
Chives tolerate frequent cutting well, but don’t cut them down to zero. Leave at least 2 inches (5 cm) so the plant can quickly produce new shoots.
And be sure to check how the ladder behaves after watering. Pots become heavier, and a light structure can start shifting, especially on tile or smooth concrete.
Everything is at hand level, and there is no need to bend or search for the right pot. Cutting takes a few seconds, and plants recover faster thanks to regular use. In this setup, herbs are used more often, and the structure itself stays convenient and doesn’t require extra care.
3. Self watering herb box for cilantro that never bolts
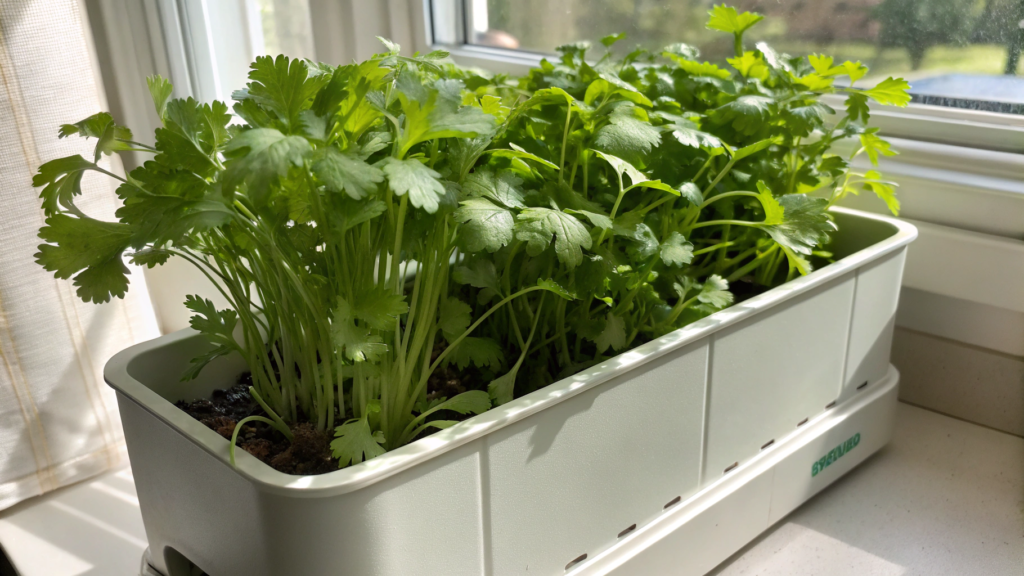
For cilantro, unstable moisture is stress. One day it’s dry, then heavy watering. And as soon as we made a simple self-watering container, the situation changed. Growth became more even, leaves — larger, and cilantro stayed in the vegetative stage noticeably longer.
What you’ll need
- Container or box with a depth of at least 8–10 inches (20–25 cm)
- Inner reservoir or self-watering system
- Wick (cord or strip of fabric)
- Light soil for containers
- Cilantro seeds (coriander / cilantro)
- Water
- Soil — for example, Miracle-Gro Potting Mix 8 qt
How to do it
- Assemble the self-watering system
At the bottom of the container there should be a water reservoir. If you make it yourself — you can use a double container or an insert with a gap. Water should not directly flood the roots. - Install the wick
Pull a cord or fabric from the reservoir up into the soil. It will draw moisture as needed. This is the key element — without it the system doesn’t work. - Fill with soil
Use a light, breathable substrate. Soil that is too dense will hold water and disrupt the balance. - Sow cilantro seeds
Place them at a depth of about 0.5 inch (1–1.5 cm). Don’t sow too densely — plants need space, otherwise they go to bolting faster. - Do the first watering from the top
This is needed to start the process. After that, the system will work on its own through the wick. - Monitor the water level in the reservoir
Check every few days. It shouldn’t dry out completely, but constant overfilling is also not needed. - Place in a spot with soft sun
4–5 hours of light is enough. Strong heat accelerates bolting, especially in containers.
Our experience
We noticed that cilantro doesn’t tolerate root overheating well. If the container stands in the sun, it’s better to choose a light-colored material or place it so the lower part stays in the shade.
Try not to cut too much greens at once. Regular moderate cutting stimulates new leaf growth and slows the transition to flowering.
If the first signs of bolting appear (center stretching), you can partially pinch the top. This won’t stop the process completely, but will give a bit more time to harvest leaves.
Over time, you’ll see that this system removes the main factor that causes cilantro to bolt quickly — sharp changes in moisture. Water comes gradually, roots don’t experience stress, and the plant stays longer in the stage of active leaf growth. As a result, greens grow well, without sharp changes in taste and texture.
4. Partial shade herb set for dill and lemon balm
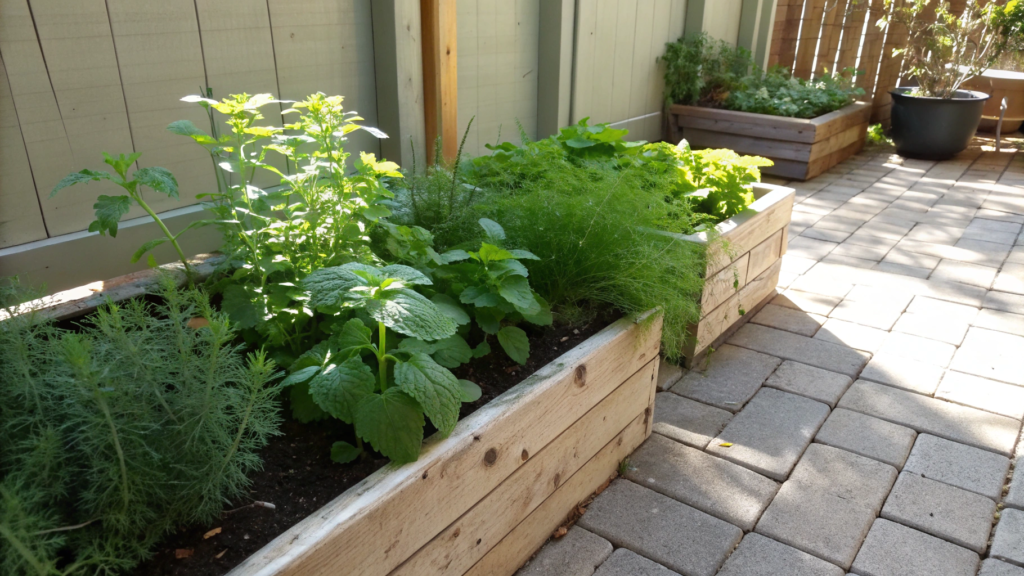
Not every patio gets sun all day. We had a corner where the sun appeared only in the morning for a couple of hours. The rest of the time — diffused light. Most herbs there stretched and looked weak. But dill and lemon balm settled in right away. Dill didn’t dry out, lemon balm didn’t burn, and its aroma was softer.
With moderate light, moisture evaporation decreases, and plants experience less stress from fluctuations. For dill, this is especially important — when overheated, it goes to bolting faster.
What you’ll need
- Container with a depth of 8–10 inches (20–25 cm)
- Light, well-draining soil
- Dill seeds or seedlings
- Lemon balm — 1 plant
- Drainage (expanded clay or gravel)
- Watering can for gentle watering
- Ready soil
How to set up this planting
- Choose a place with diffused light
Ideal — a spot where the sun is present 3–5 hours a day or passes through a canopy, fabric, pergola. If there is too little light, dill will stretch and become weak. If there is too much direct sun — it will start bolting quickly. - Prepare the container with a drainage layer
Add 1–1.5 inches (3–4 cm) of expanded clay or gravel at the bottom. This is especially important in shade, where soil stays moist longer. Without drainage, roots can start rotting after just a few waterings. - Fill with soil, leaving space at the top
Add soil so that about 1 inch (2–3 cm) remains to the edge. This helps water not overflow and spread evenly across the surface. - Place lemon balm with future growth in mind
Plant it closer to the edge of the container. It gradually spreads in width, and it needs space. Don’t bury the base of the stem — it should stay at soil level. - Sow dill with proper spacing
Make shallow rows about 0.5 inch (1–1.5 cm) and place seeds not too densely. If sown thick, plants will compete for light and quickly stretch. - Do the first watering after planting
Water slowly until the soil is fully moistened. Water should pass through the entire volume, not stay only on the surface. - Control seedling density
When dill grows to 2–3 inches (5–7 cm), thin it out, leaving some space between plants. This helps form stronger stems.
What to watch during growing
Lemon balm likes stable moisture, but doesn’t tolerate standing water. If the soil is constantly wet, roots start to suffer.
Dill reacts poorly to transplanting. It’s better to sow it directly in the container where it will continue to grow.
Even if the container is in the shade, it can still overheat from the surface underneath. If it’s tile or concrete, it’s better to lift the pot or place it on a wooden stand.
In this setup, watering is moderate, light is soft, and greens grow without sharp changes. Dill stays in the leaf stage longer, and lemon balm gives steady shoots. At the same time, the taste comes without the sharp bitterness that often appears with heat and drying out. Plants don’t experience stress, you can harvest more often, and new leaves grow back faster and more evenly.
5. Cut and come again basil pruning plan for nonstop leaves
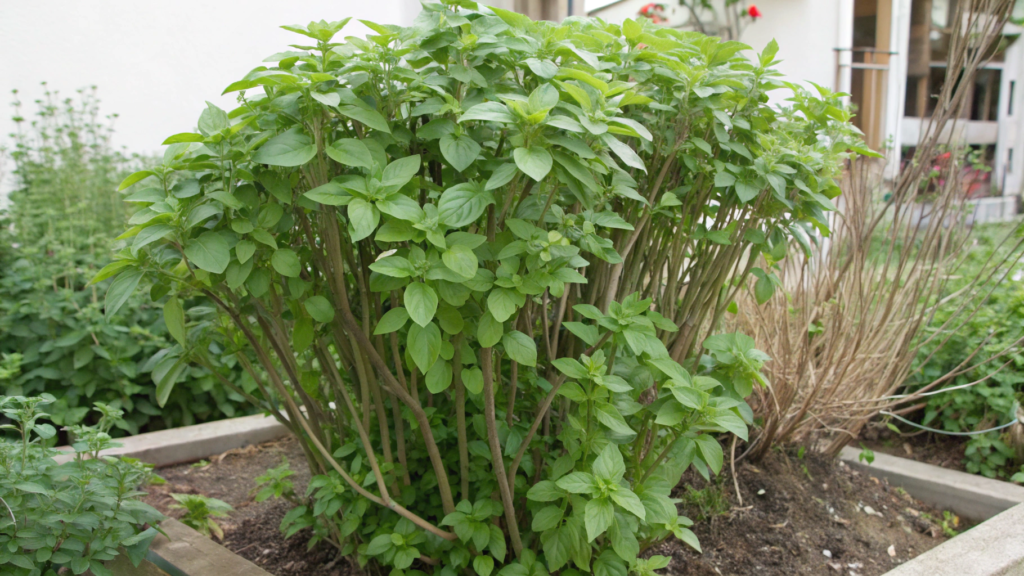
Basil pruning defines everything: either you get one long stem with a couple of leaves… or a dense bush that keeps producing leaves for a long time.
Regularly cutting the top makes the plant grow sideways instead of stretching upward. As a result, more side shoots and leaves appear, and the bush becomes fuller.
What you’ll need
- Pot 10–12 inches (25–30 cm) with drainage holes
- Basil — 1–2 plants
- Light soil for containers
- Sharp scissors or pruners
- Watering can with a thin spout
How to organize continuous leaf harvesting
- Let the plant gain some height first
Don’t start pruning right after planting. Wait until basil reaches about 6–8 inches (15–20 cm) and develops 3–4 pairs of true leaves. This gives the plant enough strength for branching. - Find the correct cut point
Make the cut not randomly, but right above a node — the place where two leaves come out of the stem. This is where new side shoots will grow. - Remove the top, not individual leaves
Don’t pick leaves one by one. Cut the top part of the stem about 1–2 inches (2–5 cm). This triggers growth in two directions at once. - Repeat pruning regularly
Every 5–7 days, when new shoots appear. The more often you trim carefully, the denser the bush becomes. - Don’t let the plant flower
If you see buds forming — remove them immediately. Flowering sharply reduces leaf quality. - Keep the balance
Don’t cut more than 30–40% of the plant at one time. If you remove too much, growth will slow down. - Water after pruning
Light watering helps the plant recover faster and start new shoots.
What to consider with this pruning method
As you already understand, basil loves warmth, but not root overheating. If the pot stands on a hot surface, growth slows down even with proper pruning.
Light directly affects bush density. It becomes clear that with low light, shoots stretch, and the “cut — grow two” pattern works weaker.
And don’t forget that sharp tools matter. A torn cut heals slower and can lead to stem drying.
When everything works right, the bush becomes dense. You don’t wait for a new batch of leaves — they appear constantly. You cut a bit for pasta or salad, and in a few days there is already more to take again. And basil doesn’t turn into one long stem, but keeps its shape and volume.
6. Korean perilla corner for lettuce wraps on a patio
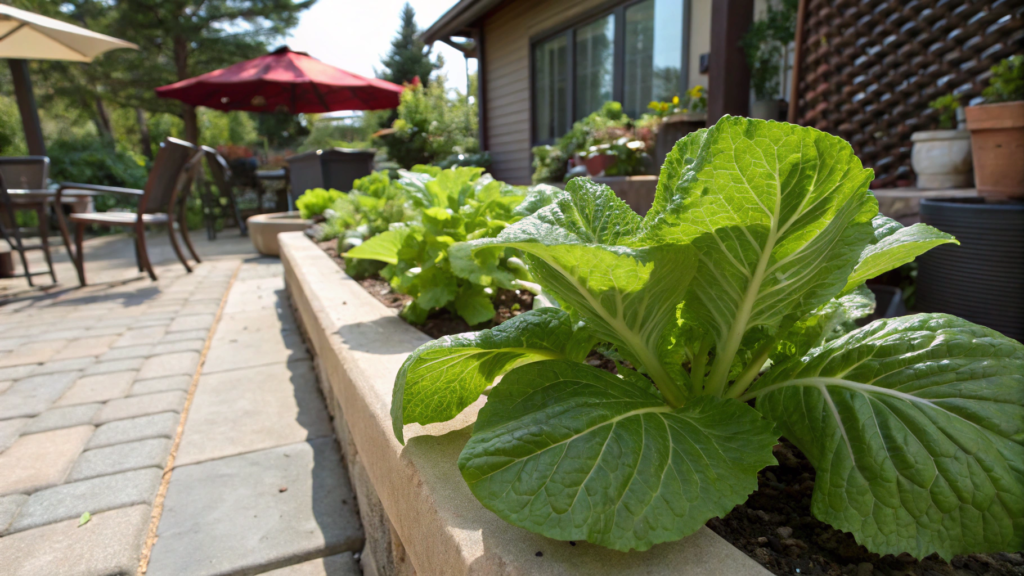
Perilla leaves completely change the taste of familiar food, giving that rich aroma that is hard to replace with anything else. Slightly spicy, a bit anise-like, with a cooling note — perfect for homemade rolls and wraps.
We set aside a separate corner for it on the patio. And it turned out to be one of the most rewarding crops: it grows fast, leaves are large, and it handles cutting easily. And you start using it much more often than lettuce.
Perilla is actively studied, its leaves contain many essential oils and beneficial compounds. In the sun, the aroma becomes stronger, but with overheating the leaves can become tougher, so it’s important to keep a balance between light and temperature.
What you’ll need
- Container with a depth of 10–12 inches (25–30 cm)
- Perilla — 2–3 plants or seeds
- Light, breathable soil
- Drainage (expanded clay or gravel)
- Watering can with gentle watering
- Seeds, for example Seeds of Change Perilla Herb Seeds on Amazon
How to organize this corner
- Choose a warm place with good light
Perilla loves sun, but also tolerates light partial shade. Optimal — 4–6 hours of light per day. In full sun, leaves become more aromatic, but it’s important to monitor moisture. - Prepare the container with drainage
Add 1–1.5 inches (3–4 cm) of expanded clay at the bottom. This protects roots from overwatering, especially after heavy watering. - Fill with soil and leave space at the top
Leave about 1 inch (2–3 cm) so water doesn’t overflow and it’s easier to water. - Sow or plant perilla with spacing
If using seeds — sow at a depth of about 0.3–0.5 inch (0.8–1 cm). If seedlings — leave at least 4–6 inches (10–15 cm) between plants so leaves can spread. - Do the first watering
Water slowly so moisture spreads evenly through the soil. Perilla likes stable moisture, but doesn’t tolerate standing water. - Start cutting when leaves reach palm size
Cut outer leaves, leaving the center to keep growing. This allows the plant to renew constantly. - Maintain the plant shape
If the bush starts stretching upward, pinch the top. This stimulates side growth and increases the number of leaves.
Practical nuances
Remember that perilla quickly reacts to drying out, and if the soil regularly dries, leaves become tougher and lose part of the aroma.
With слишком dense planting, leaves stay small, so it’s better to leave more space and get large, convenient leaves.
And don’t forget about the container. It shouldn’t overheat, because on a hot surface the roots suffer, and growth slows down even with good watering.
Very soon you’ll see that once perilla settles in, it starts giving a steady flow of leaves. Cutting takes a couple of seconds, and after a few days new ones appear. As a result, there are always fresh greens on hand for wraps.
7. French tarragon container setup with fast drainage mix
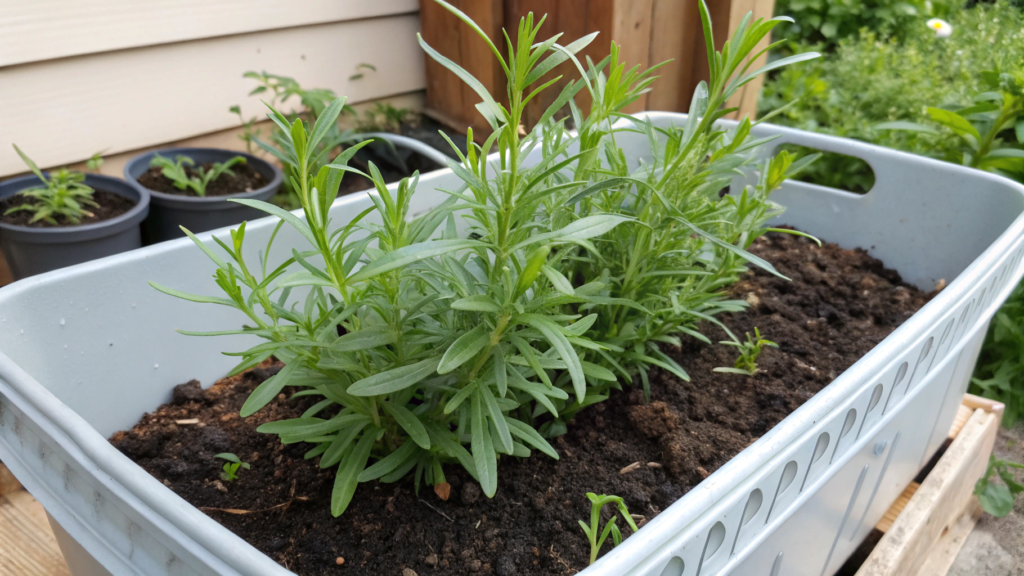
Planting a container of French tarragon with a quick-draining mix is completely dependent on the soil. It is undemanding in itself, but if you give it heavy, wet soil, it simply stops growing. The leaves become smaller, the aroma weakens, and the plant gradually declines.
French tarragon does not tolerate water standing at the roots. So what matters more is not how often you water, but how easily water drains from the soil and whether air remains inside.
What you’ll need
- Container with a depth of 10–12 inches (25–30 cm) with drainage holes
- French tarragon — 1 plant
- Expanded clay or gravel for drainage
- Base soil (light, without dense clay)
- Perlite or coarse sand
- Watering can for moderate watering
- Perlite, for example Espoma Organic Perlite 8 qt on Amazon
How to prepare the container and plant
- Choose a container with good drainage
Drainage holes are required. If there are few or they are small, water will stay, and roots will start to suffer. - Make a drainage layer at the bottom
Add 1–2 inches (3–5 cm) of expanded clay or gravel. This is the first barrier against water buildup. - Mix soil with loosening components
About 60% soil and 40% perlite or sand. The mix should be light and loose. If you squeeze it in your hand, it easily falls apart again. - Fill the container, leaving space at the top
Leave about 1 inch (2–3 cm). This makes watering easier and prevents overflow. - Plant tarragon without burying
The base of the stem should be at soil level. If buried, the risk of rotting increases. - Do the first watering
Water moderately so the soil becomes moist, but not wet. Water should pass freely through the entire volume and come out from the bottom. - Place in a sunny spot
5–6 hours of light per day is optimal. In shade, the aroma becomes weaker.
What you notice during growing
From my experience, with tarragon it’s better to slightly underwater than overwater. I tried a couple of times to keep the soil “constantly moist” — and every time the plant looked worse than it should. Leaves lose density, growth slows down. As soon as you let the soil dry a bit between waterings — the difference is immediately visible.
If the soil is heavy, no careful watering helps. Water just stays inside, and roots begin to suffer. But in a loose mix, you can water calmly — excess drains away, and the plant doesn’t react with stress.
There is also a nuance with cutting. If you cut regularly, but a little at a time, tarragon keeps its shape and produces new shoots faster.
With this setup, the soil quickly releases excess water, roots get air, and the plant grows normally. Leaves stay dense, aroma rich, and you can harvest regularly.
8. Tea herb cluster chamomile mint and lavender in pots
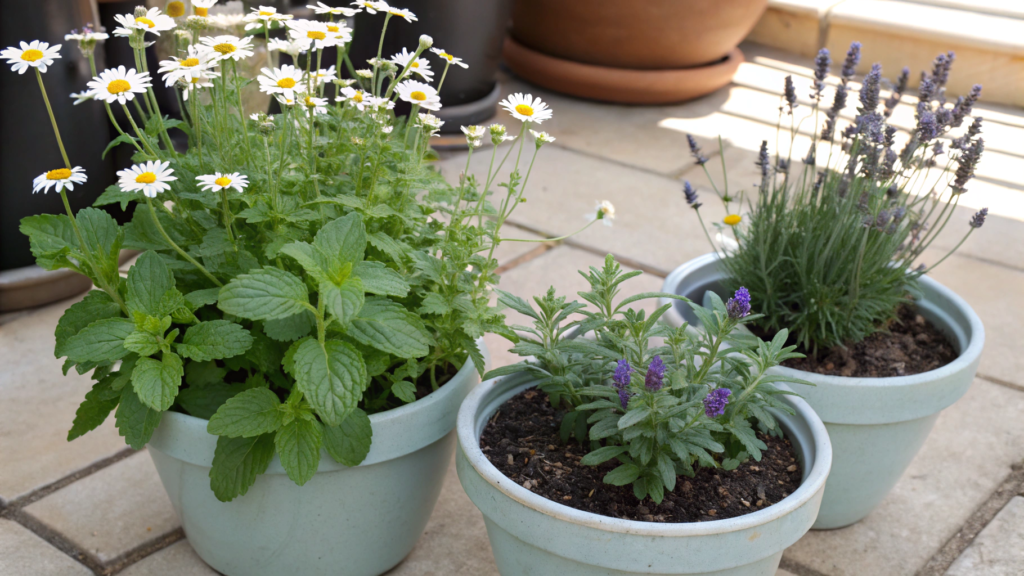
Tea herb cluster chamomile mint and lavender in pots — here you get tea, aroma, and just a pleasant look on the patio. Three separate pots, but together they create one “tea corner.”
These herbs have different profiles of essential oils, and they complement each other well. Chamomile gives softness, mint — freshness, lavender — depth. Such combinations are often used specifically because of the balance of taste and aroma.
What you’ll need
- 3 separate pots 6–10 inches (15–25 cm)
- Chamomile — seeds or seedlings
- Mint — 1 plant
- Lavender — 1 plant
- Drainage (expanded clay or gravel)
- Light soil for containers
- Watering can for precise watering
- Chamomile seeds
How to set up this group
- Choose a place with different light levels
Place the pots so lavender gets more sun (5–6 hours), while mint and chamomile stay in softer light. This can be done even on one patio, just by shifting the pots to different positions. - Prepare each pot separately
At the bottom — a drainage layer of 1–1.5 inches (3–4 cm). This is important because plants have different moisture needs, and excess water should not stay. - Fill with soil considering each herb
For lavender, make the soil a bit looser (add sand or perlite). For mint and chamomile, a regular light substrate that holds some moisture works well. - Plant or sow chamomile
Sow chamomile shallow, about 0.2–0.3 inch (0.5–0.8 cm). Plant mint and lavender so the root crown stays at soil level. - Do the first watering
Water each plant separately. Lavender — moderately, without overwatering. Mint and chamomile — a bit more, but without standing water. - Place pots with spacing
Don’t place them too close. There should be space between pots for air circulation — this reduces the risk of fungal problems. - Start regular cutting
Mint can be cut often, chamomile — as flowers open, lavender — in small portions, without touching the woody part.
What you start to notice over time
With mint, everything is simple — it grows fast and sometimes even too actively. I usually control it with cutting, otherwise it starts “taking over” space even in a pot.
Chamomile is calmer. If you give it enough light and don’t overwater, it produces flowers well. But if overwatered — growth becomes weaker.
Lavender required a bit of observation. It doesn’t like excess moisture at all. When soil is too wet, leaves lose color and become softer. As soon as you give it drier conditions — density and aroma return.
Each plant grows in its own conditions, but stays nearby. You come up, pick what you need, and you can immediately brew tea without needing to replant or change anything.
9. Kitchen door herb rail for rosemary and sage
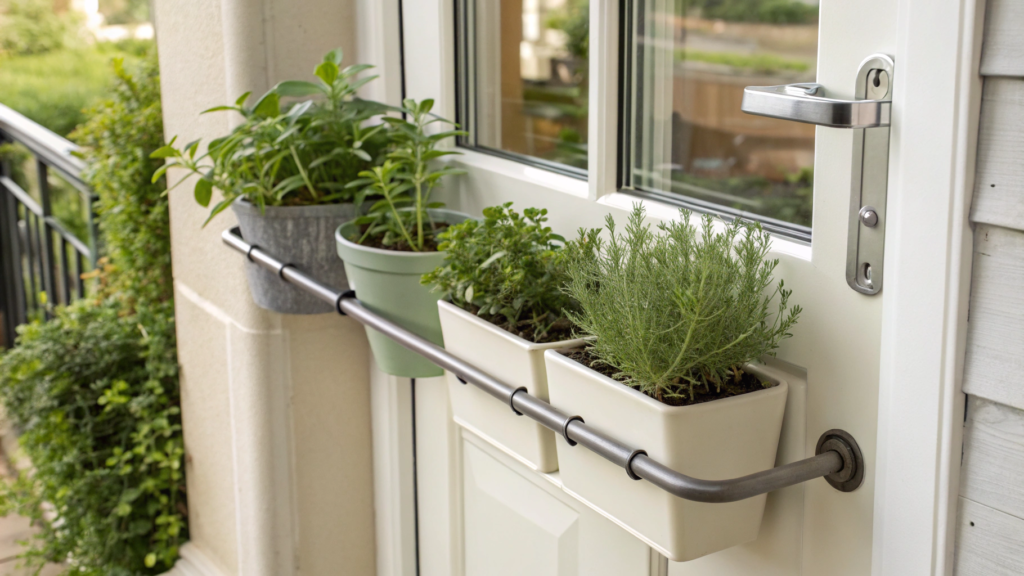
Rosemary and sage are exactly the plants that are convenient to keep near the kitchen: cut a sprig — and straight into the pan or onto a tray.
We installed a rail by the door, fixed the containers — and rosemary with sage started being used much more often.
Both plants belong to Mediterranean herbs. They prefer a lot of light, good drainage, and don’t like constant moisture. With proper placement near the entrance, they get maximum sun and don’t overheat from enclosed spaces.
What you’ll need
- Wall rail or bar (metal or wooden)
- Containers or hanging planters 6–8 inches (15–20 cm)
Rosemary — 1 plant - Sage — 1 plant
- Drainage (expanded clay or gravel)
- Light soil with added loosening components
- Mounting hardware for fixing
- Hanging planters
How to assemble this setup
- Choose a place near the kitchen door
It’s important that it gets at least 5–6 hours of sun per day. South or west side works best. With less light, the aroma becomes weaker. - Fix the rail or bar
Install it at a comfortable height — about chest level or slightly lower. This makes it easier to cut herbs and care for plants. Check that mounts can handle the weight of wet pots. - Prepare containers with drainage
At the bottom of each — a layer of 1–1.5 inches (3–4 cm). This is important because rosemary and sage don’t tolerate standing water. - Fill with breathable soil
Add some sand or perlite. The mix should be light, drain water quickly, and not hold it for long. - Plant without burying
The base of the stem should stay at soil level. Planting too deep can lead to rotting. - Water moderately after planting
Soil should become moist, but not wet. After that, watering is less frequent, letting the top layer dry out. - Check stability of the structure
After watering, weight increases. Make sure containers are securely fixed and don’t shift.
Nuances you start to notice
From my experience, rosemary is easier to “kill” by overwatering than by forgetting to water. At first, I tried to keep the soil slightly moist all the time — and every time the plant looked worse: needles darkened, aroma weakened. As soon as I stopped touching it too much and let the soil dry — it literally came back to life.
With sage, it’s a bit easier, but there are still nuances. If it stands in a place with little air movement (for example, right against a wall), leaves become softer and less aromatic. I didn’t notice it right away — just moved the pot a couple of inches (5–7 cm) away from the wall, and the difference showed in a few days.
The more often you cut a little at a time, the neater the plants look. Once I left rosemary without pruning — it started stretching and losing shape. With regular use, it stays dense and compact, without long branches.
Here you really save time on daily actions. Herbs are right at the entrance, no need to walk to separate containers or beds. Cutting takes a few seconds, and plants renew faster thanks to regular use.
10. Dollar store jar propagation station for basil and mint cuttings
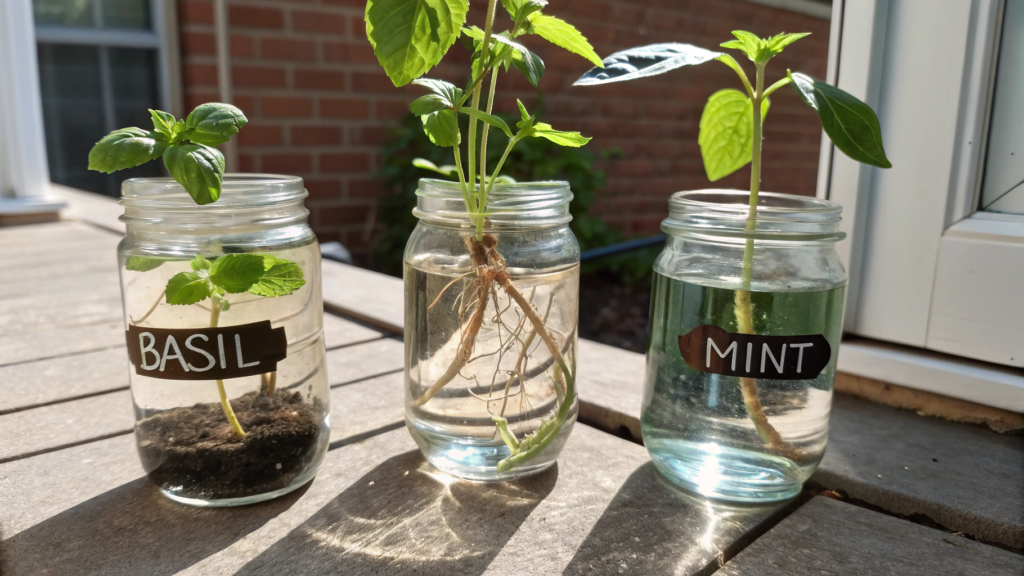
This is the simplest way to constantly refresh greens without buying new plants. Basil and mint easily grow roots in water, and if you place a few jars right on the patio or by the window, you always have a supply of young, fresh plants.
What you’ll need
- Glass jars or cups (regular, 8–16 oz / 250–500 ml)
- Clean water
- Basil cuttings
- Mint cuttings
- Scissors or pruners
- Jar set, for example Ball Mason Jars 16 oz 12-Pack on Amazon
How to organize propagation
- Cut the right cuttings
Choose healthy stems 4–6 inches (10–15 cm) long. It’s better to take ones with several pairs of leaves. Make the cut right below a node — if the cut is higher, roots appear much slower. - Remove the lower leaves
Leave only the top part. I once left leaves in the water — by the next day the water turned cloudy, and I had to redo everything. Leaves in water spoil quickly. - Place the cuttings in water
Water should cover the node, but not reach the upper leaves. If you pour too much, part of the stem will start to rot. - Place jars in a bright spot
Bright diffused light works best. Direct sun seems like a good idea, but water heats up, and cuttings start to look worse. - Change the water every 2–3 days
It doesn’t have to be strictly on schedule, but as soon as the water becomes cloudy — it’s better to replace it. In clean water, roots appear faster and look healthier. - Watch root growth
Usually within 5–10 days you already see results. Basil is faster, mint a bit slower. When roots reach 1–2 inches (2–5 cm), the plant is ready for transplanting. - Transplant into soil if needed
Don’t keep them in water too long. I once delayed — roots became long, but weaker during transplant. It’s better to move them while they are still compact.
What becomes obvious after a couple of cycles
Basil almost always gives roots faster. Sometimes it even feels like it “grabs” onto water instantly.
Mint is more patient — even if conditions are not perfect, it still roots. But if the water is clean and light is good — the process goes noticeably faster.
When there are several jars, it’s more convenient to prepare a batch right away. Part of the cuttings is rooting, part is already growing in soil — and there is no gap between “cut” and “waiting for it to grow again.”
This turns into a constant cycle. You cut — place in water — get a new plant without extra costs or complicated conditions. And over time you notice that greens are always available and just don’t run out.
Your working herb setup
As soon as herbs become part of everyday cooking, not only the taste of food changes, but the habit of cooking itself. You don’t think about which leaves to pick — you just take what has grown and add it to the dish.
When you properly balance growth control and placement convenience, you get a constant flow of greens without pauses. It becomes a working system that truly fits into life.Look at your herb setup from the outside. Which ones are used more often, which can be moved closer, and which should be replaced altogether. Write in the comments — such observations often lead to unexpected solutions.