
In fall, flower beds gradually start to empty out, but that doesn’t mean the blooming is over. There are plants that handle cooler weather really well, keep producing buds, and even get brighter after cold nights.
I try to keep this in mind when planning my plantings, so in September and October there are still blooming areas in the garden, not just dry stems and empty soil.
Some are better for flower beds, while others are easy to grow in containers or along pathways.
In this article, I’ve put together 10 plants for a fall garden and the main things to know about planting and caring for them. You don’t need to buy all ten. Sometimes just a couple of well-chosen plants are enough to keep a flower bed looking good for a few more weeks.
1. Chrysanthemums

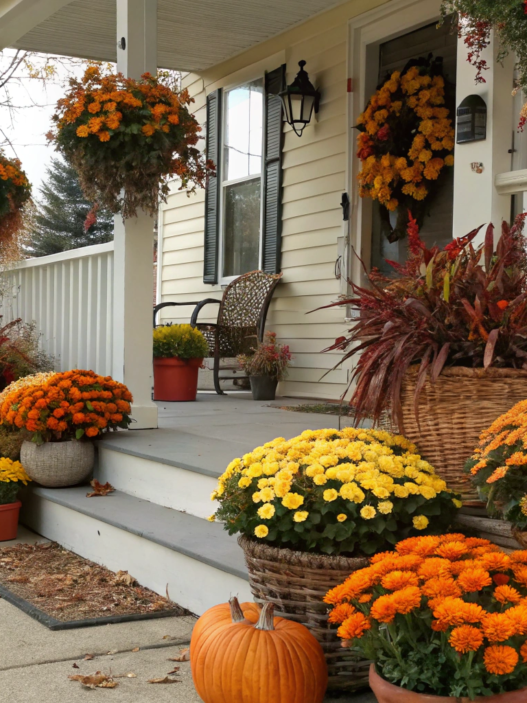
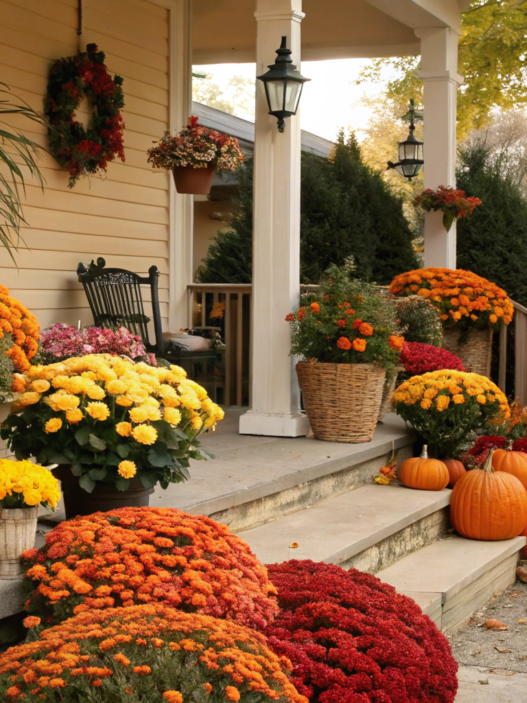
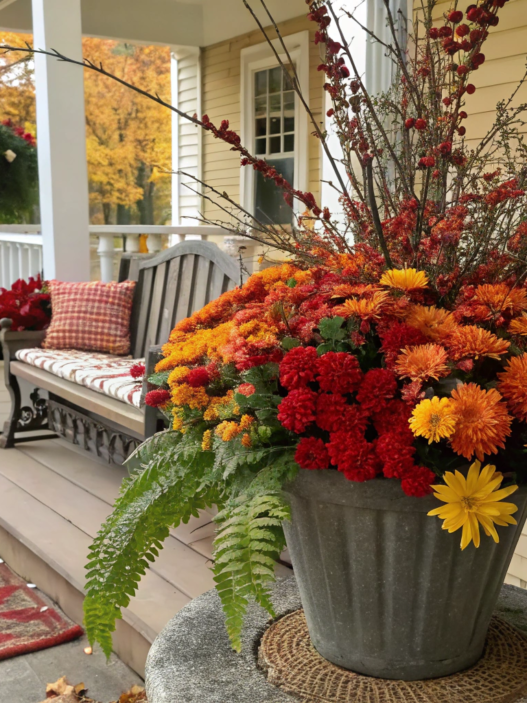
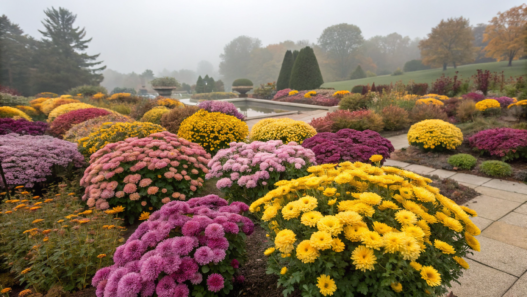
In fall, chrysanthemums often become some of the most noticeable flowers in the garden. Most summer flowers are already starting to fade, the nights are getting colder, and these bushes are just starting to look really beautiful.
When we were working on our property in Idaho, at first I thought of chrysanthemums almost like seasonal flowers from the store. Buy a pot in fall, put it by the porch, and that’s it. When most summer flowers are already starting to fade, chrysanthemums are just getting stronger. With the right variety, blooming can continue from late summer until the first serious frosts.
Where to plant chrysanthemums
Chrysanthemums need plenty of sun. I try to choose a spot where they get at least 6 hours of direct sunlight a day. They can grow in partial shade too, but the bushes become looser and bloom noticeably less.
Before planting, I usually do the following:
- Choose a spot where water doesn’t collect. Chrysanthemums don’t like constantly wet soil around their roots. After heavy rain, the water should drain away fairly quickly, so heavy, compact soil is better improved with a little compost beforehand.
- Leave about 18–24 inches (45–60 cm) between plants. Small plants may look like they have too much empty space between them at first, but mature chrysanthemums spread quickly. Proper spacing also improves air circulation.
- Add a little finished compost. I usually mix it into the top layer of soil right in the planting hole. You don’t need much. It’s more important to give the roots loose, nutritious soil than to practically plant the whole thing in compost.
- Water well right after planting. The soil should settle closely around the roots, so I give them a deep first watering. For the next few weeks, I check the soil and water when the top layer starts to dry out. I don’t let newly planted bushes dry out completely.
When to plant and pinch
I’ve noticed that if you plant a chrysanthemum too late in fall, the plant may bloom beautifully that first year but not have enough time to establish properly before winter. So I try to plant perennial varieties in spring or at least a few weeks before consistently cold weather arrives.
During spring and the first half of summer, you can lightly pinch back the tips of young shoots. This helps the plant branch more and produce more flowers later. But by late summer, I leave them alone. At that point, the plant needs to focus on forming buds.
What to do after blooming
After flowering, I don’t rush to cut the whole bush down to ground level. I usually leave some of the dry stems through winter and remove them in spring. Around the base, I add about 2–3 inches of mulch (5–8 cm). This is especially useful in places where the soil regularly freezes and thaws during winter.
When buying a plant, I don’t look at how many flowers are already open. I look at the buds and the overall condition of the plant. If there are plenty of buds, the chrysanthemum will keep blooming longer after you plant it.
I think that’s why so many of us love chrysanthemums in fall. When summer flower beds are already starting to thin out, they give the garden a few more weeks of bright color and keep blooming while many summer plants are slowly giving up.
2. Pansies

Summer heat usually doesn’t agree with pansies at all, but once cooler days arrive, the plants start blooming actively again. And they keep flowering at temperatures when many summer flowers are already starting to look tired.
The plants are small, so they’re easy to tuck into a flower bed between perennials, along pathways, or into pots near the house. And the color selection is huge. I usually pick a few shades at once, but I try not to mix absolutely everything together. Two or three colors next to each other look much better.
Cooler weather is good for them
The best place for pansies in fall depends on how warm your climate is. Where fall is already cool, a sunny spot works perfectly well. In warmer areas, I’d choose a place that gets morning sun but has some protection from the hot afternoon light.
When planting, I do the following:
- Leave about 6–10 inches (15–25 cm) between plants. Pansies fill out the space pretty quickly, so there’s no need to plant them too close together.
- Keep the soil loose. Their roots struggle in heavy, wet soil. I usually add a little compost and mix it into the top few inches of soil.
- Don’t plant them too deep. The top of the root ball should sit roughly level with the surrounding soil. There’s absolutely no need to bury them deeper.
- Water well after planting. After that, I try to keep the soil slightly moist, especially while the plants are getting established. At the same time, they don’t need constantly soggy soil either.
How to keep more flowers coming
Over time, I’ve learned that the more regularly you remove faded flowers from pansies, the less energy the plant puts into making seeds and the longer it keeps producing new buds.
I just walk along the flower bed and remove everything that has finished blooming. It only takes a few minutes. There’s no complicated pruning involved. At the same time, I remove yellowing leaves and check whether the soil has dried out.
Pansies handle light frosts much better than most summer annuals. Sometimes after a cold night they look completely droopy, but a few hours later they straighten back up. The first time I saw this, I thought that was it, my little flowers had frozen, but a few hours later they were standing up again.
Flower beds and pots
Don’t think that pansies can only be planted along the edge of a flower bed. In fall, they also grow well in containers where summer plants have already been removed. You can plant several pansies in one pot together with ornamental grasses or other plants that tolerate cooler weather.
A container definitely needs a drainage hole. In fall, moisture evaporates from the soil more slowly than it does in summer, so it’s very easy to overwater plants in pots.
Tip. When buying pansies, I don’t choose the biggest plant with ten fully open flowers. I look for a compact plant with lots of buds and strong leaves. These pansies usually bloom longer after planting because most of the buds are still getting ready to open.
As the temperature outside starts to drop, these little flowers keep bright spots in the garden for quite a while, reminding me of the summer that has already passed…
3. Asters

By September and even October, there are already noticeably fewer bright flowers around the garden, while asters are just starting to open most of their buds.
In our garden, they usually don’t grow in a separate flower bed but among other perennials. During summer, the bushes don’t really stand out, but closer to fall they turn into a dense mass of small purple, blue, pink, or white flowers. And there are usually plenty of bees around them at this time.
Sun and airflow
Most asters bloom better where they get at least 6 hours of sun a day. They can also grow in light partial shade, but the bush may stretch out and produce fewer flowers.
When planting, I try to keep a few things in mind right away:
- I don’t plant the bushes too close together. Depending on the variety, I usually leave about 18–36 inches (45–90 cm) between plants. Asters fill out quickly, and good air circulation really matters here.
- I check how well the water drains. The soil can stay moist, but I wouldn’t choose a waterlogged spot for asters. If water sits there for hours after rain, it’s better to deal with the drainage first.
- I add compost before planting. Usually, mixing a little mature compost into the top layer of soil is enough. The soil doesn’t need to be overly rich either, otherwise the bush may put a lot of energy into foliage instead of flowers.
- I water young plants well. Until the asters are properly rooted, I make sure the soil doesn’t stay dry for too long. Later, they handle short dry periods much better.
Some tall asters start leaning to the sides by late summer, especially after heavy rain. If the bush is already large, I add support early while the stems are still standing upright. For example, metal supports for perennials, such as Grow Through Plant Support Rings, work well. After a few weeks, the foliage usually hides most of the structure, so it’s barely noticeable.
Why I pinch tall varieties
Some asters can grow up to 3–6 feet (90–180 cm), and by late summer a tall bush may start falling open to the sides. Especially after rain.
That’s why I pinch tall varieties in late spring or early summer. I remove a few inches from the tops once the plant is growing well. After that, it produces more side shoots and the bush becomes fuller.
But by late summer, I stop doing this. At that point, asters are preparing to bloom, and you can accidentally remove future buds along with the tops.
Pollinators
I always notice bees, bumblebees, and butterflies on late-blooming asters. By fall, there are far fewer flowering plants around, so asters can get especially busy on a sunny day. For pollinators, they are one of the last available sources of nectar and pollen before cold weather arrives.
For this reason, I try to keep more than one late-blooming plant in the garden and choose plants that flower at slightly different times. This gives bees and other pollinators access to flowers for longer.
After blooming, I don’t rush to remove the asters completely either. Some of the dry stems can stay until spring. And if the bush has become too large or the center is noticeably bare, spring is a good time to divide and replant it.
Tip. When buying asters, be sure to check the mature height of the variety. Some are compact plants around 1 foot (30 cm) tall, while others grow into real giants over 5 feet (150 cm). In a small flower bed, that difference becomes very noticeable.
4. Ornamental kale

Ornamental kale doesn’t have flowers, but its dense rosette of green, white, cream, pink, or purple leaves can look like one large flower from a distance.
For a long time, I thought of it mostly as a plant for city flower beds. Then I tried adding a few rosettes to our fall plantings near the house. And it turned out that next to more familiar flowers, it looks completely different. Especially after cool nights, when the color in the center becomes brighter.
The colder it gets, the better the color
Ornamental kale likes cool weather and can handle light frosts. In fact, pink, white, and purple shades usually become more noticeable after temperatures drop.
That’s why I don’t rush to plant it while it’s still really hot outside. In high temperatures, the plant can stay mostly green and look pretty plain.
For planting, I usually choose the following:
- A sunny spot. The color develops best where the plants get at least 6 hours of sunlight a day.
- Well-drained soil. Ornamental kale likes moisture, but the roots shouldn’t sit in wet soil all the time.
- About 12–18 inches (30–45 cm) of space. The rosettes gradually become quite large. If you plant them too close together, the plants will start crowding each other within a few weeks.
- Regular watering after planting. I make sure the soil stays evenly moist, especially while the roots are still settling into their new spot.
If I have to plant kale in compact soil, I loosen the area first and add a little compost. There’s no need to dig the bed deeply. The soil just needs to be loose enough for the roots to grow and for rainwater not to sit around the plant for too long.
Large rosettes
Unlike many flowers, in fall I usually buy ornamental kale when it is already well formed. It grows more slowly as the days get shorter, so a small plant may stay small right into winter.
At the garden center, I look at the density of the rosette and the condition of the leaves. The lower leaves should be firm, without too many holes or damaged areas.
Brassica plants attract caterpillars, aphids, and slugs, so it’s also worth quickly checking the undersides of the leaves before buying. Sometimes a beautiful-looking plant comes home with a small group of uninvited guests already on board.
For removing damaged lower leaves neatly, you can use small garden pruners, but most of the time the leaves come off easily by hand, so I wouldn’t buy a tool just for that.
Planting in containers
Ornamental kale looks great in fall containers. One large rosette already takes up quite a bit of space, and you can plant pansies, violas, or a small ornamental grass next to it.
I just try not to pack the pot too tightly. In fall, the soil dries more slowly, there’s less airflow between the leaves, and we really don’t need extra moisture sitting there.
In the ground, ornamental kale can also be planted where empty spots appeared after summer. It keeps its shape even after many flowering plants have already started looking a little tired.
Ornamental kale, of course, isn’t a replacement for fall flowers. It simply adds a completely different shape and texture to the flower bed. In October, when there’s less and less green around, those big colorful rosettes look absolutely beautiful.
5. Flowering cabbage

Flowering cabbage looks like a huge rose made of leaves. The center can be white, pink, reddish, or purple, while the outer leaves usually stay green or bluish-green.
The main beauty is in the leaf rosette. Unlike ornamental kale with its more cut and wavy edges, flowering cabbage usually has broad, rounded, fairly smooth leaves. That’s why it looks completely different.
Don’t buy it too early
In hot weather, the center often stays mostly green, while the real white, pink, or purple color starts to show after the weather cools down. The color usually becomes especially noticeable when temperatures drop below about 50°F (10°C).
That’s why I look for these plants at the garden center closer to cooler weather and pay attention to more than just the color.
- I choose a large, dense rosette. In fall, the plant won’t grow as quickly as it does in summer. If you buy a very small one, it may not have enough time to get much bigger before cold weather arrives. It’s better to choose roughly the size you already want for the flower bed or container.
- I look at the center of the plant. It should be dense, and the inner leaves shouldn’t look stretched out or loose. The more neatly the center is formed, the better the whole rosette will look.
- I inspect the lower leaves. A few damaged leaves aren’t a problem because you can remove them. But if there are lots of holes, sticky areas, or visible insects underneath, I don’t buy that pot. Flowering cabbage can be damaged by aphids, slugs, and caterpillars.
- I check the roots. If they’re tightly wrapped around the entire root ball, the plant has been sitting in a small pot for too long. I prefer plants that look strong and haven’t completely outgrown their container.
Planting
Flowering cabbage needs a sunny spot with fertile, moderately moist soil. The main thing is not to let the plant dry out after transplanting, while also avoiding a place where water sits after every rain.
I keep the planting pretty simple:
- I dig a hole a little wider than the root ball. It’s easier for the roots to grow into loosened soil around the sides than to push through the compact walls of a narrow hole.
- I plant it fairly deep. The stem can be set deep enough that the lower leaves sit almost at soil level. This is especially useful for plants that have stretched a little in the pot.
- I leave about 12–18 inches (30–45 cm) between large rosettes. Flowering cabbage can grow to around a foot wide, so it needs some space. When planted too tightly, those nice round shapes quickly start getting lost behind each other.
- I water well right away. After transplanting, the soil should be thoroughly wet around the entire root ball. After that, I check it with my finger and water before it has a chance to dry out completely.
If I have several plants, I plant them in small groups of three or five. One rosette can get lost in a large flower bed, while several together show off the color and shape of the leaves much better.
Where to plant flowering cabbage
The most interesting part of flowering cabbage is at the top, so there’s no point hiding it behind tall plants. I plant it closer to the edge of the flower bed, near a pathway, or anywhere the center of the rosette is easy to see.
It also looks great in containers. You can place one large cabbage in the center and add lower-growing plants around the edges, such as pansies or snapdragons.
For a large pot, I would use potting mix for containers, such as Miracle-Gro Potting Mix, instead of regular garden soil. Good drainage is especially important in a container.
Once well established, the plants can handle pretty serious cold, so flowering cabbage can stay attractive much longer than many typical fall plantings. Some ornamental varieties can tolerate temperatures down to around 5°F (-15°C) once they are acclimated.
I think flowering cabbage works best where you need one large shape rather than a scattering of small flowers. You usually don’t need many of them in a fall flower bed, and one good rosette can immediately change the look of an area that’s starting to empty out.
6. Snapdragons

After low-growing pansies and broad cabbage rosettes, the tall flower spikes of snapdragons immediately add some height to the flower bed. White, yellow, peach, pink, red, burgundy — there are so many varieties now that finding a few shades for fall plantings is no problem at all.
Snapdragons also handle cool weather well. Their best flower spikes actually form at lower temperatures in spring and fall. The plants can handle light frosts too.
Choose the height first
This is something I would check before buying because the difference between varieties can be huge. There are compact plants for the edge of a flower bed and containers, and there are tall ones that are even grown for cutting.
I pay attention to a few things:
- The mature height of the plant. Low-growing varieties can go at the front of a flower bed or into a pot. Taller ones are better placed farther back, otherwise after a few weeks they can simply block the plants behind them.
- The number of side shoots. A well-branched plant will produce several flower spikes at once. If the plant is tall but mostly consists of one thin stem, I usually look for another one.
- The condition of the buds. I buy snapdragons when most of the buds are still closed and only a few lower flowers have started to open. This way, the plant will keep blooming longer after planting.
- The leaves at the base. They should be green and strong. Yellowing lower leaves, spots, or a lot of damage shouldn’t be ignored, even if the top looks great.
Planting without crowding
In cool weather, snapdragons can grow in full sun or light partial shade, but for good flowering they still do better in a sunny spot. The soil should be well drained and moderately moist, without the roots staying wet all the time.
When planting, I do the following:
- Leave about 6–12 inches (15–30 cm) between plants. The exact spacing depends on the variety. Low-growing plants can sit closer together, while tall and well-branched ones need more airflow.
- Plant at the same depth the plant was growing in its pot. I cover the entire root ball with soil but don’t bury the base of the stems too deeply.
- Water the soil well after planting. After that, I keep an eye on moisture, especially in dry weather. Snapdragons like evenly moist soil, but the top layer can dry out a little between waterings.
- Place tall varieties where they can be supported. Under the weight of the flowers and after rain, long stems can start leaning. If the spot is open and windy, it’s better to think about support early instead of trying to fix a plant that has already fallen apart.
For tall varieties, people often use thin plant supports. I choose the least noticeable ones and put them in while the plants are still short.
Don’t leave old flower spikes
Snapdragon flowers open gradually from the bottom up. When the lower part of the flower spike has already finished blooming and there’s almost nothing left at the top, I cut it off.
Removing old flower spikes helps the plant produce new ones. It also keeps the flower bed looking neater. And if I’m growing snapdragons for bouquets, I’m already cutting some of the flower spikes regularly, so there are fewer faded ones to remove separately.
I cut tall varieties when the bottom few flowers have opened and the rest are still in bud. They continue opening gradually in a vase, so there’s no need to wait until the whole flower spike opens on the plant.
Snapdragons and cold weather
Snapdragons are considered cool-weather plants and can handle a light frost, but that doesn’t mean they’ll stay green after a long, hard freeze. In mild climates, the plants may survive winter and bloom again in spring. Where winters are colder, it’s easier to grow them as annuals.
In a fall flower bed with lots of low plants and broad rosettes, a few vertical flower spikes immediately change the whole planting. And being able to cut a couple of stems to bring inside is a separate bonus for me.
7. Violas

Violas are easy to confuse with pansies, especially when they’re sitting next to each other at the garden center. Their flowers are usually smaller, but one plant can produce a lot more of them. The plants are compact too, so they look good in small open spaces between larger plants.
Violas look especially good in groups in fall. One small plant can easily get lost, while several plants in one or two shades quickly create a noticeable patch of flowers.
Where I plant them
Violas do well in sun or light partial shade. In cool fall weather, I plant them in open areas. If fall is still warm, a little shade in the afternoon helps the plants handle the hotter hours more easily.
When planting, I keep a few things in mind:
- I leave about 6–8 inches (15–20 cm) between plants. The gaps are noticeable at first, but violas spread sideways pretty quickly. If planted too close together, the leaves start overlapping, and moisture stays inside the plants longer after rain.
- I loosen the top few inches of soil. Violas have a small root system, so there’s no need to dig the flower bed deeply. If the soil is heavy, I add a little mature compost so it doesn’t turn into a hard crust after watering.
- I don’t bury the base of the plant. I plant the viola at about the same depth it was growing in the container. After planting, I gently press the soil around the root ball so there aren’t large air pockets around the roots.
- I water at soil level, not over the flowers. Especially in cool, wet weather. Wet petals lose their appearance quickly, and the soil already needs less water at this time than it does in summer.
In containers, I use a regular potting mix. For the small roots of violas, a loose mix is much better than heavy garden soil, which compacts quickly in a pot.
How violas are different from pansies
The difference becomes easy to see a few weeks after planting. Pansies have larger flowers, and each one stands out on its own. Violas produce lots of small flowers at the same time, so the planting looks fuller.
They also usually recover from bad weather more easily. Heavy rain can damage some of the flowers, but there are so many new buds on the plant that you don’t have to wait long for more blooms.
Violas are useful for:
- filling spaces between larger fall plants, for example between ornamental kale;
- planting in a narrow strip along a pathway, where the small flowers are easy to see up close;
- filling the edges of a container, while leaving the center for a taller plant;
- planting in groups of one shade, if you want noticeable color without using a dozen different plants.
Faded flowers
I remove old flowers together with the short flower stem, and at the same time I take off any yellowing or damaged leaves. It only takes a few minutes.
I check the plants carefully after several rainy days. In dense little plants, wet petals and leaves can sometimes get stuck inside, and it’s better to just remove them by hand.
I don’t water violas on a schedule. One fall week can be dry, and the next can be completely rainy. It’s easier to check the top layer of soil with your finger. If it’s still moist, the plants don’t need extra water.
A small plant keeps producing lots of new flowers, and it’s easy to find a place for violas even between established perennials. For small open spots in fall, they’re a very practical choice.
8. Sweet alyssum

Sweet alyssum doesn’t have large individual flowers. Instead, it forms low, dense cushions covered with lots of tiny white, pink, or purple blooms. It also has a light sweet scent that you can really notice when you walk past the plants on a warm day.
I grow sweet alyssum not as the main flower in a bed, but to cover the soil between larger plants or soften the edge of a pathway. It spreads quickly sideways and can hang slightly over the edge of a pot or raised bed.
Where to plant sweet alyssum
It blooms best in full sun, although it can handle light partial shade too. In fall, this works well because the heat no longer dries out the small plants as quickly.
Before planting, I keep a few things in mind:
- I leave about 6–10 inches (15–25 cm) between plants. Sweet alyssum spreads sideways quickly, so there’s no need to plant it too densely. After a while, the separate plants grow together and cover most of the soil between them.
- I choose loose soil with good drainage. The roots are small, and constantly wet, heavy soil doesn’t suit the plant at all. If the soil is compact, I mix a little compost into the top layer, but I don’t add too much fertilizer.
- I don’t bury the root ball. I plant it at about the same level it was growing in the pot. After planting, I lightly press the soil around it and water well.
- I follow the weather, not the calendar. I water newly planted sweet alyssum more often until it gets established. Later, I check the soil before watering because in cool fall weather it can stay moist for several days.
Blooming after summer heat
During a hot summer, the plant may stop blooming well, stretch out, and start looking pretty rough. But once temperatures drop, it often starts producing buds again.
If the plant has become too leggy, I cut it back by about one-third. I use garden shears and evenly trim the tops of the long stems together with the faded flower clusters, trying to make the plant more compact. For example, I cut stems that are about 9 inches (23 cm) long back to around 6 inches (15 cm). There’s no need to remove every old flower separately.
After this kind of trimming, new side shoots appear, and after a while the plant is covered with flowers again. But if the plant has completely dried out or most of the stems are already dead, I don’t try to save it at any cost. In fall, it’s easier to replace it with a strong young plant.
A good plant for the edge of a flower bed
Sweet alyssum rarely grows tall, so it’s easy to use in places where larger plants would feel too heavy. I plant it:
- along pathways, where low flowers don’t block other plantings;
- between larger plants, so the soil doesn’t stay completely bare;
- along the edges of containers, where the stems can hang slightly over the sides;
- next to taller fall flowers, where the small white or purple clusters fill the lower level.
White sweet alyssum pairs well with other colors. I’ve planted it next to bright flowers and darker foliage, and each time it looked neutral enough to fit in naturally.
Pollinators
Sweet alyssum is often planted near vegetable beds because its small flowers attract hoverflies, bees, and other beneficial insects. Some help with pollination, while hoverfly larvae can feed on aphids.
Sweet alyssum doesn’t have huge flowers. It fills the lower part of a planting, covers empty gaps, and keeps blooming in cool weather. And sometimes one small white border around a flower bed does more than adding another big flower in the middle.
9. Calendula

Calendula usually doesn’t mind cooler weather. Its bright yellow and orange flowers keep opening once the summer heat is gone, while many more heat-loving plants are already starting to slow down.
In our garden, calendula often shows up not only where I planted it on purpose. If I leave a few flowers to go to seed, it can easily come back on its own the next year. Sometimes in the most unexpected places! I’m fine with that because extra plants are easy to transplant or remove.
Sun and a little extra space
Calendula blooms best in a sunny spot, although a few hours of light shade usually don’t bother it. In too much shade, the stems stretch out and the plant produces fewer flowers.
When planting, I keep the following in mind:
- I leave about 8–12 inches (20–30 cm) between plants. Young plants look small at first, but they start branching pretty quickly. If they’re planted too close together, the lower leaves stay shaded and remain wet longer after rain.
- I don’t make the soil too rich. Regular garden soil with a little compost is usually enough for calendula. In heavily fertilized soil, it may produce lots of large leaves and long stems, but that doesn’t necessarily mean better flowering.
- I water deeply after planting. During the first few weeks, the soil shouldn’t dry out completely around the young roots. Once the plant has filled out well, it handles short gaps between waterings more easily.
- I don’t bury the stem deeper than its previous soil level. If I’m transplanting an established plant, I place the root ball at about the same depth it was growing in the pot and gently press the soil around it.
Calendula is also easy to grow from seed. For small plantings, plant markers such as Bamboo Plant Labels are useful, especially if several different flowers are sown nearby. Young seedlings can look pretty similar during the first few weeks, and labels save me time.
Regular cutting
Calendula needs a little attention. If you leave all the faded flower heads in place, the plant starts forming seeds pretty quickly and gradually produces fewer new buds.
Here’s what I do:
- find a flower whose petals have already faded or started falling off;
- follow the stem down to the nearest pair of healthy leaves or a side shoot;
- cut the stem just above that point instead of simply pulling off the dry flower head;
- remove any yellow lower leaves at the same time if they have appeared.
This keeps the plant more branched, and new flower stems grow from the side shoots.
I still leave a few flowers alone. Calendula seed heads are easy to spot and ripen quickly. Once they turn dry and brown, the seeds can be collected for the next planting.
Sowing directly in the ground
Calendula germinates pretty easily without starting seedlings indoors. The seeds are large and curved, so they’re easy to pick up with your fingers and place one at a time.
I sow them about ¼–½ inch (0.6–1.3 cm) deep, lightly cover them with soil, and water with a gentle stream so the seeds don’t get washed back out.
If the seedlings come up too close together, I keep the strongest ones and thin out the rest. I have a hard time throwing away good little plants, so I usually transplant some of them somewhere else.
For fall flowering, sowing time depends on the climate. In areas with mild falls, seeds can be sown later, while places where frost comes early need to give the plants more time to grow before serious cold arrives.
Not just for the flower bed
Calendula petals are edible, which is why the plant is often grown not only in flower beds but also near vegetable and herb gardens. The bright petals can be added in small amounts to salads or used as a garnish.
But for food, I only use plants that I know haven’t been treated with products that aren’t meant for edible crops. I wouldn’t automatically use a flower from a regular garden center in the kitchen just because it’s calendula.
Calendula flowers attract insects. But even without that, calendula deserves a place among fall plantings.
Calendula self-seeds easily, so new plants may appear near last year’s planting or a little farther down the bed in spring. I usually keep a few strong seedlings and transplant the extras. That way, calendula stays in our garden for a long time with almost no extra effort.
10. Dianthus

Dianthus handles cool weather well and often keeps blooming in fall after the summer heat is gone. It has dense blue-green foliage and small flowers with serrated edges. The colors range from white and soft pink to deep red and burgundy.
I plant dianthus closer to pathways and the edge of the flower bed. Many varieties stay fairly low, so the flowers are easy to see up close. Some also have a pleasant spicy scent that becomes more noticeable when you lean closer to the plant.
Choosing dianthus
A lot of very different plants are sold under the name “dianthus.” Some varieties form low, dense clumps only a few inches tall, while others produce flower stems 12–24 inches (30–60 cm) high and work well for cutting.
Before buying, I look at a few things:
- I check the mature height of the plant. Low-growing varieties work well along the edge of a flower bed, in a rock garden, or in a container. Taller ones are better planted a little farther back so the long flower stems don’t fall onto the pathway or block nearby plants.
- I choose a plant with lots of buds. A few open flowers let me see the color, but I prefer most of the buds to stay closed. That way, the plant will bloom longer after planting.
- I inspect the base of the plant. The leaves should be firm, without lots of brown or soggy areas. Moisture can collect in the middle of a very dense plant, so I always take a quick look inside.
- I check whether the variety is annual or perennial. Some types of dianthus overwinter well in the right climate, while others are easier to grow as annuals. It’s better to know this right away, especially if you plan to keep the plant in the flower bed for several years.
Soil and planting
For planting, I choose a sunny spot with well-drained soil. Dianthus handles a little dryness much better than constantly wet soil around the roots.
When planting, I do the following:
- I leave about 8–12 inches (20–30 cm) between smaller plants. Larger varieties may need more space. I don’t want the leaves of neighboring plants lying densely on top of each other.
- I loosen the soil around the planting hole. If the soil is heavy and stays wet for a long time after rain, one small hole isn’t enough. I try to improve the whole area around the plant so water can drain away to the sides.
- I don’t bury the base of the plant. I keep the top of the root ball roughly level with the surrounding soil. If the lower leaves and the base of the stems are buried, moisture will stay there longer.
- I water well right after planting, then check the soil. There’s no need to keep it constantly wet. I let the top layer dry out a little before watering again.
If dianthus is growing in a container, a drainage hole in the bottom is especially important. I also use small mesh covers for drainage holes, such as Pot Hole Mesh Pads, so the potting mix doesn’t wash out every time I water while the excess water can still drain freely.
Faded flowers
With dianthus, I don’t just pull off the dry petals. After flowering, a long bare flower stem remains, and if I leave it whole, the plant starts looking messy pretty quickly.
I find the faded flower, follow the stem down to the first pair of healthy leaves or a side shoot, and cut the flower stem just above that point. If there are still buds on the same stem, of course I don’t remove the whole thing.
When the first big flush of flowers finishes almost at the same time, low-growing varieties can be lightly trimmed. I remove faded tops and overly long stems, but I don’t cut deeply into the green cushion of leaves.
This way, the plant doesn’t spend as much energy producing lots of seeds, and many varieties start forming another round of buds.
Checking the plant after rain
The plant may look completely fine from the outside, while inside, between the leaves, wet dead pieces can already be sitting there after several rainy days.
I gently spread the leaves apart and remove anything brown or soggy. It only takes a couple of minutes, but it leaves more airflow inside the plant.
I don’t pile a thick layer of wet mulch right against the base of dianthus. Mulch can stay around the plant, but I leave a little open space right next to the leaves.
A low, dense plant with blue-green foliage and a few bright dianthus flowers looks great along a pathway even in late fall. And if the variety is perennial and suits your climate, it will already be there in spring, so you won’t have to plant everything again.
Late fall flowers
Over time, I stopped worrying about the empty spaces that appear in flower beds in fall. Now I just plan ahead for what I can add as those spaces open up.
You can start with one area that usually empties out earlier than the rest and try a couple of plants from this list there. By next year, you’ll already know what grows best in your garden and what is really worth planting again. That’s how I ended up with my own list of favorite plants.
If you have flowers that handle the colder weather of late fall especially well, tell me about them in the comments. I’m always curious to know what keeps blooming longest in other gardens and in different climates.