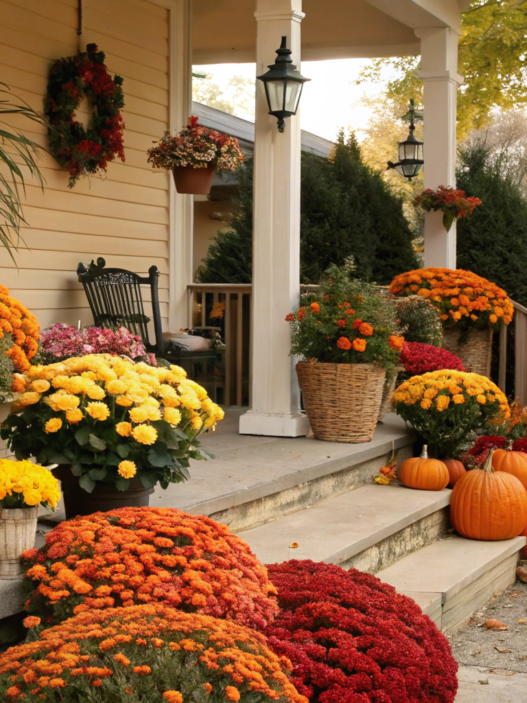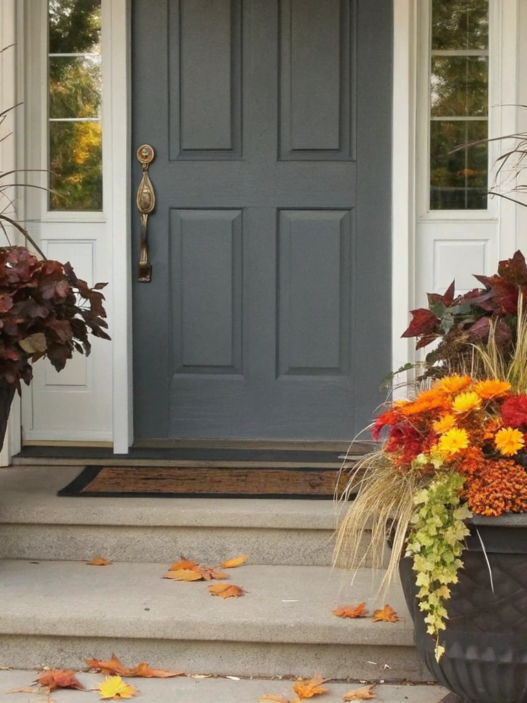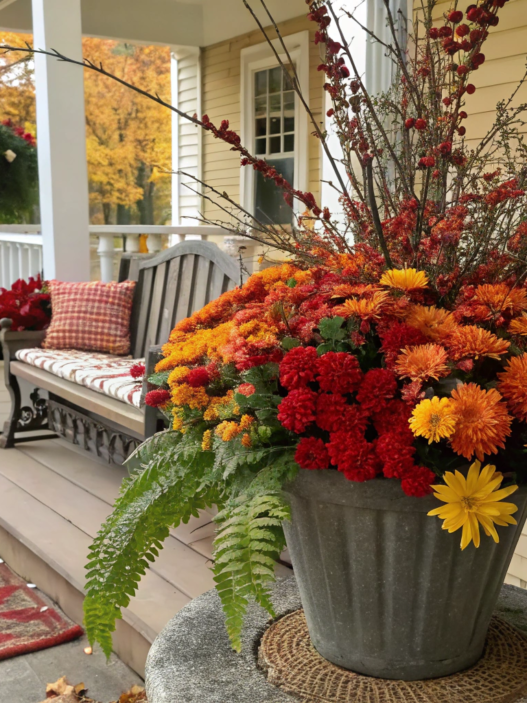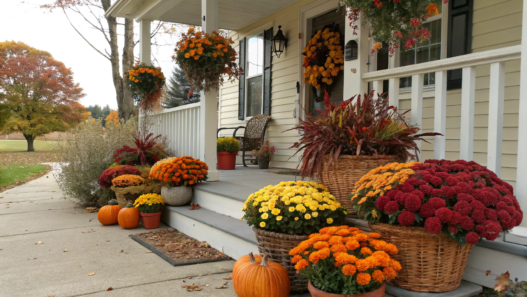
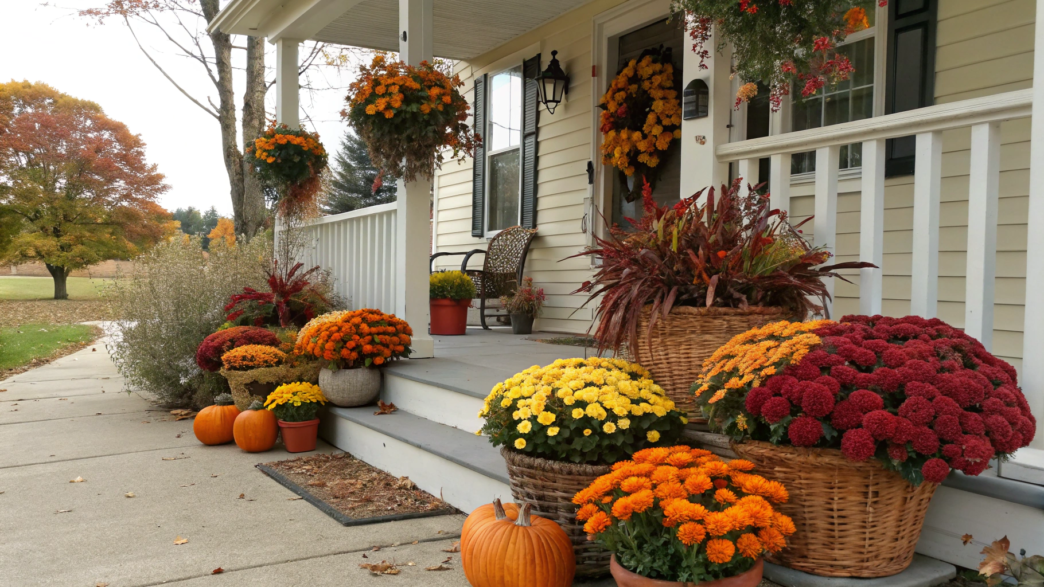
In fall, I don’t completely redo the porch. Usually, it’s enough to remove what has already finished blooming and add a few plants that handle cool nights better. Fall flowers outdoor ideas for front porch can really come down to a few simple, well-planned containers by the entrance.
One beautiful flower pot with plants that handle cool nights well often looks better than several random planters. Below, I picked 10 fall flowers outdoor ideas for you that are easy to bring to life and then keep looking good for a long time.
1. Mum and Pumpkin Planter
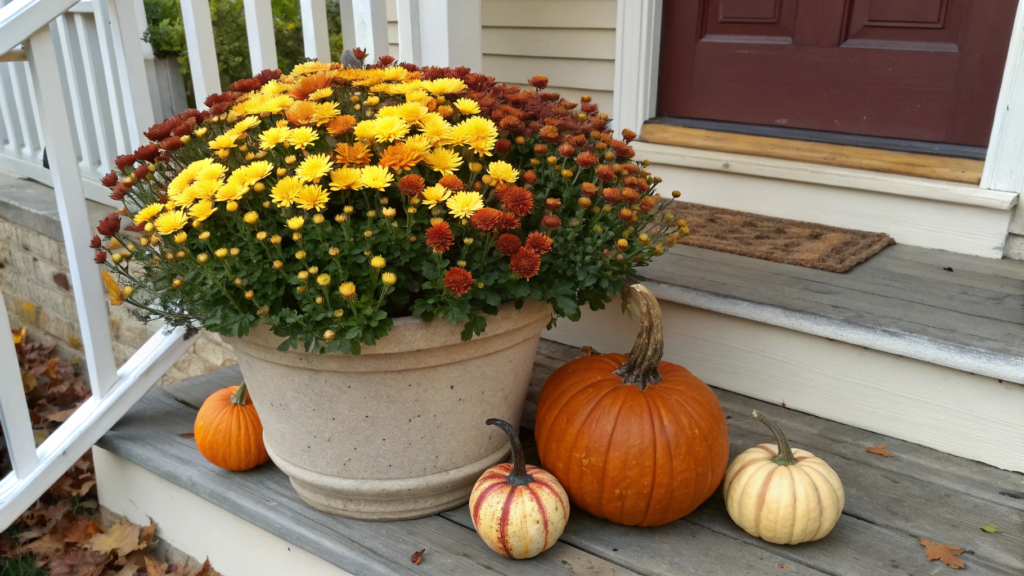
Mums and small pumpkins are one of the easiest ways to add a little more color to the porch at the beginning of fall. You don’t need to plant five different plants in one container. One full mum and a few pumpkins around it are enough.
For a planter like this, I usually choose a mum with plenty of buds that haven’t opened yet. This way, the arrangement lasts longer, and the flowers gradually change almost every day. I like yellow, burgundy, copper-orange, and cream varieties most.
What you’ll need
For one container, I use:
- a round planter about 18–20 inches (45–50 cm) in diameter, such as The HC Companies 20 Inch Round Classic Planter, with drainage holes;
- one large mum in a pot about 8–10 inches (20–25 cm) in diameter;
- all-purpose potting soil for container plants;
- 3–5 small decorative pumpkins in different shapes;
- a small garden trowel.
There’s no need to choose an extra-deep planter just for the sake of size. A mum needs enough soil and good drainage more than it needs a huge container.
How to put the arrangement together
1. Prepare the planter first.
Add enough soil so that after planting, the top of the root ball sits about 1 inch (2.5 cm) below the rim. Don’t pack the soil down too firmly. It will settle a little after a few waterings anyway.
2. Plant the mum slightly toward the back of the container.
For a container sitting on the porch, this is more practical than planting it right in the center. The front stays open, so you can arrange the pumpkins there without hiding them under the leaves.
A long time ago, I tried to fill every empty bit of soil in a container with plants. After a couple of weeks, everything turned into one dense green mass. Now I leave the plants some room, because one large mum can easily fill most of the planter on its own.
3. Water the plant well, and only then arrange the pumpkins.
I simply place a few small pumpkins around the mum, leaving some of the soil visible. You can replace the pumpkins as they start to go bad without disturbing the roots of the plant.
It’s better to choose pumpkins in different sizes, but within roughly the same color family. For example, cream and light green pumpkins next to a burgundy mum, or orange ones next to a yellow mum. I think that’s a pretty good combination.
Place the container where the mum will get several hours of direct sunlight. And check the soil with your hand. In cool weather, the top can still look damp while the middle of the pot is already fairly dry. Mums in containers dry out faster than plants in a garden bed, especially under a covered porch where very little rain reaches them.
It’s better to put this container together at the very beginning of fall and then make small changes when needed, for example, changing the number of pumpkins or removing them completely. The mum itself will also gradually change its look as new buds open. The porch will look a little different for several weeks even though you barely touch the planter itself.
2. Aster Porch Pot
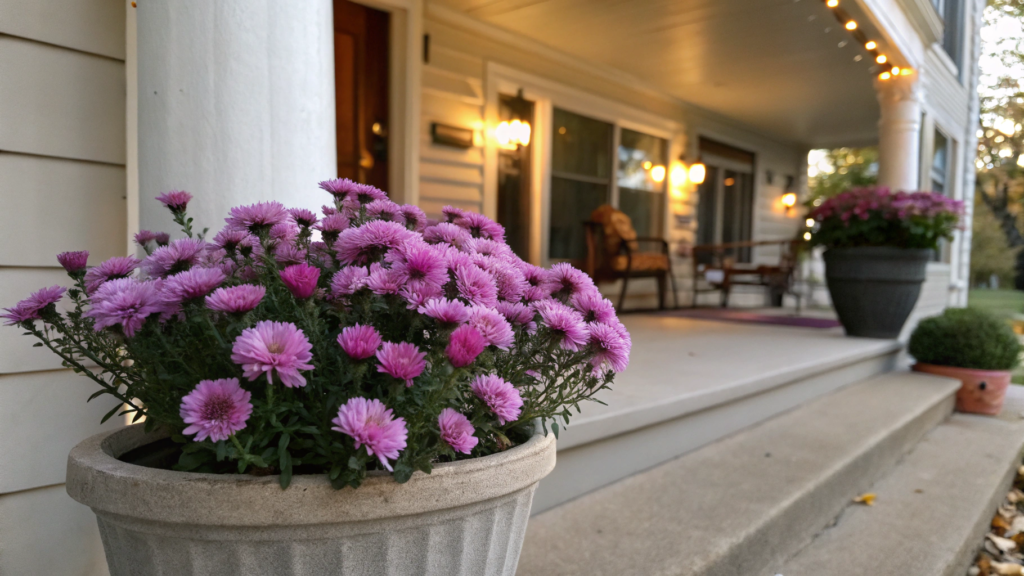
I place asters closer to the entrance, where you can easily see them from the walkway. They have lots of small flowers, and even one plant can quickly make a plain planter look bright and noticeable. In fall, I usually go for purple, lilac, or deep pink varieties.
Lindy usually leans toward softer combinations, while I can easily put a bright purple aster on the porch and call it done. In the end, as always, we find a compromise. One strong color, a simple planter, and that’s plenty.
What you’ll need
For one container:
- a round planter about 12–16 inches (30–40 cm) in diameter with drainage holes;
- one compact aster in a pot about 6–8 inches (15–20 cm);
- fresh potting soil for container plants;
- a small garden trowel.
Don’t choose a container that’s too small. An aster fills out pretty quickly, and the soil dries much faster in a tight pot.
How to plant an aster
1. Fill the planter about two-thirds full with soil.
Set the aster inside while it’s still in its nursery pot and check the height first. After planting, the top of the root ball should sit about 1 inch (2.5 cm) below the rim of the container. This keeps water from immediately spilling over the sides when you water. If the plant sits too low, just add a little more soil to the bottom and check again.
2. Gently loosen the roots.
Take the aster out of its pot, holding the plant near the base instead of pulling on the stems. If the roots have already wrapped tightly around the root ball, I gently loosen the bottom with my fingers. Freeing just a few of the outer roots is enough to help them grow into the new soil after planting. There’s no need to completely break apart the root ball.
3. Fill the gaps with soil and water well.
Add soil in small amounts around the root ball and gently press it down with your palm so there aren’t any large air pockets inside. But don’t pack it down into a hard layer either. After planting, slowly water the whole container until water starts draining from the holes at the bottom. The soil will settle a little, and then you can add another small handful on top.
It’s better to place the aster container where the plant gets at least 6 hours of sunlight a day. With too little light, the plant can stretch out and bloom less.
I check containers like this with my finger about 1–2 inches (2.5–5 cm) deep. If the soil is already dry there, it’s time to water. On an open porch after a windy day, the soil in the planter can dry out pretty quickly, even when the weather is already cool.
And in my opinion, there’s no need to add other flowers to this planter. The aster plant quickly fills the container on its own, and all those small flowers give it plenty of color and volume. Extra plants are more likely to compete with it for space and make the arrangement bulky and, as a result, visually overcrowded.
3. Pansy Window Box
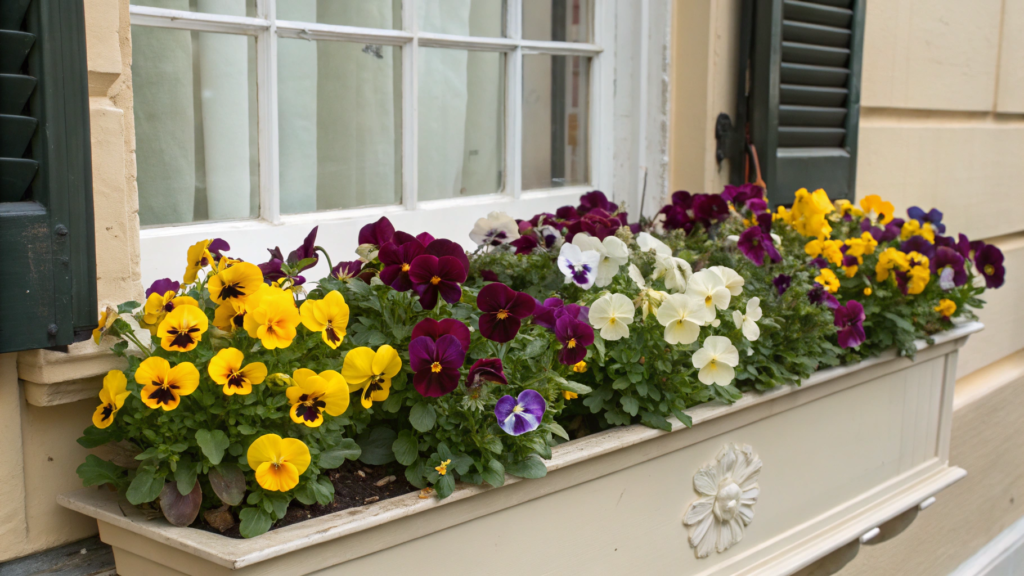
Pansies look perfect in window boxes, add plenty of color, and stay low. They don’t block the window or turn into a huge bush after a couple of weeks that you have to keep trimming. I choose yellow, burgundy, purple, and cream varieties and mix two or three shades in one box.
What you’ll need
For one window box:
- a window box about 24–30 inches (60–75 cm) long and at least 7–8 inches (18–20 cm) deep with drainage holes;
- 5–7 small pansy plants;
- fresh potting soil for container plants;
- a small garden trowel.
Pansies don’t need a very deep container, but I don’t use really shallow boxes either. In a small amount of soil, the potting mix dries out quickly, and the roots literally have to share just a few handfuls of soil.
How to plant pansies
1. Fill the box with soil, leaving about 1–1.5 inches (2.5–4 cm) below the rim.
Before planting, I first arrange the plants in their nursery pots. This makes it easy to see whether there’s enough space between them and how the colors will alternate. For a 24–30-inch box, leaving about 5–6 inches (12–15 cm) between the plants is usually enough.
2. Plant them one at a time without burying the base of the stems.
Carefully take each plant out of its pot and gently loosen the roots if they’re already wrapped tightly around the root ball. The top of the root ball should stay about level with the surface of the new soil. If you plant it too deeply, damp soil will constantly sit against the base of the stems.
3. Add soil between the plants and water the whole box well.
I add the soil in small amounts and gently press it around each plant with my fingers. Then I slowly water along the entire length of the container, not just around individual plants. Once excess water starts draining through the holes at the bottom, you can stop. If the soil settles noticeably after watering, add a little more on top.
In window boxes near the porch, pansies still look good when summer flowers are already starting to fade. They bloom best if the spot under the window gets sunlight for at least a few hours a day. A little shade in the afternoon also helps the flowers stay fresh longer.
I check the soil with my hand about 1 inch (2.5 cm) deep. Window boxes are exposed to air on all sides, so the soil dries out faster than it does in a large planter sitting on the ground.
I regularly remove faded flowers along with a short piece of the flower stem. It only takes a couple of minutes, but the window box stays neat longer and the plants keep producing new buds.
4. Ornamental Kale Urn
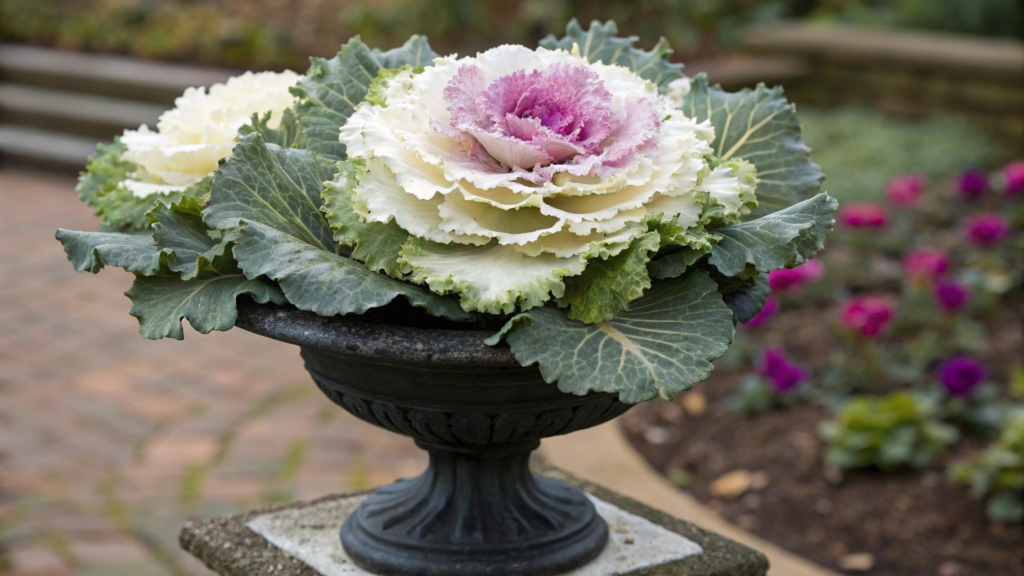
Ornamental kale looks completely different in a tall urn than it does in a regular low pot. The rosette sits around knee height or a little higher, so you can easily see it before you even reach the door. I prefer varieties with white, cream, or pink-purple centers — the leaves stand out beautifully against a dark urn.
Once, I had a large ornamental kale rosette left over and couldn’t find a place for it anywhere. I transplanted it into an old urn that was standing by the entrance, simply so the plant wouldn’t go to waste. In the end, I kept looking at it every time I walked past. A large rosette already looks beautiful on its own, so there’s really no need to add anything else to this arrangement.
What you’ll need
For one urn:
- an urn about 16 inches (40 cm) in diameter and about 18 inches (45 cm) tall;
- one large ornamental kale in a pot about 6–8 inches (15–20 cm);
- fresh potting soil for container plants;
- a small garden trowel.
For this setup, something like the Arcadia Garden Products PL00BK Classic Traditional Plastic Urn Planter, 16” x 18”, Black would work well. It doesn’t come with a drainage hole, so you’ll need to make one yourself before planting.
How to plant ornamental kale
1. Check the drainage first.
Water shouldn’t collect at the bottom of a tall urn. If there are no holes, make a few small drainage holes in the bottom of the container. Then fill the urn about halfway with soil and place the kale inside while it’s still in its nursery pot. This makes it easier to check the height before you start transplanting.
2. Plant the kale in the center of the urn.
Take the plant out of the pot and check the roots. If they’ve tightly wrapped around the root ball, gently loosen the outer layer with your fingers. Then add or remove a little soil so that after planting, the top of the root ball sits about level with the surrounding soil. Don’t bury the rosette.
3. Fill the empty space with soil and water well.
Add soil around the roots in small amounts and gently press it down with your hand. Leave about 1 inch (2.5 cm) below the top edge of the urn so water doesn’t immediately spill over when you water. Then slowly soak the soil and make sure the excess water drains out from the bottom.
After the weather cools down, the color of ornamental kale becomes more noticeable and richer, so after the first cold nights, I don’t remove the plant or rush to change the arrangement. As long as the leaves stay firm and healthy, the urn can keep standing by the entrance.
I choose a spot with good light for it. I check the soil with my finger about 1–2 inches (2.5–5 cm) deep and water when the top layer has dried out. A tall urn usually doesn’t need constant watering in cool weather, but the root ball shouldn’t be allowed to dry out completely either.
And here I would definitely stick with one plant. Ornamental kale has a wide rosette, large ruffled leaves, and noticeable color in the center. If you add a few more flowers around it, they’ll either get lost under the leaves or start crowding the kale.
5. Viola Hanging Basket
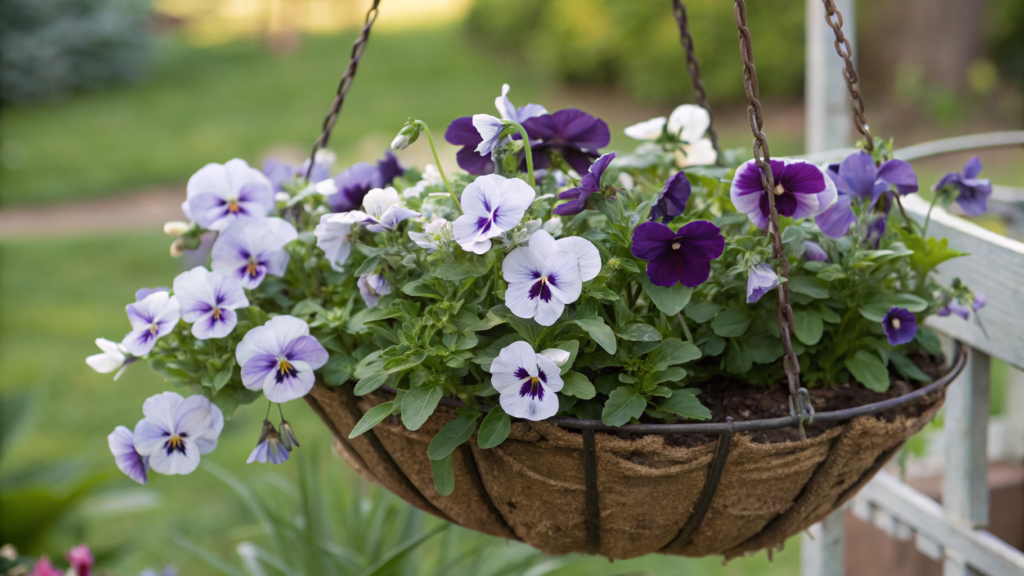
In a viola hanging basket, the flowers sit almost at eye level. In a regular planter, their small blooms can easily get lost, but in a hanging basket you can see the shape of each flower and how beautifully they spill over the edge.
It’s better to choose two shades from the same color family, for example light purple and dark purple, or cream and yellow. This keeps the basket bright without making it too colorful, and it looks much more attractive.
What you’ll need
For one basket:
- a hanging basket about 12–14 inches (30–35 cm) in diameter with drainage holes;
- 5–7 small viola plants;
- fresh potting soil for container plants;
- a hook or sturdy hanger that can support the weight of the basket after watering.
For a basket this size, that number of plants is plenty. Violas gradually spread out and cover the exposed soil, so there’s no need to plant them too tightly right away.
How to plant violas
1. Arrange the plants in a circle first.
I fill the basket about two-thirds full with soil, then place the violas on top while they’re still in their nursery pots. I usually place a few plants closer to the edges so they can eventually spill over, while the rest stay closer to the center.
2. Plant them at the same depth they were growing before.
Carefully take each plant out of its pot and gently loosen the roots if they’re tightly wrapped around the root ball. Leave about 4–5 inches (10–12 cm) between the plants. Then fill the gaps with soil and lightly press it down with your fingers.
3. Water the basket before hanging it.
After planting, water all the soil well and wait a few minutes for the excess water to drain through the drainage holes. This also makes it easy to see whether the soil has settled around the roots. If it has, simply add a little more soil on top and hang the basket only after that.
Choose a spot for the violas that gets a few hours of sunlight a day but doesn’t stay in hot afternoon sun for hours. They like cooler weather and can keep blooming for quite a while during mild fall days.
Hanging baskets need to be checked more often than regular planters. Air moves around them from all sides, so the top layer of soil can dry out faster. I check the soil with my finger about 1 inch (2.5 cm) deep and water when it feels dry at that depth.
I remove faded flowers as they appear. It doesn’t take much time, and the plant keeps putting its energy into new buds instead of making seeds.
6. Snapdragon Container
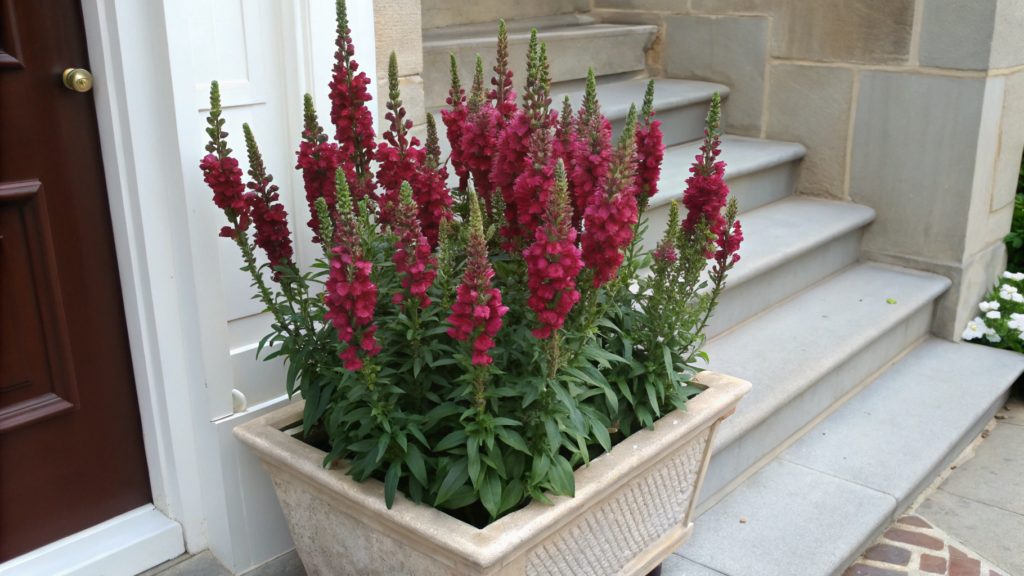
I love snapdragons for their height and slender shape. Their long flower spikes rise above the edge of the planter and visually pull the arrangement upward. That’s why even one pot of snapdragons by the door or near the steps already looks expressive enough.
I usually choose one main color, for example burgundy, cream, or warm pink, and I don’t try to mix too many shades in one pot. Snapdragons already have pretty flower spikes on their own.
What you’ll need
For one container:
- a round planter about 14–16 inches (35–40 cm) in diameter with drainage holes;
- 3–5 compact snapdragon plants;
- fresh potting soil for container plants;
- a small garden trowel.
Before buying, I always check the mature height of the variety. For planting, it’s easier to use compact varieties around 12–18 inches (30–45 cm) tall. Taller varieties can grow much higher and may need support.
How to plant snapdragons
1. Arrange the plants in the empty container first.
I place the nursery pots inside and look at how the heights are distributed. If the plants are slightly different in size, I put the taller ones closer to the center and the shorter ones closer to the edges. I leave about 5–6 inches (12–15 cm) between the plants.
2. Fill the planter with soil and plant the snapdragons.
Add enough soil so that after planting, the top of the root ball sits about level with the surface of the soil. If the roots are already tightly wrapped around the edges, gently loosen them with your fingers. There’s no need to break the root ball apart too much.
3. Add soil between the plants and water well.
Add the soil in small amounts and gently press it around each plant. After planting, slowly water the entire container until water starts draining through the holes at the bottom. If the soil settles noticeably, add a little more on top.
Snapdragons bloom better in good light, so I place the container where the plants get several hours of direct sunlight a day. In cool fall weather, the flower spikes last longer than they do in summer heat.
When a flower spike is almost completely finished blooming, I cut it back below the faded flowers. After that, the plant is more likely to produce new side shoots and stays looking fresh longer.
Snapdragons add both height and color to the arrangement on their own, so I wouldn’t plant anything else with them. The open space between the plants gradually becomes less noticeable as they grow.
7. Sweet Alyssum Bowl
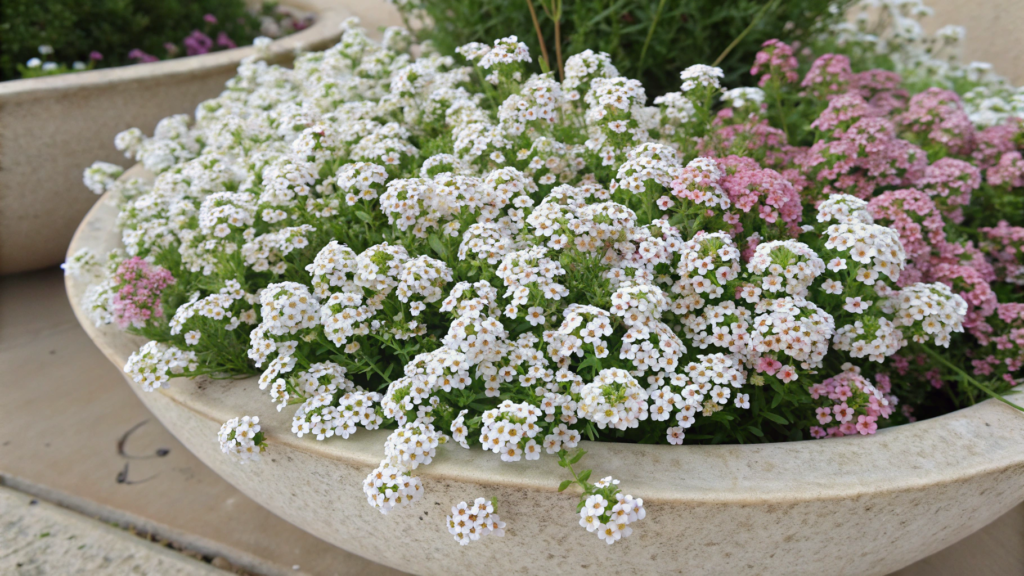
Sweet alyssum works really well in a wide, shallow bowl. It quickly spreads outward, covers the soil, and starts to spill gently over the edge. White or light pink varieties are easy to notice near the entrance and don’t clash with the color of the planter itself.
Sweet alyssum has very small flowers, but there are so many of them that the whole surface of the container gradually turns into a dense cloud of blooms. And when you walk past, you can catch its pleasant scent.
What you’ll need
For one bowl:
- a wide bowl about 14–16 inches (35–40 cm) in diameter and about 6–8 inches (15–20 cm) deep with drainage holes;
- 5–7 small sweet alyssum plants;
- fresh potting soil for container plants;
- a small garden trowel.
You don’t need a very deep container for this plant. Sweet alyssum has a compact root system, while width matters more because the plants need room to spread across the surface and grow over the edge.
How to plant sweet alyssum
1. Fill the bowl with soil almost to the top.
Leave about 1 inch (2.5 cm) below the rim so water doesn’t spill over the edge when you water. Before planting, I arrange the plants across the surface and make sure there are about 4–5 inches (10–12 cm) between them.
2. Plant them evenly across the bowl.
Take each plant out of its nursery pot and gently loosen the outer roots if they’re already tightly wrapped around the root ball. Plant the sweet alyssum at the same depth it was growing before. You can place the plants around the outer edge a little closer to the rim — those are the ones that will eventually start spilling down.
3. Add soil and water well.
Fill the gaps between the plants with soil and gently press it down with your fingers. Then slowly water the whole bowl until the excess water starts draining out from the bottom. If the soil settles, add a little more on top.
Sweet alyssum blooms well in bright light, but in warm fall weather it needs a little shade in the afternoon. In a wide bowl, the top layer of soil can dry out pretty quickly, so I check it with my finger about 1 inch (2.5 cm) deep.
If some shoots grow too long and start sticking out from the overall shape, I trim them back lightly. After a light trim like this, sweet alyssum usually puts out new side shoots faster and fills out again.
Sweet alyssum fills the whole container nicely on its own, so it really doesn’t need any other plants next to it. Its small flowers and trailing shoots add plenty of volume without any extra “neighbors.”
8. Calendula Basket
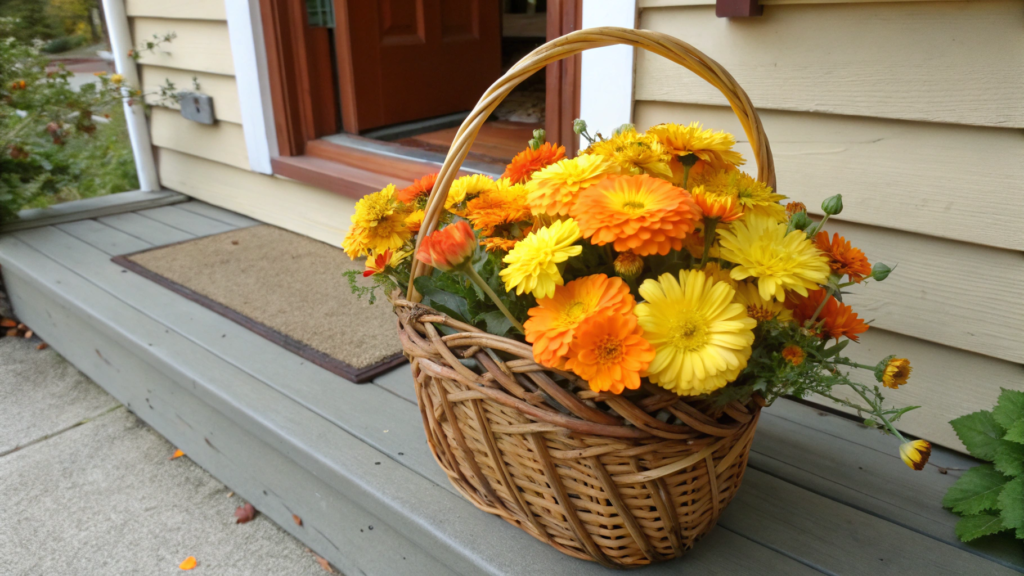
Calendula has bright yellow and orange flowers, so it really stands out in a woven basket near the porch. I place a container like this near the steps or off to the side of the door, where you can easily see the flowers from above. The blooms are fairly large, so even a few plants can fill the container pretty quickly.
Calendula has always felt very homey to me. It’s easy to grow, it keeps blooming for a long time in cool weather, and the bright flowers are noticeable even on cloudy days. Lindy usually goes for lighter shades, while I almost always reach for deep orange ones. You can easily combine both in the same basket.
What you’ll need
For one basket:
- a basket or planter about 14–16 inches (35–40 cm) in diameter and at least 8–10 inches (20–25 cm) deep;
- 3–5 compact calendula plants;
- fresh potting soil for container plants;
- a small garden trowel.
If you’re using a real woven basket, it should have a liner with drainage holes inside. Otherwise, after a few waterings, the bottom can start breaking down quickly, while excess water stays around the roots.
How to plant calendula
1. Fill the basket about two-thirds full with soil.
First, I arrange the plants while they’re still in their nursery pots. I place the taller ones closer to the center and the shorter ones around the edges. I leave about 5–6 inches (12–15 cm) between the plants so they have room to spread.
2. Plant them and add soil around the roots.
Carefully take the calendula out of the pots. If the roots have already formed a tight mass around the outside, gently loosen them with your fingers. After planting, the top of the root ball should sit level with the surrounding soil. I leave about 1 inch (2.5 cm) below the rim of the basket to make watering easier.
3. Water the whole container well.
Water slowly so the moisture has time to soak through the soil all the way down. Once water starts draining from the holes at the bottom, stop and let the basket sit for a bit. If the soil settles noticeably around the plants, add a little more.
For a calendula basket, I choose a well-lit spot. With enough sunlight, the plants stay fuller and produce more flowers. I check the soil with my finger about 1 inch (2.5 cm) deep and water after the top layer has dried out.
It’s better to remove faded flower heads regularly. I simply cut off the flower along with a short piece of stem. It only takes a little time, and after that calendula keeps producing new buds instead of putting its energy into making seeds.
There’s no need to cover the entire surface of the basket with plants right away. Leave a little open space between them — after a few weeks, the calendula will spread out, and those gaps will become much smaller.
9. Dianthus Planter
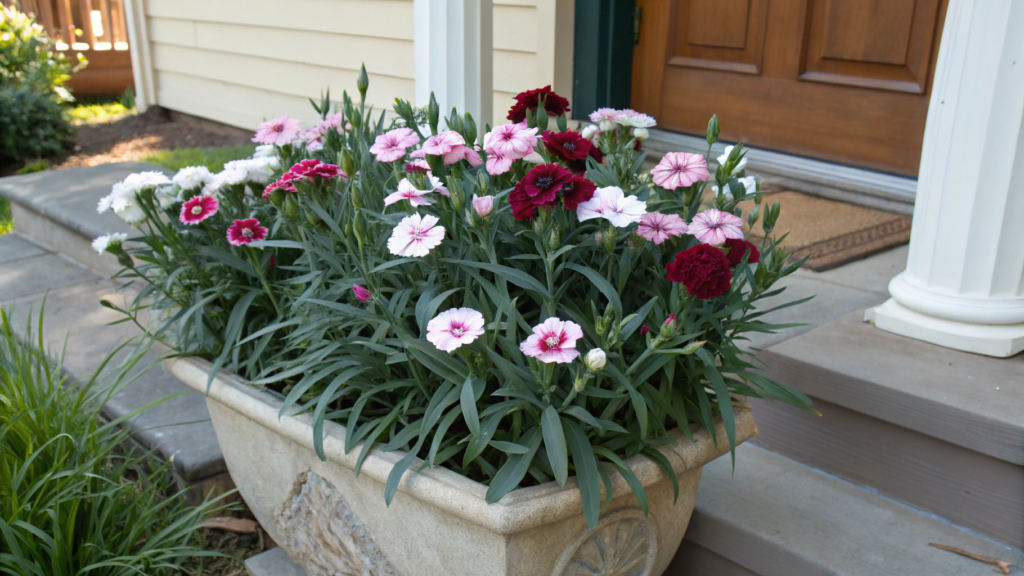
Dianthus looks beautiful in a wide planter. It forms neat little plants with blue-green leaves and small flowers with serrated edges. For a porch planter, white, pink, or dark red varieties work well, and it’s better not to mix too many colors in one container.
Some varieties also have a light spicy fragrance. Lindy has a great sense of smell, and she usually notices the scent before I do, especially when she walks past the planter. That’s why I try to place dianthus closer to the entrance or somewhere we pass by often.
What you’ll need
For one planter:
- a wide container about 12–16 inches (30–40 cm) in diameter and about 8–10 inches (20–25 cm) deep with drainage holes;
- 3–5 compact dianthus plants;
- fresh potting soil for container plants;
- a small garden trowel.
I always pay attention to the mature height of the variety. For a planter like this, compact varieties around 6–12 inches (15–30 cm) tall work best. Taller varieties are easier to grow in a garden bed or in a separate deeper container.
How to plant dianthus
1. Arrange the plants in the container first.
I place the nursery pots on top of the soil and make sure there are about 5–6 inches (12–15 cm) between them. Dianthus gradually spreads outward, so there’s no need to plant it too tightly right away.
2. Plant them at the same depth they were growing before.
Carefully take the plants out of their nursery pots and gently loosen the outer roots if they’re already tightly wrapped around the root ball. The top of the root ball should stay about level with the surface of the soil. It’s better not to cover the base of the plant with soil.
3. Add soil and water well.
Fill the gaps between the plants with soil and gently press it down with your hand. Leave about 1 inch (2.5 cm) below the rim of the planter. After planting, slowly water the whole container and make sure the excess water drains freely through the holes at the bottom.
For dianthus, I choose the brightest spot on the porch. In shade, it stretches more quickly and blooms less. I don’t rush with watering either — after a good watering, I let the top layer of soil dry out a little because dianthus doesn’t do well in constantly wet soil.
I regularly remove faded flowers without waiting for them to dry out completely. After this light trimming, the plant looks fresh and keeps producing new buds.
In this planter, I also keep only dianthus and don’t add anything else. After a while, the plants spread out, the leaves cover most of the soil, and the container no longer looks empty.
10. Mixed Fall Flower Centerpiece
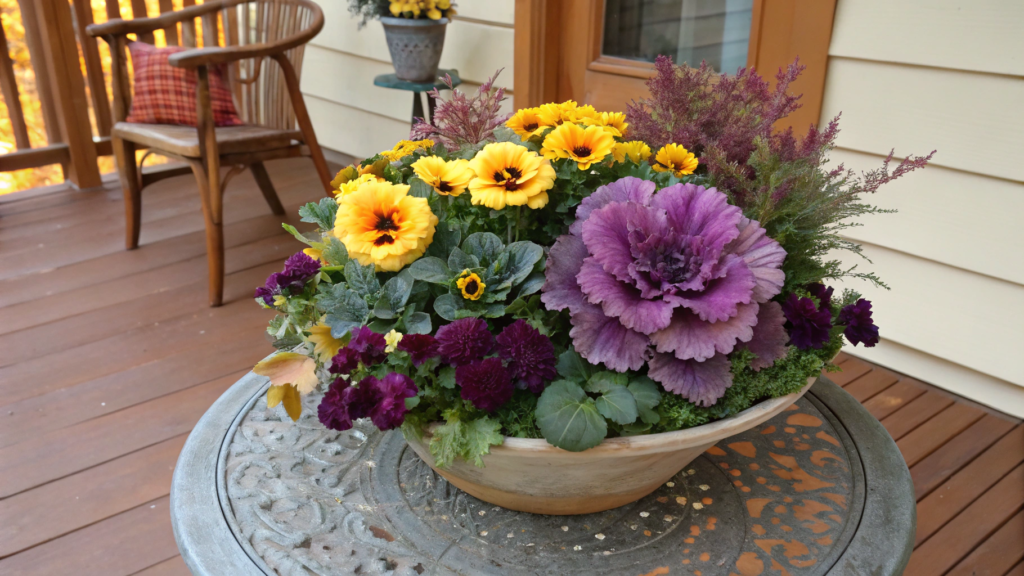
For a small table on the porch, I put together a low arrangement with several fall plants. It shouldn’t be too tall, otherwise it will block the view and get in the way of people sitting at the table. It’s better to use a wide bowl and plant different shapes at roughly the same height.
For an arrangement like this, I would choose a small mum, violas, and compact ornamental kale. The mum adds more flowers, the violas fill the edges, and the broad kale leaves add volume. It’s easy to overdo it here, so three types of plants are plenty.
What you’ll need
For one arrangement:
- a wide, shallow bowl about 14–16 inches (35–40 cm) in diameter;
- one small mum;
- one compact ornamental kale;
- 2–3 viola plants;
- fresh potting soil for container plants.
How to put the arrangement together
1. Arrange the plants in the empty bowl first.
I place the mum slightly off-center, set the ornamental kale next to it, and arrange the violas closer to the edges. I leave a little space between them right away because the plants will spread out over the next few weeks. Before planting, I always look at the arrangement from every side. On a table, people will see it from more than just the front, so it’s important not to leave an empty spot or one plant sticking out awkwardly at the back.
2. Plant the larger plants first.
Add some soil to the bowl and plant the mum and ornamental kale first. The top of each root ball should stay about level with the surrounding soil. If one plant ends up noticeably higher than the other, it’s better to remove or add a little soil underneath now than try to fix the finished arrangement later. Then plant the violas in the open spaces closer to the edges. Don’t crowd them right up against the larger plants — they’ll need room to grow too.
3. Add soil and water well.
Add soil in small amounts between the root balls and gently work it into the gaps with your fingers. There’s no need to pack it down firmly. Leave about 1 inch (2.5 cm) below the rim of the bowl so water doesn’t spill over the edge when you water. Then slowly water the whole arrangement and wait until the excess water has completely drained out. If the soil settles noticeably afterward, add a little more on top.
I keep a closer eye on the plants in a bowl like this because they can dry out at different rates. I check the soil with my finger in a few different spots and water only when the top layer has dried out.
For arrangements like this, two main shades and one more neutral shade are usually enough to make the mum, violas, and ornamental kale look harmonious together instead of like three random plants in the same bowl.
What’s on your porch?
In fall, I pay more attention to the combination of shades, height, and plant shapes than to the number of flowers. And, of course, to how well they handle cold nights. Sometimes one well-planned container lasts longer and looks much more striking than a whole group of pots.
If you have a favorite combination for your fall porch, leave it in the comments. Which plants handle colder weather best for you, and what do you usually plant together?