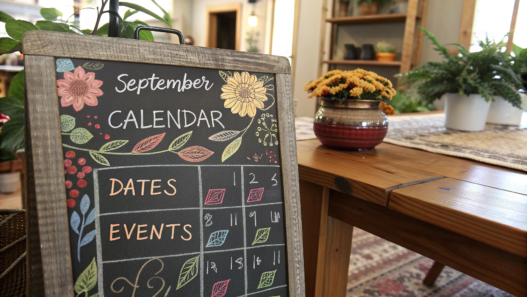
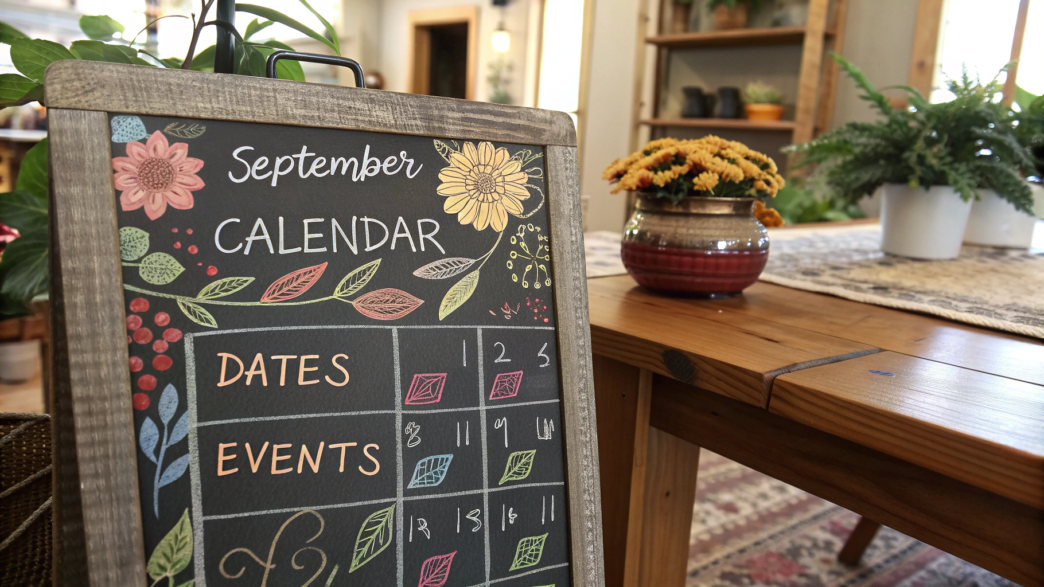
In fall, I always have a lot to do. There is still plenty of work in the garden, new plans come up, something needs to be bought, something needs to be moved, and something absolutely needs to be written down before I forget.
That’s why a September chalkboard calendar is more than just decoration for me. It needs to have enough space for notes, and the drawings and lettering should not make it harder to quickly find the date I need. So I decided to share 10 September Chalkboard Calendar Ideas that are easy to make at home and adjust to your own plans.
A chalkboard is easy to change throughout the month. Today I add a note, tomorrow I erase it, then I draw a leaf or an apple near the heading. The lines can be a little uneven, and the letters can be slightly different from each other. On a chalkboard, that looks completely natural. In fact, small imperfections in the letters and lines only make the board feel more alive.
1. Apple orchard lettering layout
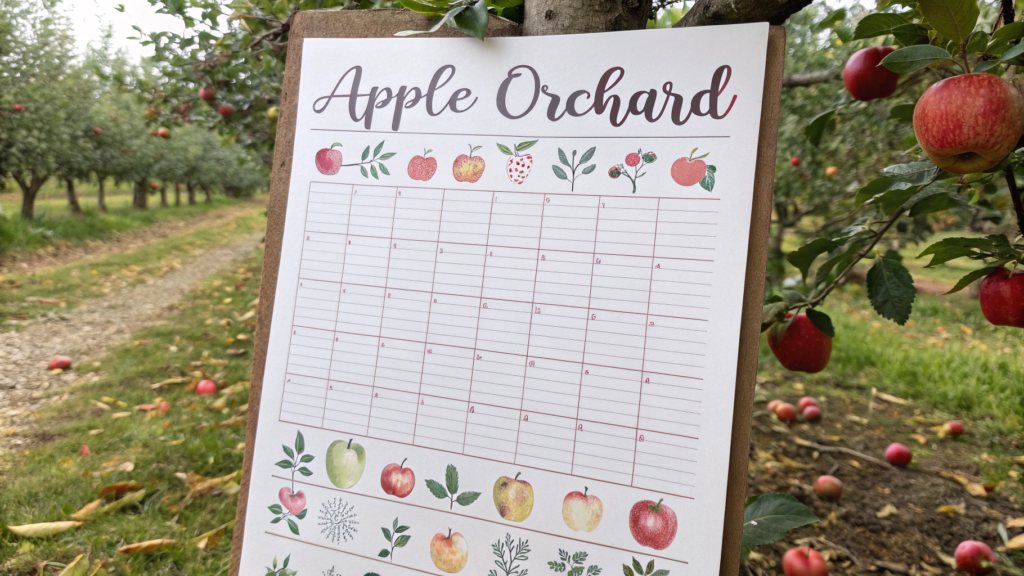
I think this kind of calendar should be a little reference to an apple orchard in September — a large heading at the top, small drawings of apples and leaves around the edges, and enough free space inside the calendar grid itself. The drawing does not take over the whole calendar, so there is still enough room for notes, like appointments, school activities, trips, and regular household plans.
Around our homestead, the list of things to do usually gets longer in fall. There is one thing in the garden, another in the house, plus preserving food and everything that needs to be finished before the cold weather arrives. So even with a decorative calendar, I try to make sure it can actually be used all month, not just photographed and then left alone.
For the drawing, you will need white, red, and green colors.
What you’ll need for an apple orchard calendar
- a black chalkboard about 18 × 24 inches (46 × 61 cm), or a little larger;
- a set of colored chalk markers;
- a ruler about 12–18 inches (30–46 cm) long;
- a soft damp cloth.
If the board is porous, I first test the marker in a small corner. Some liquid chalk formulas wipe off more easily from smooth nonporous surfaces than from a regular painted chalkboard.
How to make an apple orchard lettering layout
1. First, mark out the calendar with white chalk.
Leave about 4–5 inches (10–13 cm) at the top for the heading and drawings. Divide the rest into seven columns and the number of weeks you need. I draw the lines very lightly at first. If I make a mistake by a quarter of an inch, I just wipe that section with a damp cloth and draw it again. It is much easier to fix the grid now than after the apples and lettering are already there.
2. Make a large heading at the top.
Write the name of the month in large white block letters, then add a smaller line next to it. For example, the month and the year. I would not use more than two lettering styles. One large style and one simple style for the dates already give enough detail.
To get the look of an old garden sign, add a couple of thin strokes inside the larger letters or a small shadow on one side. You do not need to make every letter perfect. A little variation in line thickness keeps the chalk-drawn look.
3. Draw apples above the heading.
Start with two or three apples in one upper corner. Draw a simple round red shape, a small white or brown stem, and one green leaf.
In the opposite corner, add one more apple and a couple of leaves. That is enough. If you fill the whole border with fruit, the calendar quickly starts to look like a school poster.
4. Draw a few branches with leaves.
Run one branch from the apples in the upper left corner and another from the opposite side of the heading. I draw a thin curved line first, then add several leaves on both sides. Each leaf can be about 1–1½ inches (2.5–4 cm) long. You do not need to fill them in completely — a few green strokes are enough.
5. Fill in the calendar grid.
Keep the numbers white. For important dates, use a small red dot, a tiny apple, or a green leaf next to the number.
You need to stop yourself at the right moment. It is very easy to start decorating the days of the week, every box, and every empty corner too. Then suddenly there is nowhere to write that you need to pick up feed on Tuesday or that guests are coming on Saturday.
The main part of this design is the heading at the top and a few apple details. The grid stays almost plain. That keeps the calendar practical for notes, while the apples and leaves simply give it a fall theme. The calendar still does its job in the kitchen, entryway, or next to the family workspace, helping us not forget anything important.
2. Three color chalk calendar
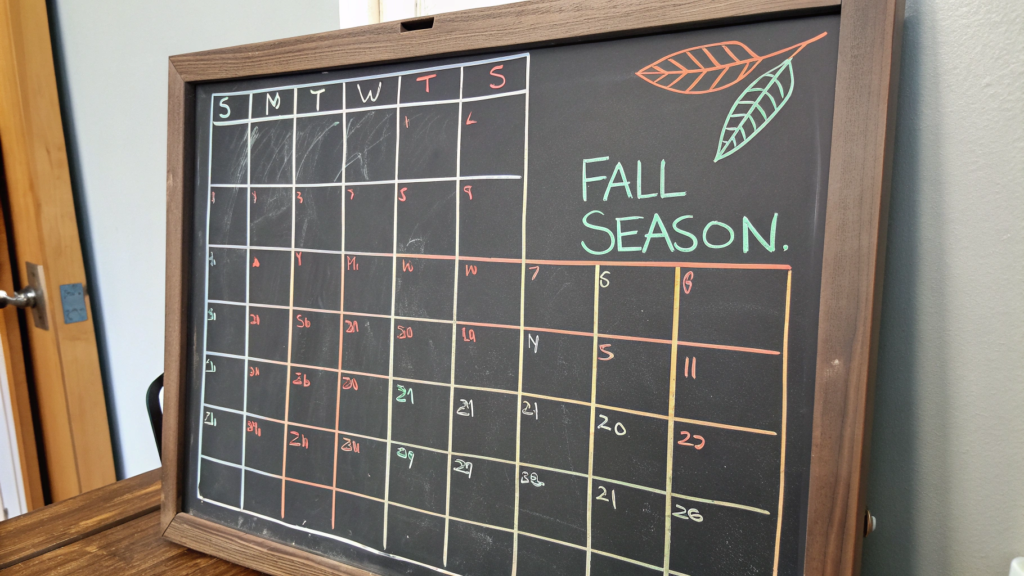
Sometimes a fall calendar does not need drawings of apples, leaves, or pumpkins at all. You can use just three chalk colors and organize them so the calendar is easy to read.
I think white, orange, and light green chalk work best. Use white for the grid and regular dates, orange for important tasks, and green for family plans and reminders. These colors show up well on a black board and are still easy to tell apart.
In fall, our calendar quickly fills with things around the house, garden work, trips, shopping, and weekend plans. When everything is written in white chalk, after a week I already start scanning the board to find the note I need. Three colors make that a little easier.
What you’ll need for a three-color calendar
For this design, you will need white, orange, and light green colors.
- a black chalkboard about 18 × 24 inches (46 × 61 cm);
- a set of colored chalk markers;
- a ruler;
- a soft damp cloth.
Before using the markers, I recommend testing them in a lower corner of the board, especially if the surface is not smooth.
How to make a three-color calendar
1. Draw the grid with white chalk.
Leave about 3–4 inches (7.5–10 cm) at the top for the name of the month. Divide the surface into seven columns for the days of the week and add as many horizontal rows as the chosen month needs.
Keep the lines thin. A grid that is too thick takes up visual space, especially once notes start appearing inside the boxes.
2. Decide what each color will mean from the start.
For example, white for regular notes, orange for important tasks, and light green for family plans and reminders.
You can choose a different system too. The main thing is not to change it halfway through the month. Otherwise, after a couple of weeks it becomes hard to remember why one note is green and another is orange.
3. Use two colors for the month heading.
Write the name of the month in white chalk, then add a short orange line underneath or a few light green strokes. That is enough to make the top part of the calendar stand apart from the main grid.
4. Add color accents inside the grid.
You do not need to highlight the whole note with color. For example, mark an important date with an orange circle and keep the text next to it white. Mark a family event with a small light green line under the number.
This keeps the notes easy to read, while the color helps you find the right days faster.
Tip. You do not need to add color to every day just for decoration. If nothing is planned for a certain date, leave only the number there.
It makes sense to fill this calendar gradually throughout the month. At first it looks fairly empty, then it slowly fills with notes, reminders, and new plans. And three colors help keep all of that from turning into one solid block of writing.
3. Dimensional fall leaf border
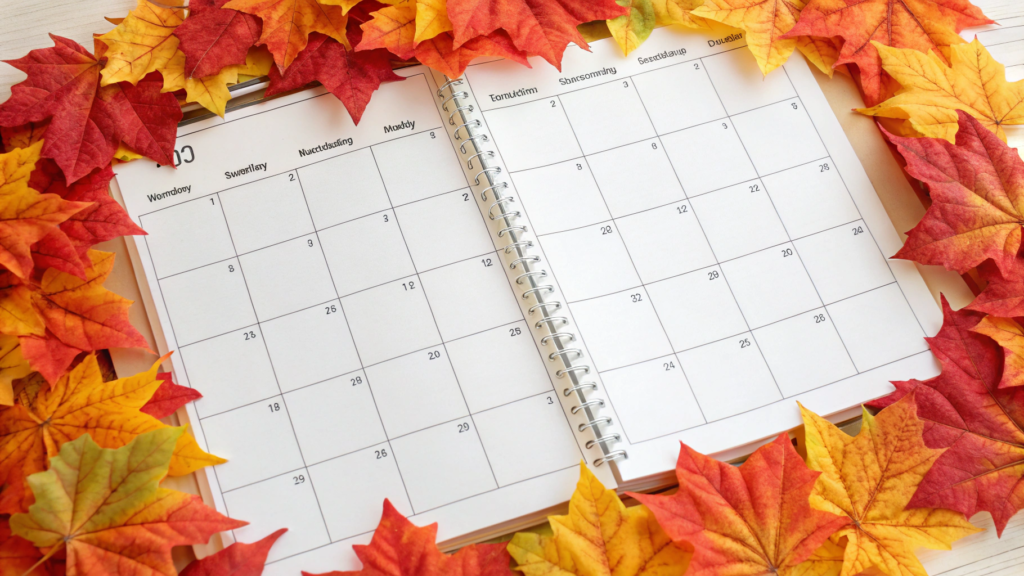
With this idea, the focus goes to a border of fall leaves around the edges, while the calendar grid itself stays simple. That makes the board look more dimensional, but it does not take away the writing space, and the main part of the board stays open for dates and notes.
What you’ll need for a calendar with a leaf border
For the border, you will need white, orange, yellow, red, and green colors.
- a black chalkboard at least 18 × 24 inches (46 × 61 cm), so there is enough room around the edges for the drawing;
- a set of fine-tip colored chalk markers;
- a ruler;
- a soft damp cloth.
Use white chalk not only for the grid, but also for the fine veins and light edges on the leaves. That makes the dimension more noticeable.
How to make a calendar with a dimensional leaf border
1. First, draw the calendar grid.
On the board, leave about 4 inches (10 cm) at the top for the month name and about 2 inches (5 cm) on each side for the leaf border. In the remaining space, mark out seven columns for the days of the week and the number of horizontal rows you need. Keep the lines thin so there is more room for notes inside the boxes.
2. Start drawing the leaf border.
Draw the leaves in the side sections you left open, and continue the drawing partly along the top edge next to the month name. Do not fill the whole border area with the same density. In the upper corners, you can draw a few large leaves, then add smaller ones below them.
3. Draw the larger leaves so they overlap.
Start with the biggest ones. For example, draw two maple leaves in one corner and a couple more in the opposite corner. Then add smaller leaves between them.
That is when the sense of dimension starts to appear. The leaves do not need to sit in one straight row. Let one overlap another a little, one turn to the side, and another sit slightly lower. That way, the border does not look flat.
4. Add color and white accents.
One leaf can be orange, the next yellow, and the third red. You can leave a bit of green too, to show early fall and not just late fall.
Once the colored leaves are done, draw the veins in white chalk and lightly highlight one edge of each leaf. On the opposite side of the leaf, add a few darker strokes so it looks more dimensional. Even that simple difference already gives the feeling that the leaves are not just flat shapes, but layered forms.
Tip. Once the border is done, do not draw leaves inside the calendar grid or next to the numbers. Inside, leave only dates and notes. The date works best when it is small and placed in the upper corner of each box, so the main area stays open for tasks and reminders.
Lindy notices small seasonal details before I do. In September, she can bring home a leaf from a walk just because it has an interesting shape or color. Those little finds often end up suggesting which leaves to draw on the board. As a result, the calendar looks a little different every year, and I like that much more than a pattern that repeats itself perfectly.
4. Cozy café calendar details
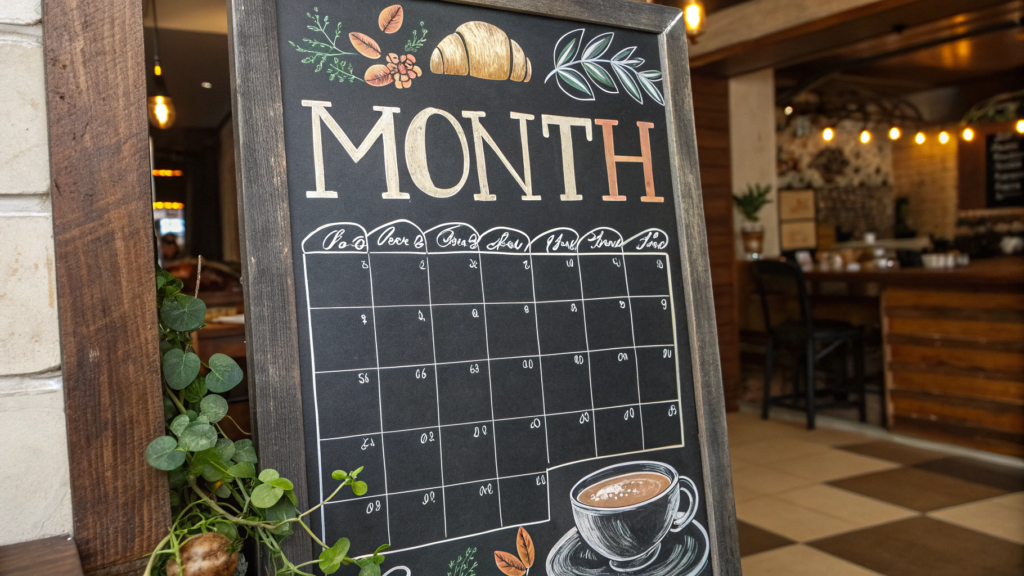
This calendar is designed in the style of chalkboards used in small cafés for menus and specials. Write the name of the month in large letters at the top, place the calendar grid below, and fill the free areas with a few drawings — a cup, a croissant, a branch with leaves, or small coffee beans.
I love looking at boards like these in small coffee shops, where the menu is written and rewritten by hand, and old lines sometimes show that a completely different dessert was there yesterday. That little bit of imperfection works well for a calendar too. You do not need to draw every letter with a ruler.
What you’ll need for a café-style calendar
For the design, you will need white, beige, and orange colors.
- a black chalkboard about 18 × 24 inches (46 × 61 cm);
- a set of fine-tip colored chalk markers;
- a ruler;
- a soft damp cloth.
Use white for the grid, dates, and main lettering. Keep beige and orange for drawings of the cup, pastries, leaves, and small details.
How to make a café-style calendar
1. Mark out the grid and leave space at the top.
On a board that is 24 inches (61 cm) high, leave about 5 inches (13 cm) at the top. That gives enough room for the name of the month and one small decorative line. Below that, draw seven columns for the days of the week and the number of rows you need. Write the dates small in the upper corner of each box so there is still room for notes.
2. Style the month name like a menu heading.
Write the name of the month in large white letters. Draw a thin line underneath and add the year in smaller lettering. The letters can vary a little in height and thickness. That is common on real chalkboards.
One decorative lettering style is enough for the heading. Write the days of the week and the dates in simple block letters, otherwise there will be too many different styles on one board.
3. Draw a few café details.
In one upper corner, draw a small cup and saucer. Add two or three short steam lines next to it — no more. In the other corner, draw a small croissant or a couple of coffee beans.
With orange chalk, add one leaf next to the cup or a short branch near the name of the month. Keep the drawings small, about 2–3 inches (5–7.5 cm), so they do not take up calendar space.
4. Add thin dividers.
Draw a thin white line under the name of the month. At the edges of the heading, add two or three dots or a few short strokes. That is enough to separate the top part of the calendar from the grid and keep the chalkboard menu style.
Lindy once pointed out that my cup drawings almost always end up too big. And she is right. Start with a cup about the size of your palm, and a minute later half the board can already look like a coffee ad. Now I try drawing it small first, then make it larger only if needed.
When everything is done, wipe around the large lettering with a dry cloth. A little chalk dust will stay on the board, and there is no need to remove all of it. Light traces around the letters make the board look like one that is actually rewritten and used every day.
5. Apples and leaves school layout
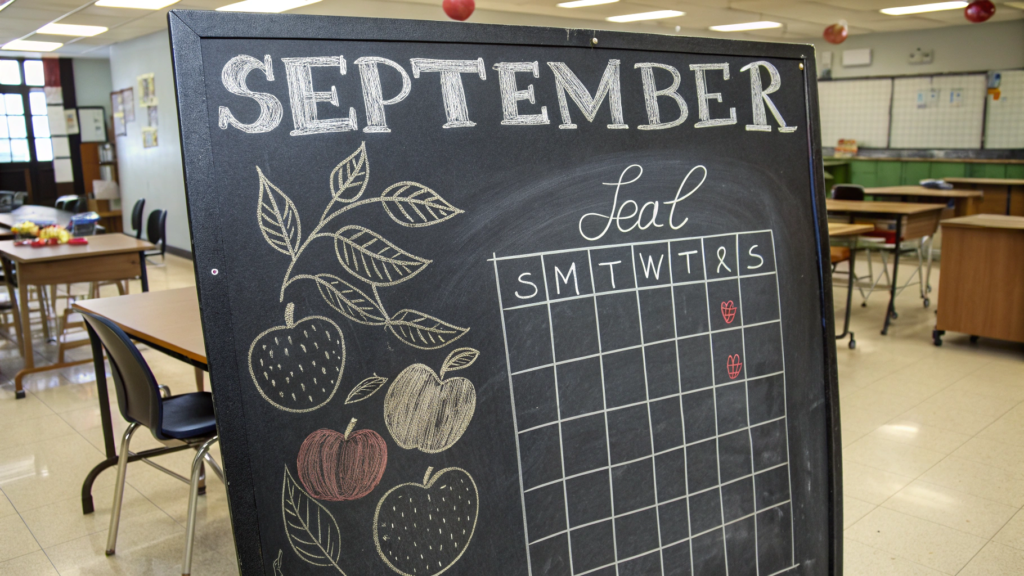
Here, the calendar is designed like a school chalkboard in September. Write the name of the month at the top, draw a few apples and leaves next to it, and keep a regular calendar grid below. The drawings can look like something a teacher quickly added in chalk before class, so perfect symmetry is not needed at all.
September still makes me think of new notebooks, pencils, and that feeling that a new school year is about to begin. Now, instead of a school schedule, our board fills with work around the property, shopping, meetings, and household plans, but I still like the idea of one shared board.
What you’ll need for a school-style calendar
- a black chalkboard about 18 × 24 inches (46 × 61 cm);
- white chalk;
- light yellow or cream chalk;
- green chalk;
- a ruler;
- a soft damp cloth.
Use white chalk for the grid, dates, and main lettering. Keep the other colors for drawings and a few small marks inside the calendar.
How to make a school-style calendar
1. Mark out the calendar grid.
On an 18 × 24 inch (46 × 61 cm) board, leave about 5 inches (13 cm) at the top for the heading and drawings. Below that, draw seven columns for the days of the week and the number of horizontal rows you need. Put the date in small numbers in the upper corner of each box.
2. Write the name of the month in large letters.
Write the name of the month in white chalk in the center of the upper part of the board. Keep the letters simple and easy to read, like on a school chalkboard. You can draw one thin line under the heading.
Write the days of the week in white too, but noticeably smaller. That separates the heading from the main part of the calendar.
3. Draw apples next to the heading.
On one side of the month name, draw two small red apples about 2–2½ inches (5–6 cm) wide. Add short stems and one green leaf to each.
On the other side, one apple or a few leaves are enough. Do not make identical groups on both sides. A little difference looks more natural.
4. Add leaves along the top edge.
Draw a few green and yellow leaves between the apples and the name of the month. Turn some of the leaves in different directions. Draw one thin white vein inside each leaf.
You can add a few small leaves near the names of the days of the week, but not inside the boxes themselves. The dates and notes will go there.
Lindy always keeps a close eye on me so I do not add too many small details. And in this case, she is right. A few apples, leaves, and one large heading are enough. Everything else will gradually appear on its own as the calendar fills with real tasks throughout the month.
6. French market signboard style
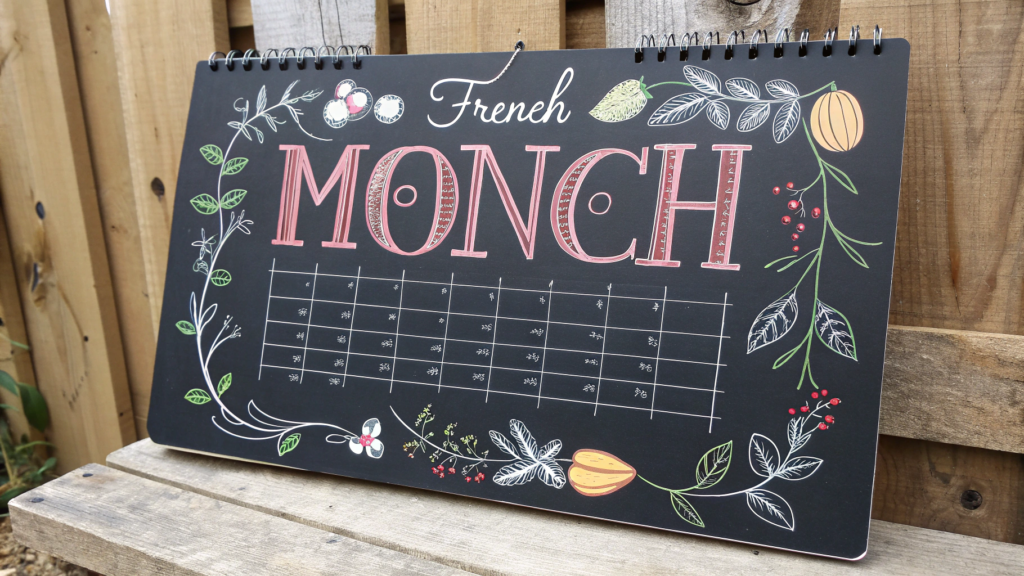
This calendar is designed in the style of a market chalkboard sign, where a large month name is combined with thin lines, small decorative lettering, and simple drawings of fruit or branches. You do not need to copy an actual menu or price board. Just take the basic idea and bring it into the calendar.
I have always liked the loose style of signs like these. One letter sits a little higher, one line is not perfectly straight, and a small detail clearly looks like it was added later. That can look attractive on a calendar too.
What you’ll need for a French market-style calendar
- a black chalkboard about 18 × 24 inches (46 × 61 cm);
- white chalk;
- a set of colored chalk with light yellow, green, and other shades;
- a ruler;
- a soft damp cloth.
Use white for the grid, dates, and main lettering. Light yellow and green will be useful for small drawings and colored details.
How to make a French market-style calendar
1. Mark out the calendar grid.
Leave about 5 inches (13 cm) at the top for the name of the month and decorative elements. Below that, draw seven columns and the number of horizontal rows you need. Put the date numbers small in the upper corner of each box.
2. Make a large heading.
Write the name of the month in large white letters. Add the year underneath in smaller lettering and draw a thin horizontal line.
You do not need to fill the whole top row. Leave some open space on the right and left so there is room for small drawings.
3. Add a short decorative line of text.
Under the name of the month, write one small word or a short phrase connected to September. Use the same white or light yellow chalk and smaller letters.
The main thing is not to turn the top part into a separate poster. One extra line looks better than several pieces of text in different sizes.
4. Draw fruit and leaves near the heading.
In one corner, draw a couple of apples, a pear, or a small branch with leaves. Keep the drawing around 2–3 inches (5–7.5 cm). On the other side, add just a few leaves or short strokes.
Draw the outline in white chalk, then add a little color inside with green and yellow. You do not need to fill the drawings in completely.
The board gets a little less neat over time. A line gets erased here, a new note appears over an old one there. Neither Lindy nor I usually rush to fix those little things. On a calendar that gets used every day, that looks much more natural than a perfectly clean surface.
7. Simple fall calendar design

In this version, we keep a simple calendar grid and add just a few fall details. The name of the month, thin lines, dates, and a couple of small leaves around the edges. This calendar is quick to draw and does not need a dozen chalk colors. You only need two colors — white and orange.
In September, our garden plans change regularly — sometimes work gets moved because of rain, sometimes a trip into town suddenly comes up. So we keep the decorative part small and leave the rest of the board for notes.
What you’ll need for a simple fall calendar
- a black chalkboard about 18 × 24 inches (46 × 61 cm);
- a set of colored chalk;
- a ruler;
- a soft damp cloth.
Two colors are enough here. Use white for the grid and dates, and keep orange for a few leaves and small marks.
How to make a simple fall calendar
1. Mark out the calendar grid.
Leave about 4 inches (10 cm) at the top for the name of the month. Below that, divide the board into seven columns for the days of the week and add the number of horizontal rows you need. Write the date small in the upper corner of each box so there is still room for plans.
2. Write the name of the month.
Place the name in the center and write it in large white chalk. Draw one thin orange line underneath. Keep the rest of the lettering white so the calendar stays easy to read even after it fills with notes.
3. Draw a few fall leaves.
In the upper left corner, draw two small orange leaves about 1½–2 inches (4–5 cm) long. Add one more leaf near the opposite edge of the heading. Draw thin white veins inside them.
You do not need more drawings. The leaves already connect the design with fall, while the grid stays free of decoration.
4. Use orange for important dates.
Mark an important day with a small orange dot or a short line next to the number. Keep the note itself white. That makes the mark easy to notice without the color competing with the text.
Lindy is always the one who fills in our calendars — she really does love to draw! So by the middle of the month, the board already has plenty of notes. I add my garden and household tasks later, and it is good that the drawings stay only near the heading — they do not get in the way when I need to quickly find the right date.
8. Apple crate calendar art
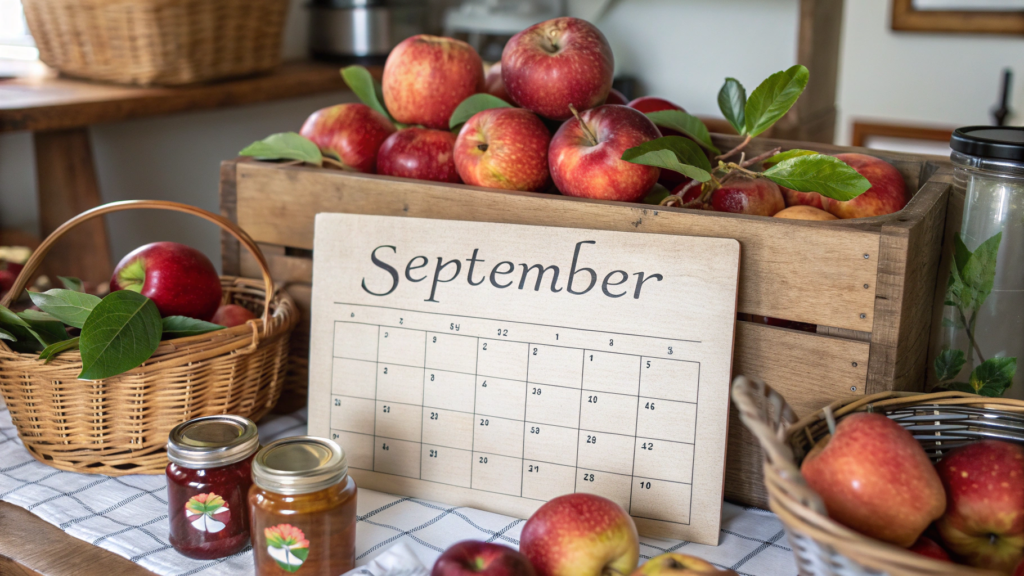
In this version, draw a wooden crate with apples above the calendar grid, and place the name of the month next to it. Draw a few apples above the top edge of the crate, and add a couple of leaves nearby.
In September, apples show up everywhere around our place — in baskets, on the kitchen table, next to jars for preserving. Lindy regularly reminds me not to pile too much fruit into one container, because the ones at the bottom start going bad fast. So a drawing of a wooden crate on a September calendar feels perfectly fitting here.
What you’ll need for a calendar with an apple crate
For the drawing, you will need white, light yellow, red, and green colors.
- a black chalkboard about 18 × 24 inches (46 × 61 cm);
- a set of colored chalk, for example, Crayola Chalk, Assorted Colors;
- a ruler;
- a soft damp cloth.
How to make a calendar with an apple crate
1. Mark out the grid and leave space for the drawing.
Leave about 6 inches (15 cm) at the top. That will be enough for the month name and the crate with apples. Below that, draw seven columns for the days of the week and the number of horizontal rows you need. Write the dates small in the upper corner of each box.
2. Draw the wooden crate above the calendar.
First, draw a rectangle in white chalk about 7–8 inches (18–20 cm) wide and about 2½–3 inches (6–7.5 cm) high. Inside it, draw two or three horizontal lines to show the wooden slats.
Add a few short strokes along the slats with light yellow chalk. You do not need to fill in the whole crate — the outline, lines, and a few colored strokes are enough.
3. Draw the apples.
Above the top edge of the crate, draw four or five red apples. Show some of the fruit fully, and show some only halfway, as if they are sitting inside.
The apples should not all look the same. Make one a little larger, turn another one to the side, and partly cover a third with a neighboring apple. Add short stems and a few green leaves. Be creative!
4. Write the name of the month next to the drawing.
Place the name of the month to the right or left of the crate in large white letters. If there is not enough space, write it above the drawing. The main thing is that the lettering should not run into the apples and should stay easy to read from a distance.
Keep red and green only for the fruit and leaves. Draw the grid, dates, and main notes in white so the drawing at the top does not blend into the working part of the calendar.
In fall, crates like these are constantly in use around our homestead. First they hold apples, then pears, sometimes onions or whatever has just come in from the garden. That is probably why a drawing of a crate with apples on a September calendar feels less like decoration for the sake of decoration and more like a familiar part of our everyday life.
9. Layered leaf calendar grid
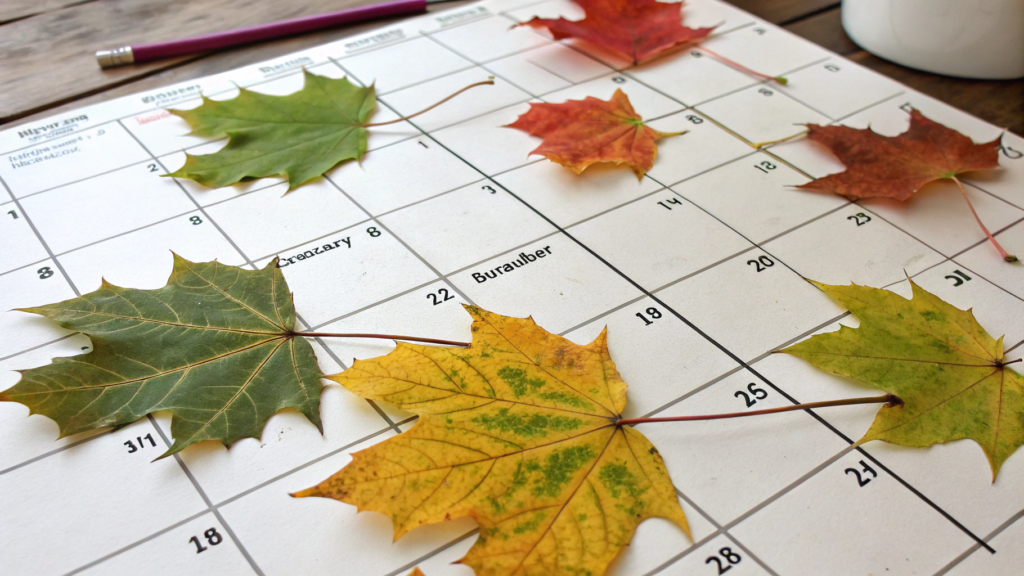
Here, a few leaves extend onto the outer lines of the calendar grid, while the rest are drawn next to it, not inside the boxes, so the dates and notes stay easy to see. This makes the drawing look more dimensional and connected to the grid itself.
What you’ll need for a calendar with leaves around the grid
For the drawing, you will need white, orange, yellow, and light green colors.
- a black chalkboard about 18 × 24 inches (46 × 61 cm);
- a set of colored chalk;
- a ruler;
- a soft damp cloth.
Use white for the grid and dates. The other colors are only for the leaves.
How to make a calendar with layered leaves
1. First, mark out the calendar grid.
Leave about 4 inches (10 cm) at the top for the name of the month. Below that, draw seven columns for the days of the week and the number of horizontal rows you need. Leave about 1½–2 inches (4–5 cm) of free space on each side of the board for the drawing.
Place the date number small in the upper corner of each box so the rest of the space stays open for notes.
2. Draw the first leaves along the outer edges of the grid.
Start in the upper left corner. Draw one large leaf next to the grid so that its edge slightly overlaps the outer grid line. Add a second leaf lower down, completely outside the grid.
Repeat the same thing on the other side, but do not make the drawing symmetrical.
3. Add a second layer of leaves.
Draw a few smaller leaves between the larger ones. Leave some leaves with only a colored outline, and add a little color to a few others with broad strokes. Use yellow, orange, and light green.
To show which leaf is on top, draw its outline completely and stop the line of the lower leaf where the two overlap.
4. Add veins and a few small strokes.
Draw one central vein and two or three side veins on each leaf with white chalk. Add a few short colored strokes closer to the edge on some leaves. You do not need to fill them in completely.
Keep the name of the month white and place it in the center above the grid. The leaves already add enough color, so you do not need extra drawings near the heading.
One day Lindy brought home a few leaves and put them on the kitchen table. They were lying mixed together, with some overlapping the others. I remembered how that looked, and I use the same idea on the calendar — drawing the leaves at different angles and sometimes layering one over another.
10. Minimal white chalk calendar
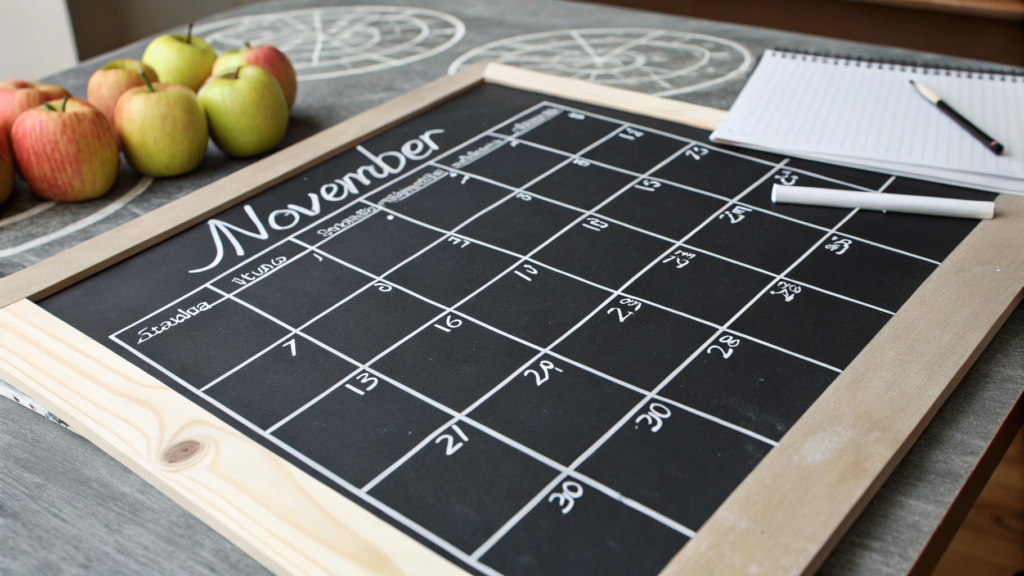
And finally, use only white chalk. No colored leaves, apples, or extra drawings. The whole board is built around a clean grid, a large month name, and a few thin lines.
Honestly, I like this version most for its practicality. When the board hangs in the kitchen or next to a workspace, it quickly fills with notes even without decoration. White chalk is easy to read on a black background, and the calendar does not look overloaded after just a week.
What you’ll need for a minimalist calendar
- a black chalkboard about 18 × 24 inches (46 × 61 cm);
- white chalk;
- a ruler;
- a soft damp cloth.
How to make a minimalist calendar
1. Mark out the calendar grid.
Leave about 4 inches (10 cm) at the top for the name of the month. Below that, divide the board into seven columns for the days of the week and add the number of horizontal rows you need.
Keep the lines thin. Place the date number small in the upper corner of each box and leave the rest of the space for notes.
2. Write the name of the month.
Place the name in the center of the upper part of the board and write it in large white letters. Add the year underneath in smaller lettering.
Do not make the letters more complicated with shadows or extra outlines. Keep the heading simple and easy to read.
3. Make the days of the week stand out.
Write the names of the days of the week slightly larger than the dates or underline them with a short white line. That is enough to separate the top row of the grid from the rest of the boxes.
4. Mark important dates with the same white chalk.
To highlight an event, draw a small circle around the number or add a short line next to it. You do not need another color for this.
I usually start the month with a couple of short notes, and a few days later there are already shopping lists, meetings, household tasks, and garden plans next to the dates. Then something gets moved, old notes get erased, and new ones are added. That is why I like such a simple calendar: it is easy to change throughout the month, and white chalk is more than enough for that.
Fall life on a chalkboard
By the end of the month, the calendar usually looks completely different from how it did on the first day. One note has been erased, another has appeared, one date has a circle next to it, and another already has two marks. And I love seeing that whole trace of our everyday life on the board.
If you make one of these versions, tell me in the comments which one you chose and what you added yourself. I am always interested to see what drawings and colors show up on your September calendars.