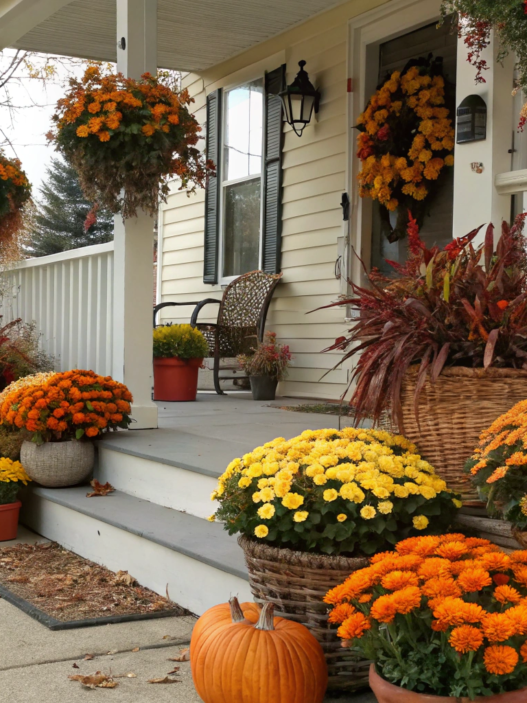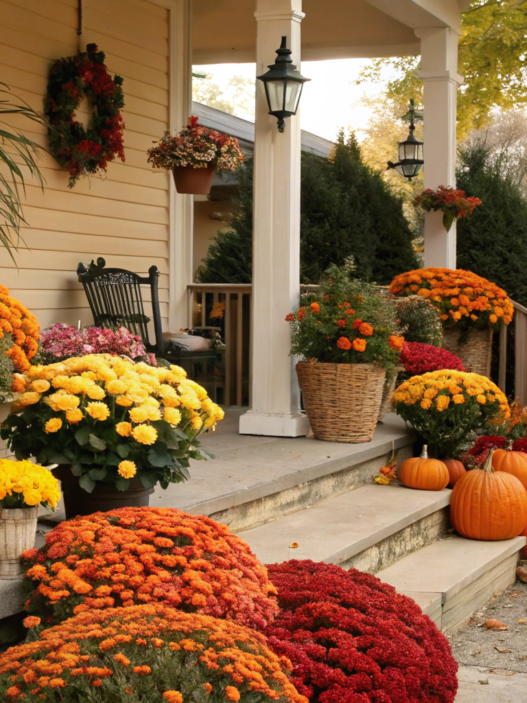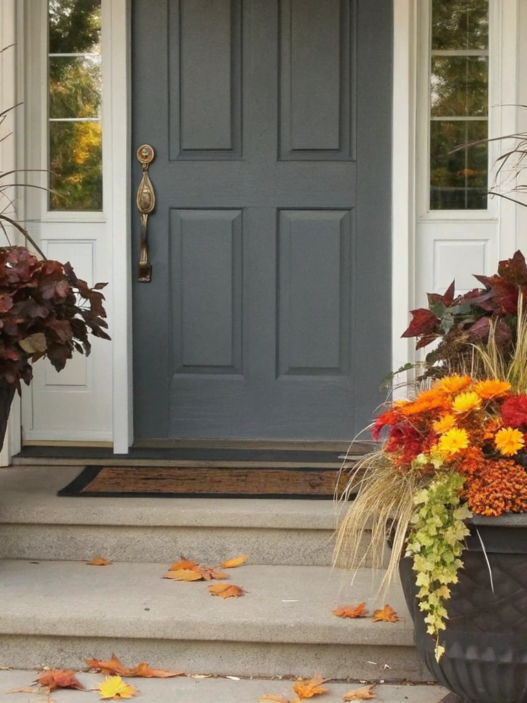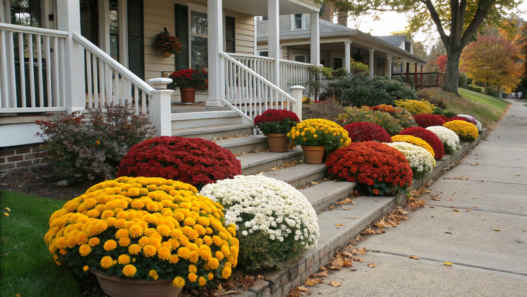

In fall, the space around the front porch changes really quickly. Just a short while ago, summer plants were blooming there, and a couple of weeks later, part of the flower bed already looks a little empty. That’s where mums come in. They quickly add dense color, fill empty spaces well, and don’t require you to completely redo everything around them.
Below, I’ve tried to put together 10 mums flower bed ideas for an unforgettable front porch that work for different areas around the house. The main goal isn’t to pack the flower bed with plants, but to make sure the mums fit nicely with what’s already growing nearby.
1. Tiered mum bed along a brick walkway

Lindy and I almost never leave walkways as just walkways. I’m constantly looking at the space along the edges and thinking about what else I can plant there without taking away room to walk. I guess it’s almost a professional habit after so many years of gardening.
And mums along a brick walkway are perfect for this. In fall, they add a lot of color to a relatively small area, where I plant them not in one straight row but in two or three tiers. This makes the planting look fuller while still giving each plant enough room of its own.
What you’ll need
For an area about 8–10 feet (2.4–3 m) long, I would prepare:
- 7–9 mums of different heights. Short ones for the front edge, medium ones for the center, and a few taller plants for the back.
- Garden soil if the soil along the walkway is compacted or hasn’t been improved in a while.
- Compost for the top layer of soil.
- Mulch made from shredded bark or wood chips.
- A hand garden trowel.
- Gardening gloves.
- A watering can or garden hose.
Before planting, I mix a little compost into the top layer of soil. This makes sense in spots where the soil near the walkway is compacted and dries out quickly. I’ve noticed that these small additions gradually make the soil noticeably looser and easier to work with when planting something new.
How to make a tiered mum bed
- Start with the tallest plants.
Plant them farther away from the walkway in small groups of two or three. I try not to line the flowers up with a ruler. Even along a straight brick walkway, shifting the plants slightly makes the planting look much more natural.
- Add the middle tier.
Place medium-sized mums in front of the taller ones. Usually, you’ll want to leave about 18–24 inches (45–60 cm) between the plants, but always check the mature size of the specific variety.
- Plant the shorter mums along the edge.
I leave about 6–10 inches (15–25 cm) between the plants and the brick. Within a few weeks, the mums grow noticeably wider, so planting them too close can quickly turn into a wall of flowers spilling right onto the walkway. Lindy has seen my “oh, there was definitely enough room here” moments more than once!
- Repeat the same colors.
For example, you can plant yellow mums at the beginning, middle, and end of the flower bed, then fill the spaces between them with burgundy or orange ones. I like repeating colors because it also means I can use fewer varieties. In a garden, you don’t always need more types of plants to make a planting look more interesting.
- Water the plants well.
After planting, thoroughly water the entire root zone. During the first week, I check the soil with my finger more often, especially if fall has been dry. Mums at the nursery can look perfectly happy and then show you the exact opposite after just a couple of hot days following transplanting.
- Cover the soil with mulch.
Spread a layer about 2–3 inches (5–7.5 cm) thick around the plants, leaving a little open space around the stems. Mulch reduces water evaporation, protects the soil surface, and gradually adds organic matter as it breaks down.
I almost always add mulch right after planting. Soil along a brick walkway can dry out pretty quickly, so a 2–3 inch (5–7.5 cm) layer helps hold moisture longer and cuts down on weeds.
Even just a few feet along an old brick walkway can become a full fall planting. Once the plants grow wider and start overlapping a little, the flower bed looks completely different from the day you planted it. You can still see the brick, but now there’s a thick line of flowers running along its edge. And walking down a path like that is really nice.
2. Yellow mums with purple asters border

Yellow mums and purple asters create a really beautiful fall contrast. Bright yellow flowers immediately stand out next to rich purple ones, so even a small flower bed near the porch looks expressive without a lot of different plants.
Mums have denser, rounded plants and larger blooms, while asters have lots of smaller flowers on more branched stems. That’s why I think it makes sense to use yellow mums as the main plants and place purple asters closer to the front edge in small groups.
What you’ll need
For a flower bed about 8–10 feet (2.4–3 m) long, you’ll need:
- 5–7 medium-sized yellow mums.
- 4–6 purple asters.
- Compost for preparing the soil.
- Mulch made from shredded bark or wood chips.
- A garden trowel.
- Gardening gloves.
- A watering can or garden hose.
- A hand cultivator for loosening the top layer of soil before planting.
The number of plants can change depending on the width of the flower bed and the size of the varieties you choose. Just don’t try to fill every free inch on the first day. Mums get fuller pretty quickly, and asters also need some room to grow.
How to plant yellow mums and purple asters
- First, arrange the plants while they’re still in their pots.
I almost always do this before reaching for the trowel. Put the mums where you’re planning to plant them, take a few steps back, and look at the flower bed from the porch or walkway. Moving a pot takes a second, while transplanting a bush you’ve already planted is definitely not fun.
- Spread the yellow mums along the whole flower bed.
Instead of one long row, make a few smaller groups. Leave enough space between the plants based on the mature size of the variety. For many garden mums, that’s around 18–24 inches (45–60 cm).
- Plant the asters closer to the front edge.
Spread them between the groups of mums instead of making one solid purple line. This way, both colors repeat throughout the flower bed without turning into long, straight strips.
- Give the plants a little breathing room.
Fall mums are often sold as huge balls of flowers at the store, and it’s very easy to place them too close together. Look at the mature width of the plant, not just the size of the pot today.
- Water the whole planting after transplanting.
The water should thoroughly soak the soil around the roots. For the first few days, I keep a closer eye on the soil. Large blooming mums can drink quite a lot of water, especially during a dry, warm fall.
- Add mulch between the plants.
A layer about 2–3 inches (5–7.5 cm) thick is enough. Leave a little open space around the stems and cover the rest of the soil surface with mulch.
When you get closer to the flower bed, you can really see the small aster flowers. From a few steps away, the large yellow mums stand out first, with patches of purple between them.
And when many summer flowers are already finishing up, you can still see bees and other insects around them. That’s why I don’t rush to cut the plants back after the first cool days. I leave them in the flower bed a little longer.
3. Front porch mum bed with ornamental grasses

Near the porch, mums pair really well with ornamental grasses. By fall, the flowers are full and bright, while the grasses have already gained height and rise beautifully above them. The result is a slightly loose, lively planting near the house instead of one straight row of identical plants.
I like combinations where the plants don’t compete with each other. Mums stay the main color accent, while grasses create the background and fill the upper part of the planting. On our properties, this has saved me more than once from buying five more different plants just because they looked good standing next to each other at the nursery.
For a flower bed near the porch, two or three large clumps of grass and several mums around them are enough.
What you’ll need
For an area about 8–10 feet (2.4–3 m) long, prepare:
- 5–7 mums in one or two shades.
- 2–3 ornamental grass plants about 3–5 feet (90–150 cm) tall.
- Compost for the top layer of soil.
- Bark or wood chip mulch.
- A garden trowel.
- Gardening gloves.
- A watering can or garden hose.
- Pruning shears for removing dry leaves and old stems, such as Fiskars Bypass Pruning Shears.
Don’t use too many large grasses in a small flower bed. Young plants at the garden center look pretty compact, but after a couple of years they can spread quite a bit. I know this for sure. In spring, there was plenty of open space between the plants, and later the grasses spread so much that the path between them was almost hidden.
How to plant mums with ornamental grasses
- Start with the ornamental grasses.
Plant them closer to the wall of the house or toward the back of the flower bed. They create the tallest layer, so it’s easier to build the rest of the planting around them.
- Leave enough room around mature plants.
Check the mature width of the variety on the label. Many ornamental grasses reach 2–4 feet (60–120 cm) wide, so don’t let a small plant from the garden center fool you.
- Place the mums in front of the grasses.
I usually group two or three plants of the same color, then repeat that shade in another part of the flower bed. This spreads the color throughout the planting instead of concentrating it in one big patch.
- Don’t completely cover the base of the grasses.
Leave a little open space between the plants. The mums will spread, and the grass leaves will start reaching outward. By mid-fall, those gaps will be much smaller.
- Water the plants right after planting.
Soak the soil well around the roots. Large ornamental grasses can have a pretty dense root ball, so a quick splash over the top won’t be enough.
- Add a layer of mulch about 2–3 inches (5–7.5 cm) thick.
Spread it between the plants, but don’t pile it around the base of the clumps. It helps the soil hold moisture longer and reduces weeds near the porch.
I don’t rush to cut back ornamental grasses in fall. The dry plumes stay beautiful long after the mums finish blooming, and in winter they look even better when frost settles on them. Lindy and I often leave plants like these standing until the end of winter, then I do the main cutback in spring.
When the mums finish blooming, ornamental grasses become the main accent. Their tall foliage and dry plumes keep the flower bed looking full and prevent it from feeling empty even as winter gets closer.
4. Curved mum bed around a mailbox

A mailbox rarely looks like part of the garden. But a small curved mum bed can quickly change that spot, especially in fall when the flowers have already filled out nicely.
Small beds like this are easy to experiment with. A few mums, a clean edge, and a couple of lower plants are enough if you want to create a second layer. I’ve noticed that in a small area, it’s better not to mix too many colors and shapes. Repeating a few plants usually looks much better.
What you’ll need
For a flower bed about 4–6 feet (1.2–1.8 m) wide, prepare:
- 4–6 mums in one or two shades.
- Compost for the top layer of soil.
- Bark or wood chip mulch.
- Garden soil if the soil near the road is compacted or poor.
- A garden trowel.
- Gardening gloves.
- A watering can or garden hose.
- Flexible garden edging if you want to clearly define the curved shape of the flower bed.
Before planting, I first mark out the shape of the bed itself. A garden hose or a long piece of rope is enough for this. It makes it much easier to see the full shape and figure out whether it ended up too narrow or, on the other hand, too wide near the road.
How to design a flower bed around a mailbox
- Start by shaping the curve.
Lay the hose on the ground and create a soft curve around the mailbox. You don’t need a complicated line here. One wide curve looks cleaner and is easier to maintain later.
- Leave space around the post itself.
Don’t plant mums right up against the base. Leave about 12–18 inches (30–45 cm) of open space so it’s easy to water, weed, and paint or repair the mailbox if needed.
- Plant the largest mums closer to the center.
Medium and larger mums look good on both sides of the post, while shorter plants can go closer to the outer edge of the flower bed.
- Repeat one color several times.
For example, you can place burgundy mums on both sides and add yellow or cream ones between them. This keeps the flower bed looking balanced even with a small number of plants.
- Check the view from the road.
This matters around a mailbox. The flowers shouldn’t block the house number, cover the mailbox itself, or get in the way when opening the door. I always step farther back and look at the planting from the spot where it will be seen most often.
- Add a layer of mulch about 2–3 inches (5–7.5 cm) thick.
It helps the soil hold moisture longer and makes the curve of the flower bed stand out. Leave a little open space around the base of the plants.
This kind of flower bed really brightens up the area near the road, even if there’s only lawn and a driveway around it. A few full mum plants add a strong patch of color, and the curved edge looks much better than a simple straight row.
It also looks good when the flower bed follows the line of the driveway or lawn. Then the mailbox stops looking like a random post in the middle of the yard and starts to feel like part of the planting.
5. Red mums and white pumpkin garden border

Lindy and I have been growing pumpkins for a long time, and in fall we use part of the harvest for decorating around the house. We place a few near the porch, set others between the flowers, and later bring the edible varieties into the kitchen. White pumpkins look beautiful next to red mums, and they stand out nicely against the greenery, making the rich flower color even more noticeable.
You don’t need much decor for a border like this. A few mums and pumpkins in different sizes already add plenty of color and volume.
What you’ll need
For a border about 8–10 feet (2.4–3 m) long, prepare:
- 5–7 red mums.
- 4–6 white pumpkins in different sizes.
- Compost for preparing the soil.
- Bark or wood chip mulch.
- A garden trowel.
- Gardening gloves.
- A watering can or garden hose.
- Pruning shears for removing damaged stems and faded blooms.
For decorating, it’s better to choose pumpkins with intact skin and a firm, dry stem. Damaged pumpkins start to rot much faster when they sit near damp soil.
How to create a border with mums and white pumpkins
- Plant the mums first.
Arrange the plants in small groups along the edge of the flower bed. Leave about 18–24 inches (45–60 cm) between them, or follow the spacing recommended for the specific variety.
- Don’t make a perfectly straight row.
Move a few plants slightly farther back and place others closer to the edge. This gives the border a more natural line and keeps the individual plants from blending into one solid strip.
- Arrange the pumpkins after planting the flowers.
Place larger pumpkins between groups of mums and smaller ones closer to the front edge. I usually set them on the ground first and move them around a few times. That’s much easier with pumpkins than with plants that are already in the ground.
- Leave some of the mulch visible.
Don’t fill every gap with pumpkins. Red mums are already pretty full on their own, so a little open space helps both the flowers and the white pumpkins stand out instead of turning the whole border into one solid mass.
- Don’t place pumpkins on constantly damp soil.
You can add some dry mulch underneath them or place a small flat piece of wood under each pumpkin. I pay close attention to the underside after rain. That’s where the first soft spots are easy to miss.
- Water the mums at the base.
Try not to soak the pumpkins every time you water the flowers. The less time the skin stays wet, the longer the pumpkins will last in the flower bed.
Lindy and I move the pumpkins around several times during fall. First they sit among the flowers, then some move closer to the steps or front door, while the edible varieties later go into the kitchen.
So this kind of fall decor doesn’t need to be packed away and stored afterward.
6. Mum bed with evergreen foundation shrubs

Around our house, we always have plants that stay green into fall. Evergreen shrubs give mums a good background and keep the flower bed from looking empty.
I used to completely redo the flower beds near the porch every fall. It took a lot of time, and I didn’t always love the result. Now the permanent shrubs stay in place, and I simply add mums in front of them.
What you’ll need
For a flower bed about 8–10 feet (2.4–3 m) long, prepare:
- 4–6 mums in one or two shades.
- 2–3 evergreen shrubs if you don’t already have them near the house.
- Compost for the top layer of soil.
- Bark or wood chip mulch.
- A garden trowel.
- Gardening gloves.
- A watering can or garden hose.
- Hand pruners for removing dry or damaged parts of the plants.
If the evergreen shrubs are already mature, first check how much space their lower branches take up. Mums need light, so don’t try to plant them directly under dense foliage.
How to design a flower bed with mums and evergreen shrubs
- Keep the shrubs in the background.
They add height and a green backdrop. Place the mums in front so the flowers stay clearly visible from the walkway or porch.
- Don’t crowd the mums against the shrubs.
Leave enough space between the plants for airflow and access to the soil. For most mums, around 18–24 inches (45–60 cm) between plants is a good starting point, but the mature size of the specific variety matters more than a general number.
- Use one or two colors.
Even a small number of mums looks bright against deep green foliage. I especially like cream and dark burgundy varieties. You rarely need three or four extra shades here.
- Spread the color across the whole flower bed.
Don’t place all the mums in one corner. Repeat one shade several times in front of the evergreen shrubs, leaving a little open space between the groups.
- Add compost and water the planting well.
I mix a small amount of compost into the top layer of soil before planting, especially near the house where the soil often gets more compact over time. After planting, soak the root zone thoroughly.
- Cover the soil with mulch.
A layer about 2–3 inches (5–7.5 cm) thick helps the soil hold moisture longer. Don’t pile mulch directly against the mum stems or the base of the shrubs.
After the mums finish blooming, the flower bed still doesn’t look abandoned. Evergreen shrubs keep the planting structured, fill the empty space near the wall, and add greenery when most of the flowers are already gone. It’s really valuable not having to start with bare soil and rethink the whole arrangement every time.
In spring, you can plant different flowers in front of the same shrubs, add taller plants in summer, and bring mums back in fall. The base stays the same, but the flower bed looks different throughout the year. And honestly, that’s very practical.
7. Cottage garden mum bed with sedum

In a cottage-style flower bed, mums look really good next to sedum, especially when the plants aren’t lined up too neatly and start overlapping a little over time.
Sedum adds height and wide, dense flower heads, while mums fill the lower space and bring in plenty of color.
I once planted sedum too close to the walkway, and after a couple of years it had spread quite a bit. I had to move it farther back into the flower bed. Then I left room in front for shorter flowers, and mums fit there perfectly. In fall, they fill the front edge of the bed while the sedum stays taller behind them.
What you’ll need
For a flower bed about 8–10 feet (2.4–3 m) long, prepare:
- 4–6 mums in one or two shades.
- 2–4 medium-sized sedum plants.
- Compost for the top layer of soil.
- Wood chip or shredded bark mulch.
- A garden trowel.
- Gardening gloves.
- A watering can or garden hose.
- A garden kneeling pad, such as Gorilla Grip Extra Thick Water Resistant Garden Kneeling Pad, if you’ll be working along a low flower bed for a while.
Sedum handles drier soil pretty well, so it’s especially important not to make the spot too wet. If water sits near the porch for a long time after rain, deal with the drainage first.
How to plant mums with sedum
- Start with the sedum.
Place the larger plants closer to the back or middle of the flower bed. Depending on the variety, a mature plant can reach around 18–24 inches (45–60 cm) tall and almost as wide.
- Leave enough space between the plants.
Sedum spreads gradually, but a mature plant takes up much more room than a young one in a small pot. Don’t plant several of them right next to each other in the first year.
- Plant the mums closer to the front edge.
Arrange them in small groups between the sedums. Cream, burgundy, and warm yellow varieties look good next to the pinkish and dark red sedum flower heads.
- Don’t line up all the plants in one row.
Plant one mum a little closer to the walkway and place the next one farther back. Offset the sedums slightly too. This keeps the flower bed looking more natural instead of turning it into two straight rows.
- Water the mums well after planting.
Sedum handles short dry periods better, while newly transplanted mums need more evenly moist soil during the first few weeks. Check the soil around the base of the plants and water when the top layer starts to dry out.
- Spread a layer of mulch about 2–3 inches (5–7.5 cm) thick.
Don’t cover the stems, and leave a little space around the base of the sedum. This is especially important for plants that don’t like constantly wet soil around the crown.
By the way, sedum is interesting even after it finishes blooming. Its dry flower heads hold their shape for a long time, so I don’t cut them back right away in fall. Birds sometimes perch right on the stems, and after cold nights the tops get covered with a thin layer of frost. Sedum stays noticeable in the flower bed like this for quite a while.
In spring, the old sedum stems can be cut back at the base, and new shoots start coming up pretty quickly. Mums aren’t needed there yet, so the front edge of the flower bed stays open for spring flowers for a while. Then closer to fall, a dense row of mums comes back again.
8. Window box mums and trailing ivy

In fall, a window box with mums and trailing ivy looks really beautiful. The mums bring dense color to the center, while the ivy spills over the edge and softens the shape of the box itself. It looks especially nice under windows near the porch, where you can see the planting both from outside and from inside the house.
What you’ll need
For a window box about 30–36 inches (75–90 cm) long, prepare:
- 2–3 compact mums.
- 2 small ivy plants.
- Potting soil for container plants.
- A little compost.
- Fine drainage material if the holes in the box are too large and the soil washes out through them.
- Gardening gloves.
- A small watering can, such as Bloem Easy Pour Watering Can, so you can water the box without a strong stream.
Check the bottom before planting. A window box should always have drainage holes, otherwise after a few rainy days the roots can end up sitting in constantly wet soil.
How to plant mums and ivy in a window box
- Fill the box with soil.
Leave about 1–2 inches (2.5–5 cm) below the top edge so water doesn’t overflow together with the soil when you water.
- Plant the mums in the center.
A larger box can hold three small plants, while two are enough for a slightly smaller one. Don’t crowd the plants together. Even compact mums will gain quite a bit of volume.
- Place the ivy near the edges.
Plant one on one side and the second on the other. Direct the shoots outward so they gradually trail down the sides of the box.
- Don’t plant them deeper than they were growing in their pots.
The top of the root ball should stay roughly level with the soil surface. After planting, gently press the soil down with your hands.
- Water the whole box well.
Soil in containers dries out faster than soil in a regular flower bed, especially under a window that gets sun and wind. I check the soil with my finger and water when the top layer starts to dry out.
- Redirect the ivy shoots from time to time.
If one starts growing inward and covering the mums, just move it over the edge or trim it back a little. After a few weeks, the greenery will start spreading naturally along the sides of the box.
This planting doesn’t lose its look as soon as the mums finish blooming. The flowers gradually fade, while the ivy stays green and keeps trailing from the container. So I don’t take the whole box apart right away. First I remove the faded mums and see how the ivy is doing.
And keep in mind that under a roof or wide overhang, a window box may get almost no rainwater, even when the rest of the garden is wet. I’ve been caught out by this a couple of times. After a good rain, the flower beds were damp, while the soil under the window was almost dry. That’s why I always check these boxes separately and water them by hand when needed.
9. Mums flower bed with black mulch contrast

Black mulch makes mum colors stand out more, especially with yellow, cream, orange, or light pink varieties. Against the dark background, the shape of each plant is easier to see, and even a small flower bed looks richer in color.
I was worried that black mulch near the house might look too harsh. But in a small flower bed, the result was completely different. The flowers actually came forward, and the space between the plants looked more defined, even after the mums had filled out quite a bit.
What you’ll need
For a flower bed about 8–10 feet (2.4–3 m) long, prepare:
- 5–7 mums in light or bright shades.
- Compost for the top layer of soil.
- Black wood mulch.
- Garden soil if the soil needs a little refreshing.
- A garden trowel.
- Gardening gloves.
- A watering can or garden hose.
- A mulch rake to spread the material evenly between the plants.
Before buying mulch, I always look at more than just the color. For a flower bed, wood chips or shredded bark are a better choice than rubber mulch. Organic material breaks down over time and gradually becomes part of the top layer of soil.
How to create a flower bed with black mulch
- Plant the mums first.
Arrange the plants in small groups, leaving about 18–24 inches (45–60 cm) between them, or follow the spacing recommended for the variety you choose.
- Choose one main color.
Yellow or cream mums stand out well against black mulch. You can add a second shade in small groups, but you don’t need too many different colors here.
- Prepare the soil surface.
Remove weeds and larger plant debris, then lightly level the soil around the mums. This helps the mulch spread more evenly instead of forming small mounds.
- Add a layer of black mulch about 2–3 inches (5–7.5 cm) thick.
Spread it between the plants, leaving a few inches of open space around the stems. Don’t pile mulch directly against the base of the mums.
- Watch the depth near the edge of the flower bed.
If the layer is too thick, it can spill onto the walkway after rain or watering. Keep it a little thinner near the edge.
- Water the soil, not just the surface of the mulch.
After watering, I sometimes check with my hand to make sure the moisture actually reached the soil under the wood chips. The top can look wet even when the soil underneath has already started to dry out.
With black mulch, it’s much easier to notice when the flower bed needs a quick cleanup. Fallen leaves, dried flowers, and random weeds stand out right away against the dark surface. I usually walk along beds like this every few days and pick up anything that doesn’t belong there.
And keep in mind that dark mulch heats up more in direct sun, so I don’t make the layer too thick in open areas. In the shade or near a wall that only gets a little sun, you barely notice the difference.
10. Layered porch mums with cabbage and kale

Mums, ornamental cabbage, and kale look bright and full together, especially near the porch, where both the flowers and the large leaves are easy to see. Cabbage has large rosettes with cream, pink, or purple centers, kale has ruffled leaves, and bright mums fill the spaces between them. Because the leaves and blooms have such different shapes, each layer stays visible even in a dense planting.
Near the porch, this kind of planting works best in several layers. Taller plants go toward the back, larger mums fill the middle, and low cabbage rosettes sit closer to the steps or walkway.
What you’ll need
For an area about 8–10 feet (2.4–3 m) long, prepare:
- 4–6 medium-sized mums.
- 3–5 ornamental cabbage plants.
- 2–4 ornamental kale plants.
- Compost.
- Wood chip or shredded bark mulch.
- A garden trowel.
- Gardening gloves.
- A garden hose with a watering nozzle so you can gently water the plants at the base.
Cabbage and kale like cooler weather, so they often start looking even better in fall. After a few cool nights, the leaf color becomes much richer.
How to create a layered planting near the porch
- Start with the tallest plants.
Place the kale closer to the back of the flower bed or near the wall of the house. It adds height and stays visible behind the lower plants.
- Plant the mums in the middle row.
Don’t arrange them in one continuous strip. Make a few groups of two or three plants and leave room for the cabbage between them.
- Move the ornamental cabbage closer to the front edge.
Its wide rosettes are easy to see from above, so near the steps or walkway they won’t disappear behind the mums.
- Alternate shapes, not just colors.
Place a large cabbage rosette next to a rounded mum, then add taller kale. The difference in height and leaf shape keeps the planting from turning into one solid row of similar plants.
- Leave room for the plants to grow.
Leave about 18–24 inches (45–60 cm) between larger mums. Space the cabbage and kale according to the mature width of the plants.
- Water the soil well after planting.
Direct the water toward the base of the plants and check the soil moisture during the first few days after transplanting. Plants from garden-center containers can sometimes dry out much faster than you expect.
- Add mulch between the plants.
A layer about 2–3 inches (5–7.5 cm) thick is enough. Don’t pile it directly against the stems or around the base of the rosettes.
Once, I planted ornamental cabbage behind the mums, almost right up against them. A couple of weeks later, the plants had filled out so much that only the tops of the cabbage leaves were visible. Since then, I keep the prettiest rosettes closer to the front edge. The neighboring plants don’t cover them there, so you can actually see both the color and the shape of the leaves.
Mums usually start fading earlier, while ornamental cabbage and kale hold their shape and color much longer. After the first cold nights, their leaves often become even brighter, so they stay noticeable near the porch longer than the flowers.
Fall flower beds
Before buying mums, I would simply step outside to the porch and look at it from the walkway. You can usually see right away where some color is missing, where there’s too much empty space, and where another plant would just be unnecessary.
Sometimes one group of mums near the steps is enough to make the whole planting look balanced.
Then you can watch how the plants behave in that spot. Which ones spread more, where the height wasn’t quite enough, and which color turned out to be the right choice. I almost always change something after the first planting because the garden shows you the mistakes pretty quickly.
If you already grow mums near your porch, tell me in the comments what you pair them with and which plants make it through fall alongside them the best.