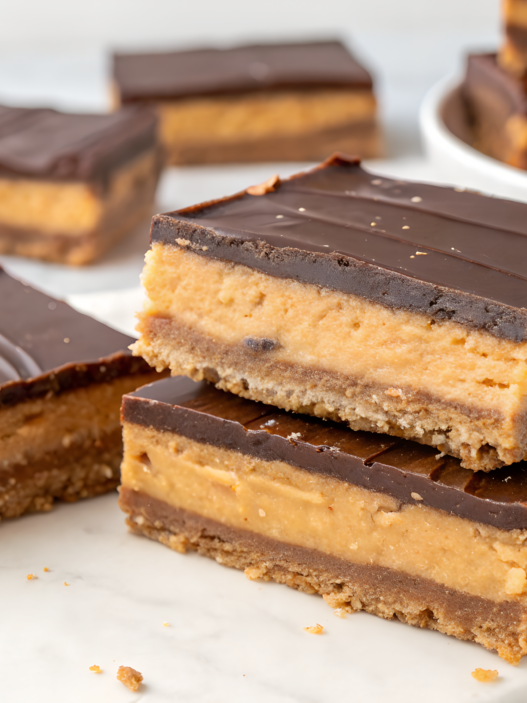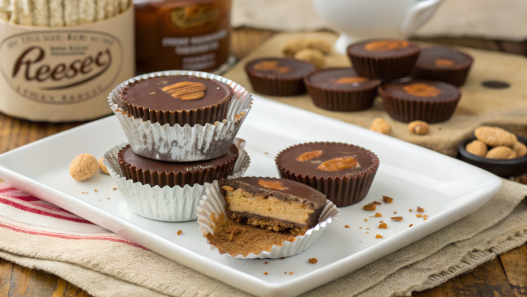
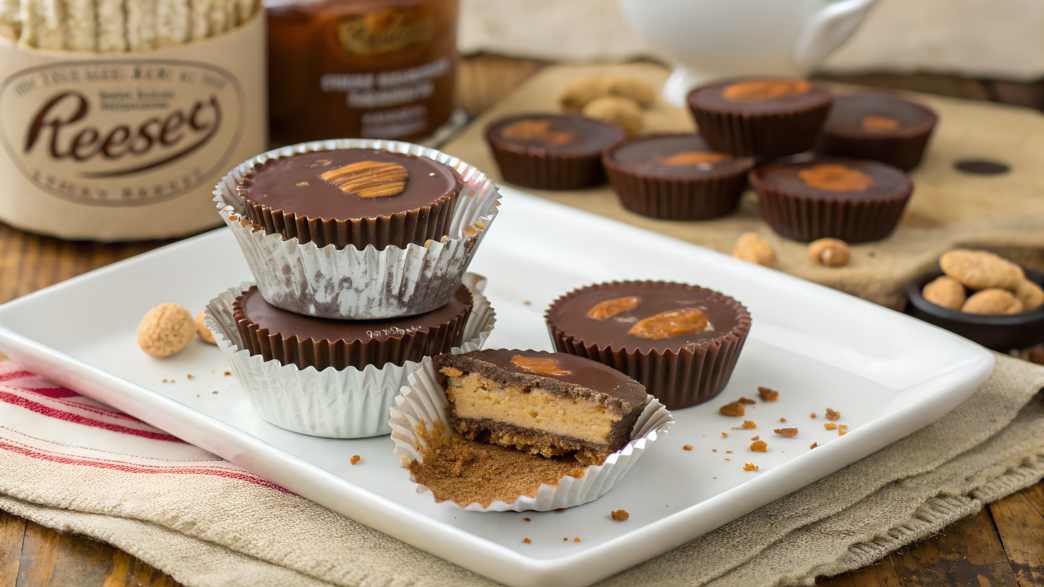
Homemade Reeses Cups turned out to be one of those things that are really easy to experiment with. The base is simple — chocolate and peanut butter filling, and from there you can change literally one detail and get a completely different candy.
In this collection, I put together 10 ways to make Homemade Reeses Cups. I’ll try to show you not only the proportions, but also the little details that change the filling texture, the chocolate snap, and how neatly the cups hold their shape.
And yes, you don’t need to turn on the oven today at all. On a hot day, that really matters.
1. 3 Ingredient No Bake Homemade Reeses Cups
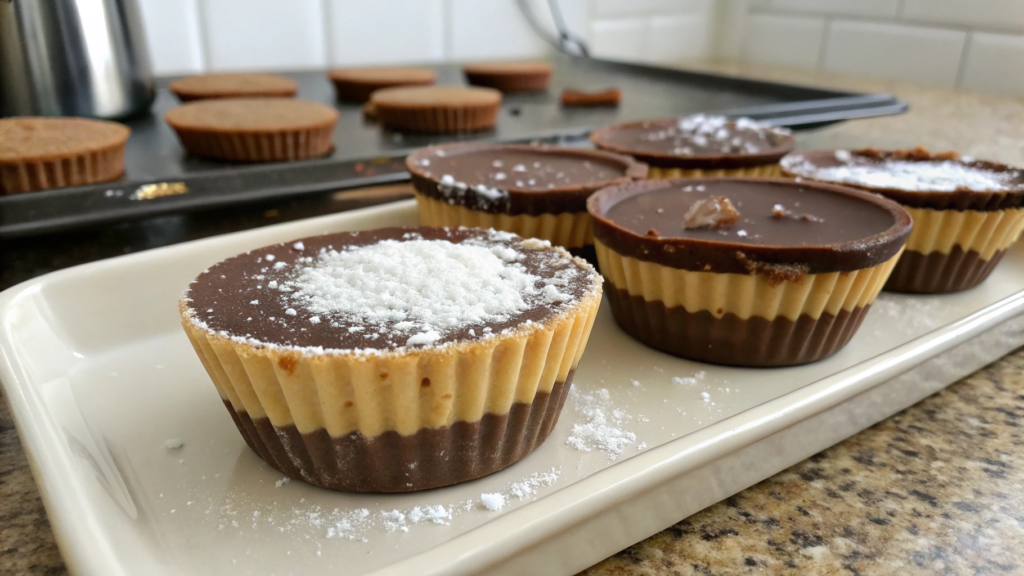
With 3 Ingredient Homemade Reeses Cups, the ingredient list is honestly easy to remember the first time. Chocolate, peanut butter, and powdered sugar — that’s all you need. Inside, you get a soft sweet-and-salty filling, while the outside stays covered with a thin layer of chocolate.
We almost always have peanut butter on hand, so we make this version pretty often. But I wouldn’t recommend pouring too much chocolate into the bottom of the mold. The candy ends up with a thick, hard base, while there’s very little peanut butter filling left in each bite.
Ingredients
For 10–12 small cups, you’ll need
- 8 ounces milk or semi-sweet chocolate (225 g);
- ½ cup smooth peanut butter (125 g);
- ¼ cup powdered sugar (30 g).
It’s better to use smooth peanut butter that holds well on a spoon. If you use very runny natural peanut butter with oil separated on top, the filling will turn out noticeably softer.
For the mold, I find a silicone mini muffin pan the most convenient. The chilled cups come out easily with your fingers without damaging the chocolate edges.
How to make
- Melt half of the chocolate. Microwave it for 15–20 seconds at a time, stirring well after each round. Once almost all the chocolate has melted, just keep stirring — the remaining pieces usually melt from the residual heat.
- Make the bottom chocolate layer. Add about 1–2 teaspoons of chocolate to each cavity and spread it over the bottom. Put the mold in the refrigerator for about 10 minutes so the chocolate can set.
- Make the peanut butter filling. Mix the peanut butter with the powdered sugar. The mixture should become thicker than regular peanut butter and be easy to scoop with a spoon. If it still looks too runny, add a little more powdered sugar.
- Add the filling. Shape it into small flat pieces and place them on top of the set chocolate. Leave a little space around the edges so the top layer of chocolate can cover the filling on all sides.
- Add the top layer. Melt the remaining chocolate the same way and spread it over the peanut butter filling. Gently tap the mold on the counter a few times to make the surface more even.
- Chill the cups. Put the mold in the refrigerator for about 30 minutes. Once the chocolate is completely firm, carefully remove the cups from the silicone cavities.
And by the way, it’s better to store the cups in the refrigerator, not the freezer. This keeps the peanut butter layer soft while the chocolate keeps a nice snap. In a closed container, these cups keep well for about a week.
When there are only 3 ingredients, the quality of each one is easy to notice. Choose chocolate that you actually enjoy eating on its own, use thick and smooth peanut butter, and don’t replace powdered sugar with regular sugar. That’s why I’d start with this version if you want the texture to stay as close as possible to classic peanut butter cups.
2. Keto Homemade Reeses Cups With Coconut Oil Snap
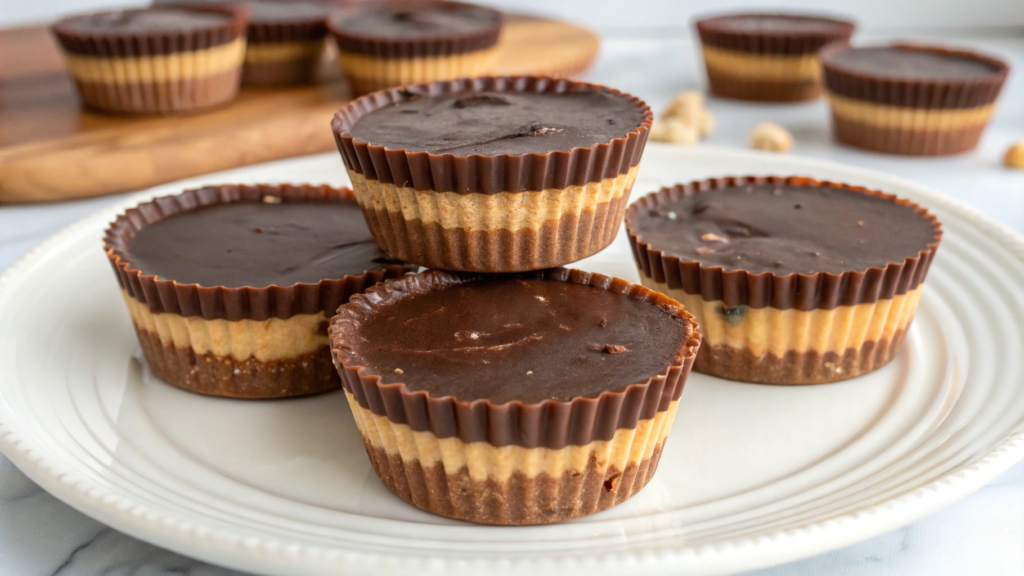
In this version of Keto Homemade Reeses Cups, a small amount of coconut oil changes the chocolate layer itself. After chilling, it becomes thin, firm, and breaks easily when you bite into it.
From experience, I know that refined coconut oil works better here. It barely affects the flavor of the chocolate and peanut butter, unlike unrefined coconut oil, which has a noticeable coconut aroma.
Ingredients
For 10–12 small cups, you’ll need
- 7 ounces dark chocolate with no added sugar (200 g);
- ½ cup smooth sugar-free peanut butter (125 g);
- 2 tablespoons refined coconut oil, for example, Refined Coconut Oil on Amazon;
- 2 tablespoons powdered low-carb sweetener;
- a small pinch of salt.
If your sweetener is granulated, it’s better to grind it until it’s almost powdery first. Large crystals don’t dissolve well in peanut butter and can still be noticeable in the filling.
How to make
- Prepare the chocolate mixture. Melt the chocolate with 1 tablespoon of coconut oil, heating it for 15–20 seconds at a time and stirring after each round. The mixture should become completely smooth.
- Make the first layer. Spread a little chocolate over the bottom of each silicone cavity. It’s better to keep this layer fairly thin. Put the mold in the refrigerator for about 10 minutes.
- Mix the filling. Combine the peanut butter, sweetener, the remaining tablespoon of coconut oil, and a small pinch of salt. If your peanut butter is already fairly salty, you can skip the extra salt completely.
- Add the peanut butter layer. Spoon small portions of the filling over the set chocolate and gently smooth them out. Leave a few millimeters of space around the edges.
- Cover with chocolate. Spread the remaining chocolate mixture over the top so it completely covers the peanut butter layer.
- Chill well. Leave the mold in the refrigerator for about 40 minutes. During that time, the coconut oil firms up again along with the chocolate, giving the chocolate layer that noticeable snap.
Keep in mind that coconut oil becomes firm when chilled but softens quickly in warmth, so it’s better not to leave these cups on the counter for too long. I take out only as many as we’re going to eat and leave the rest in the refrigerator.
The chocolate layer in Keto Homemade Reeses Cups with coconut oil turns thin and noticeably crisp after chilling, while the peanut butter filling stays soft inside. And if you’ve already made regular Homemade Reeses Cups, you’ll notice the difference right away. Just a little coconut oil, and the texture is already completely different.
3. Sugar Free Homemade Reeses Cups With Allulose
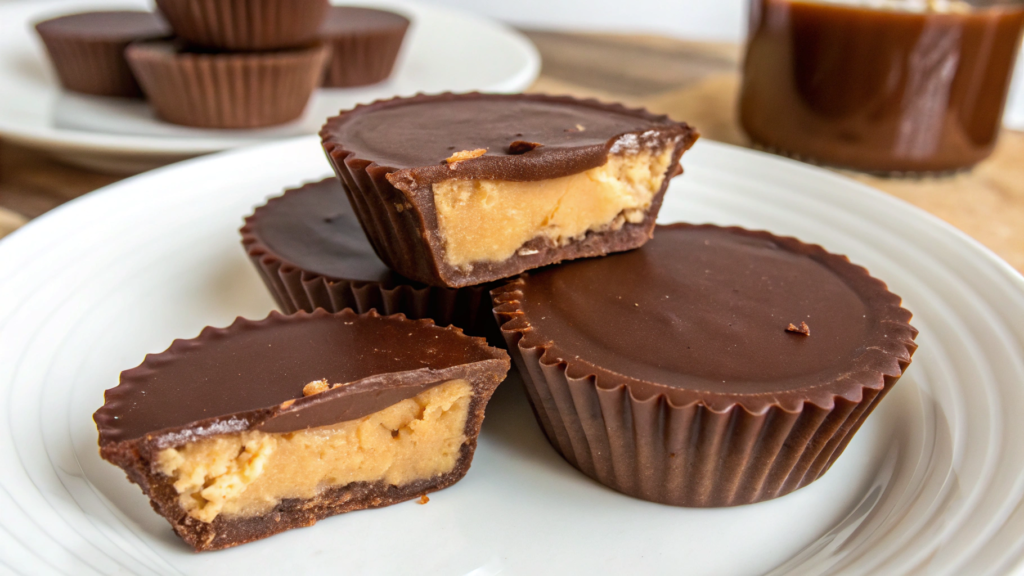
When making Sugar Free Homemade Reeses Cups, allulose feels more convenient to me than many other sweeteners. It adds sweetness without regular sugar, but without that cool aftertaste some sugar substitutes can leave behind. You can notice the difference especially well in the peanut butter filling.
I usually use allulose in powdered form. Larger crystals can stay in the peanut butter and feel slightly crunchy between your teeth, while the crunch should come from the chocolate here.
Ingredients
For 10–12 small cups, you’ll need
- 7 ounces chocolate with no added sugar (200 g);
- ½ cup smooth sugar-free peanut butter (125 g);
- 3 tablespoons powdered allulose;
- 1 tablespoon butter or coconut oil;
- a small pinch of salt.
If you only have granulated allulose, you can quickly grind it in a small blender or coffee grinder.
How to make
- Melt half of the chocolate. Heat it for 15–20 seconds at a time and stir well after each round. Don’t wait for the last pieces to melt completely in the microwave. If the chocolate is already hot, they usually melt as you stir.
- Make the bottom chocolate layer. Spoon the chocolate into the silicone cavities and spread it over the bottom in a thin, even layer. You don’t need too much here, or the bottom of the cup will end up noticeably firmer than the filling. Put the mold in the refrigerator for about 10 minutes.
- Mix the peanut butter filling. Combine the peanut butter, allulose, butter, and a pinch of salt. Mix well so the powder is fully incorporated and there are no dry spots left. The mixture should be soft but thick enough to stay on a spoon.
- Add the peanut butter mixture. Make small flat portions and place them in the center of the set chocolate. Don’t press the filling right against the sides of the mold, and leave a little space around the edges for the next chocolate layer.
- Add the remaining chocolate. Cover the peanut butter filling completely, including the open space around the edges. Then gently tap the mold on the counter a few times. This helps the chocolate settle into any small gaps and makes the top more even.
- Put the cups in the refrigerator. Leave them for about 30–40 minutes, and don’t take them out early just because the top already looks firm. The chocolate needs to set well around the edges too, so the cups come out of the silicone mold neatly without breaking.
Keep in mind that you don’t need to add too much allulose just to make them sweeter. The more powder you add to the peanut butter, the drier and denser the filling becomes. It’s better to start with three tablespoons, taste it, and then decide whether you need one more.
These Sugar Free Reeses Cups With Allulose taste pretty close to the regular version. Lindy honestly doesn’t care much which sweetener I used as long as the candy tastes good, and for me that’s a pretty decent test. It doesn’t feel like you’re eating some separate “diet dessert.”
4. Protein Homemade Reeses Cups With Greek Yogurt Filling
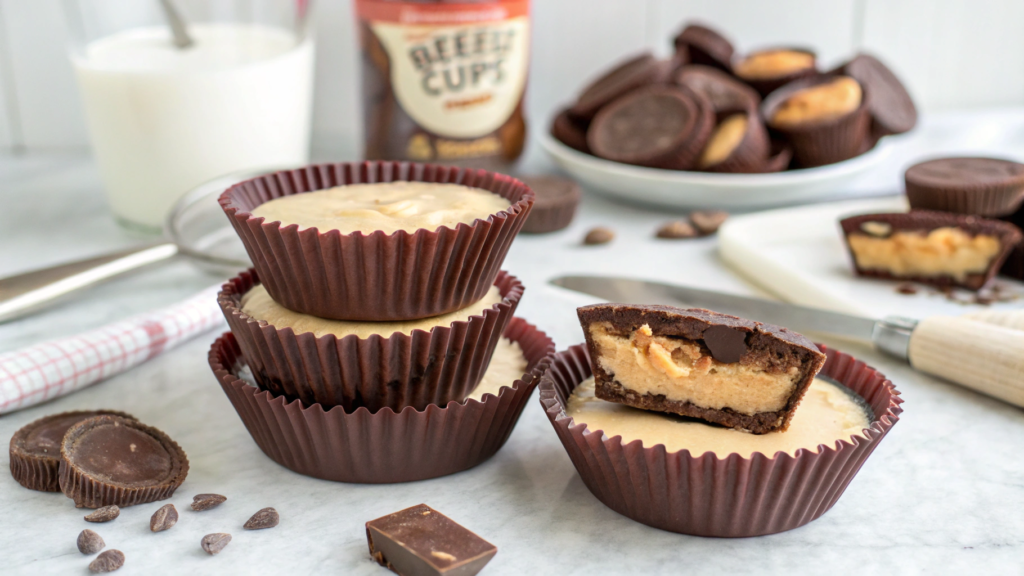
The filling in Protein Homemade Reeses Cups With Greek Yogurt turns out quite different from the classic version. It’s softer, a little lighter, and has a slight tang from the yogurt. The peanut butter flavor is still there, especially if you use a good thick peanut butter.
For this recipe, I use thick Greek yogurt, not regular yogurt. We really don’t need any extra moisture here. If the filling is too runny, it won’t hold well inside the chocolate and will stay almost creamy even after chilling. And we still want a candy that you can actually pick up with your hands.
Ingredients
For 10–12 small cups, you’ll need
- 8 ounces dark or semi-sweet chocolate (225 g);
- ½ cup smooth peanut butter (125 g);
- ⅓ cup thick Greek yogurt (80 g);
- ¼ cup vanilla protein powder (about 25–30 g);
- 1–2 tablespoons maple syrup or another sweetener to taste;
- a small pinch of salt.
For this filling, I use thick Greek yogurt with a high protein content and no unnecessary additives. The vanilla protein powder also thickens the yogurt-peanut butter mixture a little and helps it hold its shape better.
How to make
- Melt half of the chocolate. Heat it for 15–20 seconds at a time and stir after each round. When only a few small pieces are left, stop heating and just keep stirring. This lowers the chance of overheating the chocolate.
- Prepare the first chocolate layer. Spoon a little chocolate into each silicone cavity and spread it over the bottom. The layer should cover the base without being too thick. Put the mold in the refrigerator for about 10 minutes.
- Mix the filling. Combine the peanut butter with the Greek yogurt, then stir in the protein powder, sweetener, and a pinch of salt. Once mixed, the filling should be thick and fall slowly from a spoon. If it turns out too soft, add another 1–2 teaspoons of protein powder.
- Add the filling to the molds. Place a small amount of the peanut butter-yogurt mixture over each set chocolate layer. I gently smooth it with the back of a teaspoon and leave a little space around the edges.
- Cover the filling with chocolate. Melt the remaining half of the chocolate and spread it over the top. Check the edges of each cup. The chocolate should connect with the bottom layer so the soft filling stays inside.
- Chill the cups well. Leave them in the refrigerator for at least 40–45 minutes. The yogurt filling stays softer than a regular peanut butter filling, so I don’t rush to take the mold out. Once the chocolate is completely firm, the cups are much easier to remove without breaking.
It’s best to keep the finished cups in a closed container in the refrigerator. The chocolate holds its shape there, while the filling keeps a nice texture. A batch of 10–12 usually doesn’t last more than 3–4 days in our house anyway.
Lindy thought using yogurt in the recipe sounded strange at first. Then she tried one straight from the refrigerator and said the filling tasted somewhere between peanut butter cream and a tiny cheesecake. I liked that comparison. Protein Reeses Cups With Greek Yogurt really are softer than the classic version, and the filling is creamier and a little lighter in texture.
5. PB2 Homemade Reeses Cups With Extra Roasted Peanut Flavor
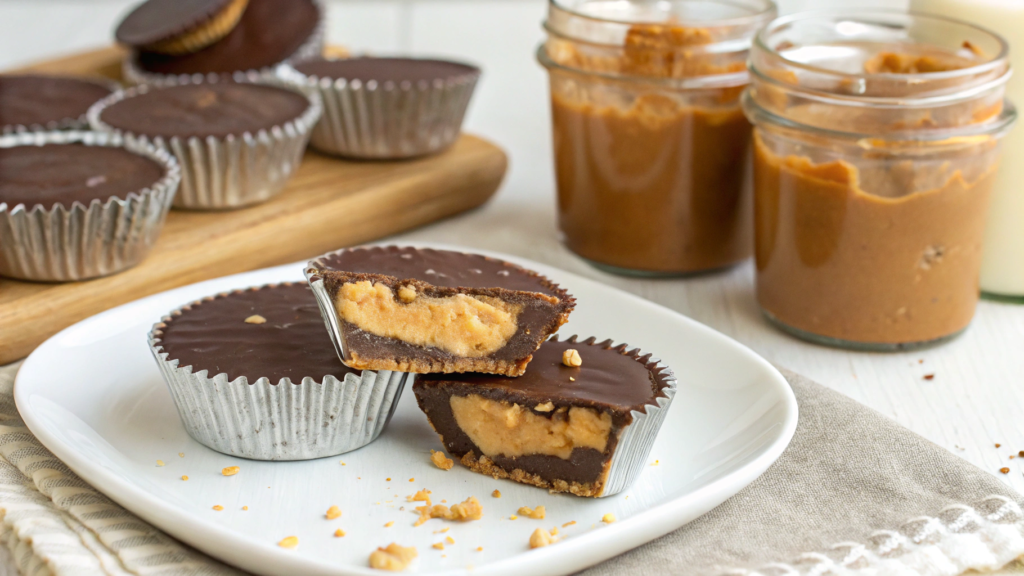
Have you ever tried adding peanut powder to Homemade Reeses Cups right into the filling along with regular peanut butter? If not, you definitely should. It brings out the roasted peanut flavor and also makes the filling a little denser. At the same time, regular peanut butter keeps it soft.
I really like the taste of well-roasted peanuts, especially that smell you get when you open a fresh jar of peanut butter made from roasted nuts. That’s why I don’t replace the peanut butter with powder completely here.
Ingredients
For 10–12 small cups, you’ll need
- 8 ounces milk or semi-sweet chocolate (225 g);
- ½ cup smooth peanut butter (125 g);
- ¼ cup peanut powder (about 25 g);
- 2 tablespoons powdered sugar;
- 1–2 tablespoons milk;
- a small pinch of salt.
You’ll need regular peanut powder here. Choose a classic version without chocolate or other flavorings, because what we want is that extra roasted peanut flavor.
How to make
- Melt half of the chocolate. Heat it for 15–20 seconds at a time and stir after each round. Once almost all the chocolate is liquid, stop heating and keep stirring until the last pieces melt.
- Spread the first chocolate layer. Add a little chocolate to each silicone cavity and spread it over the bottom. Don’t make the layer too thick. The chocolate will firm up after chilling, so a thin base is enough here. Put the mold in the refrigerator for about 10 minutes.
- Make the peanut butter filling. Mix the peanut butter, peanut powder, powdered sugar, and a pinch of salt. At first, the mixture will be fairly thick. Add one tablespoon of milk and mix, then use the second tablespoon only if the filling still feels too dry.
- Check the texture. The filling should be easy to scoop with a spoon and hold its shape without crumbling. If you accidentally add a little too much milk, a small spoonful of peanut powder will quickly bring it back to the right consistency.
- Add the filling. Make small flat portions and place them in the center of each cavity. Leave a little space around the edges so the chocolate can fill it and connect with the bottom layer.
- Add the remaining chocolate. Melt the second half and spread it over the top. I usually move the mold gently from side to side, then tap it on the counter a couple of times. This helps the chocolate fill the space around the filling.
- Chill the cups. Put the mold in the refrigerator for about 30–40 minutes. Once the chocolate is completely firm, gently pull the silicone away from each cup before pushing it up from the bottom. This helps keep the edges neater.
Storage. Since the filling contains milk, it’s best to keep the finished cups in a closed container in the refrigerator and eat them within 3–4 days. Before serving, I sometimes leave them on the counter for just a few minutes. The peanut butter filling softens a little, while the chocolate still keeps its shape.
The roasted peanut flavor comes through much more strongly in this version. Peanut powder makes it more pronounced, and for that alone I’d keep a jar in the pantry.
6. Homemade Reeses Cups With Almond Flour Peanut Butter Dough
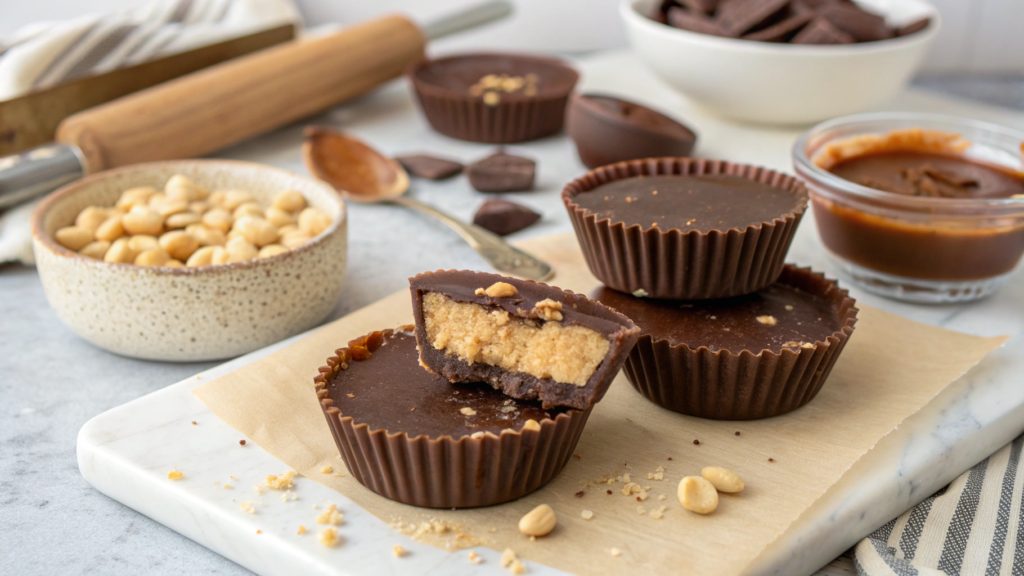
Almond flour completely changes the filling in these Reeses Cups. Instead of a soft peanut butter mixture, you get something closer to a tender dough that you can pick up with your fingers, roll into a ball, and flatten. This kind of filling is much easier to shape into an even layer inside each cup.
But don’t rush with the almond flour. It absorbs some of the moisture from the peanut butter pretty quickly, and if you add too much, the filling will start to crumble. I add it gradually and stop as soon as the mixture no longer sticks to my fingers but still feels soft.
Ingredients
For 10–12 small cups, you’ll need
- 8 ounces milk or semi-sweet chocolate (225 g);
- ½ cup smooth peanut butter (125 g);
- ⅓ cup finely ground almond flour (about 35 g);
- 3 tablespoons powdered sugar;
- 1 tablespoon melted butter;
- a small pinch of salt.
For the filling, it’s better to use finely ground almond flour. Coarser almond flour will still mix with the peanut butter, but you’ll notice the almond pieces more in the filling.
How to make
- Melt half of the chocolate. Microwave it for 15–20 seconds at a time, stirring after each round. When only a few small pieces are left, stop heating. They’ll melt as you keep stirring the chocolate.
- Spread the chocolate over the bottom of the mold. Add a small amount to each silicone cavity and smooth it out with a spoon. A thin layer that completely covers the bottom is enough. Leave the mold in the refrigerator for about 10 minutes.
- Mix the peanut butter dough. First, combine the peanut butter, powdered sugar, melted butter, and salt. Then gradually mix in the almond flour. Don’t add all of it at once because peanut butter can vary quite a bit in thickness.
- Check the dough with your hands. Pinch off a small piece and roll it into a ball. If it holds its shape and doesn’t crumble when you press it lightly, you’ve added enough flour. If the mixture still sticks to your fingers and spreads, add another 1–2 teaspoons of almond flour.
- Shape the filling. Roll small balls and gently flatten each one with your fingers. They should be slightly smaller than the diameter of the cavities. Place them on the set chocolate, leaving a little space around the edges.
- Cover the cups with chocolate. Melt the remaining half and spread it over the top. Make sure the chocolate runs down around the edges of the peanut butter dough too. Then gently tap the mold on the counter to make the top more even.
- Let the chocolate set completely. Leave the cups in the refrigerator for about 30–40 minutes. Then gently pull the silicone away from the edges and carefully remove each cup.
Storage. You can keep the finished cups in a closed container in the refrigerator for about a week. Almond flour helps the filling keep its dense texture and neat shape. Before serving, I sometimes leave the cups on the counter for 5–10 minutes. The chocolate warms up a little, and the filling becomes softer when you bite into it.
The filling in Reeses Cups With Almond Flour isn’t creamy at all. It’s soft, but dense enough to stay in a neat, even layer when you cut the cup open. The texture reminds me a little of peanut butter cookie dough, only tucked between two layers of chocolate. And I’ll admit, I always cut one cup in half just to see how nice the filling looks inside.
7. Homemade Reeses Cups With No Powdered Sugar Texture Trick
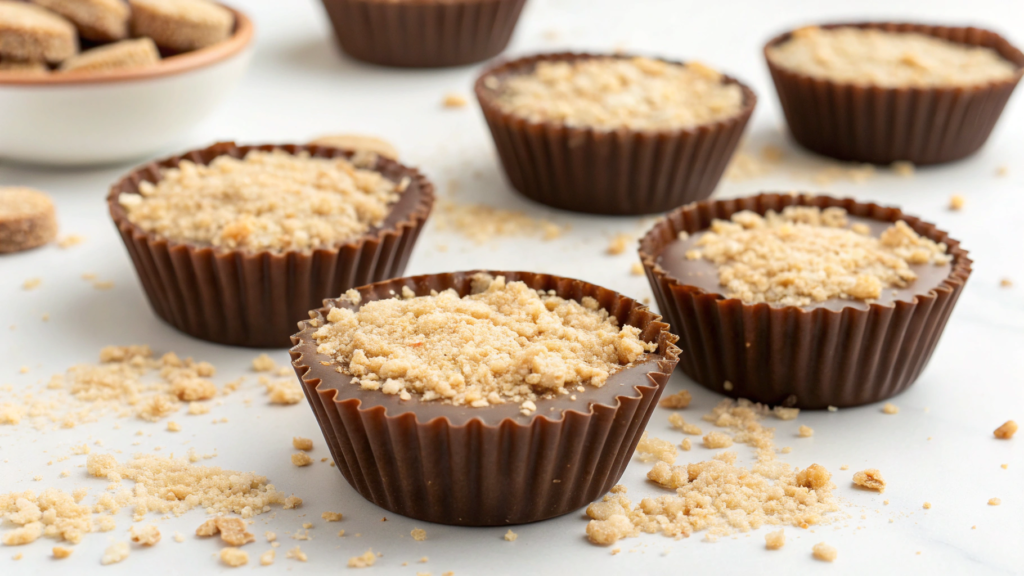
Powdered sugar usually helps make the peanut butter filling denser, but you can make it without it too. For Homemade Reeses Cups With No Powdered Sugar, I use finely ground oats. They absorb some of the extra moisture from the peanut butter and help turn the filling into a soft mixture that still holds its shape.
The oats really do need to be ground almost into flour. If you leave larger pieces, you’ll notice them when you bite into the candy, and here we want a smooth peanut butter center without any crunch.
Ingredients
For 10–12 small cups, you’ll need
- 8 ounces milk or semi-sweet chocolate (225 g);
- ½ cup smooth peanut butter (125 g);
- ¼ cup very finely ground oats (about 20 g);
- 2 tablespoons maple syrup or honey;
- ½ teaspoon vanilla extract;
- a small pinch of salt.
Regular rolled oats work perfectly well. I just grind them in small batches until they look almost like flour. A small food processor is handy for this.
How to make
- Grind the oats. Blend them in a blender or food processor until they turn into a very fine crumb. Rub a little between your fingers. There shouldn’t be any large, firm pieces left.
- Melt half of the chocolate. Heat it for 15–20 seconds at a time and stir well after each round. Once most of it has melted, keep stirring without heating it again.
- Make the chocolate base. Spoon a small amount of chocolate into each silicone cavity and spread it into a thin layer. Put the mold in the refrigerator for about 10 minutes so the chocolate can firm up before you add the filling.
- Mix the peanut butter filling. Combine the peanut butter, maple syrup, vanilla, and salt. Then gradually add the ground oats. Mix well after each spoonful and keep an eye on the consistency.
- Let the filling sit for a few minutes. Don’t rush to add more oats if it seems soft at first. Over 3–5 minutes, the oat crumbs will absorb some of the moisture and the mixture will become noticeably denser. Then you can decide whether it needs another spoonful.
- Add the filling to the molds. Shape small flat pieces and place them on top of the set chocolate. Leave a little room around the edges so the next chocolate layer can reach the bottom one.
- Cover with the remaining chocolate. Melt the second half and spread it over the top. A few gentle taps of the mold on the counter will help the chocolate settle into the small gaps around the filling.
- Chill until completely set. Leave the cups in the refrigerator for about 30–40 minutes. Then gently pull the silicone away from the edges and remove each cup.
The most important part here happens a few minutes after mixing. The ground oats keep absorbing moisture, so I always let the filling sit for a bit before adding anything else. Otherwise, it’s very easy to make it denser than you wanted.
Storage. I keep the finished cups in a closed container in the refrigerator for about a week. If I stack them in two layers, I put a piece of parchment between them so the chocolate surfaces don’t rub against each other.
The filling in Reeses Cups With No Powdered Sugar has a slightly different texture from the classic version. You don’t get that very smooth sugary center, but the peanut butter comes through clearly, and you barely notice the finely ground oats.
8. Healthy Homemade Reeses Cups With Maple and Dark Chocolate
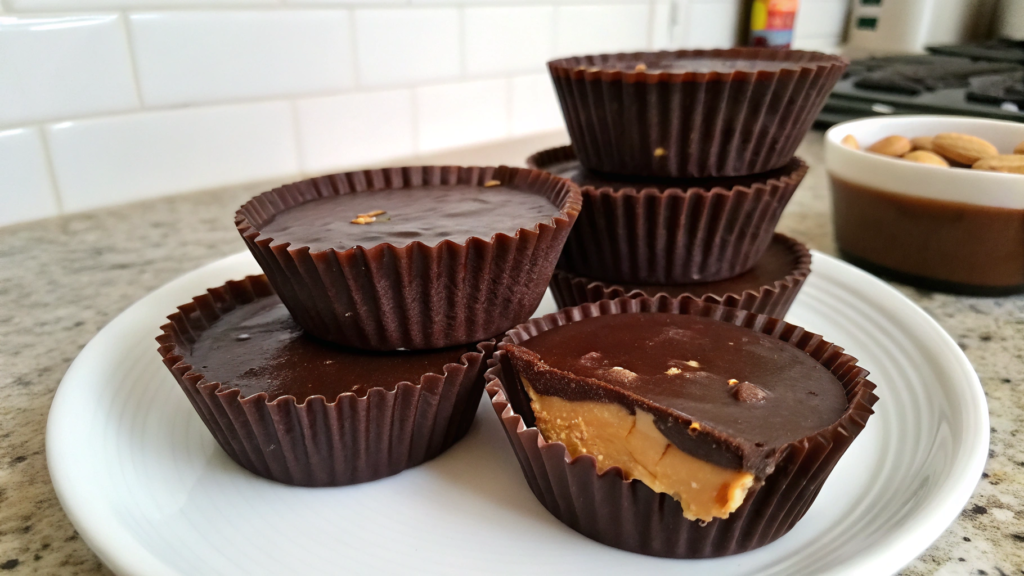
Dark chocolate and maple syrup give Homemade Reeses Cups a completely different feel. The chocolate is less sweet, while the peanut butter filling gets a light caramel note from the syrup. That means you don’t need powdered sugar or a long list of extra ingredients here.
When I make Homemade Reeses Cups With Maple and Dark Chocolate, I usually use real maple syrup, not maple-flavored syrup. Real maple syrup has a light caramel flavor that comes through nicely in the peanut butter filling. Flavored syrup usually just adds sweetness.
Ingredients
For 10–12 small cups, you’ll need
- 8 ounces dark chocolate with 70–75% cocoa (225 g);
- ½ cup smooth peanut butter (125 g);
- 2 tablespoons pure maple syrup;
- 2 tablespoons finely ground oats;
- ½ teaspoon vanilla extract;
- a small pinch of salt.
For this recipe, I use pure maple syrup, for example, Pure Maple Syrup. Check the ingredient list on the bottle. It should contain maple syrup without corn syrup or added flavorings.
How to make
- Prepare the dark chocolate. Melt about half of it in 15–20 second intervals, stirring between each round. Dark chocolate is easy to overheat, so it’s better to let the last small pieces melt while you stir.
- Make the first chocolate layer. Spread a little melted chocolate over the bottom of each silicone cavity. Try to cover the bottom completely without adding too much. Put the mold in the refrigerator for about 10 minutes.
- Mix the peanut butter with the maple syrup. Add the vanilla and a small pinch of salt. Stir well until smooth. The peanut butter will become a little softer after you add the syrup, and that’s normal.
- Add the ground oats. Mix them in gradually, stirring each time. They’ll help thicken the filling. After a couple of minutes, the mixture should stay on a spoon without spreading.
- Add the filling. Place a small portion in the center of each cavity and gently smooth it out. Leave a few millimeters around the edges so there’s room for chocolate on the top and sides.
- Add the second chocolate layer. Melt the remaining half and spread it over the filling. Gently move the mold from side to side so the chocolate reaches the edges, then tap it lightly on the counter a couple of times.
- Chill the cups. Leave them in the refrigerator for 30–40 minutes. The chocolate should firm up completely on the top and around the sides. After that, the cups should come out of the silicone mold easily.
Two tablespoons of maple syrup are enough for the flavor to come through in the filling without making the mixture runny. If I wanted more sweetness, I’d be more likely to choose chocolate with a lower cocoa percentage than add more syrup.
Storage. I keep the finished cups in a closed container in the refrigerator for about a week. If I stack them in several rows, I place parchment between them so the cups don’t stick together and the chocolate surface stays neat.
Reeses Cups With Maple and Dark Chocolate taste noticeably different from the classic version made with milk chocolate. The cocoa flavor comes through more strongly, while the maple syrup gives the filling a light caramel sweetness. If you usually choose dark chocolate over milk chocolate, I think you’ll enjoy this version too.
9. Salted Pretzel Homemade Reeses Cups With Crunchy Layer
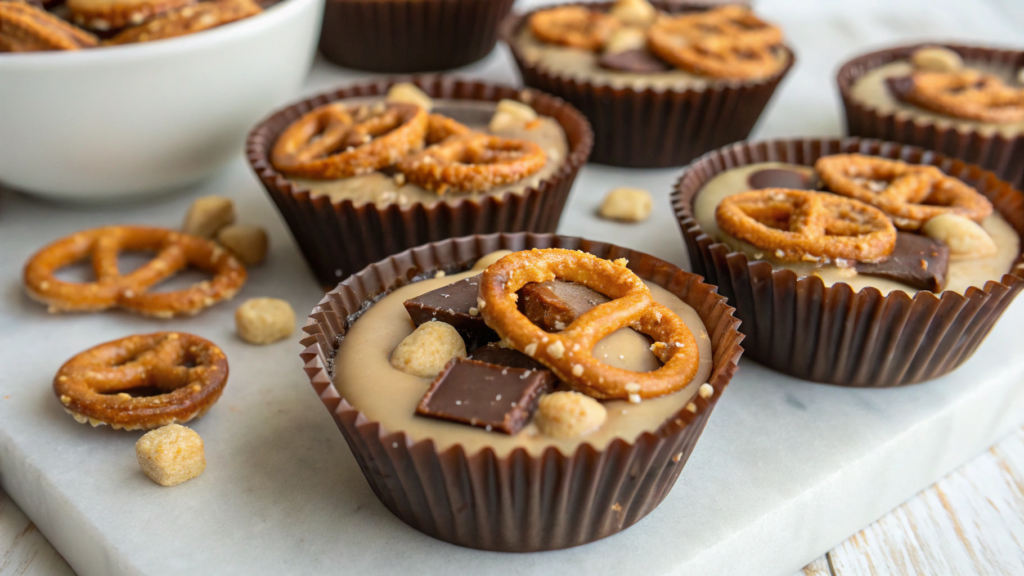
If we have an open bag of salted pretzels at home, a few of them can easily end up in Homemade Reeses Cups. I break them into small pieces and gently press them into the peanut butter filling. The soft filling ends up mixed with crunchy pieces of pretzel, while the salty flavor goes really well with the chocolate and peanut butter.
It’s better not to crush the pretzels into fine crumbs. If you grind them almost into powder, they’ll mix into the peanut butter too quickly and lose that crunchy texture. I leave the pieces about the size of a small pea.
Ingredients
For 10–12 small cups, you’ll need
- 8 ounces milk or semi-sweet chocolate (225 g);
- ½ cup smooth peanut butter (125 g);
- ¼ cup powdered sugar (30 g);
- ½ cup mini pretzels;
- ½ teaspoon vanilla extract;
- a small pinch of fine salt;
- flaky sea salt for the top.
For this recipe, small salted pretzels, such as Mini Pretzels, are the easiest to use. They’re easier to break into pieces of roughly the same size, and you don’t end up with too many fine crumbs.
How to make
- Prepare the pretzels. Put them in a sturdy bag and roll over them a few times with a rolling pin, or simply break them by hand. We need small pieces, not pretzel flour. You can leave out the finest crumbs completely.
- Melt half of the chocolate. Heat it for 15–20 seconds at a time and stir after each round. When almost all the chocolate is liquid, let the remaining pieces melt while you stir.
- Make the bottom layer. Spoon a little chocolate into the silicone cavities and spread it over the bottom. Put the mold in the refrigerator for about 10 minutes so the chocolate has time to firm up.
- Make the peanut butter filling. Mix the peanut butter with the powdered sugar, vanilla, and a small pinch of salt. The mixture should be soft but not runny. If your peanut butter is very loose to begin with, you can add another tablespoon of powdered sugar.
- Add the peanut butter layer. Spoon small portions of the filling over the chocolate and gently smooth them out. Don’t go all the way to the edges of the mold so the chocolate can later cover the filling around the sides.
- Add the pretzel layer. Press a few pieces directly into the peanut butter mixture. You don’t need to cover the whole surface tightly. About 4–6 small pieces per cup is enough for the crunch to come through without making the filling fall apart.
- Cover everything with chocolate. Melt the remaining chocolate and spread it over the top. If there are small gaps between the pretzel pieces, use the tip of a teaspoon to help the chocolate settle into them.
- Add a little salt. While the top chocolate is still soft, sprinkle a few flakes of sea salt over each cup. You really only need a few because the pretzels are already salty.
- Chill the cups. Put the mold in the refrigerator for about 30–40 minutes. Once fully set, carefully remove the cups by gently pulling the silicone away from the edges.
Storage. Keep the finished cups in a closed container in the refrigerator. Over time, the pretzels will slowly soften from the filling, so it’s best to eat the cups within 2–3 days, while the pieces are still nice and crunchy.
When we bite into Salted Pretzel Reeses Cups, the chocolate breaks first, then you get a crunchy piece of pretzel, and after that comes the soft peanut butter filling. A few flakes of salt on top bring out the chocolate and roasted peanut flavor even more. Can you feel it? It even sounds delicious!
10. Freezer Set Homemade Reeses Cups With Espresso Pinch
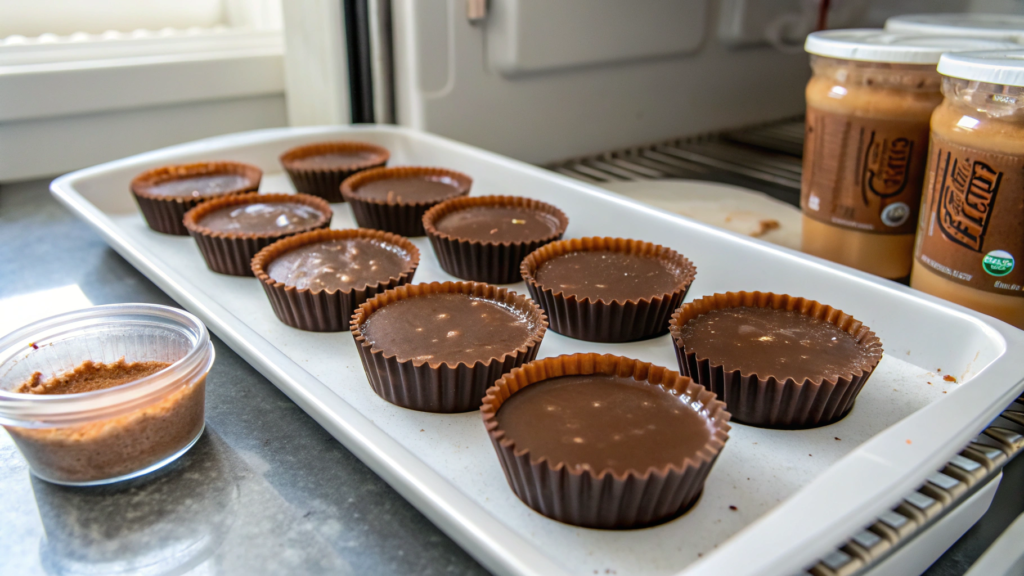
A pinch of espresso doesn’t turn Homemade Reeses Cups into a coffee dessert. In such a small amount, the coffee is barely noticeable, but it makes the chocolate flavor more pronounced. And to help the chocolate set faster, we’ll put this batch in the freezer instead of the refrigerator.
I use instant espresso powder, not ground coffee. Regular coffee will stay as tiny gritty pieces in the chocolate, while espresso powder dissolves much better. And it’s better to be careful with the amount here. Start with ⅛ teaspoon.
Ingredients
For 10–12 small cups, you’ll need
- 8 ounces semi-sweet or dark chocolate (225 g);
- ½ cup smooth peanut butter (125 g);
- ¼ cup powdered sugar (30 g);
- ½ teaspoon vanilla extract;
- ⅛ teaspoon instant espresso powder;
- a small pinch of salt.
Instant espresso powder works well for the chocolate. You literally need just a pinch for one batch.
How to make
- Prepare the chocolate with espresso. Melt half of the chocolate in 15–20 second intervals, stirring after each round. Once it’s smooth, mix in about half of the espresso powder. Taste a small drop of chocolate. The coffee flavor shouldn’t be strong.
- Fill the bottom of the mold. Spread the melted chocolate in a thin layer across the silicone cavities. Make sure the bottom isn’t showing anywhere. This time, instead of the refrigerator, put the mold in the freezer for about 5 minutes.
- Mix the peanut butter filling. Combine the peanut butter, powdered sugar, vanilla, and a small pinch of salt. Mix well until the powdered sugar is completely incorporated into the peanut butter. The filling should hold its shape but still stay soft.
- Add the filling. Divide the mixture into small portions, flatten each one slightly, and place them on top of the set chocolate. Leave a little open space around the edges.
- Prepare the remaining chocolate. Melt the second half and add the remaining espresso powder. If the coffee note already feels noticeable enough after the first half of the chocolate, you don’t need to add all of the remaining powder.
- Cover the cups on top. Spread the chocolate so it fills the space around the peanut butter filling. Gently tap the mold on the counter a few times to even out the top.
- Put the mold in the freezer. Usually 15–20 minutes is enough for the chocolate to firm up completely so you can remove the cups from the silicone. If they still bend slightly when you press from underneath, give them another 5 minutes.
When you take the cups out of the freezer, it’s better to let them sit on the counter for about five minutes until the peanut butter center softens a little. The chocolate will stay firm, while the filling won’t be as cold and dense anymore.
Storage. If you plan to eat the cups within the next few days, keep them in a closed container in the refrigerator. Before serving, you can leave them on the counter for a few minutes so the peanut butter filling softens slightly.
Lindy and I usually try the first cup right at the kitchen table, before I even manage to put the whole batch into a container. At first, Lindy didn’t realize I had added coffee, then she took another cup and started guessing why the chocolate tasted a little different. When I told her about the pinch of espresso, she just nodded and reached for a third one. Well, that’s a pretty convincing review for me.
Your Reeses ideas
When several kinds of Homemade Reeses Cups end up in our kitchen at the same time, Lindy and I usually don’t try to decide which ones are better. We just put a plate on the table and gradually notice which cups we keep reaching for more often. And sometimes it’s not the version I expected to win at the beginning at all.
I think there are still plenty of versions we haven’t included here. Maybe you add something of your own to the peanut butter filling or found a chocolate combination that’s worth trying next. Tell me about it in the comments. I’ll happily steal a good idea for our next batch.