Chicken is on our table pretty often, so I’m always looking for ways not to cook it the same way every time. And there are many more options than simply baking chicken breast with spices or frying thighs in a skillet.
Here I’ve put together 10 chicken dinners inspired by different cuisines around the world. Some recipes take around 20–30 minutes, while others need a little more time in the oven or on the grill, but none of them involve complicated techniques.
I also wanted these meals to be easy to make at home with ingredients you can actually find at a regular grocery store. Yes, a few recipes call for things like gochujang or garam masala, but you won’t need to buy a dozen unusual jars just for one dinner. And if one of those new ingredients ends up staying in our pantry for a long time afterward, even better.
1. Moroccan spiced chicken with apricot glaze
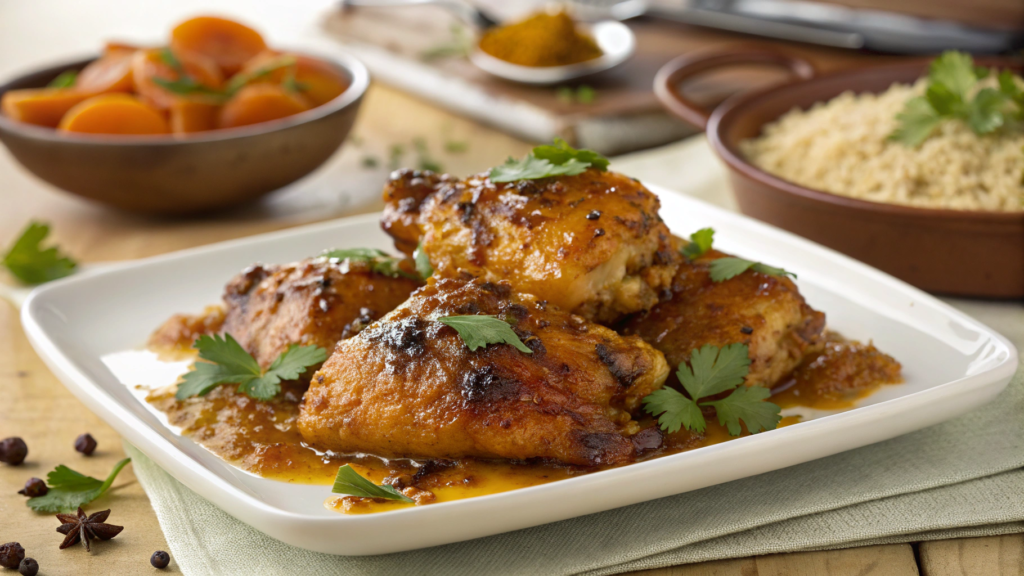
Moroccan chicken recipes often combine warm spices with fruity sweetness. At first, the combination of cumin, coriander, cinnamon, and apricot jam can seem a little unusual. But with chicken thighs, it really makes sense. The meat stays juicy, the spices add a rich aroma, and the apricot creates a thick sweet-and-sour glaze on top.
For this recipe, it’s better to use chicken thighs. They stay juicy even after the glaze forms on top. And you probably already have most of the spices in your pantry.
Ingredients
Serves 4:
- 1 ½ pounds boneless, skinless chicken thighs (about 680 g)
- 1 tablespoon olive oil
- 1 teaspoon ground cumin
- 1 teaspoon ground coriander
- ½ teaspoon smoked paprika
- ¼ teaspoon ground cinnamon
- ½ teaspoon garlic powder
- ¾ teaspoon salt
- ¼ teaspoon black pepper
- ⅓ cup apricot jam (about 110 g)
- 1 tablespoon lemon juice
- 1 teaspoon honey
- 1 small garlic clove, finely grated
- 2 tablespoons chopped fresh parsley or cilantro
If your spices have been sitting open for a long time, smell them first. Ground cumin and coriander lose a noticeable amount of their aroma over time. For recipes like this, I keep a small spice grinder at home and buy some spices whole.
How to make Moroccan chicken with apricot glaze
- Prepare the chicken. Pat the thighs dry with a paper towel. Mix the cumin, coriander, paprika, cinnamon, garlic powder, salt, and pepper. Add the olive oil and rub the mixture well over the chicken on all sides. If you have 15–20 minutes, you can let it sit on the counter while the oven heats up.
- Sear the thighs. Heat a large oven-safe skillet over medium heat. Place the chicken in a single layer and cook for about 3–4 minutes on each side. We don’t need to cook the meat all the way through yet. The main thing is to get a browned surface because that will add more flavor to the finished dish.
- Mix the glaze. In a small bowl, combine the apricot jam, lemon juice, honey, and fresh garlic. If the jam is very thick, add 1–2 teaspoons of warm water. The glaze should be easy to spread with a spoon.
- Add the apricot mixture. Reduce the heat, pour the glaze over the chicken, and turn the thighs a few times so they are coated on all sides. At this point, the smell of the spices, especially the cinnamon, becomes very noticeable. But it won’t overpower the finished chicken.
- Finish cooking. Transfer the skillet to an oven preheated to 400°F (about 205°C) for around 8–12 minutes. The internal temperature in the thickest part of the chicken should reach 165°F (about 74°C). This is the minimum safe temperature for poultry recommended by the U.S. Department of Agriculture.
- Let the meat rest for a few minutes. After taking it out of the oven, let the chicken rest for 5 minutes. During this time, the glaze will thicken slightly and stay on the surface better. Add parsley or cilantro before serving.
A small tip. Don’t add more apricot jam hoping to get extra glaze. It contains a lot of sugar, so it can start burning pretty quickly at high temperatures. It’s better to stick to the amount listed, and if the glaze seems too thick, add 1–2 teaspoons of warm water.
I often serve this chicken with couscous, rice, or roasted carrots. If you want to add something fresh, a simple salad with cucumber, tomatoes, and lemon juice works well. Lindy often spoons a little of the sauce from the bottom of the skillet over the side dish — that’s where the best mix of apricot, spices, and chicken juices is left. She knows what she’s doing.
Don’t be afraid of the combination of spices and apricot. The recipe is easy to make again and adjust a little to your own taste — add more heat, use less honey, or swap cilantro for parsley. For the first time, I just wouldn’t change the glaze proportions. That makes it easier to understand what the final result should be.
2. Indian butter chicken made in an air fryer
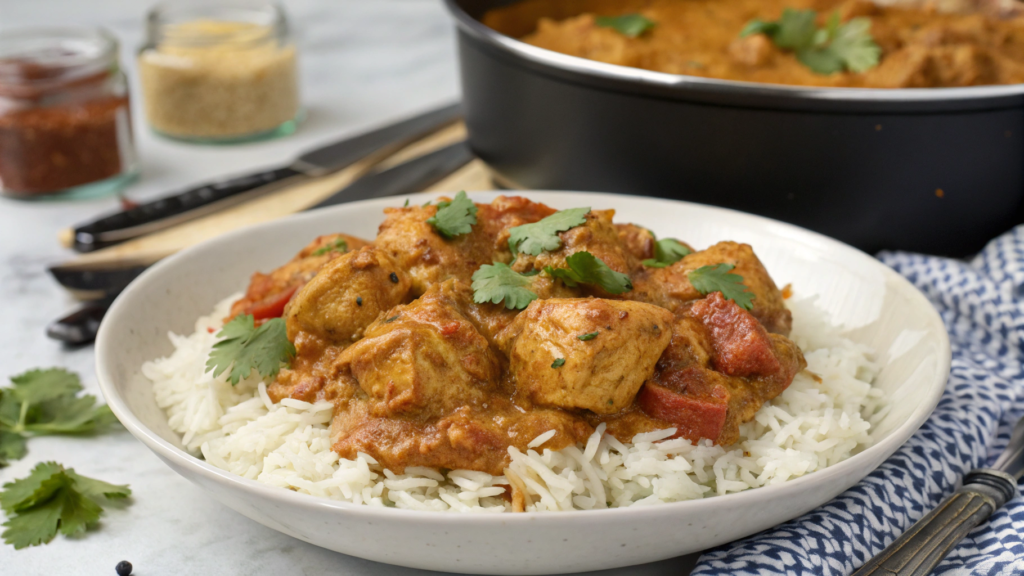
Indian butter chicken usually sounds like something that takes quite a while to make. But part of the work can easily be handed over to the air fryer. The chicken browns quickly on the outside, stays juicy inside, and the sauce comes together separately in just a few minutes.
The spice mix matters here. Garam masala, cumin, paprika, and garlic add plenty of flavor, while the cream and tomatoes soften it. I wouldn’t cut back too much on the spices, or you’ll end up with something closer to plain chicken in tomato sauce.
Ingredients
Serves 4
- 1 ½ pounds boneless, skinless chicken thighs (about 680 g)
- ½ cup plain yogurt (about 120 g)
- 1 tablespoon lemon juice
- 1 teaspoon garam masala
- 1 teaspoon ground cumin
- 1 teaspoon paprika
- ½ teaspoon ground turmeric
- ½ teaspoon salt
- 1 tablespoon vegetable oil
For the sauce
- 1 tablespoon butter
- 2 garlic cloves, finely chopped
- 1 teaspoon grated fresh ginger
- 1 cup tomato puree (about 240 ml)
- 1 teaspoon garam masala
- ½ teaspoon ground cumin
- ½ cup heavy cream (about 120 ml)
- 1 teaspoon sugar or honey
- salt to taste
- fresh cilantro for serving
How to make the chicken in an air fryer
- Marinate the chicken. Mix the yogurt, lemon juice, garam masala, cumin, paprika, turmeric, and salt. Add the chicken thighs and coat them well in the marinade. Let them sit for at least 20–30 minutes. If you have more time, you can refrigerate them for a few hours.
- Preheat the air fryer. Set it to 390°F (about 200°C). Lightly grease the basket with oil so the marinade doesn’t stick too much.
- Cook the chicken. Arrange the thighs in a single layer. Cook for about 10–14 minutes, turning the chicken after 5–7 minutes. The exact time will depend on the size of the pieces and your air fryer model. The internal temperature of the cooked chicken should reach 165°F (about 74°C). Use a kitchen thermometer to check it.
While the chicken cooks, you can make the sauce. That way, both parts are cooking at the same time and dinner comes together faster.
How to make the creamy tomato sauce
- Melt the butter in a deep skillet over medium heat. Add the garlic and ginger and cook for about 30 seconds.
- Add the tomato puree, garam masala, and cumin. Stir and let it cook over low heat for about 5 minutes. The sauce should thicken slightly.
- Lower the heat and pour in the cream. Add the sugar or honey and a little salt. Try not to let the sauce boil too hard after this, so the cream doesn’t start to separate.
- Cut the cooked chicken into large pieces and transfer it to the sauce. Stir and heat for another 2–3 minutes.
The air fryer gives the chicken nicely browned edges while keeping the meat juicy inside. If you simmer it in the sauce from the beginning, you won’t get the same browned surface.
Let the finished dish sit for a couple of minutes before serving. The chicken will soak up a little of the sauce, and the sauce itself will thicken slightly. If you have leftovers the next day, the flavor will be even richer, so this is a recipe you can easily make ahead.
3. Thai coconut lime chicken with basil rice
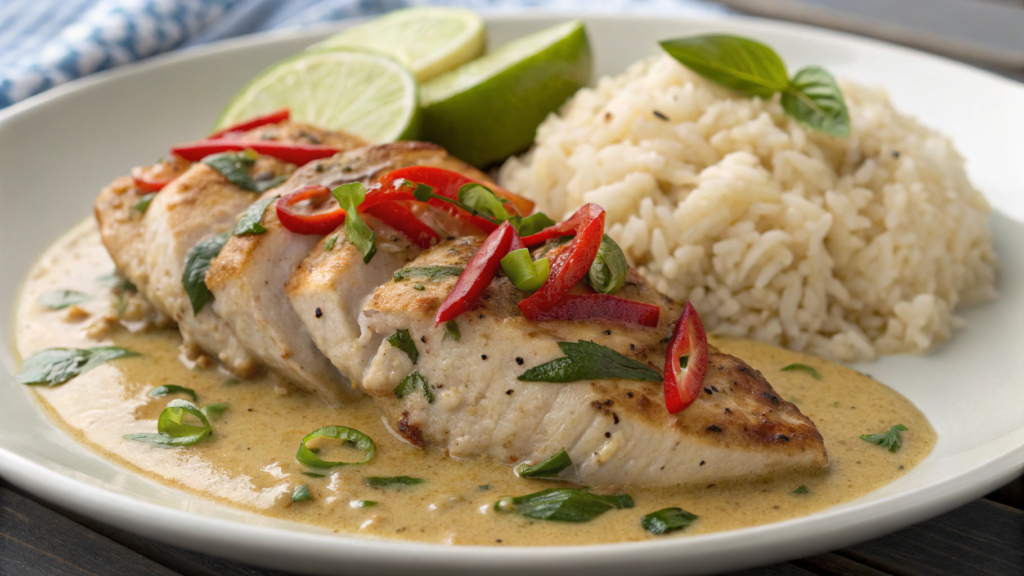
Coconut milk and lime work really well with chicken, especially with a little garlic, ginger, and red pepper added. The sauce turns out rich, but the fresh lime keeps it from feeling too heavy. I almost always make rice with a sauce like this. It soaks up the coconut milk, lime, and spices, so the sauce doesn’t just sit at the bottom of the plate.
Ingredients
Serves 4
- 1 ½ pounds boneless, skinless chicken thighs (about 680 g)
- 1 tablespoon vegetable oil
- 3 garlic cloves, finely chopped
- 1 tablespoon fresh ginger, finely grated
- ½ teaspoon red pepper flakes
- 1 can full-fat coconut milk, 13.5 fluid ounces (about 400 ml)
- 1 tablespoon fish sauce
- 1 tablespoon honey
- juice of 1 large lime
- zest of ½ lime
- ½ teaspoon salt
- ¼ teaspoon black pepper
- 2 tablespoons fresh cilantro
For the rice
- 1 cup jasmine rice (about 185 g)
- 1 ½ cups water (about 355 ml)
- ¼ teaspoon salt
- ½ cup fresh basil leaves, roughly chopped
If the coconut milk has separated into thick and liquid parts in the can, that’s completely normal. Stir it well before adding it to the skillet.
How to make coconut lime chicken with basil rice
- Cook the rice. Rinse 1 cup of jasmine rice under cold water and transfer it to a small saucepan. Add 1 ½ cups of water and ¼ teaspoon of salt. Bring to a boil, cover, and reduce the heat to low. Cook for 12–15 minutes, then turn off the heat and leave the rice covered for another 5 minutes.
- Prepare the chicken. Cut the thighs into large pieces, about 1 ½–2 inches (4–5 cm). Season with salt and pepper. Don’t cut the chicken too small because smaller pieces are easier to dry out.
- Brown the chicken. Heat the oil in a large skillet over medium heat. Add the chicken in a single layer and cook for about 3 minutes. Turn the pieces and brown the other side for another 2–3 minutes. The chicken can still be raw inside at this point.
- Add the garlic and ginger. Reduce the heat to medium and add the garlic, ginger, and red pepper flakes. Stir for about 30 seconds. That’s enough time for the garlic. If it stays in the hot skillet much longer, it can start to taste bitter.
- Make the coconut sauce. Pour in the coconut milk and add the fish sauce and honey. Stir and bring to a gentle simmer. Cook the chicken uncovered for another 7–10 minutes.
To check the chicken, I use a kitchen thermometer. The temperature in the thickest part should reach at least 165°F (about 74°C). It’s more reliable than trying to judge doneness by color.
- Add the basil to the rice. Fluff the cooked rice with a fork and stir in the chopped basil. It’s better to add fresh herbs after cooking so they keep more of their aroma and don’t turn completely dark.
- Add the lime. Remove the chicken from the heat and stir in the lime juice and zest. Taste the sauce and add a little more salt if needed. It’s better not to simmer the lime juice in the sauce for several minutes because its fresh flavor will become less noticeable.
To serve, add basil rice to the plate, place the chicken on top, and spoon plenty of coconut sauce from the skillet over everything. Don’t reduce the sauce too much. It should stay loose enough for some of it to soak into the rice.
The next day, after reheating it, Lindy adds a few thin slices of fresh cucumber to her plate and mixes them with the rice and chicken. The cucumber stays crisp and adds some freshness to the coconut sauce.
The recipe takes about 30 minutes to make, so it works well for a regular weeknight dinner. If you make a double batch, you can refrigerate some of it and quickly put together lunch from the leftovers the next day.
4. Korean gochujang chicken wings you’ll dream about
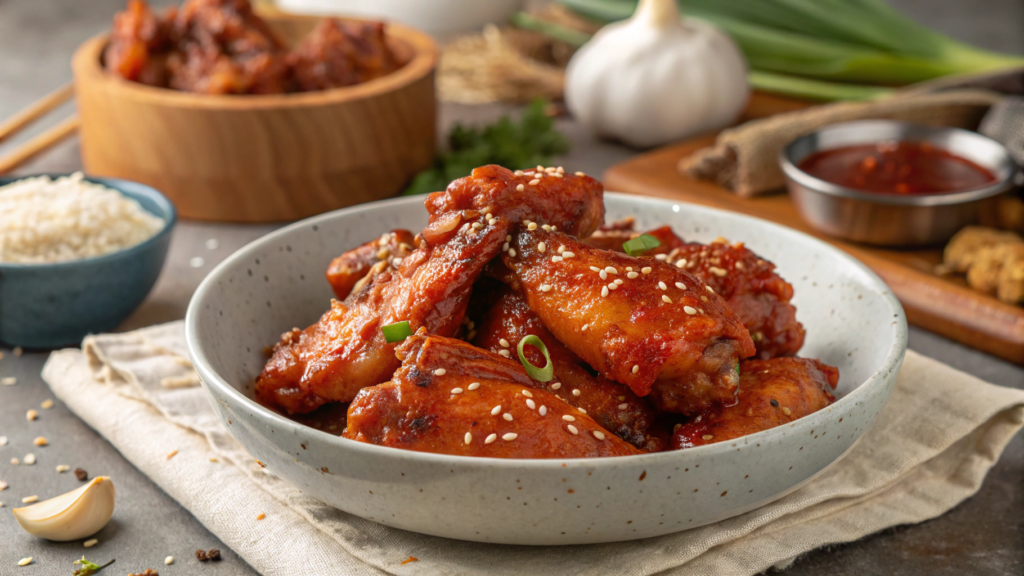
I’d love to meet someone who doesn’t like chicken wings! And in our house, they never stay on the table for long. Lindy likes hers a little spicier, while I pay more attention to keeping the skin crispy even after the sauce goes on. That matters even more with gochujang because the sauce is thick, and the honey can burn quickly at high heat.
That’s why I bake the wings until they’re almost done first and only then coat them with the sauce. This gives the skin time to brown well, while the mixture of gochujang, honey, garlic, and ginger only spends a few minutes in the oven and doesn’t have time to burn.
Ingredients
Serves 4
- 2 pounds chicken wings (about 900 g)
- 1 tablespoon vegetable oil
- 1 teaspoon salt
- ½ teaspoon black pepper
- 1 teaspoon garlic powder
- 1 tablespoon cornstarch
For the sauce
- 3 tablespoons gochujang paste
- 2 tablespoons honey
- 1 tablespoon soy sauce
- 1 tablespoon rice vinegar
- 1 teaspoon sesame oil
- 1 garlic clove, finely grated
- 1 teaspoon fresh ginger, finely grated
- 1–2 teaspoons water, if needed
- 1 teaspoon sesame seeds
- 2 green onions
Gochujang comes in different heat levels, so it’s better to taste a small amount before cooking. If yours is very spicy, start with 2 tablespoons and add a little more to the finished sauce if needed.
For chicken wings, it helps to use a wire rack set over a baking sheet. Hot air can circulate underneath, so the skin browns more evenly.
How to make gochujang chicken wings
- Dry the wings well. Pat them dry on all sides with paper towels. The less moisture left on the surface, the better the skin will brown. Then toss the wings with the oil, salt, pepper, garlic powder, and cornstarch. You only need a small amount of cornstarch. It helps keep the surface drier and crispier.
- Arrange the wings on the baking sheet. Preheat the oven to 425°F (about 220°C). Set a wire rack over a baking sheet and arrange the wings with a little space between them. If they’re packed too tightly, they’ll start steaming instead of baking.
- Bake until the skin is browned. Put the baking sheet in the oven for about 35–40 minutes. After 20 minutes, turn each wing with tongs and return them to the oven. By the end of the cooking time, the skin should be nicely browned. You can check the thickest wing with a kitchen thermometer. The meat should reach at least 165°F (about 74°C).
- Mix the sauce. While the wings finish baking, combine the gochujang, honey, soy sauce, rice vinegar, sesame oil, garlic, and ginger in a small saucepan. Heat over low heat for 2–3 minutes, stirring constantly. If the sauce is too thick, add a teaspoon of water. It should coat the wings easily without running off like water.
- Coat the wings with sauce. Transfer the hot wings to a large bowl, add about two-thirds of the sauce, and toss well with tongs or a large spoon. I don’t pour in all the sauce at once. It’s easier to control the amount this way and keep the crispy skin from getting too soft.
- Return them to the oven for a few more minutes. Arrange the wings back on the rack and bake for another 4–5 minutes. The sauce will caramelize slightly and cling to the surface better. Keep an eye on them during the last few minutes because the honey can darken quickly.
- Add the finishing touches. Transfer the wings to a plate and sprinkle with sesame seeds and thinly sliced green onions. If you have sauce left, add just a little on top or save it for anyone who wants more heat.
Lindy always thinks I didn’t make enough wings. But two pounds for four people works well if you serve them with rice, vegetables, or salad. If the wings are the main appetizer for a bigger group, I’d increase the amount by one and a half to two times.
The whole recipe takes about 50 minutes, but there isn’t much hands-on work. The wings spend most of that time in the oven, so you can make a side dish or get the rest of the meal ready at the same time. If you’re having people over or planning an evening outside, you can mix the sauce ahead of time and keep it in the refrigerator until the wings are ready to bake.
5. Greek lemon chicken soup ready in 20 minutes
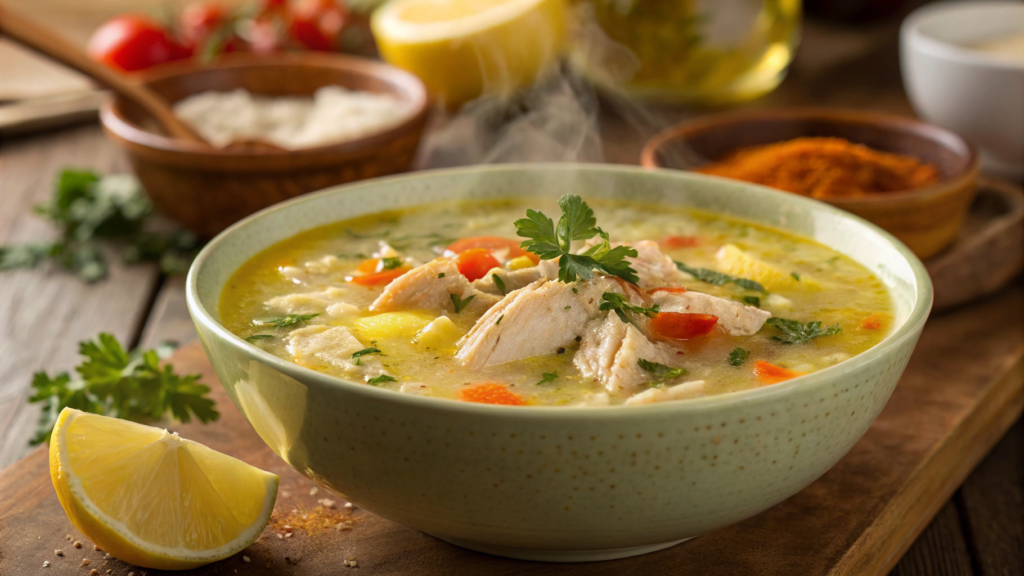
We make lemon chicken soup more often when the weather is cold. It’s filling without feeling heavy, and the lemon freshens up the chicken broth nicely. Lindy likes plenty of chicken in hers, so for four servings I use about two full cups of already cooked meat.
Traditional Greek egg and lemon soup can seem a little tricky because of the eggs, but there’s nothing difficult about it here. The main thing is not to pour them straight into boiling broth. First, we gradually mix the eggs with hot broth, and they make the soup thick and creamy without any cream.
Ingredients
Serves 4
- 6 cups chicken broth (about 1.4 liters)
- 2 cups cooked chicken, pulled into small pieces (about 280 g)
- ¾ cup orzo (about 135 g)
- 2 large eggs
- ⅓ cup fresh lemon juice (about 80 ml)
- 1 teaspoon finely grated lemon zest
- ½ teaspoon salt, or to taste
- ¼ teaspoon black pepper
- 2 tablespoons chopped fresh dill
- 2 tablespoons chopped fresh parsley
It’s better to use already cooked chicken for this recipe. Leftover roasted chicken works well, or you can use chicken you cooked ahead of time. That way, the soup really can be ready in about 20 minutes.
It’s better to squeeze the lemon right before cooking. With a small handheld citrus juicer, such as a Citrus Lemon Squeezer on Amazon, it takes less than a minute, and you don’t have to fish seeds out of the bowl.
How to make Greek lemon chicken soup
- Cook the orzo in the broth. Pour the chicken broth into a large pot and bring it to a boil. Add the orzo and cook for about 7–9 minutes, or for as long as the package directions recommend. Stir occasionally, especially toward the end. Orzo is small and can stick to the bottom if you forget about it completely.
- Add the cooked chicken. When the pasta is almost done, add the pulled chicken to the pot. Reduce the heat. We only need to warm the meat through in the hot broth for 2–3 minutes, not cook it all over again.
- Whisk the eggs with lemon. In a separate bowl, whisk the eggs well. Add the lemon juice and zest and whisk again. The mixture should become smooth and slightly foamy.
- Gradually add hot broth to the eggs. Scoop about ½ cup of hot broth from the pot. Very slowly pour it into the egg and lemon mixture while whisking constantly. Then add another ½ cup the same way. Don’t rush this step. If you combine cold eggs with a large amount of very hot liquid all at once, they can curdle.
- Pour the mixture back into the pot. Move the pot off the high heat and slowly pour in the egg mixture while stirring the soup constantly. Then warm it over low heat for another 1–2 minutes. There’s no need to boil the soup at this point. It will gradually thicken a little.
- Add the herbs and check the seasoning. Stir in the dill and parsley, then add salt and black pepper. Taste the soup. For a stronger lemon flavor, add another 1–2 teaspoons of lemon juice.
Serve the soup right after cooking. I try to scoop up broth, chicken, and orzo with each ladle because the pasta quickly settles at the bottom of the pot. If the soup sits for a while, the orzo will keep absorbing the broth and become softer.
This soup is best made for one meal or, at most, for the next day. Orzo keeps absorbing the broth even in the refrigerator, so the soup gets noticeably thicker over time. If you’re reheating leftovers, just add a little chicken broth or water and warm it over low heat without bringing it to a hard boil.
6. Brazilian garlic chicken skewers for backyard nights
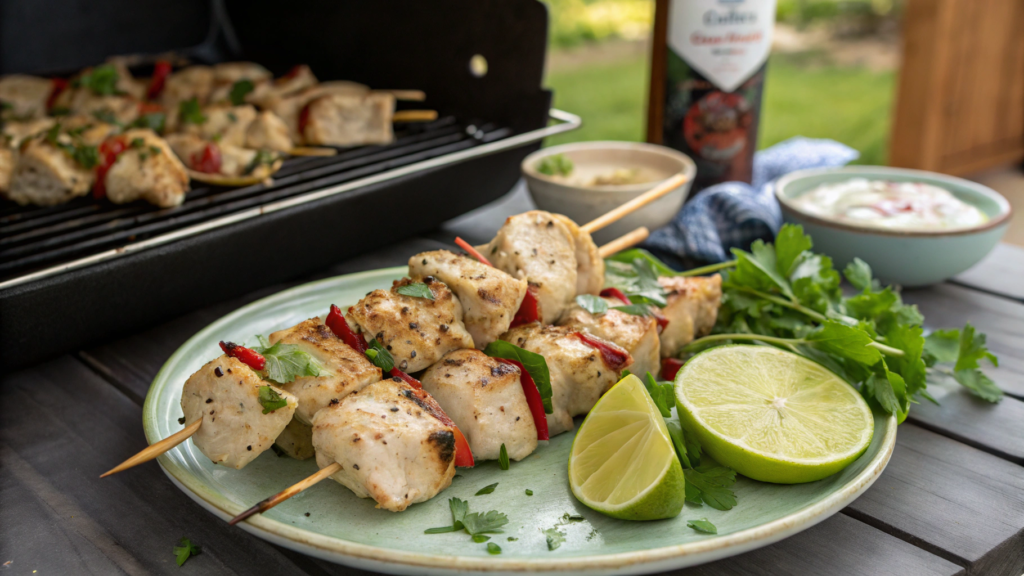
In summer, we cook outside pretty often, and chicken skewers show up on our table regularly. You can prep them ahead of time, and they only need about 10–12 minutes on the grill. Lindy usually handles the salad or vegetables while I take care of the grill.
For this version, the chicken is marinated with garlic, lime, paprika, and olive oil. The marinade is simple, but the meat comes out flavorful and browns nicely over high heat.
Ingredients
Serves 4
- 1 ½ pounds boneless, skinless chicken thighs (about 680 g)
- 4 garlic cloves
- 2 tablespoons olive oil
- 2 tablespoons fresh lime juice
- 1 teaspoon paprika
- ½ teaspoon ground cumin
- ¾ teaspoon salt
- ¼ teaspoon black pepper
- 1 tablespoon chopped fresh parsley
If you’re using wooden skewers, soak them in water for about 20–30 minutes before cooking. This helps keep the ends from burning too much on the grill. You can also use metal skewers → Stainless Steel BBQ Skewers on Amazon, especially if you make skewers often.
How to make garlic chicken skewers
- Cut the chicken. Cut the thighs into pieces about 1 ½ inches (around 4 cm) wide. Try to keep them roughly the same size so they cook at the same rate.
- Mix the marinade. Finely grate or mince the garlic and combine it with the olive oil, lime juice, paprika, cumin, salt, and pepper. Add the chicken and mix well so every piece is coated in the marinade.
- Let the chicken marinate. Cover the bowl and refrigerate for at least 30 minutes. You can leave it for 2–3 hours as well. I wouldn’t leave the chicken in a lot of lime juice much longer than that because the acid gradually changes the texture of the meat.
- Assemble the skewers. Thread the chicken pieces onto the skewers, leaving just a little space between them. Don’t press the pieces tightly against each other. Hot air should be able to move between them.
- Preheat the grill. Heat it to medium or medium-high, around 400–425°F (205–220°C). Lightly oil the grates so the chicken turns more easily and doesn’t stick to the metal.
- Grill the skewers. Place them on the grill and cook for about 10–12 minutes. Turn them every 2–3 minutes so the chicken browns on several sides and the garlic in the marinade doesn’t have time to burn.
The easiest way to check doneness is with a kitchen thermometer. Insert it into the largest piece of chicken without touching the skewer. The internal temperature should reach 165°F (about 74°C).
- Let the chicken rest for a few minutes. Remove the skewers from the grill and let them sit for 3–5 minutes. Then sprinkle with fresh parsley.
These skewers work really well for summer get-togethers when friends are hanging out in the backyard and you don’t want to spend the whole evening cooking. We slide the chicken off the skewers onto one large plate and set it in the middle of the table with vegetables, salad, or rice. It’s easier that way, since no one wants to deal with hot metal skewers.
7. French-inspired roast chicken with Dijon honey sauce
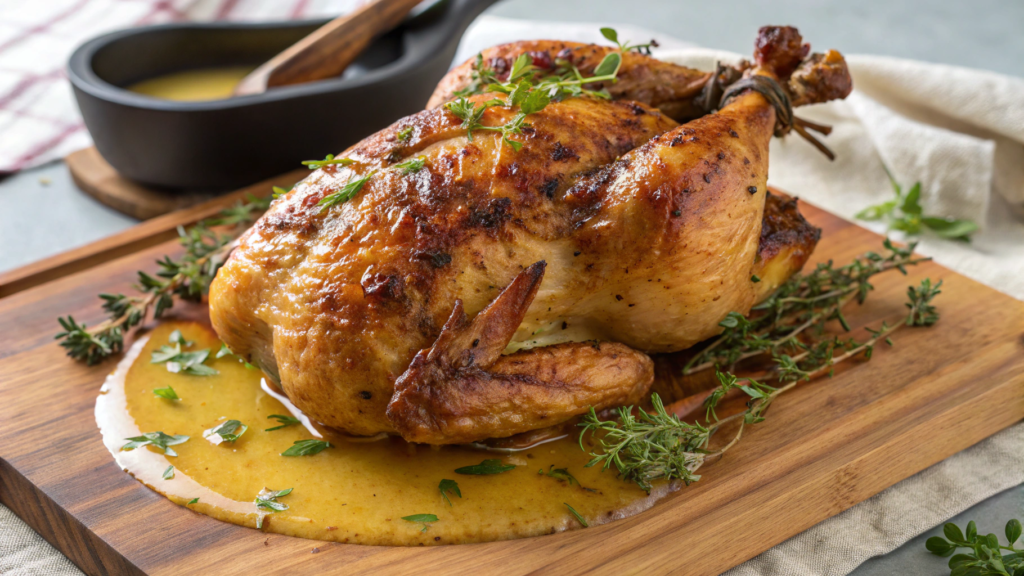
Roast chicken with Dijon mustard and honey works for us both as a regular dinner and when someone comes over. The sauce goes on closer to the end of roasting, so the skin has time to brown while the honey doesn’t start burning too early.
Lindy likes the pieces with more deeply browned skin, so I usually leave the baking sheet in the oven for another couple of minutes at the very end. You just need to keep an eye on the honey because it darkens quickly.
Ingredients
Serves 4
- 4 bone-in, skin-on chicken thighs, about 2–2 ½ pounds (900–1100 g)
- 1 tablespoon olive oil
- ¾ teaspoon salt
- ½ teaspoon black pepper
- 1 teaspoon dried thyme
- 2 garlic cloves, finely grated
For the sauce
- 3 tablespoons Dijon mustard
- 2 tablespoons honey
- 1 tablespoon lemon juice
- 1 tablespoon olive oil
- 1 teaspoon fresh thyme or ½ teaspoon dried thyme
- 1 small garlic clove, finely grated
If the honey is thick, you can warm it slightly before mixing it with the mustard. This makes the sauce easier to spread over the chicken.
How to make roast chicken with Dijon honey sauce
- Prepare the chicken. Take the thighs out of the refrigerator about 15 minutes before cooking and pat the skin dry well with paper towels. Mix the salt, pepper, thyme, and garlic, then rub the mixture over the chicken. Lightly brush the top with olive oil.
- Start roasting without the sauce. Preheat the oven to 425°F (about 220°C). Place the thighs skin-side up in a baking dish or on a baking sheet and roast for 25 minutes. During this time, the skin will start to brown and some of the excess fat will render out.
- Mix the sauce. While the chicken is in the oven, combine the Dijon mustard, honey, lemon juice, olive oil, thyme, and garlic. Mix well until smooth. If the mixture seems too thick, add 1 teaspoon of warm water.
- Add the first layer. Take the baking sheet out and brush the chicken with about half of the sauce. There’s no need to add a thick layer. A thinner coating caramelizes faster and is less likely to burn.
- Return the chicken to the oven. Roast for another 10 minutes, then brush on the remaining sauce and cook for another 5–8 minutes. The honey will already be darkening at this point, so it’s better to stay close to the oven during the last few minutes.
- Check for doneness. Insert a kitchen thermometer into the thickest part of the thigh without touching the bone. The temperature should reach at least 165°F (about 74°C). With thighs, I usually don’t worry about a few extra degrees because dark meat stays juicy longer than chicken breast.
- Let the chicken rest for a few minutes. After taking it out of the oven, let it sit for 5 minutes. During this time, the juices inside will redistribute a little and the sauce on the surface will thicken.
Potatoes, green beans, or a simple salad go well with this chicken. If there’s some juice and Dijon sauce left in the baking dish, you can spoon a little over the potatoes or vegetables.
You can prep the chicken ahead of time, and before dinner all that’s left is to put the dish in the oven and brush the thighs with sauce a couple of times. I usually serve the chicken and side dish separately so everyone can build their own plate. It keeps things simple and works well even for a small dinner with friends.
8. Healthy avocado chicken salad with a crunchy twist
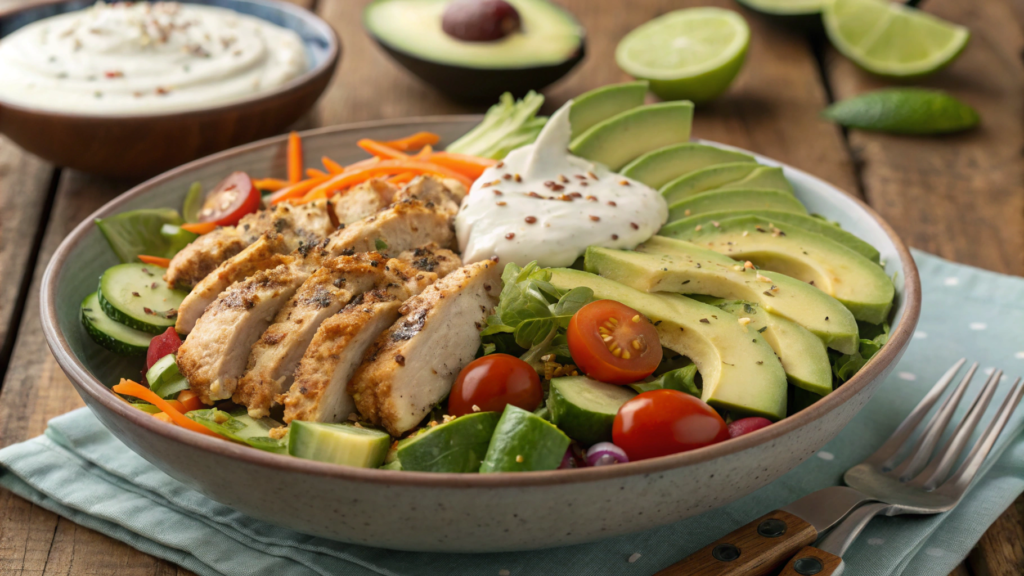
Chicken salads often come in handy at our house when there’s some cooked meat left after dinner. Lindy usually cuts everything into larger pieces than I do, and for this salad, I like her way better. You want to be able to taste the separate pieces of chicken, avocado, and vegetables instead of turning everything into one uniform mixture.
There’s no need for mayonnaise in the dressing. Ripe avocado, Greek yogurt, and lime make a creamy base, while celery and toasted seeds add crunch. The chicken and Greek yogurt provide plenty of protein, avocado adds unsaturated fats, and the vegetables and seeds bring in fiber. So this works well as a full lunch, not just a light salad that leaves you hungry again soon.
Ingredients
Serves 4
- 2 cups cooked chicken, chopped or pulled into pieces (about 280 g)
- 2 ripe avocados
- ⅓ cup plain Greek yogurt (about 80 g)
- 2 tablespoons fresh lime juice
- 1 teaspoon Dijon mustard
- ½ teaspoon salt
- ¼ teaspoon black pepper
- 2 celery stalks
- ¼ cup finely chopped red onion (about 40 g)
- ⅓ cup toasted pumpkin seeds (about 40 g)
- 2 tablespoons chopped cilantro or parsley
For this salad, it’s better to use a soft, fully ripe avocado. If it’s firm, the dressing won’t come together properly. I prefer buying raw seeds and quickly toasting them myself in a dry skillet.
How to make avocado chicken salad
- Prepare the vegetables. Cut the celery into small pieces and chop the red onion fairly finely. Large pieces of raw onion can easily overpower the rest of the salad. If the onion is very sharp, soak it in cold water for 5 minutes, then drain and dry it well.
- Make the avocado dressing. Mash one avocado with a fork in a large bowl. Add the Greek yogurt, lime juice, Dijon mustard, salt, and pepper. Mix until creamy. You can leave a few small pieces of avocado in it. The mixture doesn’t need to be perfectly smooth.
- Add the chicken and vegetables. Add the cooked chicken, celery, and red onion to the bowl. Stir with a large spoon until the dressing coats the chicken well. Don’t mix too aggressively, especially if the meat has already been pulled into small pieces.
- Cut the second avocado. Dice it into pieces about ½ inch (around 1–1.5 cm) and gently fold them into the salad. This way, part of the avocado becomes the dressing while the rest stays in separate pieces.
- Toast the seeds. Toast the pumpkin seeds in a dry skillet over medium heat for 2–3 minutes. Shake the skillet from time to time and remove the seeds once they’re lightly browned and start to smell nutty. Let them cool slightly, then stir most of them into the salad. Save a little for the top.
- Add the herbs and taste. Stir in the cilantro or parsley. Check the salt and acidity. If the avocado is very rich and creamy, you may want to add another teaspoon of lime juice.
We usually eat this salad for lunch. I put mine over a large handful of salad greens, while Lindy sometimes wraps hers in a tortilla. If you want a more filling portion, you can simply add more chicken or sprinkle a few extra seeds on top.
I definitely wouldn’t make this salad too far ahead. Avocado gradually darkens, and the seeds lose their crunch after sitting in the dressing for a few hours. It’s better to mix most of the salad shortly before eating and add the seeds last. Leftovers can be stored in a sealed container in the refrigerator and eaten the next day.
After a lunch like this, you’re less likely to be looking for another snack an hour later. The portion is filling thanks to the chicken, avocado, and seeds, without a heavy dressing. If you need a simple healthy lunch made with ingredients that are easy to keep at home, this recipe is worth keeping in mind.
9. Japanese teriyaki chicken bowls for quick lunches
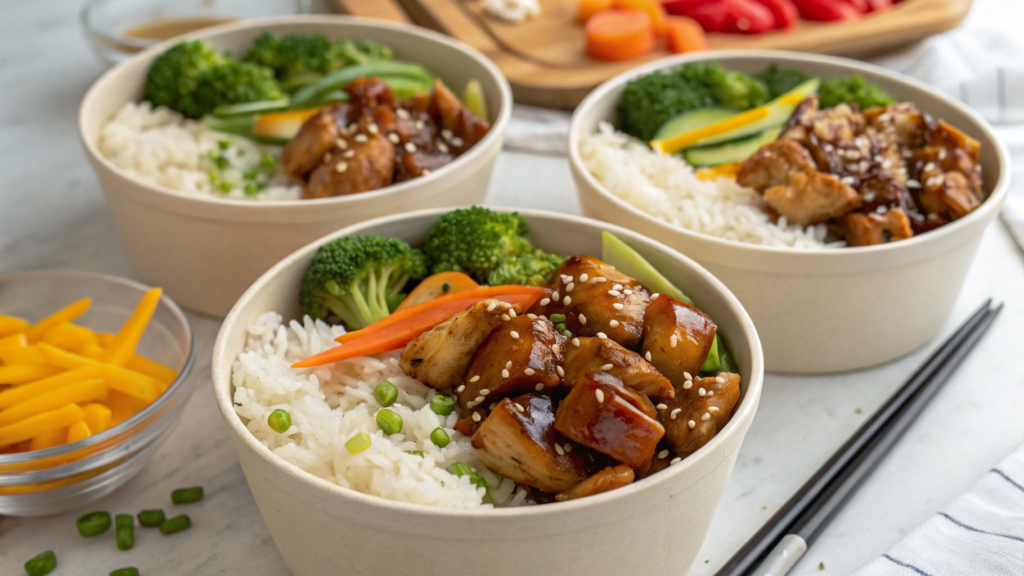
I usually make teriyaki chicken for lunch. It’s easy to portion it into containers with rice and vegetables right away, so I don’t have to make lunch from scratch for the next few days. Lindy usually adds more vegetables to her portion, so I just keep them separate and everyone takes as much as they want.
There’s no need for bottled sauce here. Soy sauce, honey, rice vinegar, garlic, and ginger come together in just a couple of minutes, and once heated, the sauce thickens and coats the chicken in a thin layer.
Ingredients
Serves 4
- 1 ½ pounds boneless, skinless chicken thighs (about 680 g)
- 1 tablespoon vegetable oil
- 2 cups cooked jasmine or short-grain rice (about 370 g)
- 1 cup small broccoli florets (about 90 g)
- 1 large carrot
- 2 green onions
- 1 teaspoon sesame seeds
For the sauce
- ¼ cup soy sauce (about 60 ml)
- 2 tablespoons honey
- 1 tablespoon rice vinegar
- 1 tablespoon water
- 1 teaspoon sesame oil
- 2 garlic cloves, finely grated
- 1 teaspoon fresh ginger, finely grated
- 1 teaspoon cornstarch
If you’re preparing several lunches ahead of time, meal prep containers with separate compartments, such as Meal Prep Containers with Compartments on Amazon, are handy. This keeps the rice and vegetables from sitting completely covered in sauce before reheating.
How to make teriyaki chicken with rice
- Prepare the rice and vegetables. If the rice isn’t ready yet, cook it according to the package directions. Cut the carrot into thin strips and divide the broccoli into small florets. Steam the vegetables for 4–5 minutes or quickly sauté them in a skillet. They should soften without falling apart.
- Cut the chicken. Cut the thighs into pieces about 1–1 ½ inches (2.5–4 cm). Pat the surface dry with a paper towel. Dry chicken browns more quickly in the skillet.
- Mix the sauce. In a small bowl, combine the soy sauce, honey, rice vinegar, water, sesame oil, garlic, and ginger. In a separate small bowl, mix the cornstarch with 1 tablespoon of this mixture, then stir it back into the sauce. This helps keep lumps of cornstarch out of the finished sauce.
- Cook the chicken. Heat the vegetable oil in a large skillet over medium to medium-high heat. Add the chicken in a single layer and leave it untouched for about 3 minutes. Then turn the pieces and cook for another 3–4 minutes. If the skillet is small, it’s better to cook the chicken in two batches rather than pile the pieces on top of each other.
- Check the chicken. Use a kitchen thermometer on the largest piece. The internal temperature should reach 165°F (about 74°C). If it’s a couple of degrees short, that’s fine. The chicken will cook a little more in the sauce.
- Add the sauce. Reduce the heat to medium and pour the mixture into the skillet. Stir the chicken constantly for 2–3 minutes. During this time, the cornstarch will thicken the liquid and the sauce will start coating the meat. If it gets too thick, add 1–2 tablespoons of water.
- Assemble the portions. Divide the rice among four bowls or containers. Add the broccoli and carrot alongside it, then place the chicken on top with a little sauce. Sprinkle with green onions and sesame seeds.
If you’re making lunches ahead, let the rice and chicken cool slightly before closing the containers. They can be stored in the refrigerator for up to 3–4 days. Before reheating, I add a teaspoon of water to the rice so it softens again.
If you make several portions ahead of time, the next day you only need to reheat the rice, chicken, and vegetables. After reheating, you can add some fresh cucumber or green onion. I usually prepare a few containers at once so lunch is already taken care of for the next couple of days.
10. Tex-Mex baked chicken casserole that feeds everyone
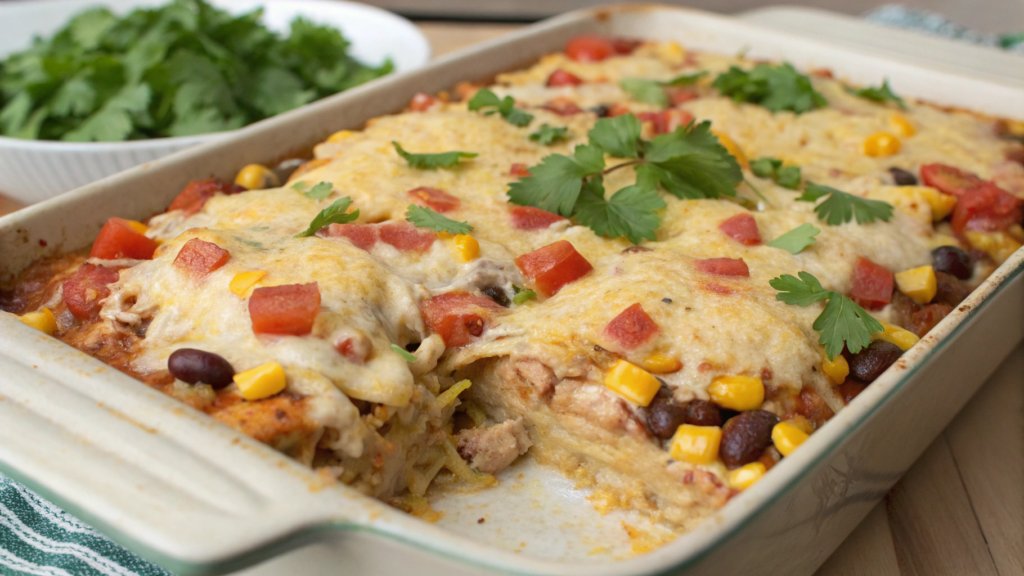
I usually think of casseroles when more people than usual are gathering around the table. You don’t need to cook the meat, side dish, and a few extras separately because most of the dinner goes into one baking dish. Lindy always votes for a generous layer of cheese on top. Fresh cilantro is better added after baking so it keeps its flavor and color.
This casserole brings together chicken, beans, corn, rice, tomatoes, and spices. You can use already cooked chicken, so most of the work is simply mixing everything together and putting it in the oven.
Ingredients
Serves 6–8
- 3 cups cooked chicken, chopped or pulled into small pieces (about 420 g)
- 2 cups cooked rice (about 370 g)
- 1 15-ounce can black beans (about 425 g), rinsed and drained
- 1 cup corn (about 165 g)
- 1 14.5-ounce can diced tomatoes (about 410 g), excess liquid drained
- 1 small red bell pepper
- ½ small red onion
- 1 ½ cups shredded cheddar or a cheese blend (about 170 g)
- ½ cup tomato salsa (about 120 g)
- 1 teaspoon ground cumin
- 1 teaspoon smoked paprika
- ½ teaspoon garlic powder
- ½ teaspoon chili powder
- ½ teaspoon salt
- ¼ teaspoon black pepper
- 1 tablespoon olive oil
- 2 tablespoons chopped fresh cilantro
How to make chicken casserole
- Prepare the vegetables. Cut the bell pepper into small cubes and finely chop the red onion. Heat the olive oil in a skillet and cook the vegetables over medium heat for 4–5 minutes. They should soften a little, but they don’t need to cook all the way through.
- Mix the casserole base. In a large bowl, combine the cooked chicken, rice, black beans, corn, tomatoes, and cooked vegetables. Add the salsa, cumin, paprika, garlic powder, chili powder, salt, and pepper. Mix well so the spices and salsa are evenly distributed throughout.
- Add some of the cheese. Stir in about 1 cup of shredded cheese. Save the remaining ½ cup for the top. The cheese inside helps the ingredients hold together a little after baking, but the mixture shouldn’t turn into a dense mass.
- Transfer everything to the baking dish. Lightly grease a 9 × 13-inch baking dish and spread the mixture evenly inside. Don’t press it down too firmly with a spoon. Sprinkle the remaining cheese over the top.
- Bake. Place the dish in an oven preheated to 375°F (about 190°C) for 20–25 minutes. The edges should be heated through and the cheese on top should be completely melted. Since the chicken and rice are already cooked, the casserole doesn’t need to stay in the oven for long.
- Let it rest for a few minutes. After taking it out of the oven, leave the dish on the counter for about 5 minutes. This helps the casserole firm up slightly and makes it easier to serve. Add fresh cilantro before serving.
You can serve avocado, sour cream, extra salsa, or sliced green onions with this dish so everyone can add them to their own portion. I don’t mix these into the casserole itself, especially the avocado. They’re much better fresh.
This casserole makes about 6–8 servings, so it works well for a family dinner or when friends are coming over. If you end up with a smaller group, the leftovers keep well in the refrigerator and reheat nicely the next day.
What are we cooking?
After ten different ideas, it’s pretty clear how many different meals you can make with regular chicken. But there’s no need to cook all of them one after another. I’d start with whichever one fits the day best.
For a quick lunch, you can make teriyaki chicken with rice or the lemon soup. For a group, the big Tex-Mex casserole is easy to put in the oven, while I’d save the gochujang wings for an evening when getting a little sauce on your fingers isn’t a problem.
If you make one of these dishes, tell me in the comments which one you started with and what you changed in the recipe to make it your own. I always read those variations, and they often give us new ideas for our kitchen.