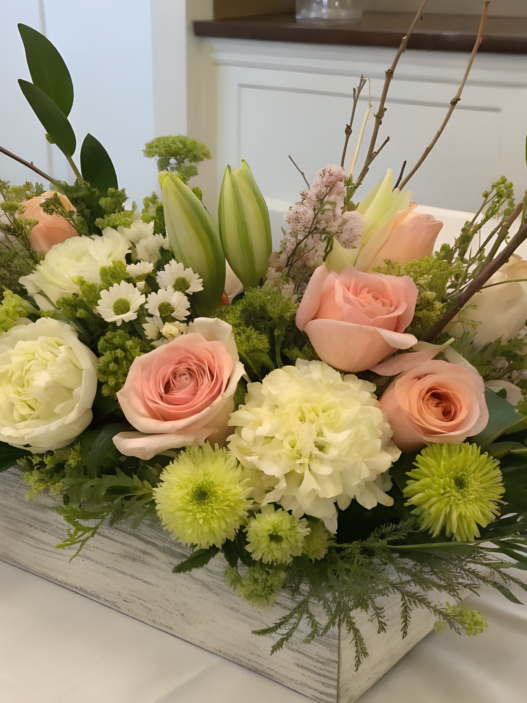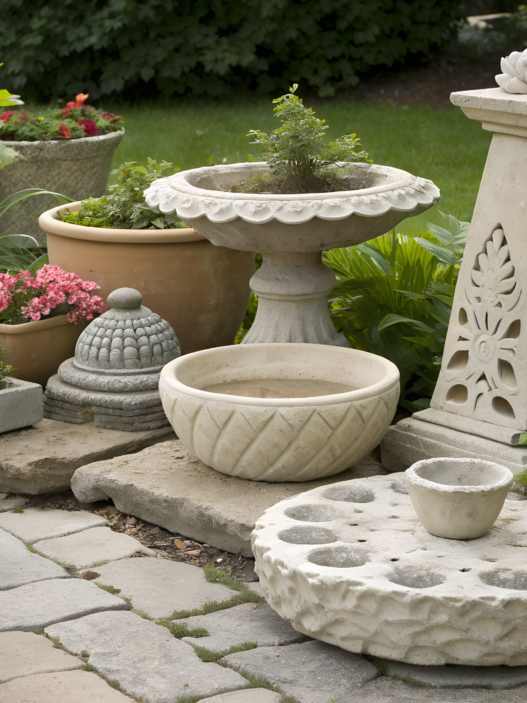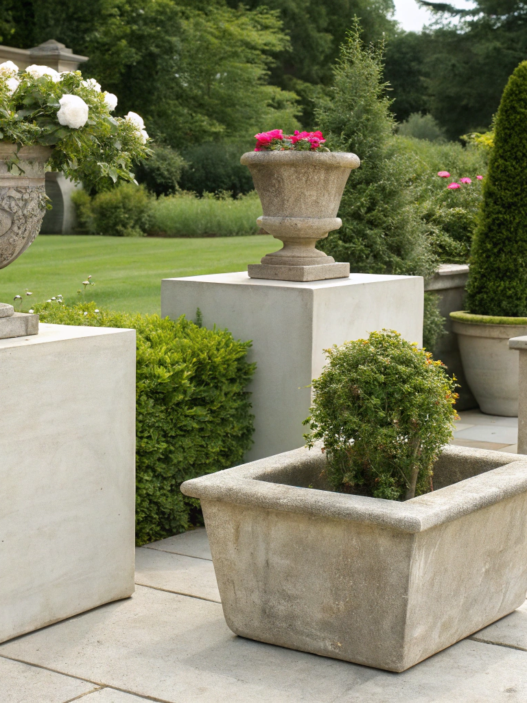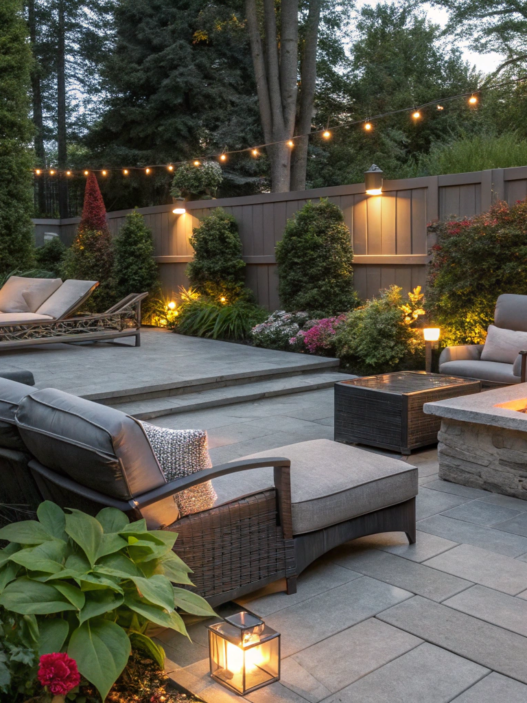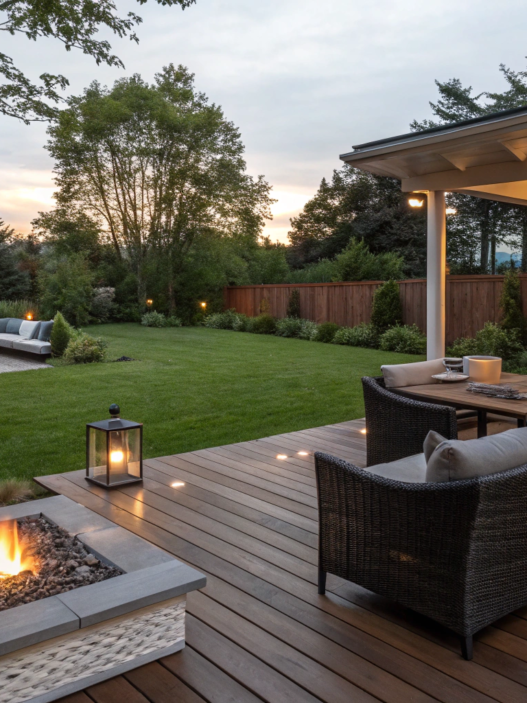
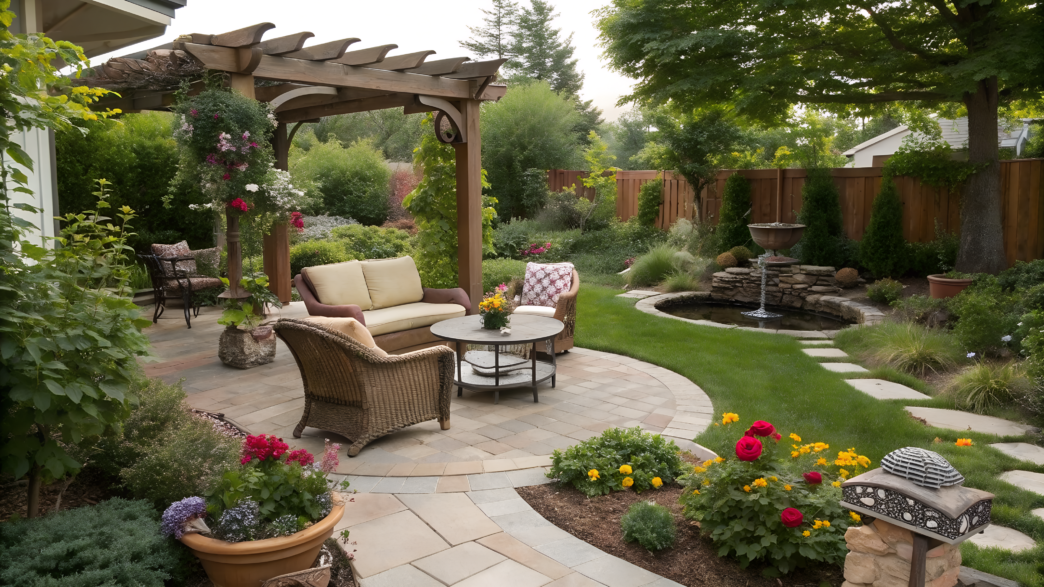
You really do not have to build a new terrace or completely redo your yard to make it feel like a place where you want to spend a nice evening. In real life, it is often enough to add just a few details, like soft lighting, a cute little sitting area, something unusual, and so on.
These ideas are very simple, and that is why Lindy and I love them. Almost all of them can be done over a weekend using easy-to-find materials, old things, or leftovers from other projects. And the result still looks pretty convincing and beautiful.
Here I want to share 10 projects that help make the garden cozier, more useful, and more interesting without a big rebuild.
1. Outdoor Candle Chandelier From a Tomato Cage
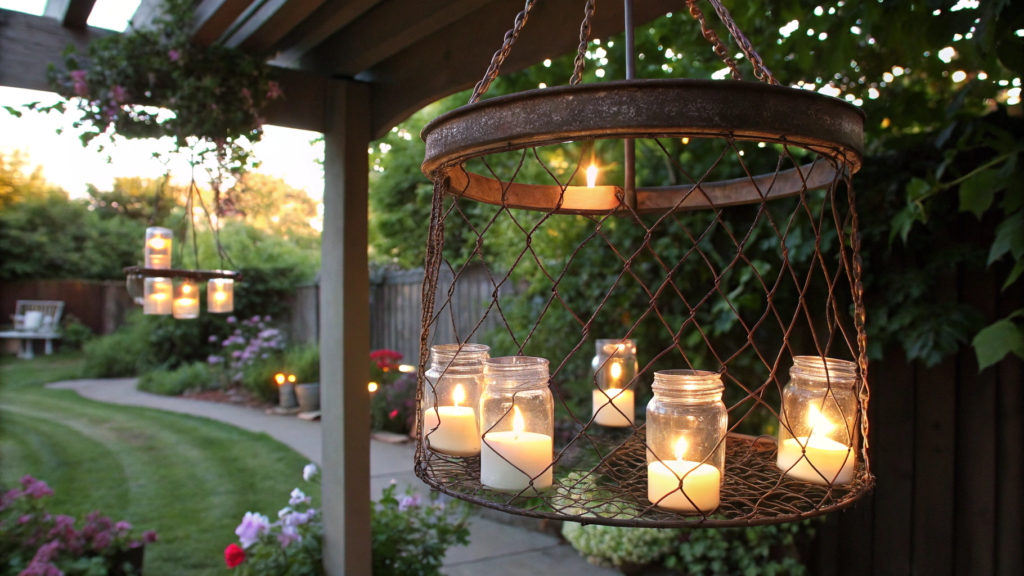
In this project, we take a tomato cage, a few jars, candles — and make a hanging chandelier without any electricity. Here we use garden things that we originally bought for the beds. And we liked the tomato cage because if you turn it upside down, it already looks like a light fixture frame.
What you’ll need
- One tall metal tomato cage, 42–54 inches (107–137 cm)
- 6–8 small glass jars
- Thin galvanized wire
- Wire cutters and pliers
- S-hook
- Tea lights or LED candles
- Spray paint for metal, if you want to repaint the frame
- Gloves
If you do not have jars, you can use Ball Regular Mouth Mason Jars. Personally, I chose smaller ones. Large jars make the frame heavy pretty quickly, and the chandelier starts to look a little bulky.
How to make this chandelier
1. Prepare the frame
Turn the tomato cage upside down. The wide ring will be at the bottom, and the legs at the top can be gathered together and turned into a hanging point.
If the cage is new and too shiny, I would paint it. Black, dark green, or graphite looks more natural and hides better among the plants in the evening.
It is better to apply the paint in thin layers. Put the cage on a piece of cardboard, paint one side, let it dry a little, then turn it over. Do not try to cover all the metal in one pass. A thick layer can stay sticky or form drips later.
2. Check the edges
Before assembling, run your gloved hand over the rings and connection points. Old cages sometimes have a small sharp piece of wire sticking out. It is better to remove sharp edges right away — bend them with pliers or cut them off.
3. Make handles for the jars
Cut pieces of wire 8–10 inches long (20–25 cm). Wrap the wire around the neck of the jar and make a loop at the top.
First, prepare all the jars on the table. This makes it easier to see which ones turned out straighter, and which ones are better to hang on the other side so the chandelier does not tilt.
I would start with six jars. I would hang three on the lower ring, then three more between them a little higher. If the frame is large, you can add two more. But do not fill everything too tightly. There should still be some space between the jars.
4. Hang the jars
Attach the jars to the rings of the tomato cage. Leave about 5–6 inches (13–15 cm) between them so it is easy to place the candles and light them later.
Look not only at symmetry, but also at weight. Sometimes one jar is a little heavier than another, and the chandelier starts pulling to one side. Just hang it across from the heavier side or a little lower. Do not be afraid to move the jars around a bit until they sit the way they should.
5. Make the top hanger
Gather the top legs of the cage together and wrap them with wire. Make a strong loop for the S-hook.
If the legs are too long, shorten them with wire cutters. Be sure to bend the sharp ends inward. Otherwise, you will run into them exactly when it is already dark and you just want to light the candles.
Where to hang the chandelier
This kind of chandelier looks best where you actually sit in the evening. Above a small table, next to a bench, by an outdoor kitchen, under a pergola. You can also hang it from a strong branch. But only if the branch is really strong.
If people will be walking under the chandelier, leave about 7 feet (2.1 m) from the ground. Above a table, you can hang it a little lower, but make sure no one hits their head when they stand up.
Candles and safety
For real candles, use deep jars so the wind does not blow out the flame as easily. Do not hang the chandelier near dry grass, fabric, low branches, or a wooden wall.
If the spot is windy, or if kids and animals run nearby, I would rather choose LED candles. I love real fire, but not so much that I want to spend the whole evening watching it and wondering if it is time to put it out. I am always for safety, especially since according to the National Fire Protection Association, candles remain one of the causes of home fires. So no heroics here: light them, sit for a while, put them out.
During the day, this chandelier looks pretty simple. But in the evening, when the candles are lit, the jars look completely different among leaves, wood, and stone.
Do not be afraid to change something after assembling it. Sometimes moving the chandelier a little to the side or adding a couple more candles is enough to make the result feel much better.
2. No Dig Pea Gravel Patio With Steel Edging
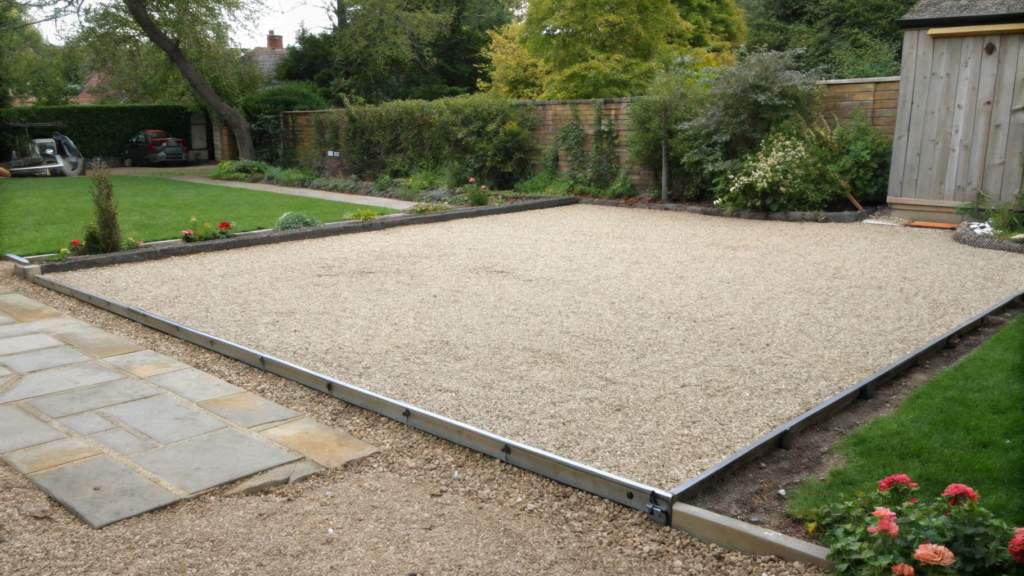
When we were thinking about making a patio area, we first wanted to lay pavers, but we quickly realized it would take a lot more time. Gravel turned out to be much more practical. If in a year you want to move a flower bed or add a path, you will not have to break anything apart.
What you’ll need
- Small rounded gravel, pea gravel, around 3/8 inch (9–10 mm)
- Steel edging, 4–5 inches tall (10–13 cm)
- Landscape fabric
- Rubber mallet
- Shovel
- Rake
- Hand tamper
- Stakes and string for marking
What to do before you start
First, put the table and chairs right on the grass. This helps you understand how much space you really need. Very often, the original plan turns out to be wrong. For a small table, an 8×8 foot area (2.4×2.4 m) is usually enough, and if you want to add chairs, it is better to go straight to 10×10 feet (3×3 m).
How to make the patio
1. Mark the edges
Stretch the string and mark the shape of the future patio. It does not have to be square. I like softer lines more, especially if there are flower beds or trees nearby.
After marking it, walk around and look at the patio area from different sides. Sometimes moving one corner by just one foot (30 cm) is enough to make the place look much more natural.
2. Prepare the surface
You do not need to dig a deep pit. That is what makes this project so useful. Cut the tall grass, remove large stones, and lightly level the surface with a rake.
If there are small uneven spots, you can leave them. The gravel layer will cover most of them later.
3. Install the steel edging
Place the steel edging along the marked line and slowly tap it in with a rubber mallet.
Do not try to make the whole length perfect at once. It is much easier to move little by little, checking the line from the side every few feet (about 1 m).
The edging is what keeps the gravel from spreading into the lawn after rain or foot traffic.
4. Lay the landscape fabric
Roll out the landscape fabric over the whole area with a small overlap.
It will not stop weeds forever; that material simply does not exist. But there will be much fewer of them, and the gravel will not slowly sink into the soil. Here, landscape fabric works as a separation layer: it keeps the soil from gradually mixing with the gravel, so the patio stays more level for longer.
5. Add the gravel
Spread the pea gravel evenly in a layer about 2–3 inches deep (5–8 cm).
Do not dump the whole pile in one spot. It is much faster to place smaller piles around the patio first, and then spread them out with a rake.
After that, lightly compact the surface with a hand tamper. The gravel will not become hard like concrete, but it will feel much better to walk on.
How to care for the patio
- During the first few weeks, the gravel will settle a little. That is normal. I usually just add one more thin layer and go over it with a rake again.
- Once a season, it is worth removing leaves and checking whether any weeds have appeared along the edges. They are easy to pull while they are still small.
If in a few years you want to make the patio larger, you can remove part of the edging, add landscape fabric, and pour in more gravel — without taking apart half the yard.
3. Stone Look Planters Using Painted Plastic Pots
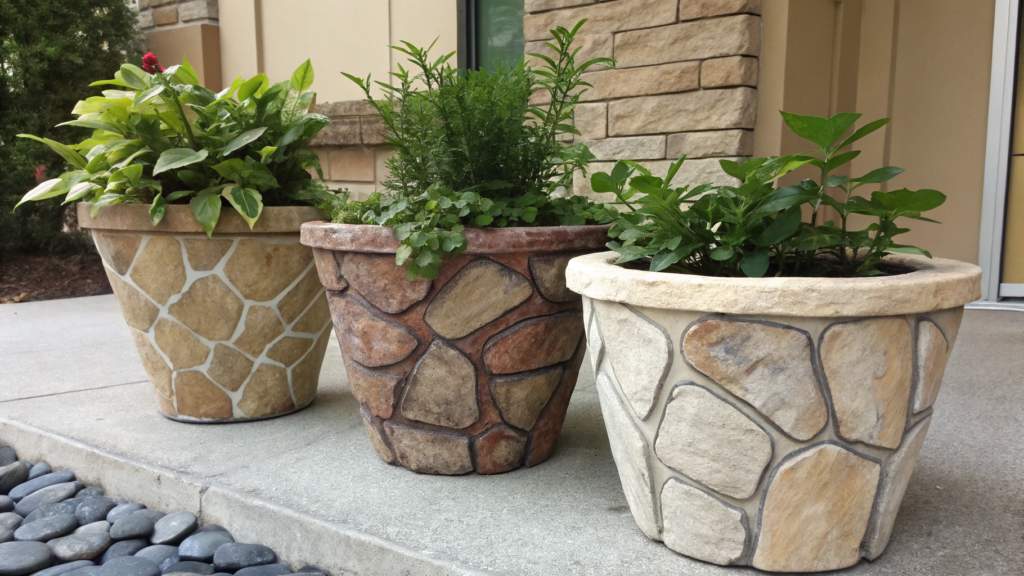
It is always a little hard to throw away old plastic pots: the shape is fine, the size is useful, but the plastic has already faded. After painting, they start to look like heavy stone planters, even though you can still move them with one hand.
What you’ll need
- Old plastic pots
- Medium-grit sandpaper
- Spray primer for plastic, for example, Rust-Oleum American Accents Stone Spray Paint
- Stone-look spray paint
- Matte protective sealer
- Cardboard or plastic sheeting to protect the surface
- Gloves
- Mask, if you are painting in an enclosed space
How to make the planters
1. Wash the pot
First, wash the pot well to remove soil, dust, and old water stains. Pay special attention to the bottom edge and around the drainage holes.
Paint does not stick well to dirt and greasy spots. Even if the pot looks clean, it is better to quickly wash it with soapy water, rinse it, and let it dry completely.
2. Lightly sand the plastic
Go over the surface with sandpaper. You do not need to sand the top layer all the way off. You just need a bit of roughness so the primer holds better.
If the pot is smooth and shiny, this step is simply necessary. On that kind of plastic, paint can start peeling after the first season if you skip the prep.
3. Apply primer for plastic
Place the pot on cardboard and apply a thin layer of spray primer for plastic. Let it dry according to the instructions on the can.
Do not rush straight into painting it “stone.” The primer is not there for looks, but for grip. It helps the paint stay on the plastic, especially if the pot will sit in the sun or rain.
4. Apply the stone-look paint
Spray the paint from about 10–12 inches away (25–30 cm). Move the can smoothly and do not stay too long in one spot.
It is better to do 2–3 thin coats than one thick coat. The stone texture appears gradually. After the first coat, the pot may look strange and spotty. Do not worry. The second coat usually pulls everything together.
5. Add a protective layer
When the paint is completely dry, apply a matte protective sealer. It will help the surface handle sun, rain, and watering for longer.
Plastic itself is lightweight, and paint does not hold on it the same way it does on clay or metal. The sealer gives the planter a better chance of not peeling after a couple of hot weeks.
Where to use these planters
After painting, these planters look much prettier, so you can place them closer to the house or near a sitting area.
- By the front door — one pot on each side, or one large pot off to the side of the door.
- On the patio — next to chairs, a garden table, or a small sofa.
- Along the edge of a path — especially if you want to mark a turn or the entrance to another part of the garden.
- Near a bench — with herbs, flowers, or plants that are nice to touch with your hand.
- On steps — if the pots do not get in the way and stand firmly.
- By a wall or fence — to fill an empty spot and add greenery without making a new garden bed.
I would not put them somewhere they will constantly get bumped by feet, a wheelbarrow, or a hose. Even with a protective sealer, the paint lasts longer when the pot stays in a more or less calm spot.
Let the pot sit for at least a day after sealing before adding soil. Then add fresh potting mix and plant as usual.
It is nice that these planters are quick and easy to move around. They look almost like stone, but your back does not hurt all evening after carrying heavy things.
4. Bamboo Privacy Fence Panels With Wire Ties
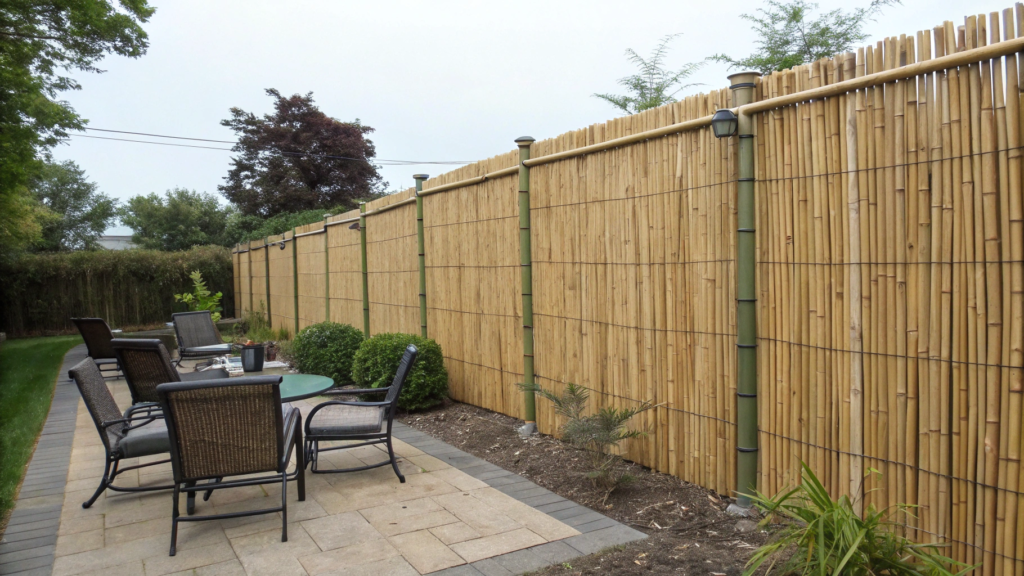
We made a bamboo privacy screen next to our seating area after realizing we spent much more time there than we expected. We did not want to build a fence, and bamboo solved the problem in just a few hours.
What you’ll need
- Bamboo fence panel or bamboo roll
- UV-resistant outdoor zip ties
- Wire cutters
- Tape measure
- Scissors or pruning shears
- An existing fence, wire mesh, or wooden frame
How to attach the panels
1. Decide what you want to hide
First, look at the yard from the place where you usually sit or walk. Sometimes a 6–8 foot panel (1.8–2.4 m) is enough to block the view of a neighbor’s shed, trash bins, or an area that feels too open.
Then measure the width and height you need. You can trim a bamboo panel a little, but it is easier to start with one that is already close to the right size.
2. Prepare the base
It is best to attach the panels to a solid base: a wooden fence, wire mesh, a pergola, or a simple wooden frame.
If the base moves, strengthen it first. Bamboo is lightweight, but the wind puts much more pressure on it than you might expect.
3. Attach the panel
Hold the panel against the base and start fastening it with outdoor zip ties, working from the top down.
I usually place the ties every 12–16 inches (30–40 cm). That keeps the panel straight and helps prevent it from pulling away from the fence after the first strong wind.
When everything is secured, trim the long ends of the zip ties with wire cutters.
4. Check that everything is secure
Gently pull on the panel in a few different places. If one section moves more than the others, simply add another zip tie.
This is not the place to save money. A few extra ties cost very little, but they help keep the panel quieter and more stable when it gets windy.
Where these panels work well
Bamboo privacy panels are not just for fences. They also look great in other parts of the garden.
- Next to a patio, to make the dining area feel more private.
- Near a hot tub or small pool, if you want a little more privacy.
- On a balcony or terrace, to block the view of neighboring houses.
- Behind a garden bench, to create a cleaner background.
- Next to a container garden, if there is a utility area or parking space nearby.
After installation, you can leave the panels as they are, or let clematis, jasmine, or climbing beans grow over them. In a couple of seasons, the bamboo will almost disappear behind the greenery.
A few things to keep in mind
Even treated bamboo gradually changes color in the sun. That is completely normal. After a few years, it becomes lighter and develops a more natural look.
To help the panels last longer, clean them once a year with a soft brush to remove dust and leaves. It only takes a few minutes, but they will keep looking much better.
And one more thing: I would not install bamboo where the bottom stays wet all the time. The lower part of the screen will age faster than the rest. Leave a small gap above the ground or place the panel somewhere with good drainage.
5. DIY Garden Bar Cart From Scrap Wood and Casters
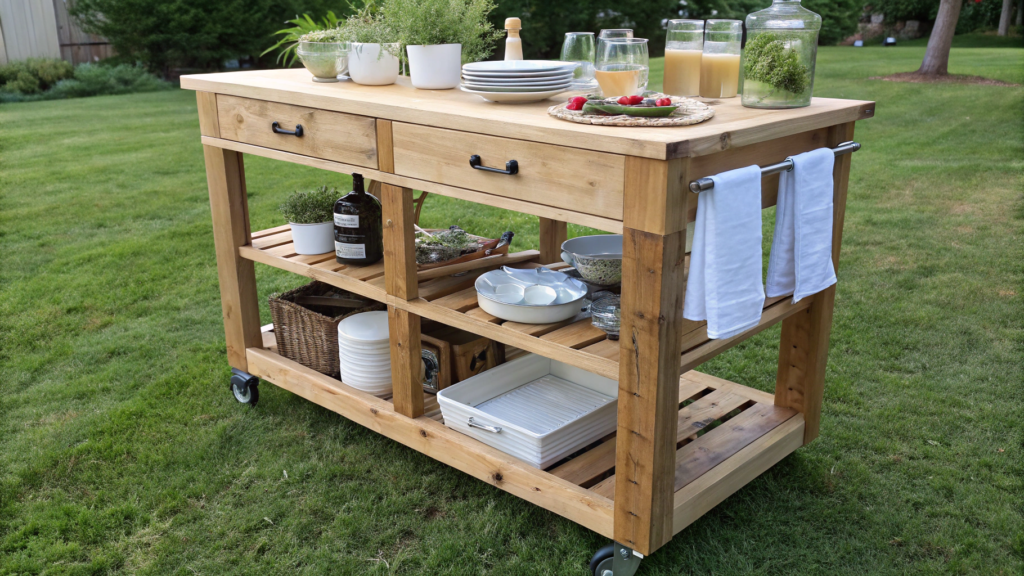
On a DIY Garden Bar Cart From Scrap Wood and Casters, you can keep drinks, dishes, towels, pots with herbs, or all of it at once. It is also easy to roll it to wherever you are planning to have dinner today.
What you’ll need
- Leftover wooden boards
- Lumber pieces for the frame
- 4 furniture casters, ideally two with locks, for example, Finnhomy Heavy Duty Swivel Casters. They roll easily over tile, wood, and compact gravel.
- Wood screws
- Screwdriver
- Drill
- Tape measure
- Sandpaper
- Outdoor protective oil or wood treatment
How to make the cart
1. Decide on the size
First, decide what will sit on the cart. If it is only drinks and a few plates, a top around 24×16 inches (61×41 cm) is enough. If you also want to keep pots with herbs or a basket with dishes on it, you can make it a little wider.
I would not make the cart too big. The more compact it is, the easier it is to roll along paths and put away for storage.
2. Build the frame
Build a rectangular frame from the lumber pieces and connect it with wood screws. Check the corners before the final assembly so the cart does not end up crooked.
If you are planning two shelves, add the extra cross pieces for the lower level right away.
3. Attach the shelves
Screw the boards to the top and bottom parts of the frame. You can leave small gaps between them — about 1/4 inch (6 mm). Water will drain through them after rain, and the wood will dry faster.
If you are using old boards, carefully check them for cracks and sticking-out nails before assembly.
4. Install the casters
Attach the furniture casters to the bottom part of the frame. It is better if at least two of them have locks. Then the cart will not roll away while you are setting the table.
After installing them, turn the cart over and roll it around the yard. If one wheel is hanging in the air, the frame is probably a little crooked. It is easier to fix that now than after painting.
5. Protect the wood
Sand the surface and apply outdoor oil or wood treatment. Pay special attention to the ends of the boards. They absorb moisture the fastest.
If the cart will stay outside in the open air, refresh the finish about once a year. It takes less than an hour, and the wood will last much longer.
The wheels matter most
If your paths are made of pea gravel, choose wheels with a slightly larger diameter. Small rollers move much worse over that kind of surface.
Do not fill the cart completely just because there is still free space on it. When you have to push it with one hand, a few extra pots or a heavy box make themselves known right away. And a little free surface will definitely be useful while working or eating outside.
6. Rain Chain From Copper Cups With Splash Basin
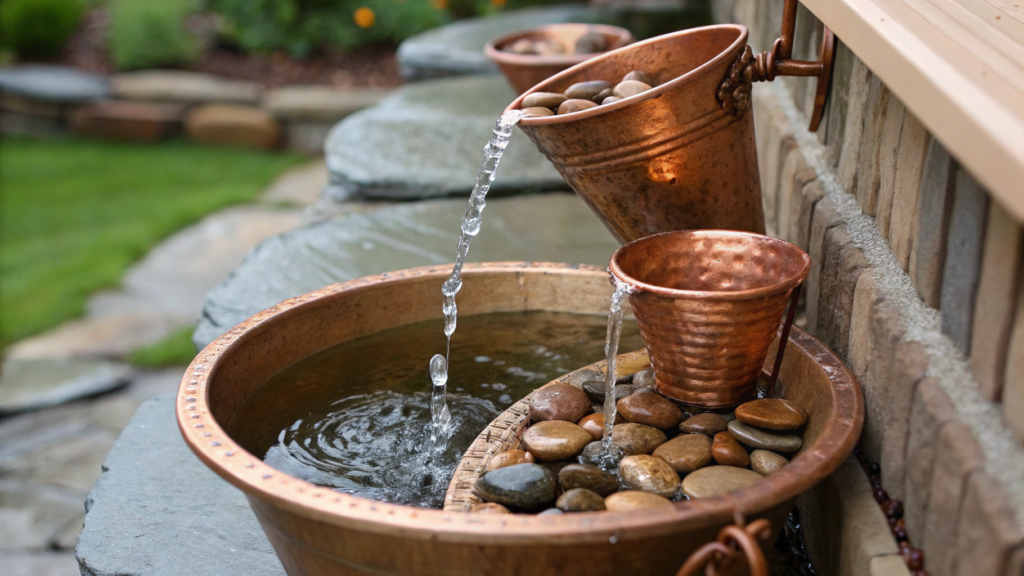
Rain Chain From Copper Cups With Splash Basin is a beautiful replacement for a regular downspout. During rain, water moves through copper cups, flows down, and lands in a decorative basin with stones.
So Lindy and I decided that we needed one too. A couple of weeks later, we made it.
What you’ll need
- Copper cups of the same size
- Copper wire or thin copper chain
- Small copper rings or hooks for connecting
- Pliers
- Drill with a metal drill bit
- Hook for attaching to the gutter
- Decorative basin or wide ceramic pot
- Large pebbles or river stones
I would not make the cups from scratch myself. For this project, it is easier to take a ready-made copper rain chain, for example, Monarch Pure Copper Lotus Rain Chain, and make the pretty base with a basin and stones by hand.
How to make the rain chain
1. Prepare the cups
Drill a small hole in the center of each cup. It is better to mark the center first with a marker so the holes do not shift to the side. If the cups hang unevenly, water will start flowing past the next cup.
After drilling, check the edges. If they are sharp, lightly smooth them with sandpaper or gently press them down with pliers.
2. Connect the cups
Connect the cups together with copper wire, small rings, or ready-made connecting pieces so they hang one under another at a distance of 3–4 inches (8–10 cm). The main thing is to keep the hole in the center of the bottom open, so water can freely move into the next cup.
3. Attach the chain
Remove the lower part of the downspout or install the chain right under the gutter outlet. The top cup should sit directly under the place where the water comes out.
Make sure the top attachment is secure. During heavy rain, the chain becomes heavier, and the wind can also move it around.
4. Make the decorative basin
Place a wide basin under the chain and fill it about two-thirds full with large pebbles. The basin should stand level so the water does not overflow only from one side.
The stones reduce splashing and help keep the basin in place. If the soil around it often washes out, you can add a little more gravel around the basin.
Where this chain looks best
Not every downspout needs to be replaced with a rain chain. It works best where it will actually be seen.
- Near the front door
- Next to a patio or sitting area
- Near a small rain garden
- Next to a decorative flower bed
- By a gazebo or pergola
This chain still looks beautiful even without rain. And when it starts raining, it quickly becomes one of those details people notice first.
How to care for the chain
Over time, copper will start to develop a natural patina. Many people wait for this effect on purpose, so polishing the metal is not necessary.
A couple of times a year, it is worth checking the attachments and removing leaves that may get stuck between the cups. We usually do this in the fall when we clean the gutters. It takes literally just a few minutes, and then during the first rain everything works again the way it should.
7. Upcycled Drawer Planter With Landscape Fabric Liner
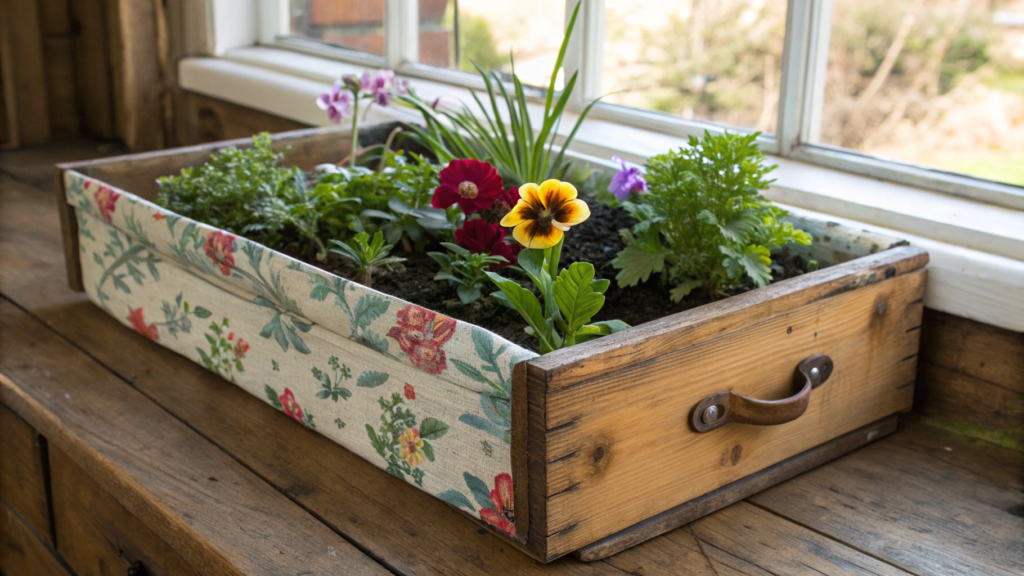
After our renovation, we had an old dresser sitting around for a long time, and no one was going to use it anymore. We got rid of the main cabinet, but we kept a few of the drawers. This is a good way to turn an old dresser drawer into an unusual planter for flowers, herbs, or low-growing decorative plants.
What you’ll need
- Old wooden dresser drawer
- Landscape fabric
- Upholstery stapler
- Scissors
- Drill
- Wood drill bit
- Potting mix
- Plants
How to make the planter
1. Check the drawer condition
Look at the bottom and the sides. If the wood has already started to rot or has dried out badly, it is better to leave that drawer for decor and not use it as a planter.
If there is old hardware or sticking-out nails, remove them ahead of time. It will be much easier to work that way.
2. Make drainage
Drill 6–10 holes in the bottom, spacing them evenly across the whole surface.
Without them, water will collect inside. For most plants, that is much more dangerous than accidentally missing one watering.
3. Attach the landscape fabric
Cut a piece of landscape fabric with a little extra room and lay it inside the drawer. Attach the edges with an upholstery stapler along the upper inside edge.
The fabric does not need to be pulled too tight. It is better to leave a little slack so it can settle onto the bottom once you add the soil.
4. Fill the drawer
Add good potting mix, leaving about 1–2 inches (2.5–5 cm) below the top edge. That way, the soil will not spill out while watering.
After that, plant your plants and water them well. During the first few days, the soil will settle a little, and that is normal. If needed, just add a bit more soil.
What to plant
This kind of drawer is usually not very deep, so it is better to choose plants with a compact root system. They will grow normally, and the drawer will not become too heavy after watering.
- Petunias — if you want bright blooms all summer.
- Pansies — for spring and cooler weather.
- Lobelia — it trails nicely over the edge of the drawer.
- Leaf lettuce — if you want to combine decor with a small edible garden.
- Basil — it grows well in containers and is always close by for the kitchen.
- Thyme — compact, fragrant, and does not need much space.
- Decorative succulents — if the drawer will sit in a sunny spot.
I like combining one taller plant in the center with a few trailing ones around the edges. Then the whole piece looks fuller, and the wood is almost completely hidden by greenery after just a few weeks.
To help the wood last longer
For this, do not place the drawer directly on the ground. It is better to raise it at least on small feet or two wooden blocks. After rain, the wood will dry faster.
If the drawer is old, do not overload it with soil. Wet soil weighs more than it seems, especially after a good watering. I would use this kind of drawer as a seasonal planter, not as a permanent garden bed for years. That way it will stay intact longer, and it will be easier to move if needed.
8. Hose Hiding Pot With Side Notch and Drain Holes
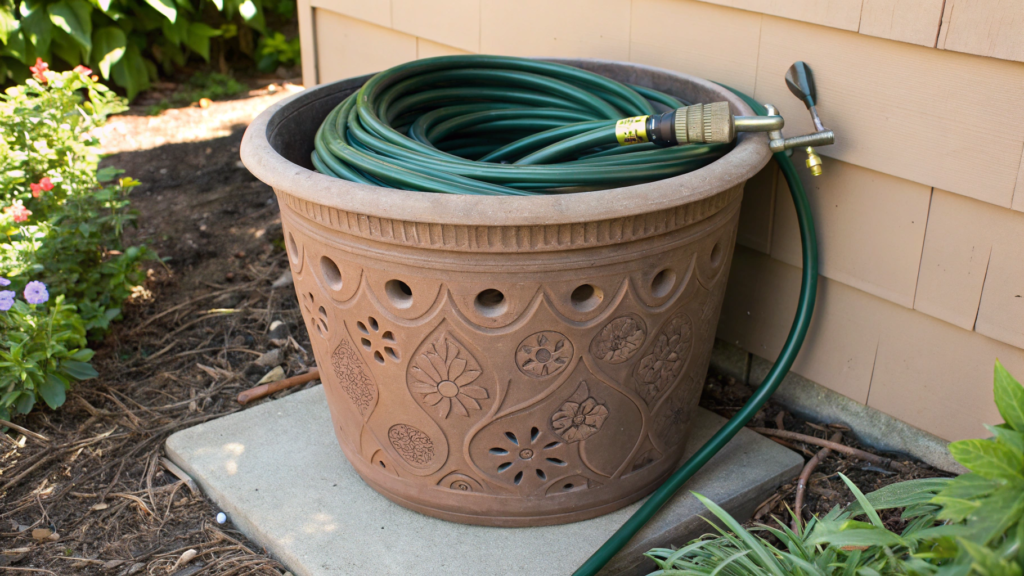
Hose Hiding Pot With Side Notch and Drain Holes helps hide a garden hose from view without putting it back in the shed after every watering. From the outside, it looks like a regular decorative pot, and inside it neatly stores the hose so it is always close by.
What you’ll need
- Large plastic or ceramic pot
- Drill
- Hole saw or large drill bit
- Drill bit for ceramic or plastic
- Sandpaper
- Marker
- Garden hose
- Circle of water-resistant plywood, 1/2 inch thick (12 mm), optional
How to make it
1. Choose the pot
Choose a pot large enough for the hose to fit inside in loose coils. For a 50-foot hose (15 m), a pot about 20–24 inches wide (50–60 cm) is usually enough.
Before you start, simply place the hose inside without making any changes. That way, you will immediately see whether there is enough room.
2. Make the side notch
Mark the place near the bottom of the pot where the hose will come out. Drill a hole, then carefully make it larger until the hose can pass through freely without getting pinched.
After that, smooth the edges with sandpaper. Sharp edges can damage the hose over time, especially if you pull it out often for watering.
3. Drill drainage holes
If the pot does not already have holes in the bottom, make 4–6 small holes.
After rain or watering, a little water will still get inside. With drainage, it will not sit there, and the hose will dry faster.
4. Place the hose inside
Coil the hose in wide loops, starting from the outer edge and gradually moving toward the center. This helps it twist less and makes it easier to pull out when you use it.
Pull the end of the hose through the side opening and connect it to the spigot, or leave it next to it.
This option works best for short and lightweight garden hoses. After watering, they are easy enough to put back by laying them inside in wide loops. If you use a long, heavy hose for the whole yard, a regular hose reel will be more convenient.
5. Make an inner cover, optional
If you want to hide the hose completely, cut a circle from water-resistant plywood to match the inside diameter of the pot. Set it a little below the top edge, and place a small pot of flowers or a decorative lantern on top.
The hose will stay hidden, but you can quickly remove the cover when you need it.
Where to place this pot
This kind of pot is best placed where you use the hose most often.
- Near the garden spigot
- By the vegetable garden
- Next to the greenhouse
- Near flower beds that need frequent watering
- On the patio, if you have a lot of container plants
If there are regular planters nearby, this hose pot will not stand out much and will look like part of the overall arrangement.
Tip
Do not try to fit a hose into this pot if it is longer than the pot can actually hold. In that case, every watering turns into untangling knots. It is better to choose a slightly larger pot or keep a long hose on a reel, and use this idea for short garden hoses near the house.
9. Pergola String Light Pole Bases Using Concrete Buckets
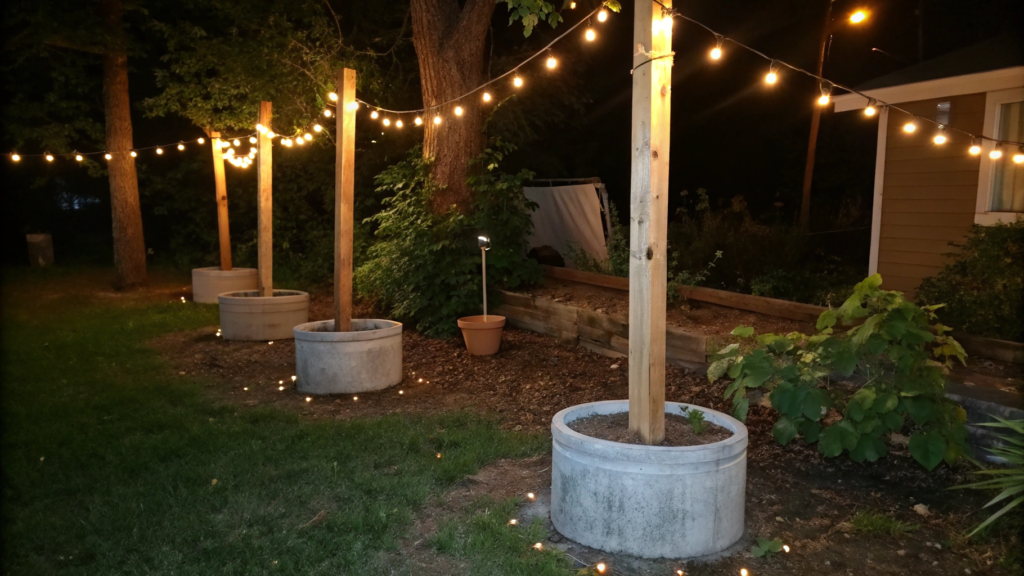
String lights can really dress up a patio or sitting area, but often there are no trees or pergola nearby. In that case, Pergola String Light Pole Bases Using Concrete Buckets can help. A few buckets with concrete become sturdy bases for poles that you can move to another spot if needed.
What you’ll need
- 4 plastic buckets, 5 gallons each (19 l)
- Fast-setting concrete mix
- Metal pipes or wooden poles
- Water
- Shovel or construction mixer
- Level
- Gloves
- Decorative stones or mulch, optional
How to make them
1. Prepare the buckets
Place the buckets on a flat surface and think ahead about where the finished bases will stand. After you pour in the concrete, they will become much heavier to move.
If you want the bases to look neater, you can choose matching larger decorative planters right away. Later, the concrete bucket can simply sit inside, and the open space on top can be covered with stones or mulch.
2. Mix the concrete
Prepare the concrete according to the manufacturer’s instructions. The mix should be thick, without too much extra water.
Fill each bucket about ¾ full. That is enough to hold the pole securely and still leave a little room on top for decorative finishing.
3. Set the pole
Place the metal pipe or wooden pole in the center of the bucket right after pouring the concrete.
Check it with a level on two sides. It is better to spend a couple of minutes now than to look later at string lights that clearly lean to one side. While the concrete has not started setting yet, the pole position can and should be adjusted.
4. Let the concrete set
Leave the bases alone for at least 24–48 hours. The exact time depends on the mix and the air temperature.
Do not try to test the strength too early by gently shaking the pole. Concrete gains strength gradually, and extra pressure in the first hours does not help it at all.
5. Hide the base
When the concrete is fully dry, cover the top with decorative gravel, mulch, or bark. If the bucket is sitting inside a large planter, it will look like the pole is coming straight out of a decorative container.
After that, all that is left is to attach the string lights and check that the tension is even between all the poles.
Where these poles are useful
These bases are helpful where you cannot, or do not want to, install permanent supports. You can bring them out for summer, move them for a new furniture layout, and put them aside for winter.
- Over a patio with a dining table.
- Near a fire pit area.
- On an open terrace.
- Next to an outdoor kitchen.
- On a gravel area, where permanent supports are harder to install.
Before installing them, look at where people will walk most often. The wires should not cross a walkway too low, and the buckets are better placed along the edge of the sitting area, not in the middle.
Tip
Do not pull the string lights too tight. A little sag looks more natural, and the load on the poles and fasteners is lower.
We usually hang the lights first, turn them on in the evening, and only then adjust the height. During daytime assembly, it is easy to make everything too tight, but in the evening you can immediately see where and how the light falls better.
10. Birdbath From Two Pots and a Serving Bowl
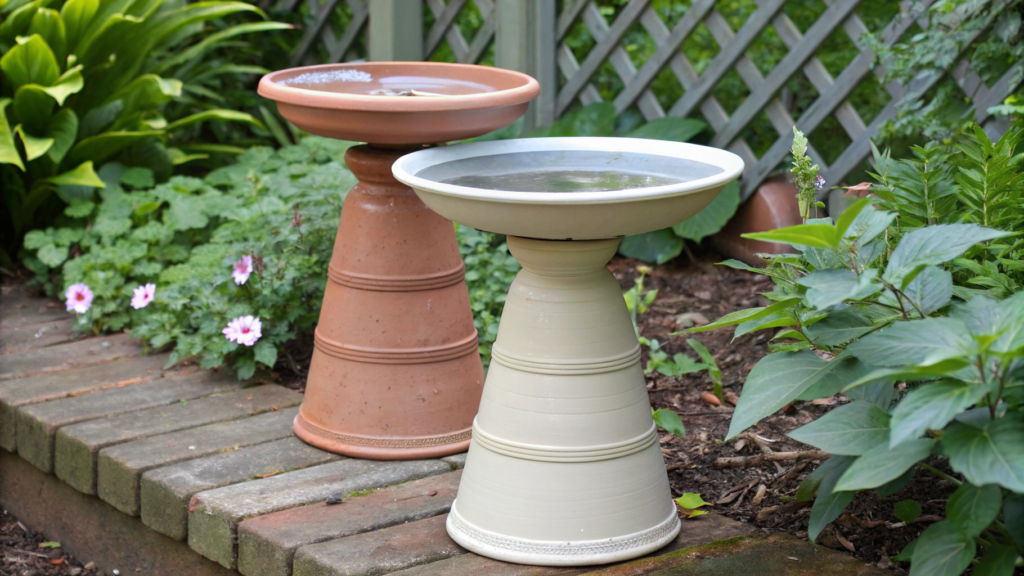
For Birdbath From Two Pots and a Serving Bowl, you only need two upside-down pots and a wide serving bowl. You get a small birdbath that looks much nicer than a regular plastic bowl.
What you’ll need
- 2 terracotta flower pots in different sizes
- Wide serving bowl made from ceramic, glass, or metal
- Waterproof construction adhesive, optional
- Level
- Water
- Small stones
How to make it
1. Choose the spot
It is better to place the birdbath right where it will stay. After assembly, moving the whole piece will be inconvenient.
It is good if there is a shrub or small tree nearby. Birds like having a place close by where they can quickly fly to.
2. Build the base
Place the large pot upside down and apply waterproof construction adhesive along its upper edge. Set the second upside-down pot on top and check with a level so the base is even.
Let the adhesive dry completely according to the manufacturer’s instructions.
3. Attach the bowl
Apply another layer of adhesive to the top pot and set the wide serving bowl on top. After that, leave the whole piece again until it is fully dry.
4. Add water and stones
Add water so the depth is about 1–2 inches (2.5–5 cm). For most small birds, that is plenty.
Place a few flat stones in the bowl. They make it easier for birds to land and drink, especially if smaller species often visit your garden.
Where to place the birdbath
Birds notice water faster when the birdbath stands in an open spot, but there is shelter nearby. Then they feel calmer and can quickly fly to a branch if needed.
- Near a perennial flower bed.
- Next to the vegetable garden.
- Not far from shrubs.
- Near the lawn, where birds often look for insects.
- By a sitting area, where you can watch the birds.
Try not to place the birdbath directly under a tree. Leaves, berries, and small twigs will make the water dirty faster, and you will have to clean the bowl more often.
Tip
Change the water every 2–3 days, and even more often in hot weather. This is better for the birds and helps reduce algae and bacteria. Caring for this birdbath takes literally just a couple of minutes, and the birds will thank you.
A useful project
I am not even sure which one I would start with, because all the ideas are interesting. Probably with the project that would solve some problem in the yard — maybe the hose is in the way somewhere, or maybe there is not enough privacy in another spot. When you make everything the way you like it, you start using your yard completely differently.
How are things in your yard? What needs to be redone or improved? Tell me in the comments — it is always interesting to peek at good ideas from other gardeners.