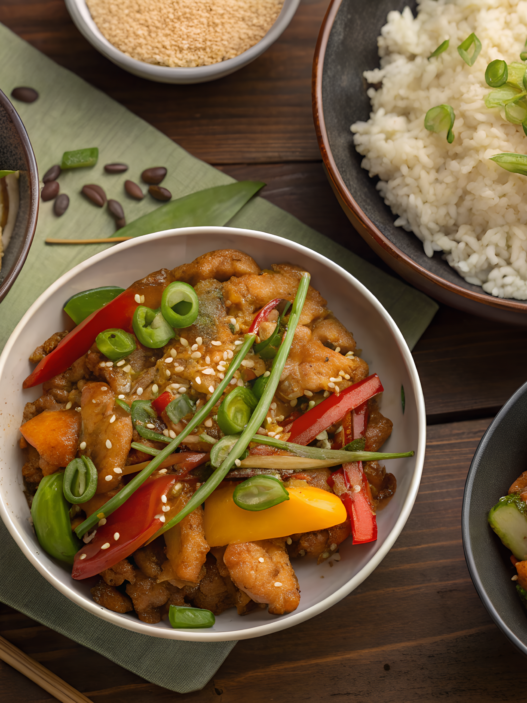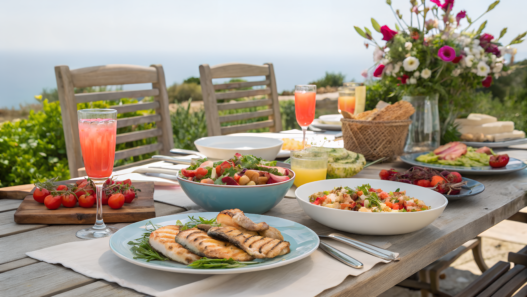
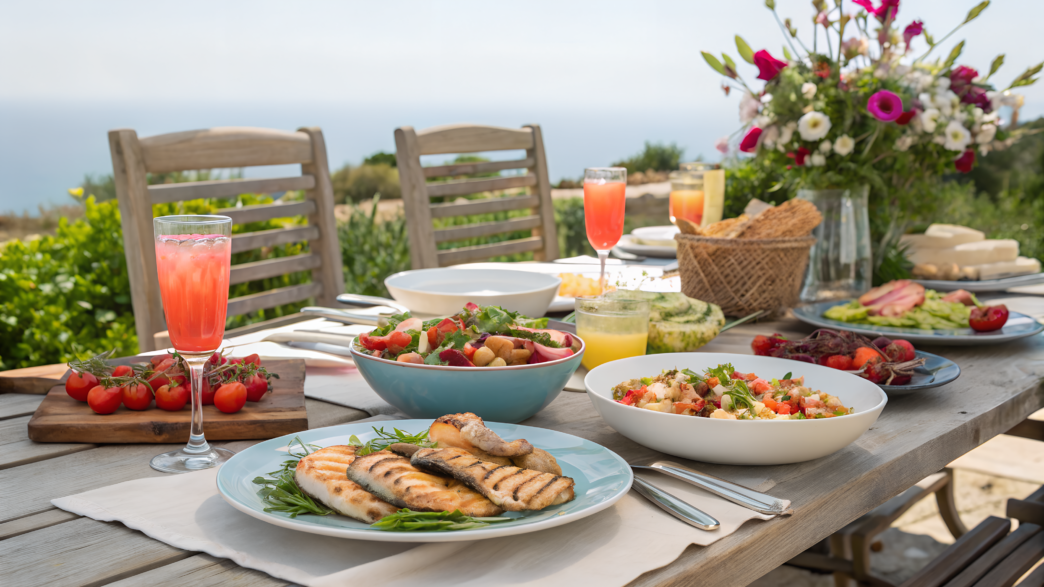
Easy summer dinners should taste good, cook fast, and not take much time. Especially when it’s hot outside and you really do not want to turn on the stove.
These 10 dinners are made without heavy sauces, long time at the stove, or a pile of dirty dishes. Everything here is built around ripe tomatoes, cucumbers, corn, watermelon, herbs, lemon, good bread, beans, chicken, or cheese.
All these recipes will help you feed your family in summer and not feel worn out before you even sit down at the table. Just tasty, fresh, and realistic for a regular summer evening.
1. Santorini Lemon Chicken Bowls With Cucumber Feta Salad
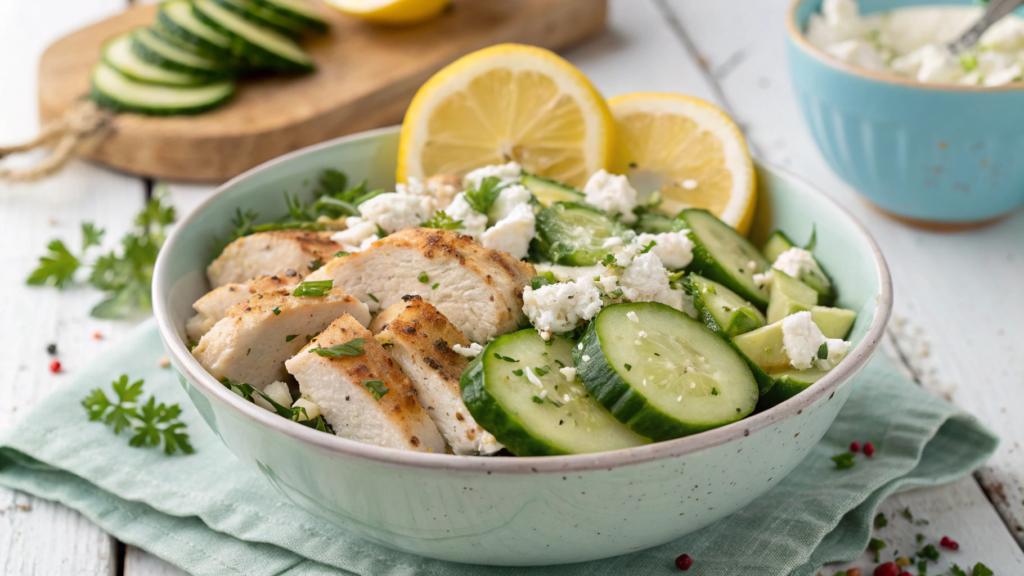
In Santorini-style lemon chicken bowls, everything is simple, and nothing feels heavy. The main things here are lemon, salty feta, crunchy cucumber, and warm chicken. Everything comes together in a bowl, looks pretty, tastes good, and works for a family dinner.
What you’ll need
For 4 servings:
- 1 ½ lb boneless, skinless chicken thighs or chicken breast, cut into pieces (about 680 g)
- 2 tbsp olive oil (30 ml)
- 2 tbsp lemon juice (30 ml)
- 1 tsp lemon zest
- 2 garlic cloves, minced
- 1 tsp dried oregano
- ¾ tsp salt
- ¼ tsp black pepper
- 2 cups cooked rice, couscous, or quinoa (about 350–400 g)
- 1 large cucumber, diced
- 1 cup cherry tomatoes, halved (150 g)
- ½ cup feta, crumbled (75 g)
- ¼ cup red onion, thinly sliced (35 g)
- 2 tbsp fresh parsley or dill
- 1 tbsp red wine vinegar or lemon juice
- Greek yogurt for serving, optional
How to make the lemon chicken
1. Mix the marinade
In a large bowl, mix the olive oil, lemon juice, lemon zest, garlic, oregano, salt, and pepper. The marinade should not be too sour. You should simply taste the lemon flavor.
2. Marinate the chicken
Put the chicken into the marinade and mix well. Every piece should be coated with the marinade. If you have 20–30 minutes, leave the chicken on the counter while you make the salad and the base. If you are cooking ahead, put it in the fridge for 2–4 hours.
I do not like marinating chicken in lemon for too long. The acid can change the texture of the meat, and instead of juicy pieces, you can get something a little dry around the edges.
3. Prepare the base
While the chicken is marinating, cook the rice, couscous, or quinoa. Rice makes the bowl more filling. Couscous is the fastest option. Quinoa works well if you want more protein and texture.
I let the base cool a little before assembling, so it is not burning hot. That way, the cucumber, feta, and herbs stay fresh.
4. Cook the chicken
Heat a large skillet over medium heat. Add the chicken in one layer. Do not overcrowd the pan, or the pieces will start to steam instead of brown.
Cook for about 5–7 minutes on each side, until the chicken is browned and cooked through inside. I check the thickest piece with a kitchen thermometer: chicken should reach 165°F (74°C). That way, you are not guessing by color or cutting every piece open in the pan.
5. Let the chicken rest
When the chicken is ready, transfer it to a plate and let it sit for 5 minutes. Do not cut it right away. These 5 minutes help the meat stay juicier.
How to make the cucumber salad with feta
- In a bowl, mix the cucumber, cherry tomatoes, red onion, herbs, and feta. It is better not to cut the cucumber too small, so it does not release too much water and stays crunchy.
- Add red wine vinegar or lemon juice, a little olive oil, a pinch of salt, and pepper. Add the salt carefully because feta is already salty. Mix gently so the cheese does not turn into mush.
- If the red onion is too sharp, cover it with cold water for 5 minutes, then drain. The onion stays tasty, but it does not overpower everything else on the plate.
Assemble the bowl
Divide the rice, couscous, or quinoa between bowls. Add the lemon chicken on top, then the cucumber salad with feta. If you want, add a spoonful of Greek yogurt and a little more lemon zest.
You can add olives, chickpeas, or warm pita, but it is better not to overload it. This dinner is good because it is simple. It has fresh salad, juicy chicken, a soft base, and bright lemon flavor.
Tip. If you do not have feta at home, use goat cheese or a little grated Parmesan. The flavor will be different, but the lemon, cucumber, herbs, and warm base will still come together well. If you do not have chicken, you can use chickpeas or white beans and quickly cook them with the same lemon marinade. You will get a lighter meatless dinner, but it will still be filling.
These bowls do not need much prep. The chicken cooks quickly, the salad takes just a few minutes to chop, and the lemon and feta immediately give it a bright summer taste. This simple dinner gives you a chance to eat well and not spend the whole evening at the stove.
2. Sicilian No Cook Tomato Basil Protein Plates
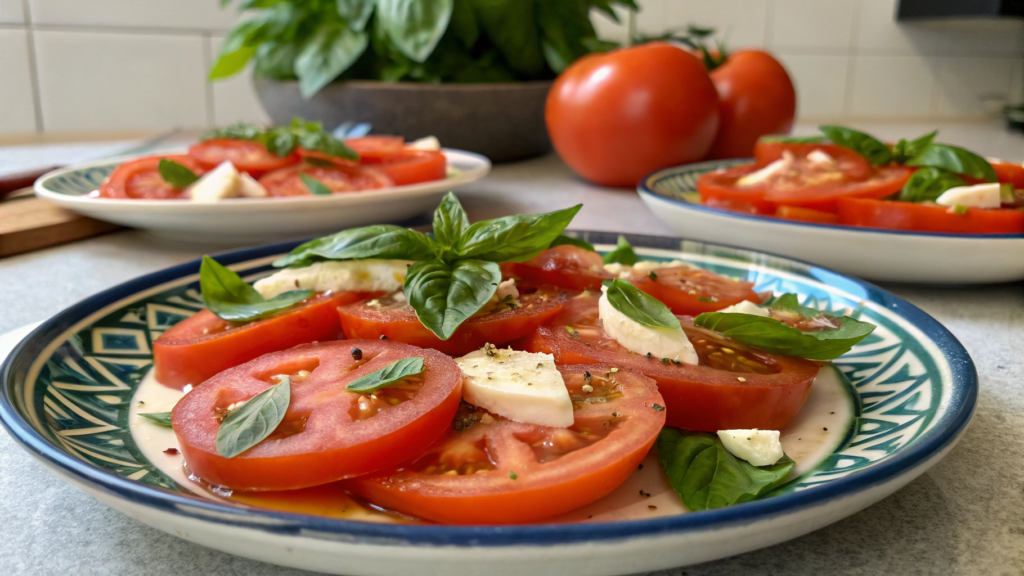
I make Sicilian No Cook Tomato Basil Protein Plates in August, when tomatoes finally smell right: sweet, bright… These plates show up in our house a lot when the day has been long, and dinner needs to happen now, not in an hour. Lindy and I love this kind of summer Italian food — simple ingredients, lots of freshness, minimum effort.
What you’ll need
For 4 servings:
- 4 large ripe tomatoes, cut into wedges or big pieces
- 1 cup cherry tomatoes, halved (about 150 g)
- 1 can white beans, rinsed and drained, 15 oz (about 425 g)
- 8 oz mozzarella, burrata, or tuna in olive oil (about 225 g)
- ½ cup fresh basil, torn by hand
- ¼ cup olives, sliced or left whole (about 35–40 g)
- 2 tbsp olive oil (30 ml)
- 1 tbsp red wine vinegar or lemon juice
- 1 small garlic clove, grated
- ½ tsp salt, then more to taste
- ¼ tsp black pepper
- 4 thick slices of good bread or 2 cups cooked beans/chickpeas for a more filling base
- Red pepper flakes, optional
How to prepare the tomatoes
1. Cut the tomatoes big
Cut the large tomatoes into wedges or big pieces, and halve the cherry tomatoes. Do not cut them too small. Here, the tomatoes are the main part of the dinner, not a garnish on top.
If the tomatoes are very juicy, cut them right over the bowl so you keep the juice. It will mix with the oil, vinegar, and garlic and turn into almost a dressing. I love that part. Especially when you can dip a piece of bread into it later.
2. Add salt and let them sit
Salt the tomatoes and leave them for 10 minutes. During that time, they will release juice and taste better. It changes the flavor of the dish in a noticeable way.
Do not pour the dressing over them right away. First salt them, then give them a little time, then add everything else.
3. Mix with oil, vinegar, and garlic
Add the olive oil, red wine vinegar or lemon juice, grated garlic, and black pepper. Mix gently so the tomatoes do not turn into mush.
If the garlic is too sharp, use half a clove. It should just stay in the background.
Add the protein
Here, you can choose. White beans make the dinner filling and soft in flavor. Mozzarella or burrata adds creaminess. Tuna in olive oil makes the plate saltier and more like a real meal, if I can say that without making it sound like restaurant talk.
I usually use white beans when I want dinner without meat or fish. I simply rinse them, let the water drain, and add them straight to the tomatoes. The beans soak up the juice, oil, and vinegar. After a few minutes, they no longer feel like “just beans from a can.”
If you use tuna, do not mash it too much. Keep some larger pieces. If you use mozzarella or burrata, add it at the very end, right on the plates.
Assemble the dish
Divide the tomatoes with their juice between plates. Add the beans, mozzarella, burrata, or tuna. Put the olives and basil on top. It is better to tear the basil by hand instead of cutting it with a knife. That way, it darkens less and looks fresher.
Serve with a thick slice of bread. You can toast it, but you can also skip that.
At the end, add a little more olive oil, black pepper, and red pepper flakes if you like a little heat. Do not mix everything until it looks the same. Let each bite feel a little different: tomato, beans, basil, cheese, or tuna.
Ingredient swaps
If you do not have fresh basil, use parsley and a little mint. It will not be exactly the Sicilian version, but it will still be fresh and aromatic. If you do not have white beans, chickpeas will work. If you do not have good bread, you can serve the dish with cold rice, quinoa, or simply add more beans.
Do not make it complicated, because this dish is best right when the tomatoes are ripe, the basil smells through the whole kitchen, and dinner can be made without the stove. Five to ten minutes — and you have good summer food on the table.
3. Korean BBQ Ground Beef Lettuce Cups With Crunchy Slaw
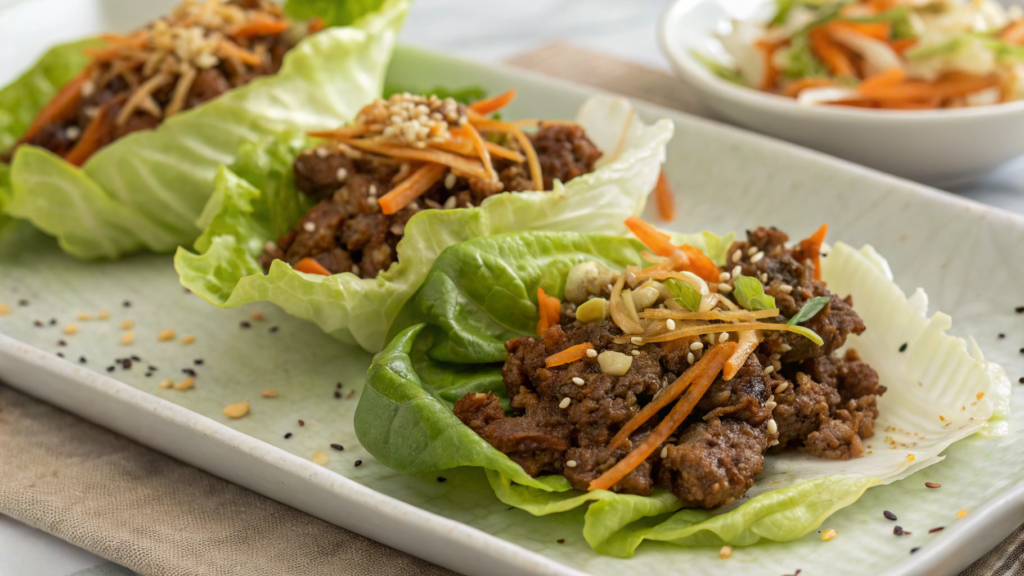
In this dish, fresh lettuce leaves are used instead of tortillas or buns. Inside, there is hot ground beef with garlic, ginger, soy sauce, and sesame, and on top there is a crunchy cabbage mix. It turns out filling, but there is no heavy feeling in your stomach. For a hot evening, it fits really well.
What you’ll need
For 4 servings:
- 1 lb ground beef (about 450 g)
- 1 tbsp neutral oil (15 ml)
- 3 garlic cloves, minced
- 1 tbsp fresh ginger, grated
- ¼ cup soy sauce (60 ml)
- 2 tbsp brown sugar or honey (25–30 g)
- 1 tbsp rice vinegar (15 ml)
- 1 tbsp sesame oil (15 ml)
- 1 tsp sriracha or another hot sauce, optional
- 1 large head of romaine, iceberg, or butter lettuce
- 2 cups thinly sliced cabbage or ready-made slaw mix (about 150 g)
- 1 carrot, grated or cut into thin strips
- 2 green onions, sliced
- 1 tbsp lime juice
- 1 tsp sesame seeds
- Cooked rice for serving, optional
I use a kitchen mandoline — OXO Good Grips Hand-Held Mandoline Slicer. It helps make even thin strips quickly, but you need to be careful with it. I always use the safety holder because I still need my fingers.
How to cook the beef
1. Brown the ground beef
Heat a skillet over medium heat and add the oil. Add the ground beef and break it into small pieces with a spatula. Cook for about 6–8 minutes, until the meat darkens and is no longer pink.
If there is a lot of fat in the pan, drain the extra. You can leave a little, but the beef should not be swimming in it. We need juicy flavor, not a heavy oily filling.
2. Add the garlic and ginger
Add the garlic and ginger straight to the beef. Cook for another 30–60 seconds, until they start to smell stronger. Do not walk away from the stove at this point. Garlic can burn quickly.
The ginger really helps here. It makes the flavor fresher, especially when the meat is served in cold lettuce leaves.
3. Make a quick sauce
Mix the soy sauce, brown sugar or honey, rice vinegar, sesame oil, and hot sauce if you are using it. Pour it into the skillet and mix it with the beef.
Cook for another 2–3 minutes, until the sauce thickens a little and coats the meat. Do not cook it down completely. A slightly moist filling sits better in the lettuce leaves and does not feel dry.
4. Check doneness
If you use a kitchen thermometer, check the thickest piece of the beef: it should be 160°F (71°C) inside. For ground beef, this matters more than for a whole cut of meat because the meat is ground, so it needs to cook evenly all the way through. If you cook without a thermometer, just make sure there are no pink raw spots left in the beef.
Cabbage salad for the filling
- In a bowl, mix the cabbage, carrot, green onion, lime juice, and sesame seeds. You can add a small pinch of salt, but be careful: the beef will already be salty because of the soy sauce.
- It is better to slice the cabbage thinly. Thick pieces will fall out of the lettuce leaves and make it harder to eat. It is good when the mix stays fresh, almost like a quick salad, instead of turning into soft slaw with a heavy dressing.
- If you are making it ahead, do not add the lime right away. Slice the vegetables and put them in the fridge, then add the lime juice before serving. That way, the cabbage stays crunchy.
Divide between the lettuce leaves
Separate the lettuce leaves, rinse them, and dry them well. If the leaves are wet, the filling will slide around and the flavor will turn watery.
Put a little beef into each leaf, then add the cabbage mix, green onion, and sesame seeds on top. If dinner needs to be more filling, add a spoonful of rice first, then the meat and vegetables.
Do not overfill the leaves. It is better to make two smaller portions than one huge one that breaks in your hands right away.
Possible ingredient swaps
If you do not have ground beef, use ground turkey or chicken. The flavor will be milder, so you can add a little more garlic, ginger, and sesame oil. If you need a meatless option, finely chopped tofu or mushrooms cooked with the same sauce will work.
You can also change the lettuce. Romaine holds its shape well, iceberg gives more crunch, and butter lettuce is softer and easier to fold around the filling.
Hot beef, cold lettuce, crunchy cabbage, lime, and sesame make tasty food that is easy to eat with your hands and easy to adjust for different family preferences. Someone can add rice, someone can add more hot sauce, someone can choose just meat and cucumber. And dinner still happens.
4. Moroccan Chickpea Skillet With Preserved Lemon Shortcut
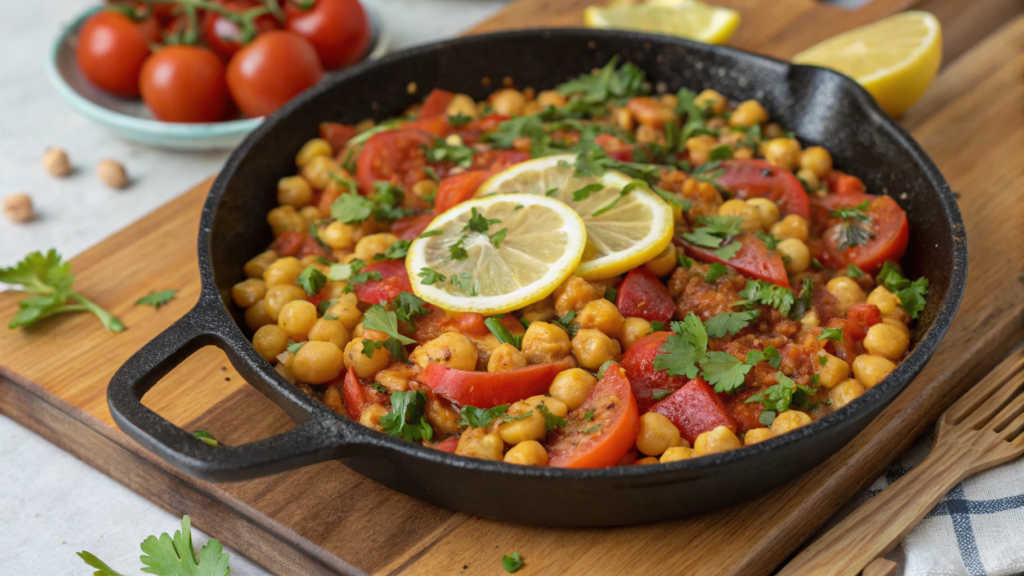
This dinner is cooked in one skillet. Here, chickpeas, tomatoes, spices, herbs, and lemon give a flavor that feels close to North African dishes. But here, you can skip real preserved lemons, which usually need weeks.
What you’ll need
For 4 servings:
- 2 tbsp olive oil (30 ml)
- 1 small onion, finely chopped
- 3 garlic cloves, minced
- 1 tsp ground cumin
- 1 tsp sweet paprika
- ½ tsp ground cinnamon
- ¼ tsp turmeric
- ¼ tsp red pepper flakes, optional
- 2 cans chickpeas, rinsed and drained, 15 oz each (about 850 g total)
- 1 can diced tomatoes, 14.5 oz (about 410 g)
- ½ cup vegetable broth or water (120 ml)
- 1 tbsp lemon juice (15 ml)
- 1 tsp lemon zest
- ½ small lemon, very finely chopped with the peel
- ½ tsp salt, then more to taste
- ¼ tsp black pepper
- 2 cups baby spinach or chopped greens (about 60 g)
- ¼ cup fresh parsley or cilantro, chopped
- Greek yogurt for serving, optional
- Couscous, rice, or warm pita for serving
How to make a quick preserved lemon shortcut
1. Chop the lemon
Take half of a small lemon and chop it as finely as you can, with the peel. Remove the seeds. The small size matters here: big pieces of peel can taste bitter and stand out too much in the dish.
Real preserved lemons are made ahead and sit in salt for several weeks. Here, we are making a quick version for dinner today, so we simply use zest, juice, and a little chopped lemon.
2. Mix the lemon with salt
Put the chopped lemon into a small bowl, add a pinch of salt, and mix. Leave it for 10 minutes while you cook the onion and spices. During that time, the peel will soften a little, and the flavor will become less sharp.
This will not be an exact replacement for real preserved lemons. But for a quick chickpea skillet, it works well. The lemon gives the dish brightness, not just acidity.
How to cook the chickpeas
1. Rinse the chickpeas and cook the onion
Drain the liquid from the cans of chickpeas, rinse the chickpeas under cold water, and let them drain well. This removes the extra salty liquid from the can, and the flavor of the dish will be cleaner.
Heat a skillet over medium heat and add the olive oil. Add the onion and cook for 4–5 minutes, until it softens. Do not brown it too much. We need a soft base, not dark onion with bitterness.
2. Add the garlic and spices
Add the garlic, cumin, paprika, cinnamon, turmeric, and red pepper flakes. Stir and cook for 30–60 seconds. The spices should warm up in the oil, so the flavor becomes deeper. Pay attention. Ground spices can burn quickly.
3. Add the chickpeas and tomatoes
Add the chickpeas, diced tomatoes, broth or water, salt, and black pepper to the skillet. Stir and bring to a gentle simmer. Then lower the heat and cook for 10–12 minutes, until the sauce thickens a little.
The chickpeas are already cooked, so you do not need to simmer them for a long time. We just want them to soak up the spices and tomato juice. If the sauce gets too thick, add a little more water.
4. Add the lemon
Add the lemon juice, zest, and that finely chopped salted lemon. Stir and taste. If the flavor is too quiet, add a little more salt or lemon juice.
It is better to add the lemon closer to the end. That way, the flavor stays brighter, and the dish does not become too sour after simmering for too long.
5. Stir in the greens
Add the spinach or other soft greens and cook for another 1–2 minutes, until they shrink down. At the end, sprinkle with parsley or cilantro.
Chickpeas make the dish filling because they have both plant-based protein and fiber. Legumes are often recommended as a simple way to add more nutrition to a regular diet, and the Harvard School of Public Health separately writes about the benefits of beans, chickpeas, and other legumes.
Divide into servings
Serve the chickpeas with couscous, rice, or warm pita. You can add a spoonful of Greek yogurt, herbs, and a little more olive oil on top.
I like serving this dish straight from the skillet. Especially when dinner is simple and everyone is already sitting nearby. I put the skillet on a trivet, set a bowl of couscous, yogurt, and herbs next to it — and everyone takes as much as they want.
For freshness, put cucumbers or a simple green salad on the side. If you need a more filling dinner, serve it with rice and an egg on top.
Swaps in the recipe
If you do not have chickpeas, white beans will work. They are softer, but they soak up the tomato sauce and spices well. If you do not have spinach, you can add kale, chard, or just more parsley at the end. If you do not want to use yogurt, serve it with tahini mixed with lemon juice and water.
5. Tuscan White Bean and Grilled Zucchini Toasts
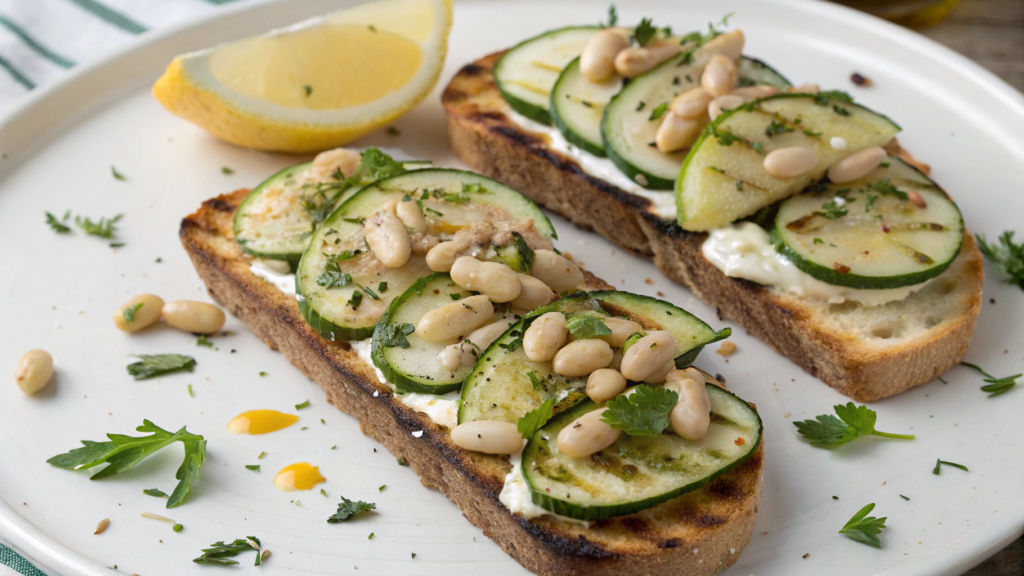
Tuscan white bean and grilled zucchini toasts — this Italian-style summer dinner can be made from simple ingredients: bread, beans, zucchini, garlic, lemon, herbs, and a little olive oil. There is no heavy sauce and no long cooking here. Just crunchy bread, soft beans, and warm zucchini with light charred spots.
What you’ll need
For 4 servings:
- 4 large slices of sourdough bread or another sturdy bread
- 2 medium zucchini, cut into long slices
- 1 can white beans, rinsed and drained, 15 oz (about 425 g)
- 3 tbsp olive oil (45 ml)
- 1 garlic clove, grated or minced
- 1 tbsp lemon juice (15 ml)
- 1 tsp lemon zest
- ½ tsp salt, then more to taste
- ¼ tsp black pepper
- ¼ cup grated Parmesan or crumbled feta, optional (about 25 g)
- 2 tbsp fresh basil or parsley, chopped
- Red pepper flakes, optional
- Balsamic vinegar for serving, optional
How to prepare the beans
1. Rinse the beans
Drain the liquid from the can and rinse the beans well under cold water. Let the water drain. If the beans stay wet, the mixture will be too loose and will not sit well on the toast.
White beans make the dish filling, but they do not make dinner heavy. They have plant-based protein and fiber, so these toasts can be more than just a snack. They can be a full summer dinner.
2. Mash some of the beans
Transfer the beans to a bowl. Add 1 tbsp olive oil, lemon juice, lemon zest, garlic, salt, and black pepper. Mash about half of the beans with a fork and leave the other half whole.
That way, the mixture will stay on the bread, but it will not look like smooth puree. I like when some of the beans stay in pieces. The food immediately looks more homemade, not like a spread from a jar.
3. Add the herbs
Stir in the basil or parsley. Taste and add more salt or lemon juice if needed. Lemon freshens the flavor and keeps the mixture from feeling too heavy.
If you are making it ahead, put the beans in the fridge, but before serving, let them sit at room temperature for a little while.
How to cook the zucchini
1. Cut into slices
Cut the zucchini into long slices about ¼ inch thick (about 6 mm). Slices that are too thin will get soft quickly, and slices that are too thick will not brown properly in time.
Transfer the zucchini to a bowl, add 1 tbsp olive oil, a pinch of salt, and pepper. Mix with your hands or tongs.
2. Grill or pan-cook
Heat a grill, grill pan, or regular skillet over medium heat. Add the zucchini in one layer and cook for 2–3 minutes on each side, until charred spots appear and the slices soften.
3. Let the zucchini cool a little
Transfer the cooked zucchini to a plate. If you put it on the toast right away, the bread will get soggy faster. Two or three minutes is enough.
At this point, you can splash the zucchini with a drop of lemon juice or balsamic vinegar. Not much. Just enough to make the flavor brighter.
Assemble the toasts
Toast the bread in a toaster, on the grill, or in a dry skillet. It should be crunchy on the outside, but not turn into a cracker. If the bread is too soft, the beans and zucchini will make it wet quickly.
Spread the beans onto each slice. Add the grilled zucchini on top, a little Parmesan or feta, herbs, and red pepper flakes if you want a little heat. At the end, you can add a couple drops of olive oil or balsamic vinegar.
Serve right away. These toasts are best fresh, while the bread still has a little crunch.
Ingredient swaps
If you do not have zucchini, use eggplant or sweet pepper. You can also quickly cook them and put them on top. If you do not have white beans, chickpeas will work, but it is better to mash them a little more and add a bit more olive oil. If you do not have Parmesan, you can leave the toasts without cheese and add more herbs, lemon, and black pepper.
6. Crockpot Salsa Verde Chicken Tacos With Pineapple
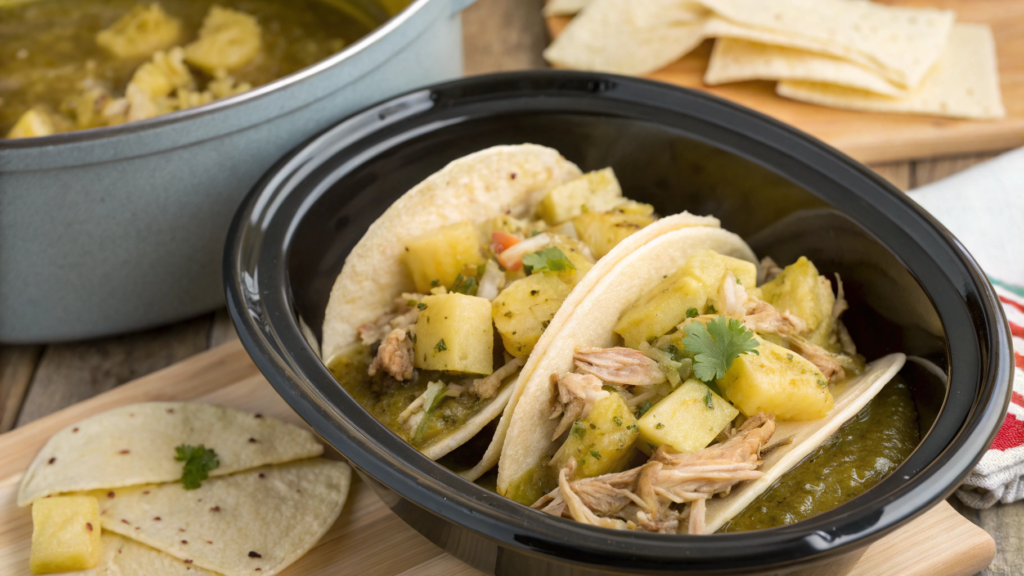
Here, the slow cooker does almost all the work. The chicken slowly cooks in salsa verde, gets soft, and easily pulls apart with a fork, while pineapple adds sweetness and freshness.
You add the chicken, salsa, and spices — and go on with your day. Then all that is left is to shred the meat, cut the pineapple, and warm the tortillas. And there you have a simple and tasty dinner.
What you’ll need
For 4 servings:
- 1 ½ lb boneless, skinless chicken thighs or chicken breast (about 680 g)
- 1 ½ cups salsa verde (about 360 ml)
- 1 tsp ground cumin
- ½ tsp garlic powder
- ½ tsp salt, then more to taste
- ¼ tsp black pepper
- 1 tbsp lime juice (15 ml)
- 8 small corn or flour tortillas
- 1 cup fresh pineapple, cut into small cubes (about 165 g)
- ¼ cup red onion, thinly sliced (about 35 g)
- ¼ cup cilantro, chopped
- ½ cup crumbled cotija cheese or feta (about 75 g), optional
- 1 avocado, sliced, optional
- Lime wedges for serving
I use a slow cooker — Crock-Pot 7 Quart Oval Manual Slow Cooker. I do not need it every day, but in summer, I like cooking meat in it because the kitchen heats up less, and dinner gets to the right place on its own.
How to cook the chicken
1. Put the chicken in the slow cooker
Place the chicken on the bottom of the slow cooker. Sprinkle with cumin, garlic powder, salt, and black pepper. Pour the salsa verde on top.
If you use chicken breast, do not cook it for too long. I usually use thighs, especially for tacos. They are easier to shred, and they do not dry out as quickly.
2. Cook until soft
Cover and cook on low for 4–5 hours or on high for 2–3 hours. The chicken should pull apart easily with a fork.
Closer to the end of cooking, check the thickest piece with a kitchen thermometer. It should be 165°F (74°C) inside. This is the safe temperature for chicken according to the U.S. Department of Agriculture. It is especially worth checking if the pieces are large or the chicken was very cold before cooking.
3. Shred the meat
Take the chicken out onto a plate and shred it with two forks. Then return the meat to the slow cooker and mix it with the sauce. Add lime juice and taste.
If the flavor seems too mild, add a little more salt or lime. Salsa verde can be different: one kind is bright and tangy, another is almost neutral. Here, it is better to taste than to trust the jar.
4. Let the chicken sit in the sauce
Leave the shredded chicken in the sauce for another 5–10 minutes on warm. During that time, the meat will soak up more flavor and become better for tacos.
If there is too much sauce, you can leave the lid open for a few minutes. Some of the extra liquid will reduce a little, and the filling will not run out of the tortilla right after the first bite.
How to prepare the pineapple
- Cut the pineapple into small cubes. Add the red onion, cilantro, and a little lime juice. Mix and leave for a few minutes while the tortillas warm up.
- Fresh pineapple is better here than canned. It is firmer, brighter, and not as sweet. But if you only have canned pineapple, that works too. Just drain the syrup and pat the pieces dry with a paper towel.
Pineapple goes well with spicy and tangy salsa verde. It does not make the tacos taste like dessert if you do not overdo it. For 4 servings, about 1 cup is enough. More than that, and it will be too sweet.
Assemble the tacos
Warm the tortillas in a dry skillet, on the grill, or right over a low gas flame if that is convenient for you. A warm tortilla is softer and breaks less.
Put the chicken into each tortilla, then add the pineapple with onion and cilantro on top. If you want, add avocado and a little cotija cheese or feta. Finish with lime juice.
Do not overload the tacos with filling. It is better to make two small portions than one that falls apart in your hands. Especially if kids are eating dinner, or someone is trying to hold a taco, a napkin, and a glass of water at the same time. That happens at our table all the time.
What you can swap in the recipe
If you do not have salsa verde, you can use a green tomatillo-based sauce or a mild green hot sauce and add a little chicken broth;have pineapple, mango or peach cut into small cubes will work; like cilantro, replace it with green onion or parsley.
7. Kid Friendly Ranch Parmesan Corn Sheet Pan Dinner
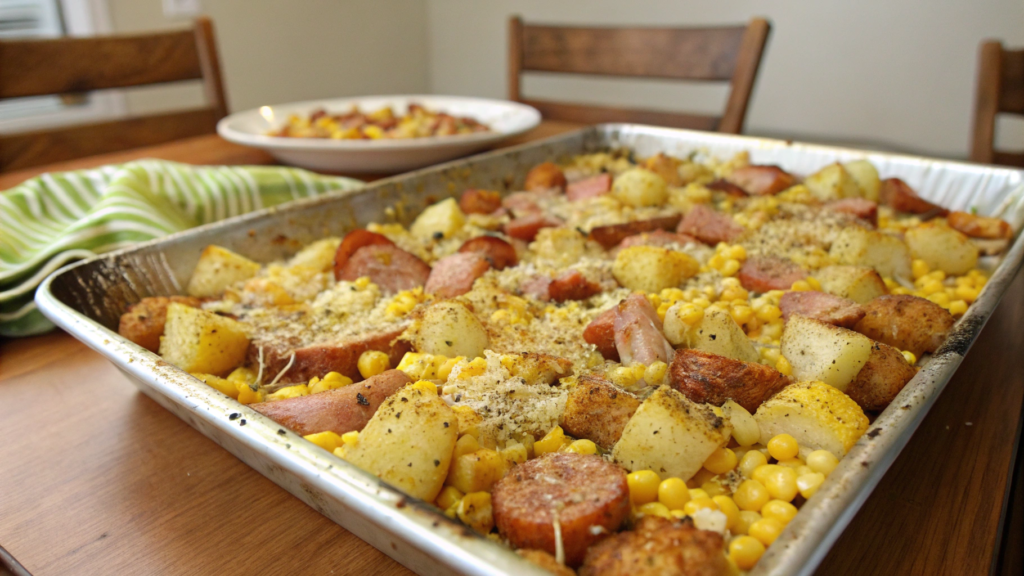
Kid friendly ranch Parmesan corn sheet pan dinner is made in the oven. Corn, potatoes, chicken or sausages, a little ranch seasoning, Parmesan — and you get a dinner that kids are happy to eat.
In our house, dishes like this often go straight to the table on the sheet pan. Maybe it does not look very pretty, but it is fast, hot, and everyone picks the pieces they like.
What you’ll need
For 4 servings:
- 1 lb boneless, skinless chicken thighs or chicken sausages, cut into pieces (about 450 g)
- 1 lb small potatoes, halved or quartered (about 450 g)
- 3 ears of corn, cut into 3–4 pieces each
- 2 tbsp olive oil (30 ml)
- 1 ½ tbsp dry ranch seasoning
- ½ tsp garlic powder
- ½ tsp paprika
- ¼ tsp salt, then more to taste
- ¼ tsp black pepper
- ⅓ cup grated Parmesan (about 35 g)
- 2 tbsp chopped parsley or green onion, optional
- Lemon wedges for serving, optional
How to prepare the ingredients
1. Cut the potatoes
Cut the small potatoes in half. If the potatoes are larger, cut them into quarters. The pieces should be about the same size, so they cook at the same time.
Potatoes take longer to cook than corn, so do not leave them too large. I usually look at the smallest piece of chicken and cut the potatoes about the same size.
2. Prepare the corn
Husk the ears of corn and cut each one into 3–4 pieces. If the corn is very fresh and sweet, it does not need many seasonings. Ranch, Parmesan, and a little oil will already give enough flavor.
Cutting corn cobs can be awkward, so use a heavy knife and a steady cutting board.
3. Cut the chicken or sausages
Cut the chicken thighs into pieces about 1 ½ inch wide (about 4 cm). If you use chicken sausages, cut them into rounds or larger pieces.
Thighs are more convenient here than breast because they are juicier and handle baking better. But you can also use chicken breast. Just do not cut it too small, and watch so it does not dry out.
How to bake the sheet pan dinner
1. Mix everything with the seasonings
Put the potatoes, corn, and chicken into a large bowl. Add the olive oil, ranch seasoning, garlic powder, paprika, salt, and pepper. Mix well.
If you do not want to dirty a bowl, you can mix everything right on the sheet pan. I do that often. The sheet pan just needs to be large enough, or half the seasoning will end up on the table.
2. Spread in one layer
Spread the ingredients on the sheet pan in one layer. Leave a little space between the pieces. If everything is piled up, dinner will turn out soft and wet, without proper browning.
You can put the corn closer to the edges, the potatoes cut side down, and the chicken between them. That way, everything browns better.
3. Bake until done
Put the sheet pan into an oven preheated to 425°F (220°C). Bake for 25–30 minutes, turning the pieces about halfway through.
The chicken should be fully cooked. The safe internal temperature for chicken is 165°F (74°C). This is the standard the U.S. Department of Agriculture gives for poultry. If you use already cooked sausages, focus mostly on the potatoes: they should be easy to pierce with a fork.
4. Add Parmesan
During the last 5 minutes, sprinkle everything with Parmesan and return the sheet pan to the oven. The cheese will melt a little, brown in some spots, and stick to the corn, potatoes, and chicken.
Do not add Parmesan at the very beginning. It can dry out or burn before the potatoes become soft.
Serving
Take the sheet pan out and let dinner sit for 5 minutes. Then sprinkle with parsley or green onion if you like. For adults, you can add a little lemon juice on top. It freshens up the corn and cheese nicely.
For kids, I usually serve dinners like this this way: corn separately, potatoes separately, chicken separately. Even if everything cooked together, you can arrange it on the plate in clear parts. This is especially necessary for kids who do not like it when “everything is mixed together.”
Put Greek yogurt with a pinch of ranch seasoning or a regular mild ranch sauce on the side. But just a little. There is already oil, cheese, and seasoning here, so it does not need a heavy layer of sauce.
Ingredient swaps, if needed
If you do not have chicken, use turkey, chicken sausages, or white beans. It is better not to add the beans right away, but during the last 10 minutes, so they warm through and brown a little without drying out. If you do not have fresh corn, frozen corn on the cob will work. Just do not put it on the sheet pan completely icy — let it thaw a little and pat off the extra water.
8. Family Greek Orzo Salad With Rotisserie Chicken
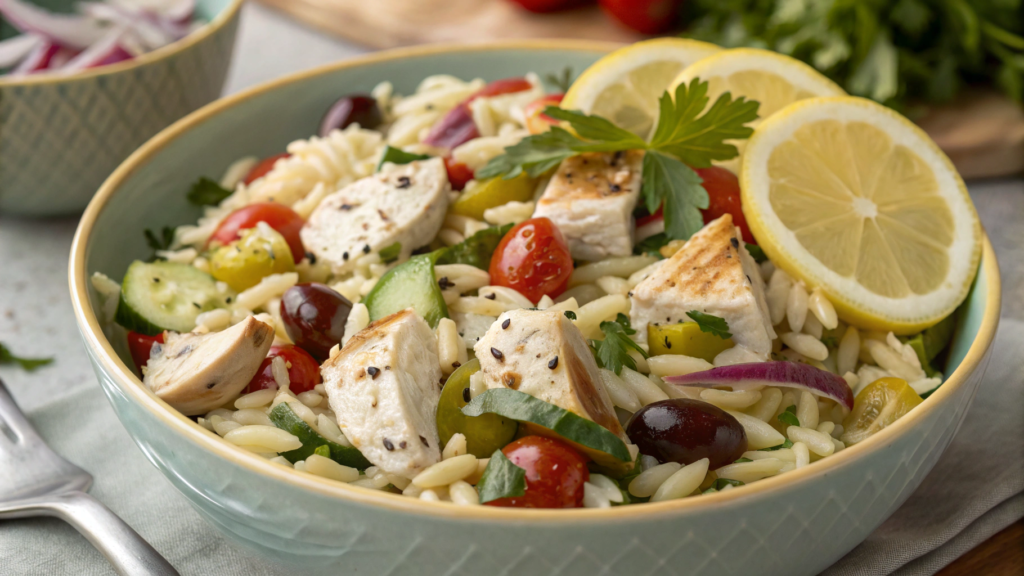
Family Greek orzo salad with rotisserie chicken tastes close to a Greek salad, but with pasta and chicken, so the dish turns out more filling and works for the whole family.
Rotisserie chicken helps a lot here. You do not need to bake meat, wait, check, and cool it. You just pull the meat off the bones, cook the orzo, cut the vegetables — and dinner is almost ready.
What you’ll need
For 4–6 servings:
- 1 ½ cups dry orzo pasta (about 300 g)
- 2 cups rotisserie chicken, pulled into pieces (about 280–300 g)
- 1 large cucumber, diced
- 1 ½ cups cherry tomatoes, halved (about 225 g)
- ½ cup Kalamata olives, sliced or left in halves (about 75 g)
- ½ cup feta, crumbled (about 75 g)
- ¼ cup red onion, thinly sliced (about 35 g)
- 2 tbsp fresh parsley, chopped
- 2 tbsp fresh dill, optional
- 3 tbsp olive oil (45 ml)
- 2 tbsp lemon juice (30 ml)
- 1 tbsp red wine vinegar (15 ml)
- 1 tsp dried oregano
- 1 small garlic clove, grated
- ½ tsp salt, then more to taste
- ¼ tsp black pepper
For this kind of salad, it is convenient to use a large mixing bowl. Orzo, chicken, and vegetables take up a lot of space. In a small bowl, everything will spill over the edge, and you will be cleaning onion off the table again.
How to cook the orzo
1. Cook the pasta
Bring a large pot of water to a boil, salt it, and add the orzo. Cook according to the package instructions, usually 8–10 minutes, until the pasta is soft but not overcooked.
Orzo looks like rice, but it is pasta, so it is easy to overcook. For salad, it is better a little firm than too soft. That way, it will not turn into a sticky mass after the dressing.
2. Rinse and cool
Drain the water and quickly rinse the orzo with cold water. This stops the cooking and removes extra starch. Then shake the strainer well so the water drains.
For warm pasta, this is not always needed, but for salad, it is. If you add vegetables to hot orzo, the cucumbers will quickly get soft, and the feta will start to melt. We do not need that.
3. Mix with part of the dressing
Transfer the orzo to a large bowl and add 1 tbsp olive oil and a little lemon juice. Mix. This keeps the pasta from sticking while you cut the vegetables and pull apart the chicken.
How to prepare the chicken and vegetables
1. Pull apart the rotisserie chicken
Remove the meat from the chicken and cut or tear it into small pieces. You can remove the skin or leave a little for flavor if it is not too soft.
Rotisserie chicken is convenient because it already has salt and spices. So it is better not to make the dressing too salty right away. First mix the salad, then taste.
2. Cut the vegetables
Dice the cucumber, halve the cherry tomatoes, and slice the red onion thinly. You can leave the olives in larger pieces so they do not get lost in the salad.
If the red onion is sharp, cover it with cold water for 5 minutes, then drain.
3. Prepare the feta and herbs
Crumble the feta with your hands or a fork. Chop the parsley and dill finely, but not into dust. The herbs here should feel like fresh little pieces.
If you are making the salad ahead, it is better to leave some of the feta for serving on top. That way, it looks fresher and does not fully mix into the dressing.
How to make the dressing
- In a small bowl, mix the olive oil, lemon juice, red wine vinegar, oregano, garlic, salt, and black pepper. Whisk with a fork until smooth.
- Lemon and vinegar add freshness, olive oil softens the dressing, and oregano goes well with feta, olives, and chicken. Do not pour in all the dressing at once. Orzo absorbs liquid, but the vegetables also release juice, especially if the salad sits for a while.
The Mediterranean style of eating is often built around vegetables, whole foods, olive oil, legumes, fish, and poultry. The Harvard School of Public Health writes that this approach is linked to benefits for heart health and healthy aging. This dish has exactly that kind of simple food: lots of vegetables, a little cheese, and a good protein.
Assemble the salad
- Add the chicken, cucumber, tomatoes, olives, red onion, feta, and herbs to the orzo. Pour in about two-thirds of the dressing and mix gently.
- Taste. If needed, add more dressing, salt, pepper, or lemon juice. I almost always add more lemon at the end. Especially in summer, when cold salads taste better with a brighter tang.
- Let the salad sit for 10 minutes before serving. During that time, the orzo will absorb part of the dressing, and the chicken, vegetables, and feta will blend better in flavor.
Ingredient swaps
If you do not have orzo, small pasta, couscous, or cold rice will work;rotisserie chicken, you can use leftover baked chicken or quickly cooked chicken breast. If kids do not like olives or red onion, serve them separately in small bowls.
9. Hot Day Watermelon Feta Steak Salad With Mint
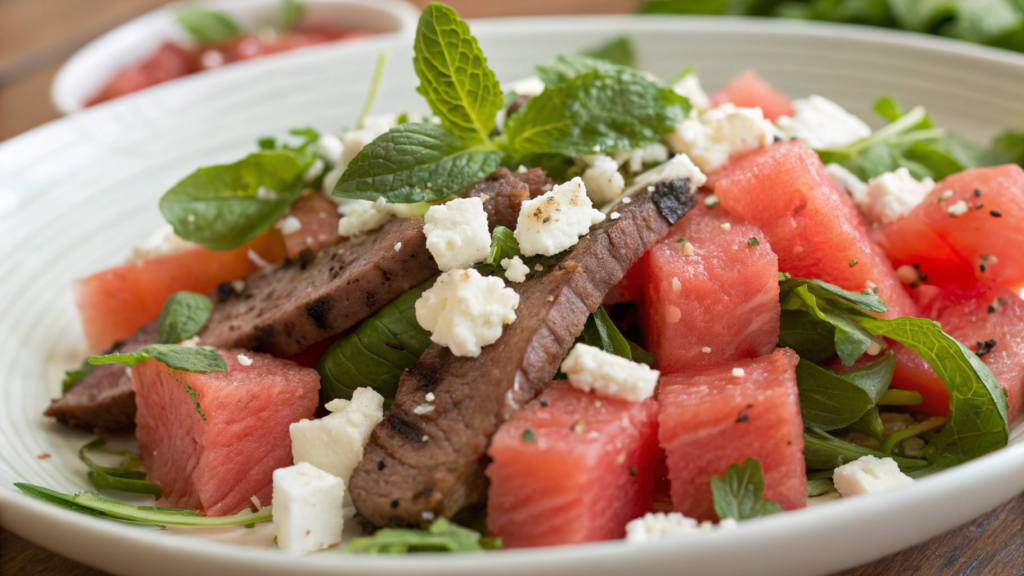
Juicy watermelon, salty feta, fresh mint, greens, and thin slices of steak — a good option for those evenings when it is hot outside, and you really do not feel like making a heavy dinner.
Especially if you cook the meat quickly on the grill or in a skillet and do not keep it on the heat longer than needed.
What you’ll need
For 4 servings:
- 1 ¼ lb flank steak, sirloin, or ribeye (about 560 g)
- 1 tbsp olive oil (15 ml)
- ¾ tsp salt
- ½ tsp black pepper
- 1 tsp garlic powder, optional
- 6 cups watermelon, cut into cubes (about 900 g)
- 4 cups arugula, spinach, or mixed salad greens (about 120 g)
- ½ cup feta, crumbled (about 75 g)
- ¼ cup fresh mint, torn by hand
- ¼ cup red onion, thinly sliced (about 35 g)
- 2 tbsp olive oil for the dressing (30 ml)
- 1 tbsp lime juice or lemon juice (15 ml)
- 1 tbsp balsamic vinegar, optional
- 1 tsp honey, optional
- Pinch of salt for the salad
For this recipe, it is convenient to use a meat thermometer — ThermoPro TP19H Digital Meat Thermometer, because steak is easy to overcook.
How to cook the steak
1. Let the meat sit a little
Take the steak out of the fridge 20–30 minutes before cooking. You do not need to leave it on the counter for too long, but ice-cold meat cooks less evenly.
Pat the steak dry with a paper towel. A dry surface browns better. Then rub it with olive oil, salt, pepper, and garlic powder if you are using it.
2. Heat the grill or skillet
Heat a grill, grill pan, or regular heavy skillet over medium-high heat. The surface should be very hot before the meat touches it.
If the skillet is barely warm, the steak will start releasing juice and steaming. We need quick charred spots on the outside and juicy meat inside.
3. Cook the steak
Cook the steak for about 3–5 minutes on each side, depending on the thickness of the piece and the doneness you want. Many people use 130–135°F (54–57°C) as a guide for medium-rare, and about 140–145°F (60–63°C) for medium. But if we are talking specifically about food safety, the U.S. Department of Agriculture recommends 145°F (63°C) for whole cuts of beef and a 3-minute rest before slicing.
4. Let the meat rest
Transfer the steak to a cutting board and let it sit for 5–10 minutes. Do not cut it right away, even if you really want to. This helps the juices spread evenly inside the piece of meat.
Then slice the steak thinly across the grain. This is important, especially for flank steak. If you cut with the grain, the meat will be tougher.
Watermelon and greens
- Cut the watermelon into cubes and remove the seeds if there are any. For salad, it is better to use cold watermelon from the fridge. On a hot day, that really helps.
- Rinse the greens and dry them well. Wet leaves will quickly water down the dressing, and the salad will become watery. It is better to tear the mint by hand. Slice the red onion very thinly. If it is sharp, cover it with cold water for 5 minutes, then drain.
- Crumble the feta into large pieces. Do not rub it into tiny crumbs. Larger pieces stand out better next to the watermelon and steak.
How to make the dressing
- In a small bowl, mix the olive oil, lime or lemon juice, balsamic vinegar, and honey if you are using it. Add a pinch of salt and black pepper.
- The dressing should be light. You do not need a lot of oil and vinegar because the watermelon will release juice on its own. If you dress the salad too heavily, it will quickly get wet.
- I like adding balsamic when the watermelon is very sweet. If the watermelon turns out watery, it is better to add more lime and skip the honey.
Assemble the salad
Put the greens into a large bowl or onto a wide platter. Add the watermelon, red onion, feta, and mint on top. Pour over some of the dressing and mix gently.
It is better to add the steak slices on top at the very end. That way, the meat does not get lost in the salad, and the greens do not get crushed under its weight. Add a little more black pepper and a few drops of dressing over the steak.
Serve right away. This salad does not like to sit for long: the watermelon releases juice, the greens soften, and the feta starts mixing with the dressing. It is better to assemble it right before dinner.
What you can swap
If you do not have steak, you can use rotisserie chicken, shrimp, or chickpeas. With chickpeas, you will get a meatless version, but it is better to add more feta or a few toasted nuts so the salad is more filling. If you do not have mint, basil will work, but the flavor will be softer and not as cooling.
10. Vegetarian Street Cart Halloumi Bowls With Garlic Yogurt
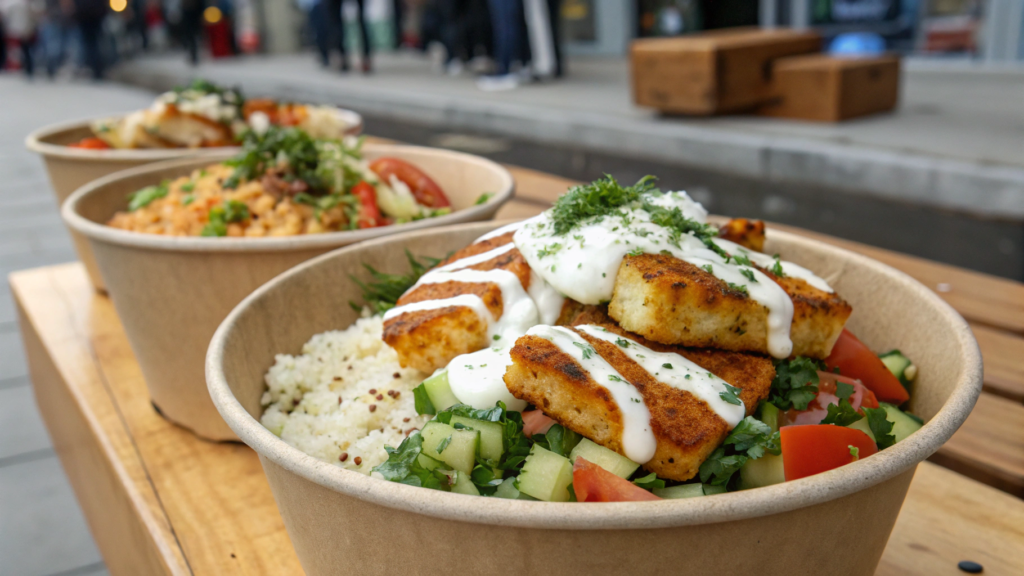
This dish feels like food from a small street cart with fried cheese, rice or couscous, fresh vegetables, herbs, and a quick garlic yogurt sauce. Halloumi holds its shape well in the skillet, gets golden on the outside, and stays salty and soft inside. For a vegetarian dinner, it is a very convenient thing.
What you’ll need
For 4 servings:
- 8 oz halloumi, sliced (about 225 g)
- 2 cups cooked rice, couscous, or quinoa (about 350–400 g)
- 1 tbsp olive oil (15 ml)
- 1 cup cucumber, diced (about 130 g)
- 1 cup cherry tomatoes, halved (about 150 g)
- ½ cup red bell pepper, diced (about 75 g)
- ¼ cup red onion, thinly sliced (about 35 g)
- ½ cup chickpeas, rinsed and drained, optional (about 85 g)
- 2 tbsp fresh parsley or mint, chopped
- 1 tbsp lemon juice (15 ml)
- ¼ tsp black pepper
- Pinch of salt, if needed
For the garlic yogurt:
- ¾ cup Greek yogurt (about 180 g)
- 1 small garlic clove, grated
- 1 tbsp lemon juice (15 ml)
- 1 tsp olive oil
- ¼ tsp salt
- 1–2 tbsp water, if you need to make the sauce thinner
How to make the garlic yogurt
1. Mix the base
In a bowl, mix the Greek yogurt, grated garlic, lemon juice, olive oil, and salt. Stir until smooth. It is better to grate the garlic, not chop it into big pieces. That way, it spreads through the sauce better.
2. Adjust the thickness
If the sauce is too thick, add 1–2 tbsp water and mix. For a bowl, the sauce should be easy to spoon over the top, but not watery.
Taste and add more lemon or salt if needed. Halloumi is salty on its own, so it is better not to oversalt the sauce.
3. Let the sauce sit
Leave the yogurt for 10 minutes while you cook the cheese and vegetables. During that time, the garlic will become a little softer in flavor, and the sauce will go better with the other ingredients. Yogurt here adds protein, acidity, and a cool taste.
How to cook the halloumi
1. Slice the cheese
Cut the halloumi into slices about ⅓ inch thick (about 8 mm). Do not make them too thin, or the cheese will quickly become tough and dry.
Before frying, you can pat the slices with a paper towel. That way, they will brown better.
2. Heat the skillet
Heat a skillet over medium heat. Add a little olive oil, or cook almost without oil if your skillet is good.
Halloumi does not need long cooking. It needs a hot surface and a few minutes of attention. The cheese quickly goes from golden to too dark.
3. Fry until golden
Put the slices in one layer and cook for 1–2 minutes on each side, until a golden crust appears. Flip carefully so the slices do not tear.
Serve the halloumi right after frying. When it cools, it gets firmer. Still tasty, but hot is better. Especially in a bowl with cold vegetables and yogurt.
Preparing the vegetables
- Cut the cucumber, tomatoes, bell pepper, and red onion. Mix them in a bowl with lemon juice, black pepper, herbs, and a small pinch of salt if needed.
- Do not add too much salt right away. Halloumi is already salty, and the yogurt already has salt too. It is better to assemble the bowl, taste, and then decide.
- If the red onion is too sharp, cover it with cold water for 5 minutes, then drain. This is an easy way to keep the onion flavor but remove the extra bite.
Assemble the bowls
Divide the rice, couscous, or quinoa between bowls. Add the fresh vegetables, chickpeas if you want, and hot halloumi slices. Spoon the garlic yogurt on top and add a little more herbs.
You can add warm pita, pickled onion, or a little hot sauce. Just do not overload it. There is already salty cheese, fresh vegetables, garlic, lemon, and yogurt here.
I like when each bowl has a mix of warm and cold. Halloumi gives that fried flavor, the vegetables crunch, and the yogurt cools everything down. It is all simple and tasty.
Possible ingredient swaps
If you do not have halloumi, you can use paneer or firm tofu. Paneer also holds its shape well in a skillet, and tofu is better if you pat it dry first and fry it until it gets a crust. If you do not have Greek yogurt, regular thick yogurt or tahini sauce with lemon and water will work.
To make the dish more filling, add more chickpeas or serve pita on the side. If you need a very light dinner, use less base and add more vegetables.
This dinner comes together quickly, but it does not look like a random mix of things from the fridge. For a hot summer evening, it is exactly what you need when you want to eat well and not get stuck in the kitchen for too long.
Summer dinner
For a nice summer dinner, you do not need a complicated recipe. You need good ingredients and normal serving.
If you are having a hot week right now, choose one recipe from the list and start with that. You do not need to make all ten. One good dinner already counts. Especially if you do not have to wash the kitchen for forty minutes afterward.
What summer dinner do you make when you really do not want to stand at the stove? Tell me in the comments. I am always looking for new ideas for days like that. Especially if there are tomatoes, corn, cucumbers, watermelon, or something you can pick from the garden and put straight on the table.