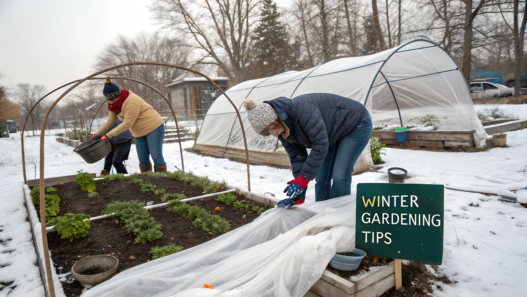
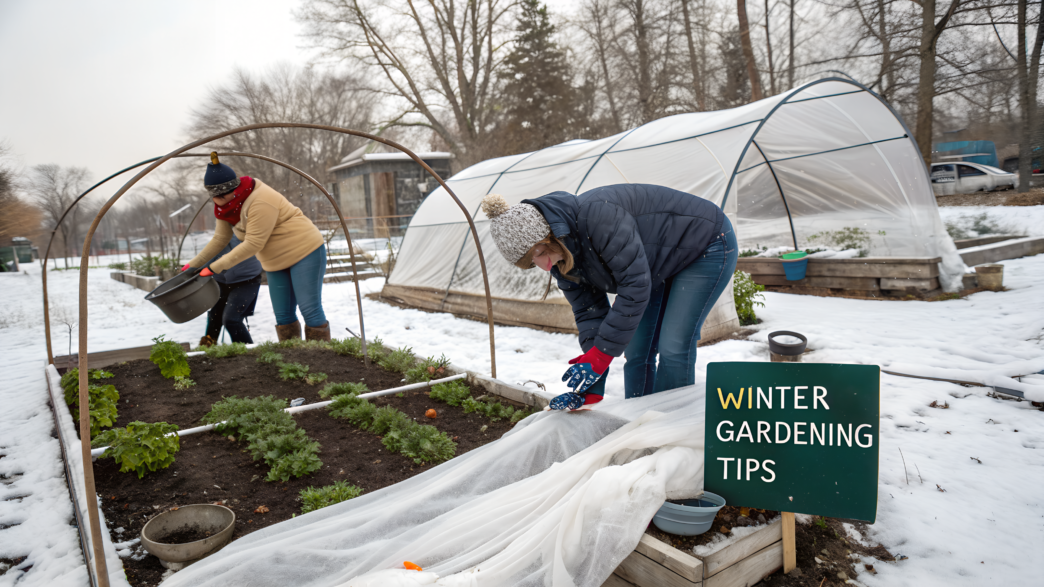
There’s much less garden work in winter than in spring and summer, but these months are a great time to prepare a lot in advance. Soil, compost, mulch, frost protection, seeds, and tools — if you take care of these things during winter, there will be far fewer urgent jobs waiting for you in spring.
Over the past few years, we’ve developed our own winter routine for getting ready for planting. We know what’s better to do ahead of time and what can easily wait until spring.
In this article, I’ve collected 10 winter gardening secrets that help keep the soil, compost, and perennial plantings in good shape and get the garden ready for the first spring jobs.
1. Preparing soil in cold weather for maximum spring nutrition
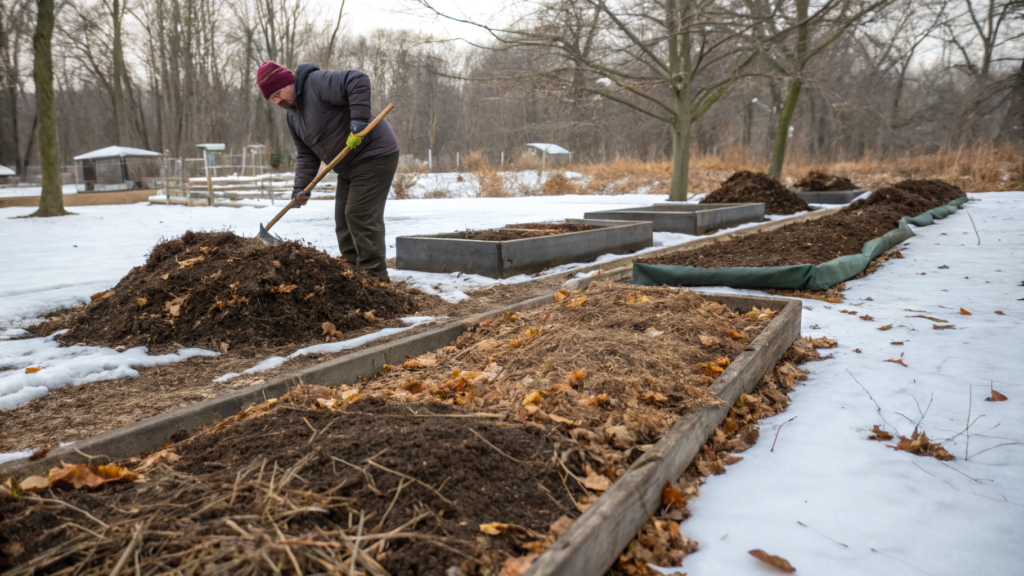
In winter, I don’t try to “improve the soil” the same way I do in spring. If the ground is frozen, there’s no point digging it, mixing it, or working fertilizer deep into the soil. But you can still prepare the beds so the soil comes back to life faster in spring and the plants have a good supply of nutrients.
At our first property in Idaho, I originally treated winter like a break. The harvest was done, so I figured there was almost nothing to do with the beds until spring. But after just a couple of seasons, Lindy and I completely changed our approach. What stays on the soil surface through winter directly affects what that soil will be like in spring.
1. I don’t leave the soil exposed
The first thing I do after harvesting the last crops is cover any exposed soil. Rain, snow, wind, and repeated freezing and thawing gradually break down the top layer, especially when a bed is left empty.
For protection, you can use:
- shredded dry leaves;
- seed-free straw;
- finished compost;
- finely chopped plant debris;
- a mix of leaves and compost.
A layer of about 2–4 inches (5–10 cm) is usually enough for me. In open, windy areas, I may make it a little thicker.
I use leaves most often. They’re free, there are usually plenty of them, and by spring the bottom part of the layer has already started breaking down noticeably. Whole large leaves can sometimes mat together into a dense, wet layer, so I prefer to shred them a little with the lawn mower first.
2. I add compost on top instead of digging it in
If the compost is already finished, I spread it directly over the surface of the bed in late fall or winter in a layer about 1–2 inches (2.5–5 cm) thick and don’t dig it in.
Earthworms, moisture, and soil organisms gradually do part of the work themselves. By spring, I only need to move the mulch aside a little where I’m planning to sow.
I learned from experience a long time ago that the less we disturb the soil, the better it holds onto its structure and organic matter. In the beds we don’t keep digging, the soil becomes looser over time and much easier to work with.
3. I leave the roots in the ground
If a plant is healthy and hasn’t been affected by disease, I often cut it off at soil level and leave the roots in the ground. That can seem a little strange. We’re used to pulling everything out in fall and leaving the bed looking completely clean. But the roots gradually break down right in the soil, leaving small channels behind for water and air.
This works especially well with beans, peas, lettuce, and many annual flowers.
Diseased plants are different. If there were serious fungal diseases or pests, I remove those plant remains from the bed instead of leaving them there for winter.
4. I don’t fertilize frozen soil
If the ground is already frozen or covered with snow, I don’t add mineral fertilizer. The plants can’t use it at this point anyway, and during a thaw, some of those nutrients can simply wash away with the melting water.
In winter, it makes much more sense to leave compost, mulch, and plant debris on the beds. They’ll gradually break down, and in spring I can see what the soil actually needs.
I’m especially careful with new beds. It’s better to test the soil first. For a simple home check, you can use a soil test kit such as the Luster Leaf Rapitest Soil Test Kit.
That makes it easier to understand the soil pH and get an approximate idea of the main nutrient levels. Then you can add what’s actually missing instead of fertilizing the bed at random.
Protecting the soil surface through winter
So before the ground freezes hard, I leave healthy roots in the soil, add compost, and cover the surface with organic mulch.
That’s enough to protect the soil surface through winter and let the organic matter slowly break down. In spring, the soil under a layer of leaves or straw usually stays more moist and loose, which makes it much easier to work before the first plantings.
On a small property, this matters even more. We use every garden bed pretty actively, so I don’t want the soil to lose over winter what we’ve spent so much time adding to it.
The soil keeps changing through winter too. Our job is mostly to help it along rather than constantly trying to do something to it.
2. Winter composting methods that heat up fast
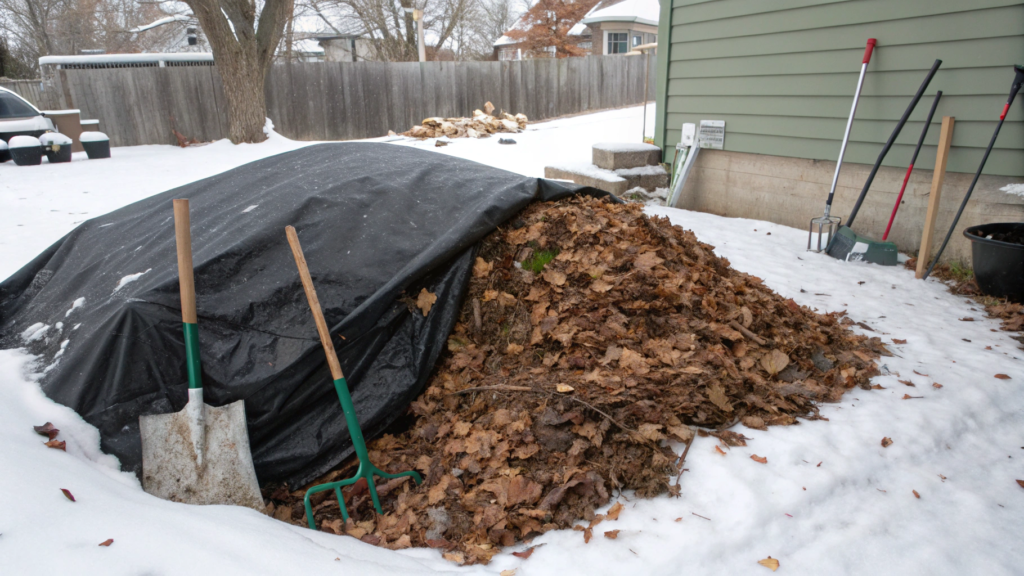
In winter, the compost pile works more slowly, but it doesn’t have to turn into a frozen mound that stays that way until spring. If there’s enough food for microorganisms, moisture, and air inside, compost can still heat up noticeably even in cold weather.
In our first few years, Lindy and I just tossed everything in and hoped nature would figure it out. Sometimes it did. Sometimes in spring we found almost the same kitchen scraps we had thrown in there several months earlier. Over time, we learned that in winter it’s especially important to keep a good balance of dry and wet materials. If you keep adding kitchen scraps one after another, the pile quickly gets too wet and stops heating up properly.
1. Compost pile size
A small compost pile loses heat very quickly. That’s why in winter I try to build mine to at least about 3 × 3 × 3 feet (90 × 90 × 90 cm).
A pile this size holds heat much longer. If there isn’t much organic material and it’s spread in a thin layer, cold air cools it down quickly from all sides.
For the same reason, it’s more convenient to use a closed composter or at least one protected from the wind. It won’t make the compost hot on its own, but it will help the pile hold onto more heat.
2. Balance of wet and dry materials
If you add only kitchen scraps to the compost in winter, the inside quickly turns into a wet, dense mass. It can start to smell bad, become compacted, and barely heat up.
That’s why I always keep a supply of dry materials. Usually I use:
- shredded dry leaves;
- straw;
- small pieces of non-glossy cardboard;
- dry plant stems;
- a little wood chip or sawdust.
For one bucket of kitchen scraps, I add about the same amount of dry material or a little more. Of course, I don’t weigh any of this on a scale. I just look at the mixture itself. It should be damp but not wet, and it should stay fairly loose.
If you squeeze a handful and water runs out, there’s already too much moisture.
3. Chopping large scraps
A whole pumpkin can sit in the pile for a very long time. Pumpkin pieces a couple of inches across break down much faster.
So it’s better not to put large pieces into the compost. Cabbage cores, thick stems, large vegetables, and cardboard are better chopped up first.
I’ll admit, this isn’t the most fun job on a cold day. But the difference is noticeable. The more surface area the material has, the easier it is for microorganisms to get to it.
4. Turning the compost
A compost pile needs oxygen to heat up quickly. If the middle becomes dense and wet, I lightly mix it with a garden fork.
But in winter, I don’t turn the compost every few days. Each time you do that, some of the heat stored inside escapes. I usually disturb the pile only when I notice that it has stopped heating up or started to smell.
A long compost thermometer is useful here. It saves you from guessing what’s happening in the middle. If the temperature inside reaches around 130–150 °F (54–66 °C), decomposition is very active. When the temperature starts to drop after the pile has heated up well, it can mean that it needs more oxygen, moisture, or fresh material.
5. A top layer of dry organic material
After adding kitchen scraps, I always cover them with leaves, straw, or another dry organic material. In winter, this top layer also provides a little extra insulation.
After a snowfall, the snow itself can become another layer of protection. I don’t rush to clear it off the composter. The temperature underneath can stay more stable than it would in an exposed, windy spot.
As you can see, it’s pretty simple. First, feed the compost, then help it hold onto the heat. A huge amount of insulation won’t save a pile that doesn’t have the right balance of materials.
Winter compost
Looking back at everything above, there really isn’t anything complicated here. I make sure the compost pile is large enough, add dry material to wet scraps, chop up large pieces, and check the middle from time to time.
I also don’t worry if the pile stops heating up noticeably in January. Even with good care, decomposition slows down during hard freezes. As the weather warms, microorganisms become more active again, and the temperature inside gradually rises.
So with winter compost, the main goal is to have plenty of dark, partially decomposed material by spring that can finish breaking down and later be used in the garden beds.
3. Choosing mulch that works hard all winter
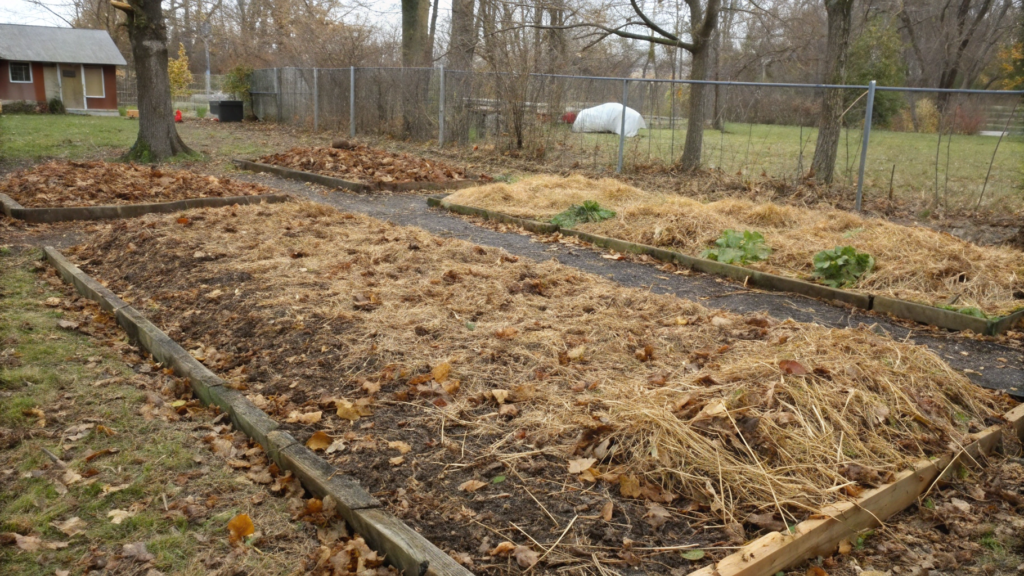
The main job of winter mulch is to protect the soil from sharp temperature swings, heavy rain, and wind, while also helping it hold onto more moisture.
Lindy and I got into the habit pretty quickly of collecting leaves, straw, and other dry materials in fall instead of getting rid of them. On a small property, we try to make the most of every bit of organic material. Especially when leaves can protect a garden bed for several months and then slowly start breaking down.
But I don’t use the same mulch everywhere. In winter, it’s important to think about what’s growing in the bed and what I want from that bed in spring.
1. Shredded leaves for most garden beds
Well, you’ve probably figured out by now that this is one of my favorite options. Leaves cost nothing, cover the soil well, and gradually break down.
I prefer to shred them first. Whole wet leaves can mat together into a dense layer, especially after several rains. Shredded leaves stay looser and start breaking down faster.
I usually add about 3–4 inches (7.5–10 cm) of shredded leaves. If the area gets a lot of wind, I lightly wet them after spreading them out. Damp leaves settle faster and don’t blow around as much. You can also weigh the layer down with a few small branches and remove them later.
2. Straw for garden beds
If garlic, perennial herbs, or other plants are staying in the bed through winter, I use straw.
It holds a layer of air above the soil and helps reduce sudden temperature changes. That matters not only during a hard freeze. Sometimes the bigger problem comes when the ground thaws after a warm day and then freezes hard again overnight.
My straw layer is usually around 4–6 inches (10–15 cm) thick. I spread it loosely without packing it down.
Just make sure not to confuse straw with hay. Hay usually contains a lot more seeds, and in spring you can end up growing a whole bed of grass right along with your first crops. I definitely don’t need that extra addition!
3. Compost for added nutrients
On empty vegetable beds, I use finished compost as the bottom layer and then add leaves or straw on top.
I wouldn’t count compost as a full winter mulch on its own. It settles fairly quickly and doesn’t create the same thick protective layer as leaves or straw. But 1–2 inches (2.5–5 cm) of compost under mulch works really well for beds that will be used heavily in spring.
Over winter, the top layer mixes slightly with the soil, while some of the organic matter keeps breaking down.
And with this setup, there’s less work to do in spring. I just move the remaining coarse mulch aside where I’m planning to sow.
4. Wood chips
I don’t use wood chips on regular vegetable beds. They’re much better for paths and perennial plantings, where you don’t need to clear the soil every spring for small seeds, and a longer-lasting cover is actually useful.
A layer about 3–5 inches (7.5–13 cm) thick protects the soil surface and also helps suppress some weeds. And don’t pile wood chips right against the trunks of shrubs and trees. I leave a little open space around the base so moisture doesn’t constantly build up there.
5. Mulch depth
Of course, it’s easy to think that more mulch must be better. But a 10- or 12-inch layer on a regular garden bed can become a separate problem in spring.
A thick, wet layer warms up more slowly, and small seedlings have a hard time pushing through it. So I choose the amount of mulch based on the material.
I usually use roughly:
- leaves — 3–4 inches (7.5–10 cm);
- straw — 4–6 inches (10–15 cm);
- compost — 1–2 inches (2.5–5 cm) under another material;
- wood chips — 3–5 inches (7.5–13 cm) around perennials and on paths.
In spring, some of the winter mulch can stay in place. But where I want to sow carrots, lettuce, or other small-seeded crops early, I move the thick layer aside ahead of time so the sun can warm the top couple of inches of soil faster.
Which mulch handles winter best
We rarely use just one type of mulch across the whole property. There might be leaves in one area, straw around the garlic, and wood chips around the berry bushes. And that’s completely normal. The material should fit the specific spot, not just be whatever happens to be available first.
By spring, some of that mulch has already settled noticeably and started breaking down. I either leave the remaining material between plants or move it aside a little before early sowing. That way, the work we did in fall keeps helping for several more months.
4. Frost-proof planting tricks
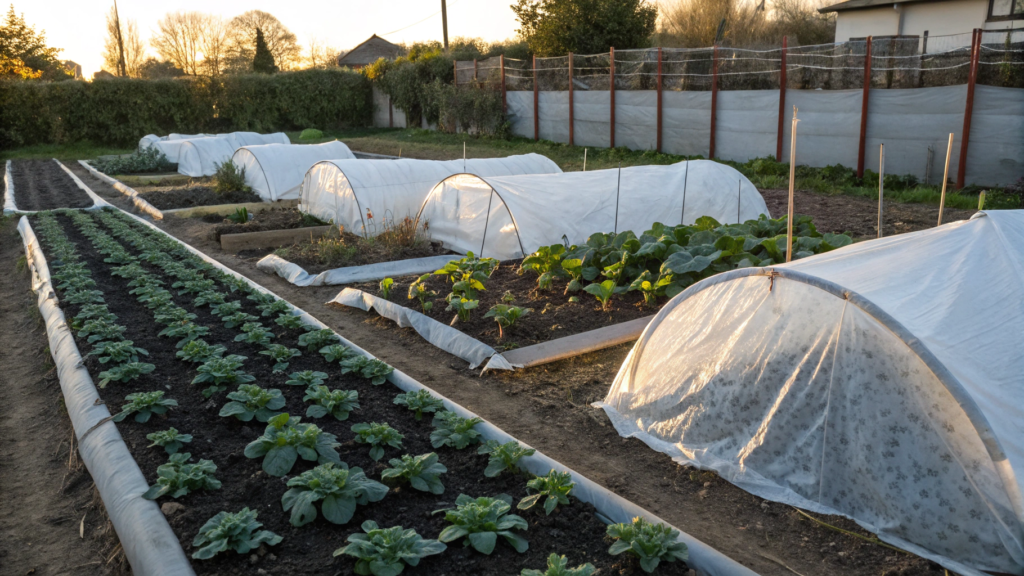
A few warm days in a row can easily throw you off in spring. Daytime temperatures can reach 60–70 °F (16–21 °C), the sun is already warming the beds nicely, and it starts to feel like you can plant almost anything. Then nighttime temperatures suddenly drop to 30–32 °F (−1–0 °C), and young plants get a very different start than the one we were hoping for.
We’ve had this happen more than once. So now I don’t look only at the daytime temperature. If I want to plant something earlier than usual, I think ahead about how I’ll protect it in case of sudden nighttime frost. A few simple tricks really do help.
Tips for protecting plants from frost
- I plant cold-hardy crops first. Spinach, kale, peas, radishes, carrots, onions, and lettuce handle cool weather much better than tomatoes, peppers, and basil. I still sometimes cover young seedlings during a hard frost, but the risk is much lower. I don’t rush warm-season crops, especially while nighttime temperatures are still dropping below 50 °F (10 °C).
- I cover plants ahead of time. If colder temperatures are expected overnight, I cover the bed in the evening while the soil is still holding onto some of the day’s warmth. I use frost cloth over hoops and always secure the edges with rocks or garden staples. In the morning, once it warms up, I open the cover. A frost protection cover works well for this.
- I use cloches for individual plants. For a few young plants, a large plastic bottle of about 1 gallon (3.8 L) with the bottom cut off works well. I place it over the plant at night, then remove it or open the cap in the morning. It can get hot inside very quickly once the sun comes out.
- I check the soil moisture. If the soil is very dry, I water it a little during the day. Moderately moist soil holds onto stored heat longer than very dry soil. But there’s no need to add more water if the ground is already moist after rain.
- I don’t remove mulch too early. Around perennials, I leave some of the winter mulch in place longer to protect the roots from sharp temperature swings. In areas where I’ll be sowing soon, I move it aside so the soil can warm up faster.
- I pay the most attention to nighttime temperatures. A few warm days don’t mean frost is over. If nights are still expected to drop to around 30–35 °F (−1–2 °C), my tomatoes, peppers, and other warm-season plants wait. Sometimes a few extra days in a protected spot do more than any cover can.
I always keep a few pieces of frost cloth and a couple of simple cloches handy for individual plants. Spring weather can change quickly, and I really don’t want to run around the house in the evening looking for old sheets. Unfortunately, we’ve done that more than once.
I don’t try to plant warm-season crops too early and rely only on covers. These tricks work well for getting plants through one or a few cold nights, but they don’t turn tomatoes or basil into frost-hardy plants. Sometimes it makes more sense to give the weather a few more days and plant them later.
5. Winter garden planning for early blooms
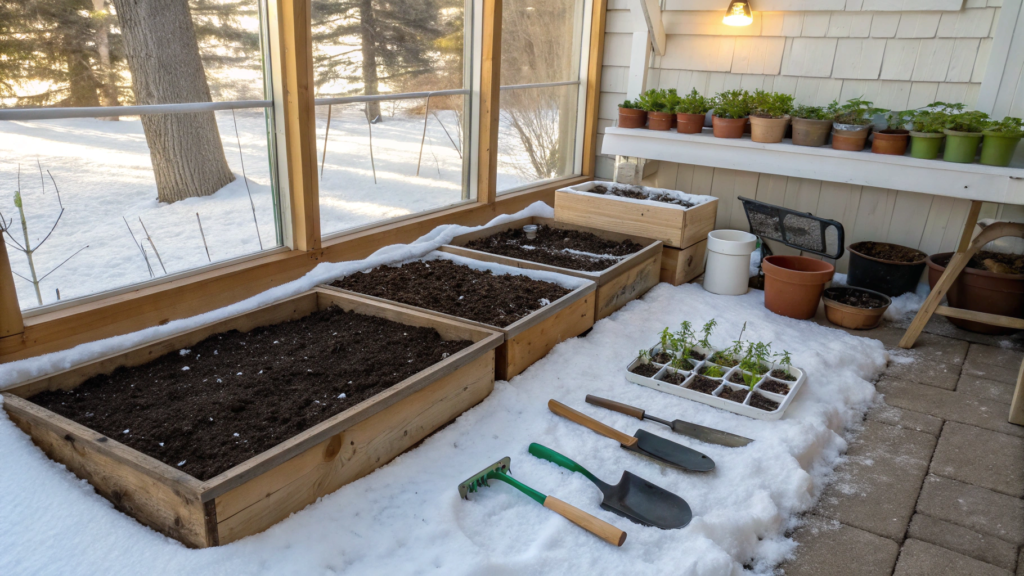
If you want to see the first flowers in your garden as early as possible, it’s better to start preparing in winter. By spring, some things are already too late to change. Bulbs need to be in the ground, perennials need to be in place, and some flower seeds should already be started ahead of time.
Over time, Lindy and I learned to plan these plantings not just by asking “what looks pretty,” but by looking at timing. Imagine a garden that doesn’t bloom all at once in May, but starts flowering little by little in late winter and early spring.
Tips for early blooms
- I choose plants with different bloom times. For the earliest flowers, crocuses, snowdrops, hellebores, and some daffodils work well. Then come tulips, primroses, and other spring perennials. If you plant several types with different bloom times, flowering can stretch out for weeks instead of ending in one short burst.
- I plant bulbs in fall. Tulips, daffodils, crocuses, and many other spring bulbs need a cold period. They’re usually planted before the ground freezes completely. The depth depends on the type, but for many bulbs, a good rule is to plant them about 2–3 times as deep as the bulb is tall. If you’re planting a lot of them, a bulb planter, such as the Bulb Planter Tool, can make the job easier.
- I place the earliest flowers where the snow melts first. The south side of the house, a spot near a stone wall, or a sunny raised bed usually warms up earlier. Even a difference of a few days is noticeable in spring. I try not to place all my early flowers in low spots, where cold air tends to settle and meltwater can sit longer.
- I use winter sowing for suitable flowers. Some cold-hardy annuals can be sown in winter in covered clear containers and left outside. The seeds go through a natural cold period and then germinate when temperatures become warm enough. This works for some types of poppies, calendula, and cold-hardy native flowers. The container needs drainage and ventilation holes.
- I don’t forget about perennials. Hellebores, primroses, and other early-blooming perennials can give you some of the first flowers without replanting them every spring. Their root systems are already established in the soil, so once the weather stays warmer, the plants can start growing quickly. You notice those first flowers right away when they’re planted near a path.
- I mark empty spots in winter. Once the leaves are gone and most of the garden is dormant, it’s much easier to see its overall structure. I take photos of the areas where I want to add more color in spring and mark spots for new bulbs or perennials.
I’ve gotten into the habit of making a small list by month. For example, what should bloom in late winter, what should bloom in March or April, and what comes after that. It makes it much easier to see where there might be a long gap with no flowers.
Early blooming rarely happens by accident. Most of the work takes place several months before the first bud appears. If you already know in winter which plants should bloom first and where they’ll grow, in spring you can simply watch as the garden gradually changes.
6. Underground watering tips for frozen soil
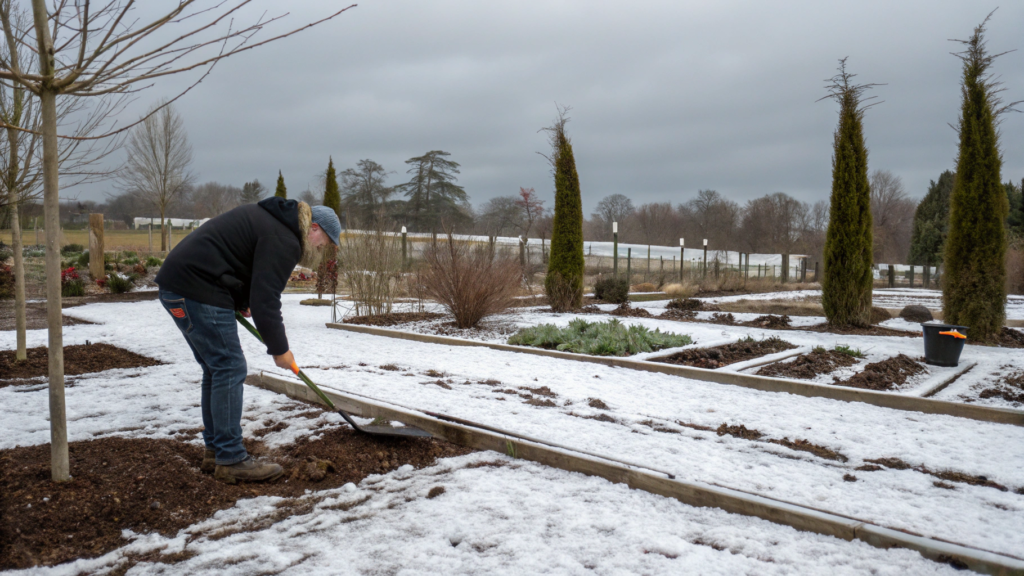
It’s easy to forget about watering completely in winter. But snow doesn’t always give plants as much water as they need. This is especially true for young trees, shrubs, perennials, and evergreens, which continue to lose moisture even during the colder months.
We’ve had winters with plenty of snow on our property, and others that were fairly dry. So in winter, I check the condition of the soil itself instead of looking only at how much snow we’ve had. Watering frozen ground is useless, but during a thaw, extra water can sometimes be exactly what plants need.
Winter watering tips
- I check whether the ground is actually frozen. The top layer can feel hard in the morning, then thaw several inches deep after a few warmer days. I check the soil about 2–4 inches (5–10 cm) down. If it’s soft and dry, the plants can take up water. If a shovel or my finger hits a hard frozen layer, I wait.
- I water during a thaw, not before a freezing night. The best time is a day when the temperature rises above 40 °F (4 °C) and the soil has had time to thaw a little. I try to water closer to midday so the water has time to soak in before temperatures drop again in the evening. There’s no point pouring water over frozen ground. It will just run off or freeze again on the surface.
- I direct the water toward the roots. In winter, I don’t need a quick surface watering for a couple of minutes. For trees and shrubs, it’s better to slowly soak the soil around the root zone. A low-pressure hose or soaker hose lets the water move deeper instead of spreading across the surface.
- I keep a closer eye on young plantings. A newly planted tree or shrub hasn’t had time to spread its roots very far yet. These plants handle a long dry winter less easily. If there has been almost no snow or rain for several weeks and the ground has thawed, I check them first. Mature plants with deeper roots usually need less attention.
- I don’t rely on snow alone. A few inches of fluffy snow can look like a lot, but once it melts, the actual amount of water may be pretty small. I check what’s happening under the mulch and in the top few inches of soil. Sometimes there’s snow on the surface while the soil around the roots is still fairly dry.
- I leave mulch around the roots. A layer of leaves, straw, or wood chips around perennials helps the soil lose moisture more slowly and reduces sudden temperature swings. Around tree and shrub trunks, I don’t pile mulch right up against the bark. I leave a little open space around the base.
It makes sense that one good watering during a thaw is better than adding a little water to the surface every week. I want the water to reach the roots, not turn into a thin layer of ice by evening.
Not every garden needs extra watering in winter. After a rainy fall, regular snowfall, and a few thaws, the soil may already be holding enough moisture. I check the ground by hand and water only when I can see that it has actually dried out. That way, the plants get water at the right time.
7. Seed sorting strategies before spring rush
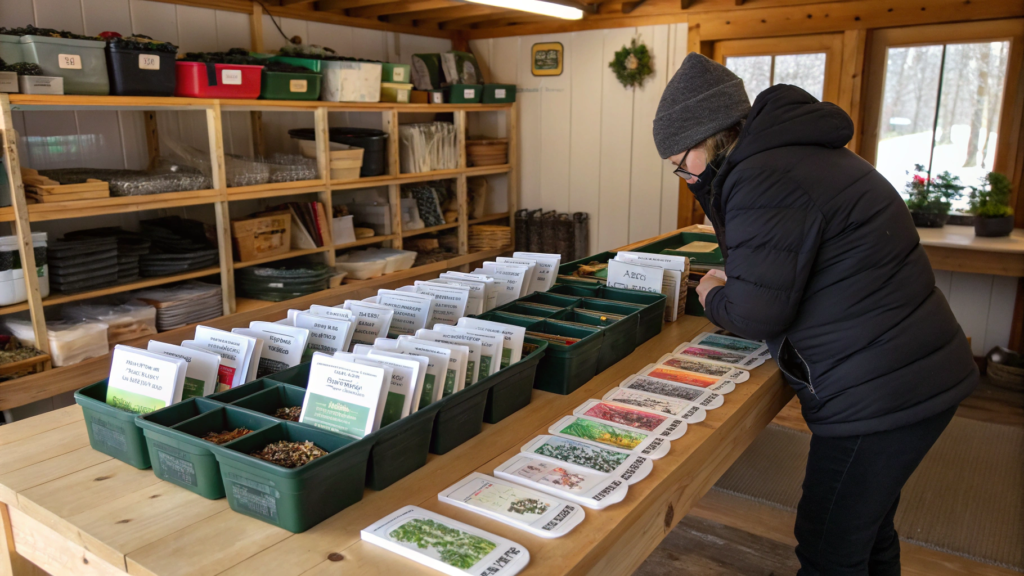
In winter, I always do a quick seed check. For some reason, there’s never enough time for it in spring. It’s already time to start sowing, new seed packets are showing up, the old ones are mixed together, and then I find out we have five kinds of lettuce but none of the beans we actually need. Just a mess and a lot of rushing around.
We used to store seed packets pretty randomly. Some were in a box, some were left in the shed after planting, and a few would always turn up somewhere in the house. Now I gather everything in one place during winter and calmly figure out what we already have, what is still good for planting, and what we actually need to buy.
Seed sorting tips
- I sort seeds by crop first. Tomatoes go with tomatoes, lettuce with lettuce, and flowers stay separate from vegetables. Even at this stage, it becomes pretty obvious what we have too much of. Then I sort the packets a little more closely, like early and late tomatoes or bush and pole beans. In spring, it’s much easier to find the variety I need.
- I check the year on every packet. Old seeds don’t automatically need to be thrown away. Different crops keep good germination rates for very different lengths of time. Onion and parsnip seeds usually lose viability faster, while tomatoes, cucumbers, and some other crops can last for several years if stored properly. So I write down the year the seeds were bought or collected if it isn’t already on the packet.
- I test questionable seeds ahead of time. If a packet has been sitting around for a few years, I take about 10 seeds, place them between damp paper towels, and leave them somewhere warm. If eight sprout, the germination rate is around 80%. If only two or three sprout, I’ll either sow them more heavily in spring or buy fresh seeds. The test doesn’t take much time, and it saves me from staring at an empty seed tray for two weeks.
- I remove duplicates and make a shopping list. I don’t buy new seeds until I’ve checked what we already have. After sorting, I write down only what is actually missing. I also make a separate note of crops where I want to try a new variety.
- I store seeds somewhere cool and dry. After sorting, the packets go back to a place without high humidity or big temperature swings. I don’t leave them near a heater, in a damp kitchen, or in an unheated space where the packets could pick up moisture. If you have a lot of packets, a seed storage organizer is really useful.
- I label our own saved seeds right away. With seeds we collect ourselves, I write the variety name and year directly on the envelope. The phrase “I’ll definitely remember what’s in here” has failed me more than once. A few months later, two brown envelopes full of tiny seeds look exactly the same.
After this winter sorting, I’m left with one box of checked, organized seed supplies and a short list of what still needs to be bought. In spring, I can just pull out the group of seeds I need and start sowing instead of sorting through dozens of old packets first.
8. Essential tools to use in winter gardening
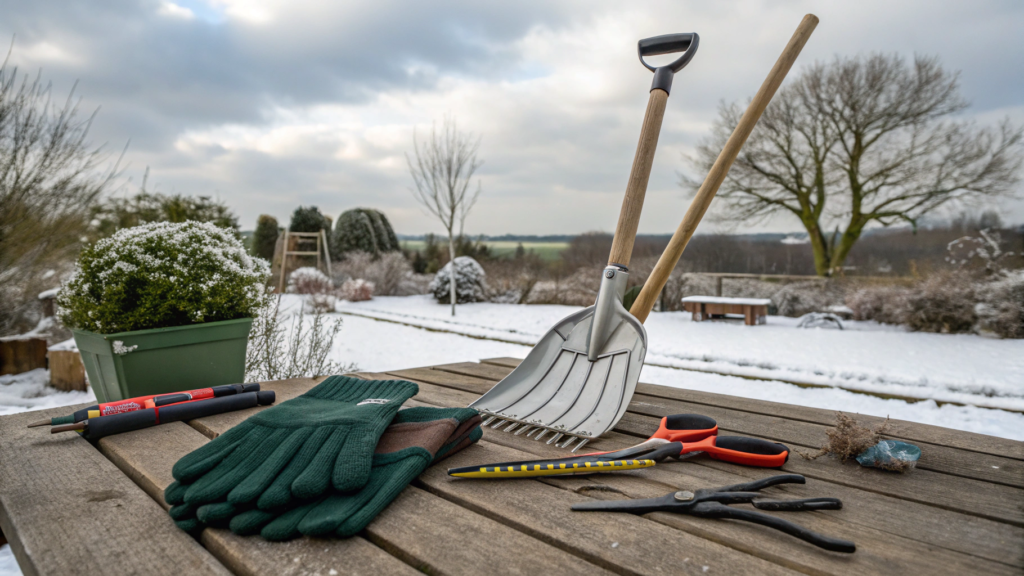
In winter, my set of garden tools is noticeably smaller than in summer. I don’t need harvest baskets, a dozen hand tools, or everything else that usually follows me around the property from spring through fall.
After a snowfall or strong wind, garden work sometimes finds you on its own. You may need to fix the mulch, clear heavy snow off covers, or remove a damaged branch. So I keep a few essential winter gardening tools where I can grab them quickly.
Tools that come in handy in winter
- Good gardening gloves. Regular thin gloves get wet quickly in winter, and working with cold, wet hands is miserable. I choose thick, water-resistant gloves that let me adjust mulch, carry branches, or work with compost comfortably. My fingers still need to bend properly, otherwise even simple pruning becomes a struggle. Insulated gardening gloves, such as Insulated Waterproof Gardening Gloves, work well.
- Pruning shears for winter pruning. Winter and the end of the dormant period are suitable for pruning many deciduous trees and shrubs. Without leaves, it’s much easier to see crossing, broken, and damaged branches. I use regular sharp pruning shears for thinner branches and save thicker ones for loppers or a saw. Before I start, I check and clean the blades. Dull pruning shears don’t make a clean cut and can crush the wood instead.
- Small garden fork. I leave most frozen soil alone in winter. But a garden fork is useful for compost, loose mulch, and areas that have already thawed. It’s handy for lifting compacted material a little or checking how deeply the soil is frozen. I don’t force the tool into a frozen bed. That’s an easy way to damage both the fork and your back.
- Soil and compost thermometer. You can’t always tell by touch what’s happening a few inches below the surface. A thermometer helps check whether the soil has thawed before watering, while a longer model is useful for the compost pile. For compost, a long thermometer, such as Compost Thermometer, works well.
- Lightweight snow shovel. I use it for more than just paths. After a wet snowfall, I may need to clear access to the composter, greenhouse, or garden beds, and sometimes carefully remove heavy snow around structures. I usually don’t knock snow off plants with a shovel. If branches are bending badly, I gently remove the snow by hand or with a soft brush, working from the bottom up.
- A watering can or hose that’s easy to put away after watering. During a winter thaw, young trees and perennials may sometimes need water. But I don’t leave a regular hose full of water outside. After watering, I drain it and store it somewhere the remaining water won’t freeze inside. Finding a split hose in spring is not a great surprise.
I also check the condition of the tools themselves during winter. I clean off soil, remove rust, sharpen cutting edges, and lubricate moving parts. In summer, I keep putting this off because I usually need the same tool again the next day. Winter gives me more time to deal with it.
There’s no need to buy a separate set just for cold weather. Most winter jobs use the same tools we rely on during the rest of the year. I just keep the most useful ones easy to reach and get the others back into good shape.
With this practical approach, by spring I’m not dealing with dirty pruning shears, dull shovels, or searching for missing gloves. I already have clean tools that are ready to use. And spring brings plenty of other jobs on its own.
9. Common winter gardening mistakes to avoid
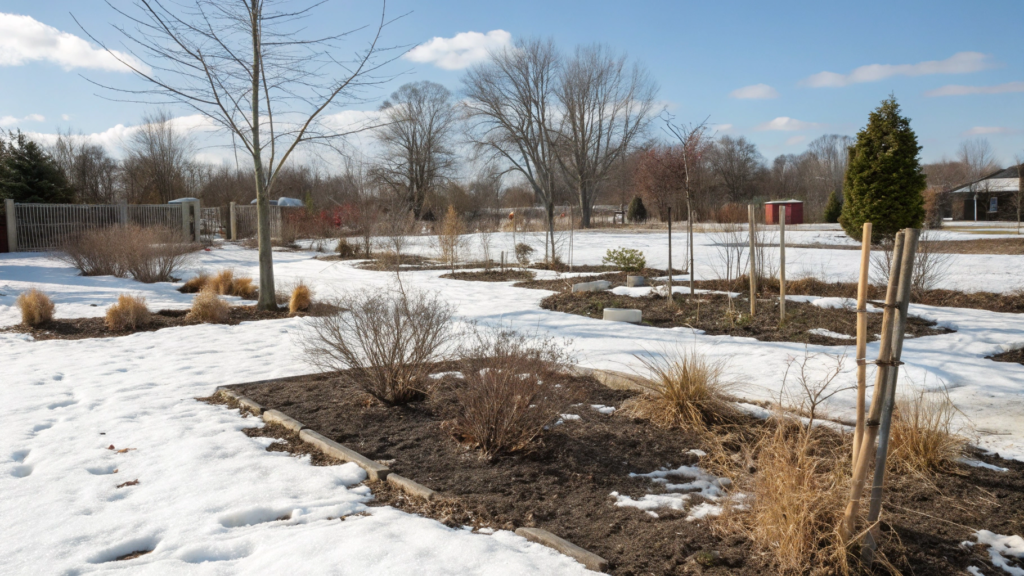
The garden needs less attention in winter, and that makes some problems easy to miss until spring. You can remove plant protection too early, leave wet mulch piled around a tree trunk, or assume that snow automatically replaces watering.
Some mistakes seem pretty minor in January, but the consequences may not show up for several months. So during winter, I try to walk around the property from time to time and check a few simple things.
Mistakes I try to avoid in winter
- Walking on frozen or overly wet garden beds. It can be tempting to take a shortcut across frozen ground, especially when the spot you need is only a few steps away. But after a thaw, wet soil compacts easily under your weight. In spring, those areas don’t let water and air move through as well. So I try to stay off the beds themselves and use the paths, even if it means taking a small detour.
- Leaving thick mulch right against tree trunks. Mulch protects roots well, but I leave a few inches of open space around trees and shrubs. Keeping wet leaves or wood chips pressed against the bark can make problems with rot and pests more likely. With young trees, I check from time to time to make sure mulch hasn’t collected right around the trunk. Strong wind can shift leaves and wood chips, so sometimes I need to spread them back out.
- Assuming snow completely replaces watering. A few snowy days don’t necessarily mean the soil has received enough moisture. During a dry winter, young trees, shrubs, and evergreens may still need water. I check the soil during a thaw and water only when the ground has thawed and actually feels dry.
- Removing winter protection too early. The first warm days can be misleading. If you remove mulch or covers after one sunny weekend, the next cold night can damage young shoots. I check the forecast for the next few days first and remove protection gradually. There’s really no need to rush this in spring.
- Leaving heavy wet snow on weak branches and covers. Light snow usually doesn’t bother plants, but wet snow is much heavier. It can bend young shrubs, break branches, or collapse a low cover. I remove it carefully without hitting frozen branches. If a branch is already covered in ice, it’s better to wait for a thaw than to try to knock it off by force.
- Adding fertilizer to frozen soil. Plants use very few nutrients in winter, and fertilizer left on a frozen surface can wash away with water during a thaw. So I leave compost and organic mulch on the beds during winter and add extra fertilizer only after the ground has thawed and plants have started growing again.
- Forgetting to check plants after strong wind. Wind can lift row covers, blow leaves off a bed, or loosen a young tree. After rough weather, I do a quick walk around the property and fix anything that has shifted. It only takes a little time, and I don’t end up discovering in spring that a cover has been sitting at the other end of the garden for weeks.
Not every winter problem needs immediate action. Sometimes it’s better to leave things alone. Frozen soil doesn’t need to be loosened, ice-covered branches shouldn’t be forced back into place, and plants don’t need to be uncovered and covered again after every warm day.
I only step in when I see a specific problem. The garden handles a lot on its own during winter, and my job is simply not to create extra problems before spring.
10. Scheduling winter maintenance for perfect timing
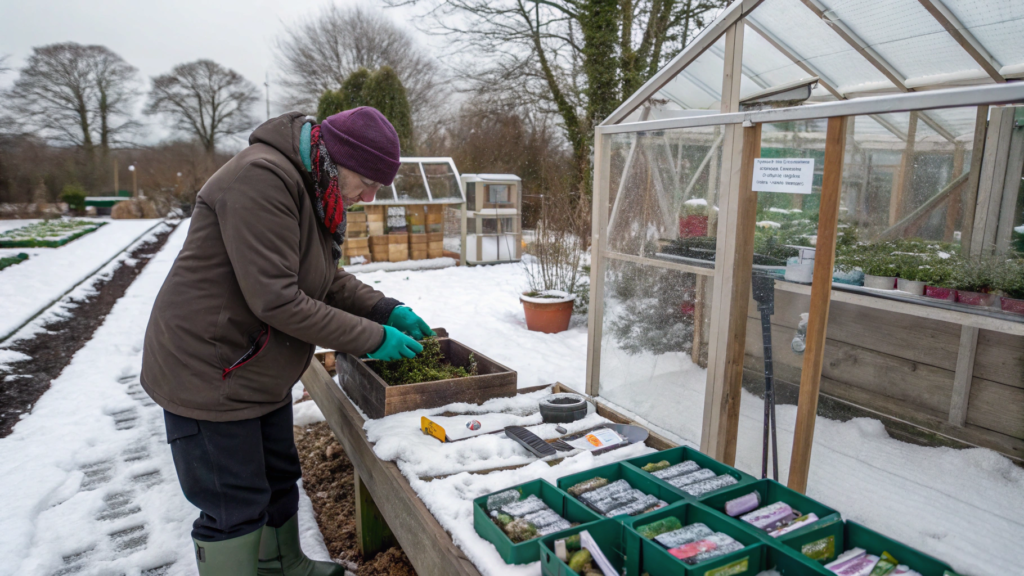
At any time of year, gardening is easier for me when bigger jobs are broken into smaller tasks. There’s noticeably less to do in winter. Sometimes I can leave the property alone for a couple of weeks, then after a heavy snowfall or thaw, I walk around again and check the plants. At the same time, other jobs slowly start coming up — sorting seeds, taking care of tools, and getting ready for the first sowing.
Lindy and I used to put off winter jobs until they became urgent. The pruners needed sharpening right before pruning, the seeds had to be sorted the day before sowing, and covers needed fixing only after a snowfall. Now I spread the work roughly across the winter months. That makes it easier not to miss anything without creating extra work for myself.
Winter maintenance schedule
- At the beginning of winter, I check soil and plant protection. After the first frosts, I walk around the property and check the beds to make sure the mulch is still in place, the covers are secured, and young plantings are protected. I also remove any remaining diseased plant material. After that, the property can usually be left alone until serious weather comes through.
- After heavy snow or strong wind, I do a quick check. There’s no fixed date for this. If we get a lot of wet snow, I check weak branches, small greenhouses, and covers. After strong wind, I look to see whether mulch has shifted or row covers have lifted. This usually takes very little time.
- During a thaw, I check soil moisture. A few warmer winter days are a good chance to see whether the soil around young trees, shrubs, and evergreens has dried out. If the ground has thawed and feels dry several inches down, I can water. I don’t plan this job at all when the ground is frozen.
- I use midwinter for seeds and tools. When there’s almost nothing to do outside, I sort through seed packets, test older seeds for germination, and make a list of what still needs to be bought. At the same time, I clean garden tools, sharpen pruners, and check what may need replacing before spring. A garden tool sharpener is useful for this.
- I schedule pruning by the plant, not just by the calendar. Many deciduous trees and shrubs are pruned during dormancy, but there isn’t one winter date that works for the whole garden. Spring-flowering shrubs, for example, may already have flower buds on last year’s growth. If they’re pruned without checking first, there may be fewer flowers in spring. So before pruning, I always check what that specific plant needs.
- Toward the end of winter, I start getting ready for the first sowing. I check the timing for crops we’ll start as seedlings, bring out trays and potting mix, and check the lights. I also mark areas where I want to make changes in spring. It’s much easier to do that now than try to remember every idea once planting has already started.
I don’t make a winter schedule day by day. The weather will make its own changes anyway. It’s more practical to have a few general tasks for each part of winter and then check the property again after snow, strong wind, or a thaw.
That way, the garden doesn’t turn into another burden or a long list of chores. Some jobs depend on the calendar, some depend on the weather, and some are better left until spring.
Winter preparation for spring
Most of these jobs don’t take much time. Adding mulch, checking compost, looking at soil moisture after a thaw, sorting seeds — all of it can be done gradually through winter.
Each job is small on its own. But by spring, the beds are already prepared, the tools are sharpened, the seeds are checked, and the plants don’t need to be rescued from problems that could have been prevented during winter.
Tell me in the comments which winter jobs you always do in your garden. And do you have a trick that once made your spring planting noticeably easier?