With vegetarian takeout, sometimes it’s enough to know exactly what to order and what small add-on to ask for: extra hummus, potatoes in a сrunchwrap, crispy tofu on the side, mango pickle with chickpeas, or a spicy drizzle for a simple pizza.
I really do love home-cooked food, of course. But sometimes I just do not want to cook at all. I think you know that feeling. And that’s when a good takeout order helps you eat normally without any extra trouble.
Here are 10 vegetarian orders you can grab fast and make better with a couple of precise requests, based on your taste and choice. Nothing complicated, just small changes that make the food noticeably better.
1. Chipotle Sofritas Bowl With Fajita Veggies and Extra Hot Salsa
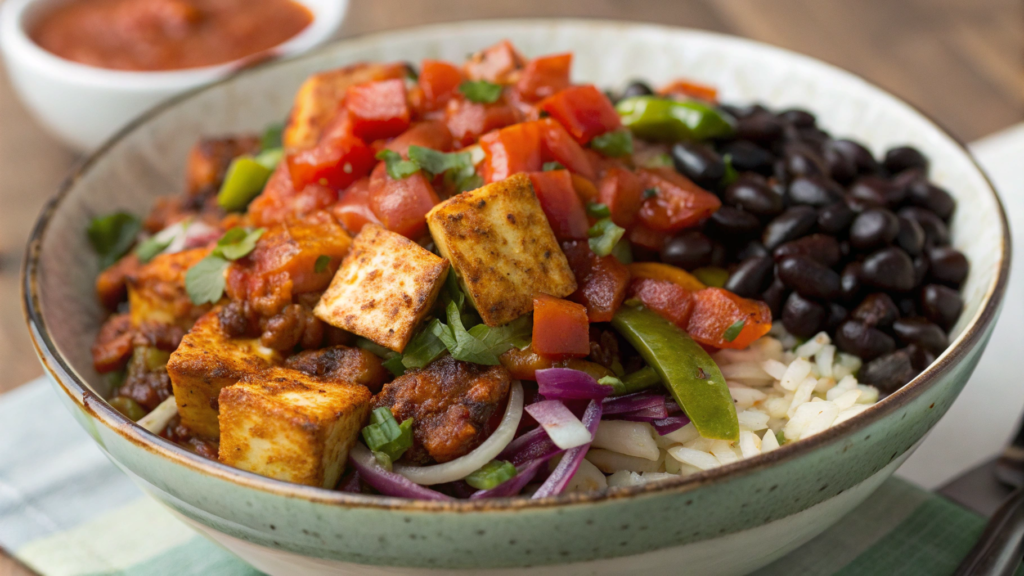
Chipotle Sofritas Bowl With Fajita Veggies and Extra Hot Salsa is a vegetarian order where spice, softness, and heat come together really well. The sofritas give you tasty tofu in a sauce with tomato, pepper, garlic, cumin, oregano, and smoked paprika. Black beans make the dish more filling, while roasted peppers and red onion add sweetness and texture.
Bean- and pea-based meals have been compared with meat-based meals that had a similar amount of protein. Legumes showed good results for the feeling of fullness. So beans plus tofu are not just a “vegetarian replacement,” but a solid base for a quick lunch.
What to Order and How to Build the Bowl
- Order a bowl, not a burrito. For sofritas, this is more convenient: rice, beans, veggies, and salsa stay in separate layers instead of turning into a soft filling inside a tortilla. Plus, it is easier to control the heat, especially if you ask for the salsa separately.
- Choose the rice. Brown rice works for a more filling lunch. White rice tastes softer and simpler.
- Add black beans. They go well with sofritas and hot salsa. You can choose pinto too, but black beans feel like the better fit here.
- Ask for sofritas. This is the main filling: spiced tofu in sauce. It has its own flavor, not just the role of “something with protein.”
- Add fajita veggies. Peppers and red onion make the bowl tastier and livelier. If you skip them, the order will be much simpler.
- Ask for the hot salsa in a small separate container. This way, you can add the amount you need yourself. If you love really spicy food, you can ask them to add a little straight into the bowl.
- Guacamole is optional. It makes the lunch more filling and softens the heat. If you are taking the food home, it is better to ask for the guacamole separately so it does not get warm from the rice and sofritas.
Homemade Version
This is not an exact copy of the restaurant bowl, but at home you can put together a very similar mix: rice, beans, spiced tofu, roasted peppers with onion, and hot sauce.
What You Need for 2 Servings
- 1 cup dry rice, about 190 g, or about 3 cups cooked rice, about 450–500 g
- 1 can black beans, about 15 oz, about 425 g
- 14 oz firm tofu, about 400 g
- 1 red bell pepper, sliced into strips
- 1 green or yellow bell pepper, sliced into strips
- 1 small red onion, sliced into half-moons
- 2 tbsp oil, about 30 ml
- 1–2 tbsp sauce from canned chipotle peppers in adobo, about 15–30 ml
- 1 tbsp tomato paste, about 15 g
- 1 tsp ground cumin, about 2–3 g
- 1/2 tsp smoked paprika
- 1/2 tsp oregano
- 1 garlic clove, finely grated
- 1 tbsp lime juice, about 15 ml
- salt to taste
- hot salsa or hot sauce, to taste
- guacamole, optional
How to Make the Homemade Version
- Cook the rice. Make it the way you usually do. At the end, you can add a little lime juice and a pinch of salt.
- Warm the beans. Rinse the black beans from the can, move them to a small pot, add a couple of spoonfuls of water, a pinch of salt, and a little cumin. Warm for 3–4 minutes.
- Prepare the tofu. Place the tofu between towels and press it with something heavy for 10–15 minutes. Then crumble it with your hands into small pieces.
- Fry the tofu. Heat a pan, add a little oil, and fry the tofu for 6–8 minutes, until some of the pieces turn golden.
- Add the sauce. Add tomato paste, the sauce from the chipotle peppers in adobo, cumin, smoked paprika, oregano, garlic, and salt to the tofu. Add 2–3 tbsp water, about 30–45 ml, and cook for another couple of minutes, until the sauce coats the tofu.
- Fry the peppers and onion. In another pan, heat a spoonful of oil. Add the peppers, red onion, oregano, and salt. Fry over high heat for 6–8 minutes. The vegetables should get softer, but not turn into mush.
- Build the bowl. Put rice on the bottom, beans next to it, then sofritas and veggies on top. Add hot salsa, a little lime, and guacamole if you want.
In this order, you get a hot lunch with rice, beans, spiced tofu, roasted peppers, onion, and hot salsa. Nothing extra, just what you need for good flavor. Especially if you ask for the salsa and guacamole separately — at home, you can put everything together properly, add heat gradually, and avoid soggy rice on the way.
2. Taco Bell Black Bean Crunchwrap With Added Potatoes
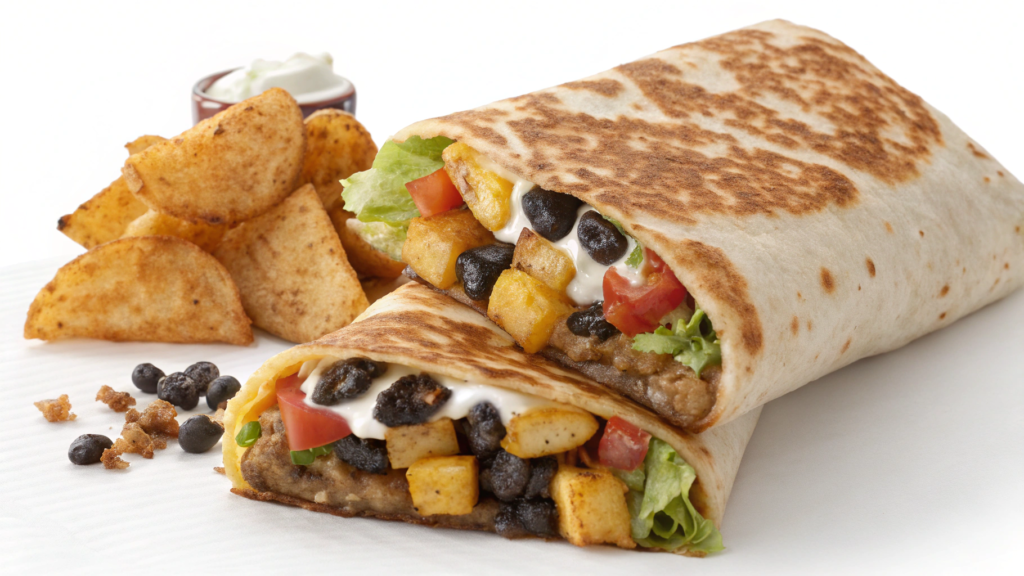
Taco Bell Black Bean Crunchwrap With Added Potatoes has one advantage over a regular taco or burrito: it holds its shape. Inside, you get beans, cheese sauce, sour cream, lettuce, tomatoes, and a crunchy layer. Outside, there is a large tortilla toasted until it gets those golden spots. And that mix of soft and crunchy is exactly what makes the order more interesting.
The potatoes work well with the black beans here: they become a soft, hot part of the filling and make the dish feel more like a real lunch, not just a quick snack on the go.
What to Order and How to Build the Crunchwrap
- Order a Black Bean Crunchwrap. This is the vegetarian base. Instead of meat, you get black beans inside, and they work better here than just an empty tortilla with cheese and lettuce.
- Ask to add potatoes. This is the main little trick. Potato pieces make the filling thicker, hotter, and tastier. Without them, the Crunchwrap can feel too light.
- Keep the crunchy tortilla inside. Do not ask them to remove that layer. It gives the Crunchwrap its crunch. Without it, you just get a folded tortilla with soft filling.
- You can keep the sour cream, but do not ask for extra. This order already has soft beans, cheese sauce, and potatoes. If you add too much sour cream, the filling can quickly get heavy and wet.
- Add hot sauce separately. It is better to grab a couple of packets and add them right before eating. That way, the Crunchwrap will not get soggy while you are taking it home.
- If you want more freshness, ask for tomatoes. Just do not overdo it. Too much fresh filling inside a hot Crunchwrap can quickly add extra moisture.
Tip. If you are taking the Crunchwrap with you, eat it as soon as you can. After an hour in the bag, it is not as tempting anymore. Still edible, of course, but sadly, it will not be crunchy anymore.
Homemade Crunchwrap Version
Do not try to turn it into an exact restaurant copy. Just be patient enough to fold the edges properly.
What You Need for 2 Crunchwraps
- 2 large flour tortillas, about 12 inches wide, or about 30 cm
- 2 small flour tortillas or pieces of tortilla to close the top
- 1 can black beans, about 15 oz, or about 425 g
- 1 cup potatoes cut into small cubes, about 150–170 g
- 2 crunchy tostadas
- 1/2 cup shredded cheese, about 55–60 g
- 1/4 cup sour cream, about 60 g
- 1/2 cup chopped lettuce, about 25–30 g
- 1/4 cup chopped tomatoes, about 40 g
- 1 tbsp oil, about 15 ml
- 1/2 tsp ground cumin
- 1/2 tsp smoked paprika
- salt to taste
- hot sauce, optional
How to Make the Homemade Version
- Prepare the potatoes. Cut them into small cubes. The smaller the pieces, the faster they cook and the easier it will be to fold the Crunchwrap. Fry the potatoes in a pan with oil, salt, cumin, and smoked paprika for 8–10 minutes, until they are soft inside and lightly golden outside.
- Warm the beans. Rinse the black beans from the can and warm them in a small pot with a couple of spoonfuls of water and a pinch of salt. You can lightly mash some of the beans with a fork. This helps the filling stay inside instead of falling apart after the first bite.
- Warm the large tortilla. Place it on a dry warm pan for 10–15 seconds on each side. It will get softer and will not tear when you start folding the edges. This step is boring, but necessary.
- Build the filling. Put the beans in the center of the large tortilla, then add the potatoes, a little cheese, and sour cream. Place the crunchy tostada on top. Add lettuce and tomatoes over it. Do not spread the filling all the way to the edges, or it will be almost impossible to fold.
- Close the top with a small tortilla. Place the small tortilla over the filling. If you do not have one, you can cut a circle out of another large tortilla. This helps close the Crunchwrap without leaving a hole in the middle.
- Fold the edges. Lift the edges of the large tortilla toward the center, overlapping them around the circle. Hold everything with your hand so it does not open up. The first Crunchwrap may turn out a little crooked. That is fine. The second one usually looks better.
- Toast it seam-side down. Place the Crunchwrap on a hot dry pan with the folded side down. Press it with a spatula and cook for 2–3 minutes, until the bottom turns golden. Flip it and toast the other side for another 1–2 minutes
. - Let it sit for a minute before cutting. Do not cut it right away. The filling will settle a little, the cheese will set, and the Crunchwrap will not fall apart as fast. Then cut it in half and add hot sauce on the plate.
The Crunchwrap is not trying to be a healthy version of fast food. It is hot food in a tortilla: beans, potatoes, a crunchy layer, a little fresh veg, and sauce. Very simple. I order it when I want something without meat, but with a real filling, not just lettuce leaves and the hope that they will somehow take care of my hunger.
3. Panera Mediterranean Veggie Sandwich With Extra Hummus
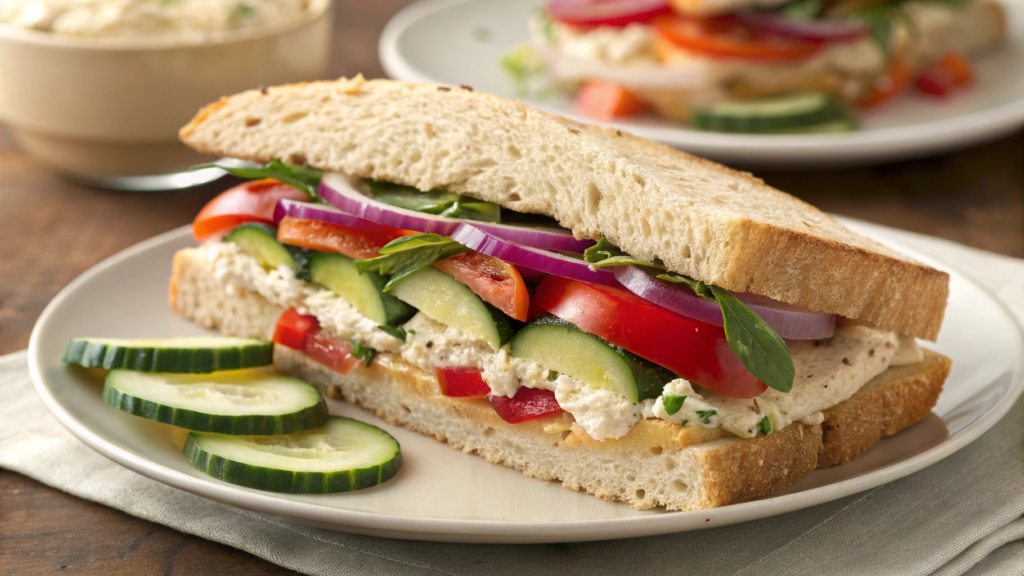
This is a good quick lunch at Panera without a heavy filling, with hummus, cucumbers, tomatoes, red onion, greens, sweet peppers, and feta inside.
In the regular version, there may not be enough hummus, especially if the bread is on the denser side. So I would ask for extra right away, because a veggie sandwich without a good layer of hummus can feel dry.
What to Order and How to Build the Sandwich
- Order the Mediterranean Veggie Sandwich. This is the basic vegetarian option with hummus, vegetables, feta, and tomato-basil bread.
- Ask for extra hummus. It is better to ask for an extra layer, not to replace something inside. Hummus helps hold the vegetables together and makes the sandwich juicier.
- Keep the sweet peppers. They add a sweet-and-sour flavor and make the filling more interesting. Without them, the sandwich becomes too basic: bread, vegetables, cheese.
- Do not remove the red onion. In a small amount, it fits really well, especially together with hummus and feta.
- Ask them not to overload it with greens. Greens are needed, but if there are too many, they take space away from the cucumbers, tomatoes, and hummus. And those are exactly the parts that make the sandwich worth ordering.
- If you are taking the sandwich with you, ask them to cut it in half. This makes it easier to eat on the road or save the second half for another snack. Convenient.
Tip. If you are taking the sandwich home, ask for extra hummus, but not extra tomatoes. Hummus will add juiciness, while extra tomatoes can quickly make the bread soggy.
Homemade Sandwich Version
The main thing here is not to cut the vegetables too thick. In a sandwich, every layer should sit properly between the bread, otherwise everything starts sliding out after the first bite.
What You Need for 2 Sandwiches
- 4 slices tomato-basil bread or another soft bread with a firm crust
- 1/2 cup hummus, about 120 g
- 1/2 cup canned chickpeas, about 80–90 g, if you want to quickly mash some chickpeas into the hummus for a thicker layer
- 1 small cucumber, thinly sliced
- 1 medium tomato, thinly sliced
- 1/4 small red onion, very thinly sliced
- 1/2 cup greens, about 15–20 g
- 1/4 cup feta, about 35 g
- 2–3 sweet pickled peppers, sliced into strips
- salt and black pepper to taste
- a few drops of lemon juice, optional
How to Make the Homemade Version
- Prepare the vegetables. Thinly slice the cucumber, tomato, and red onion. Thick slices get in the way here: the sandwich becomes tall, awkward, and falls apart quickly.
- Remove extra moisture from the tomatoes. Place the slices on a paper towel for a couple of minutes. Remove the extra juice so the bread does not get soggy.
- Make the hummus thicker if it is too soft. If the hummus is runny, mash a little chickpea with a fork and mix it in. You will get a thicker layer that holds the vegetables better.
- Spread hummus on both slices of bread. Not just one. A thin layer on both sides helps the filling hold together better, and the bread does not soak up the vegetable juice as quickly.
- Build the bottom layer. On the first slice, add the greens, then the cucumbers and tomatoes. Greens on the bottom help protect the bread a little from moisture.
- Add the feta, peppers, and onion. Crumble the feta finely, slice the peppers into strips, and add the onion in a thin layer. Red onion should not take over the whole sandwich. It is there for a sharp little accent.
- Season and close the sandwich. Add a pinch of salt, black pepper, and a couple of drops of lemon juice if you want more acidity. Cover with the second slice of bread and gently press with your palm.
- Cut it in half. It is better to use a sharp knife and not press too hard. If you press down, the tomatoes and cucumbers will start sliding out.
The bread in the homemade version may be different, the hummus may be thicker or softer, and the vegetables may be fresher because you are building the sandwich right before eating. That is exactly what I like about the homemade version: you can add more hummus, slice the onion thinner, and not wait for the tomatoes to make the bread soggy in the bag.
I would order this sandwich at Panera when I need a quick cold lunch without a fried filling. It is a good veggie sandwich you can eat at a table, in the car, or in the kitchen between errands. Extra hummus really changes things here: the bread does not feel dry, the vegetables hold together better, and the feta and sweet peppers stand out more.
4. Shake Shack Grilled Cheese With Tomato and Pickle Add Ons
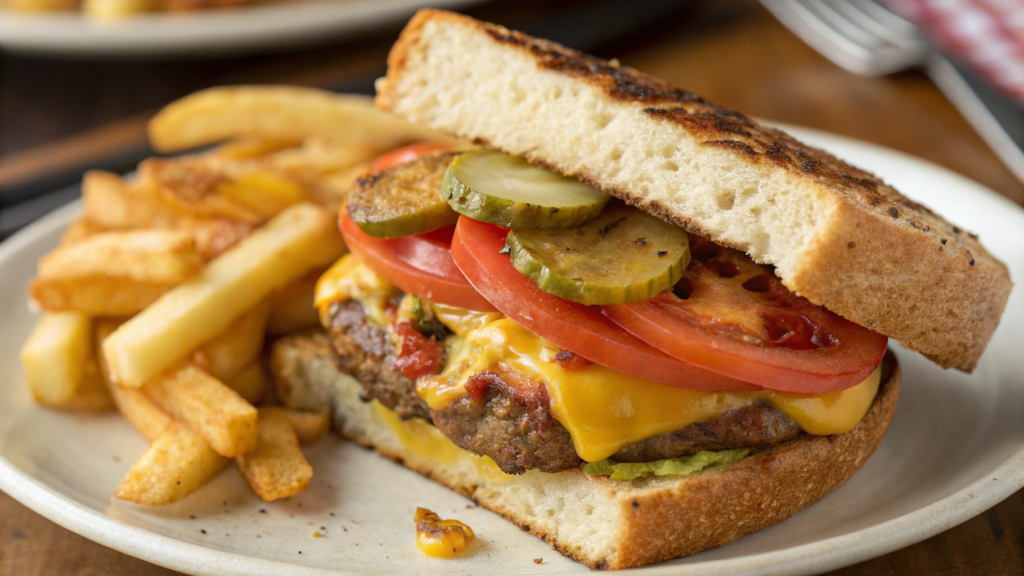
A grilled cheese with tomato and pickles from Shake Shack is a hot potato bun, melted cheese, juicy tomato, and tangy pickles.
The tomato adds juice and freshness, while the pickles add acidity and crunch. Without them, it is just bread with cheese. With them, it already feels like a normal small lunch or snack, especially if you eat it with fries.
What to Order and How to Build the Sandwich
- Order the grilled cheese. This is the base: a toasted potato bun and melted American cheese. It is better not to complicate the starting order, because the sandwich itself is small and can get overloaded quickly.
- Ask to add tomato. One layer of tomato will add juiciness and a little freshness. You do not need more: extra tomato can quickly make the bun soggy.
- Add pickles. They add acidity and crunch, so the grilled cheese does not feel so one-note and soft.
- Do not add too much sauce. It is better to get the sauce separately. Inside a hot grilled cheese, extra sauce can quickly make the bun soggy.
- Eat it right away if you can. A grilled cheese handles a long time in the bag worse than almost anything. The cheese cools down, the bun steams, and the pickles release moisture. After 10–15 minutes, it is still okay. After an hour, it is a completely different story.
Tip. If you are taking the order with you, ask them not to go too heavy on the tomato and pickles. One normal layer is better than a tall wet stack that makes the bun fall apart.
Homemade Grilled Cheese Version
The bun needs to be toasted, not just warmed up. That way, it gets a light crust on the outside, while the cheese has time to melt inside.
What You Need for 2 Sandwiches
- 2 potato buns
- 4 slices American cheese
- 1 medium tomato, sliced into thin rounds
- 6–8 slices pickles
- 1 tbsp butter, about 14 g
- 1 tsp mayo, about 5 g, optional, for the outside of the bun
- a pinch of black pepper
How to Make the Homemade Version
- Prepare the tomato. Slice it thinly and place the slices on a paper towel for a couple of minutes. The tomato should stay juicy, but it is better to remove the extra juice right away.
- Prepare the buns. Cut the potato buns in half. Lightly spread butter on the inside. If you want a more golden crust, you can spread a very thin layer of mayo on the outside.
- Build the cheese layer. Place two slices of cheese on the bottom half of each bun. Do not cut the cheese into small pieces. Slices melt more evenly and hold their shape better.
- Toast the sandwich. Put the bottom half of the bun with the cheese on the pan, cover it with the top half, and cook over medium heat for 2–3 minutes. Then carefully flip it and toast for another 1–2 minutes. If the cheese is melting slowly, cover the pan with a lid for 30–40 seconds.
- Add the tomato and pickles after toasting. Do not put them on the pan together with the cheese. The tomato will release juice, and the pickles will lose their crunch. Open the sandwich, add a thin layer of tomato, a few pickle slices, and a little black pepper.
- Close it and eat it warm right away. Do not leave it sitting on the board. A grilled cheese is best in the first few minutes, while the bun is still toasted and the cheese is soft.
At the restaurant, the bun is usually softer, and the sandwich comes out more even in flavor. At home, you can slice the tomato thinner, choose crunchier pickles, and toast the bun more. I like the homemade version exactly because you get more control over every layer.
This is a hot grilled cheese sandwich that gets noticeably better with two add-ons: tomato and pickles. Tomato gives juiciness, pickles bring tang, and cheese gives that soft hot base. And yes, eat it while the bun is still warm. That’s it.
5. Thai Pad See Ew With Tofu and Extra Chinese Broccoli
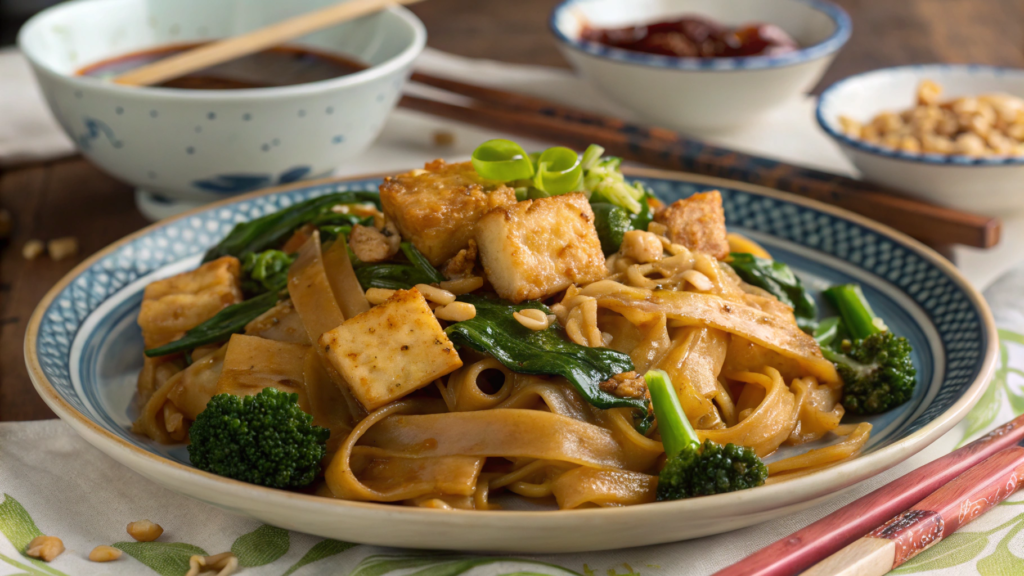
In Thai Pad See Ew With Tofu and Extra Chinese Broccoli, you get wide rice noodles, fried tofu, egg, dark sauce, and greens that give the dish a good balance.
I would ask for extra Chinese broccoli right away. There is often not much of it in a regular portion, and it is exactly what gives the dish crunch, a little bitterness, and the feeling that you are not just eating noodles in sauce.
What to Order and How to Build the Dish
- Order Pad See Ew with tofu. This is the basic vegetarian version: wide rice noodles, tofu, egg, sauce, and Chinese broccoli. If you do not eat eggs, ask them to make it without egg right away.
- Ask for extra Chinese broccoli. This is the main upgrade. The stems add crunch, the leaves soak up the sauce, and the taste does not feel as heavy.
- Check the spice level. Pad See Ew is usually not a spicy dish, but some places can add chili if you ask. I would get chili separately so it does not cover the taste of the sauce.
- Do not ask for too much sauce. In this dish, extra sauce can quickly make the noodles wet and sweet. It is better for the noodles to be coated in sauce, not swimming in it.
- Ask for lime separately if the restaurant gives it. A few drops at home or at the table can freshen up the noodles. But do not pour it over the whole container right away.
- If you are getting it for takeout, eat it the same day. Wide rice noodles get firmer and stick together after the fridge. You can reheat them, but the first version is almost always better.
Tip. If it seems like the restaurant does not add many vegetables, ask for a double portion of Chinese broccoli, not just “more vegetables.” This gives you a better chance of getting the exact stems and leaves this dish needs, not a random mix of carrots and cabbage.
Homemade Pad See Ew With Tofu
At home, it is better to cook Pad See Ew in small portions. In an overcrowded pan, the noodles start steaming, the tofu loses its crust, and the sauce does not coat everything evenly.
What You Need for 2 Servings
- 8 oz wide rice noodles, about 225 g
- 14 oz firm tofu, about 400 g
- 2 cups Chinese broccoli, about 180–220 g
- 2 eggs, optional
- 2 tbsp oil, about 30 ml
- 2 garlic cloves, finely chopped
- 2 tbsp light soy sauce, about 30 ml
- 1 tbsp dark soy sauce, about 15 ml
- 1 tbsp mushroom-based oyster sauce, about 15 ml
- 1–2 tsp sugar, about 4–8 g
- 1 tsp rice vinegar or a few drops of lime juice
How to Make the Homemade Version
- Prepare the noodles. Soak or boil the rice noodles according to the package instructions. Do not cook them until fully soft. They will finish cooking in the pan and take in the sauce.
- Press the tofu. Place the tofu between towels and press it for 10–15 minutes. Then cut it into cubes or rectangles. Do not cut it too small: tiny pieces break faster.
- Fry the tofu. Heat a pan with oil and fry the tofu for 6–8 minutes, until the edges turn golden. Move it to a plate so the tofu does not fall apart in the noodles.
- Prepare the Chinese broccoli. Cut the stems into thin pieces and keep the leaves larger. The stems need a little more time, while the leaves need almost none.
- Mix the sauce. In a small bowl, combine the light soy sauce, dark soy sauce, mushroom-based oyster sauce, sugar, and rice vinegar. Taste it. The sauce should be salty-sweet, but not too sweet.
- Quickly fry the garlic and broccoli. Heat a little oil over high heat, add the garlic for 10–15 seconds, then add the Chinese broccoli stems. After one minute, add the leaves.
- Add the egg if you are using it. Push the vegetables to the side of the pan, crack in the eggs, and stir quickly. You do not need to make a separate omelet. Let the egg set in small pieces right in the pan.
- Return the tofu and add the noodles. Put the tofu back in, then add the noodles and sauce. Stir gently but quickly. It is better to lift the noodles from the bottom with a spatula instead of pressing them down.
- Let the noodles fry a little. Leave them on the hot pan for 20–30 seconds without constant stirring. This gives you that fried taste that makes this dish worth cooking at home.
- Serve right away. Pad See Ew does not like waiting. Move it to plates and add a little lime or chili separately if needed.
If you ask for more Chinese broccoli in the portion, the dish gets more interesting: more texture, more greens, and less of a feeling that the whole lunch depends only on the sauce.
I would prefer to eat this dish at a small Thai restaurant that knows how to fry noodles over high heat, not just warm everything up to the same softness. Tofu, wide noodles, dark sauce, and a generous portion of Chinese broccoli — that is where the order gets much better.
6. Indian Chana Masala With Garlic Naan and Mango Pickle
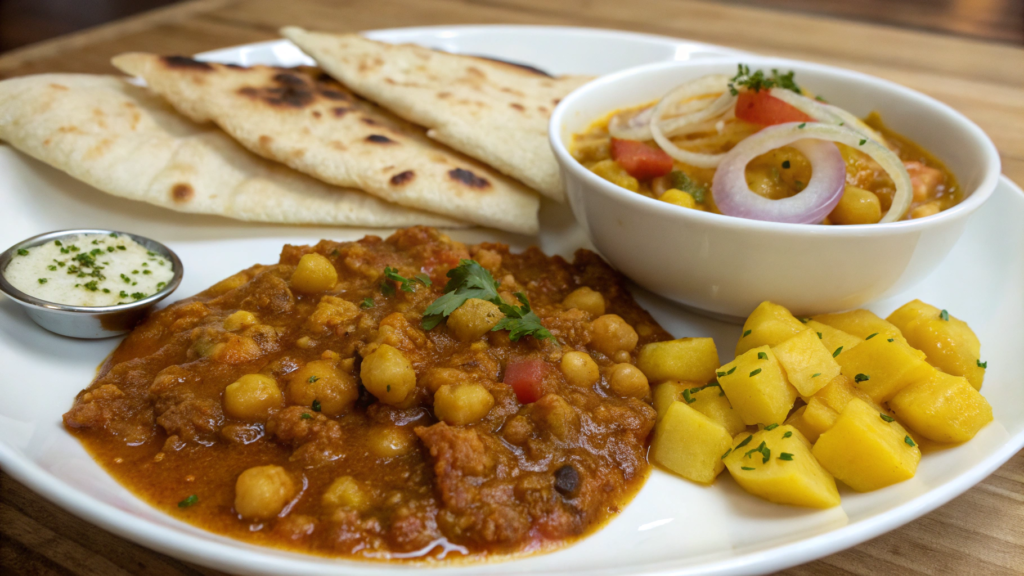
Indian Chana Masala With Garlic Naan and Mango Pickle is built around chickpeas, onion, tomatoes, ginger, garlic, and spices. In a good version, the sauce is not watery, but thick, spiced, and a little tangy. The chickpeas should be soft, but not falling apart into mush. That matters.
Garlic naan is great for scooping up the sauce from the plate. And mango pickle adds what this dish sometimes misses in a takeout order: acidity, salt, and a little fruity sweetness. Even a small spoonful can completely change the taste.
What to Order and How to Build the Dish
- Order chana masala. Ask for chickpeas in a spiced tomato sauce, especially if the menu has a few similar dishes. Sometimes the names are different, but the idea is the same: chickpeas, spices, onion, and a tomato base.
- Choose garlic naan. Plain naan works too, but garlic naan ties the whole dish together better. It adds aroma, oil, and a brighter taste.
- Ask for mango pickle separately. Do not mix it into the whole dish right away. It is sharp, salty, and sour. It is better to add a little at a time while you eat.
- Check the spice level. Chana masala can be mild, medium, or pretty spicy, depending on the restaurant. If the place is new to me, I would get medium spice and keep the pickle separate. That way, it is easier not to overload the dish.
- If there is a rice option, choose basmati. Rice is not required if you have naan, but basmati soaks up the sauce well. Especially if the portion is big and you want to stretch it into two meals.
- Ask them not to make the sauce too thin. Not every restaurant will react to that, but sometimes you can ask for it “thicker.” For chana masala, that really is better: the chickpeas and sauce should stay together.
Tip. Add mango pickle in small portions. Do not stir the whole spoonful into the chickpeas right away. It is better to tear off a piece of naan, take a little chana masala, and add just a tiny bit of pickle on top.
Homemade Chana Masala Version
What You Need for 2–3 Servings
- 2 cans chickpeas, 15 oz each, about 850 g total, rinsed and drained
- 1 medium onion, finely chopped
- 3 garlic cloves, finely chopped
- 1 tbsp grated ginger, about 15 g
- 1 can diced tomatoes, 14.5 oz, about 410 g
- 2 tbsp oil, about 30 ml
- 1 tsp ground cumin
- 1 tsp ground coriander
- 1/2 tsp turmeric
- 1/2 tsp smoked paprika or regular paprika
- 1/2 tsp garam masala
- 1/4–1/2 tsp ground chili, to taste
- 1/2 cup water, about 120 ml
- 1 tbsp lemon juice, about 15 ml
- salt to taste
- 2–3 garlic naans
- 1–2 tbsp mango pickle, about 15–30 g
How to Make the Homemade Version
- Fry the onion. Heat the oil in a deep pan or pot. Add the onion and cook for 7–9 minutes, until it gets soft and lightly golden. Do not rush this, because raw onion will show up in the sauce later.
- Add the garlic and ginger. Add them to the onion and cook for about a minute. Stir constantly so the garlic does not burn.
- Add the spices. Add cumin, coriander, turmeric, paprika, garam masala, and chili. Warm the spices in the oil for 30–40 seconds. They should not burn, but they should open up in the hot oil.
- Add the tomatoes. Pour in the diced tomatoes with their juice. Stir and cook for 5–7 minutes, until the sauce gets thicker. If the tomatoes are sour, you can add a tiny pinch of sugar, but it is not required.
- Add the chickpeas. Add the rinsed chickpeas and water. Stir, lower the heat, and simmer for 12–15 minutes. You can lightly mash some of the chickpeas with a spoon right in the pan so the sauce gets thicker.
- Add salt and lemon juice. At the end, salt the chana masala, add the lemon juice, and taste it. If the sauce needs a little more brightness, add a few more drops of lemon.
- Warm the naan. Garlic naan is best warmed in a dry pan or in the oven so it gets soft and warm. If you have a little garlic butter, you can brush a very thin layer on top.
- Serve with pickle on the side. Put the chana masala in a bowl, place the naan next to it, and add a small spoonful of mango pickle. Do not mix everything ahead of time. The pickle should show up in little bites, so it does not take over the chickpeas.
Homemade chana masala often turns out less oily and less salty than the restaurant version. But you can make the sauce thicker, brown the onion more, and keep the chickpeas whole instead of overcooked.
Chana masala with garlic naan is one of those vegetarian takeout orders where you do not need to add much else to feel full. Chickpeas, thick sauce, and warm bread already make it a full meal. And mango pickle adds a sharp little kick, so the dish does not become one-note. I would eat this dish at a small Indian restaurant where they do not hold back on the spices and cook the chickpeas until soft, but not mushy.
7. Sushi Avocado Cucumber Roll Combo With Spicy Mayo
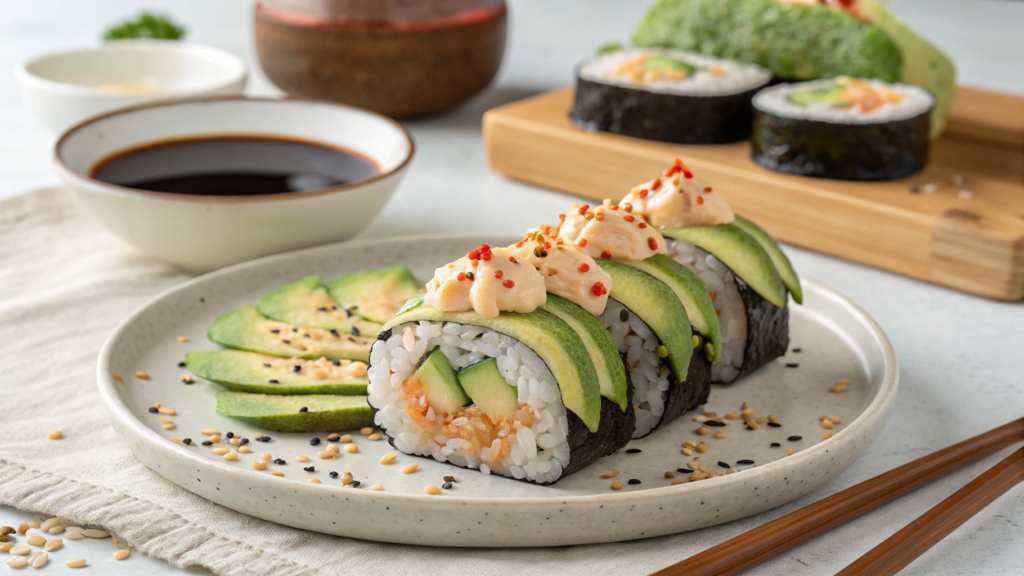
A roll combo with avocado, cucumber, and spicy mayo sounds almost too simple. But if the rice is fresh, the nori is not soggy, and the avocado is ripe, this kind of combo is really nice to eat.
This order is not the highest in protein. If this is a full lunch, I would add miso soup, edamame, or seaweed salad. And if it is a light snack or part of a bigger table order, avocado and cucumber rolls are exactly what you need.
What to Order and How to Build the Combo
- Order a combo with an avocado-cucumber roll. In this kind of set, the main thing is not a bunch of complicated fillings, but a fresh contrast: soft avocado, crunchy cucumber, rice, and nori. It is better to get the spicy mayo separately, so you can add it little by little while eating.
- Ask for the spicy mayo separately. You do not need it poured over all the pieces right away. The rice gets wet faster that way, and the sauce can cover up the avocado and cucumber.
- Take ginger and wasabi. Ginger is good between pieces, and wasabi is better in a very small amount in the soy sauce or directly on a piece. If you mix in too much right away, the whole combo will taste the same.
- Use soy sauce carefully. Rice absorbs salt quickly. It is better to lightly touch the edge of the roll to the sauce than to dunk the whole piece.
- If you need a more filling order, add edamame. Avocado and cucumber rolls are tasty, but light. Edamame helps make the lunch more filling without a heavy fried add-on.
- Make sure the combo comes without fish flakes, roe, or random toppings. In some places, rolls can be sprinkled on top “for looks.” For a vegetarian order, it is better to say this right away.
- Ask them not to put spicy mayo inside the rolls. If it is added inside, the rice and nori get soggy faster. A separate sauce is more convenient: you can dip only some pieces and keep the flavor fresh.
Homemade Roll Version
The rice should be sticky, the cucumber thin, and the avocado ripe but not mushy. If the avocado is too soft, the roll will still taste good, but cutting it neatly will be almost impossible.
What You Need for 2 Servings
- 1 cup sushi rice, about 200 g
- 1 1/4 cups water, about 300 ml
- 2 tbsp rice vinegar, about 30 ml
- 1 tbsp sugar, about 12 g
- 1/2 tsp salt
- 4 sheets nori
- 1 ripe avocado, sliced into strips
- 1 small cucumber, sliced into long thin strips
- 2 tbsp mayonnaise, about 30 g
- 1–2 tsp hot sauce, about 5–10 ml
- 1 tsp lime juice, about 5 ml
- soy sauce, pickled ginger, and wasabi for serving
- 1 bamboo rolling mat
How to Make the Homemade Version
- Rinse the rice. Rinse it in cold water until the water is almost clear. This helps remove extra starch, so the rice does not turn into a heavy clump after cooking.
- Cook the rice. Move the rice to a pot, add water, and cook according to the package instructions. After cooking, let it sit under the lid for 10 minutes. The rice is better when it can finish gently.
- Season the rice. Mix the rice vinegar, sugar, and salt. Add the seasoning to the warm rice and gently mix. Do not press the rice with a spoon, or it will turn into a sticky mass without nice grains.
- Prepare the filling. Slice the avocado and cucumber into long thin strips. You can lightly dry the cucumber with a paper towel so it does not add extra water inside the roll.
- Make the spicy mayo. Mix the mayonnaise, hot sauce, and lime juice. Start with one teaspoon of hot sauce, taste it, and add more if needed. The sauce should be spicy, but not so strong that it takes over the whole roll.
- Place the nori on the mat. The shiny side usually goes down. Spread a thin layer of rice on top, leaving about 1 inch or 2.5 cm of empty space at the edge to close the roll.
- Add the filling. Place the avocado and cucumber strips closer to the lower edge. Do not overfill it. With rolls, it always feels like there is not enough filling until you start rolling.
- Roll it up. Lift the edge of the mat and carefully wrap the nori around the filling. Press gently. The roll should hold its shape, but the filling should not come out around the edges.
- Cut with a sharp knife. Wet the knife with water and cut the roll into 6–8 pieces. If the knife is dry, the rice will stick and pull the nori with it.
- Serve with the sauce separately. Put the rolls on a plate and place the spicy mayo, soy sauce, ginger, and wasabi nearby. That way, each piece can be made softer, spicier, or saltier right on the plate.
In this combo, everything is clear: rice, nori, avocado, cucumber, and spicy mayo on the side. No fried coating, no heavy cream cheese, no sweet sauce poured over everything else. You can add miso soup, edamame, or one more vegetable roll to the order.
8. Mediterranean Falafel Wrap With Pickles and Toum
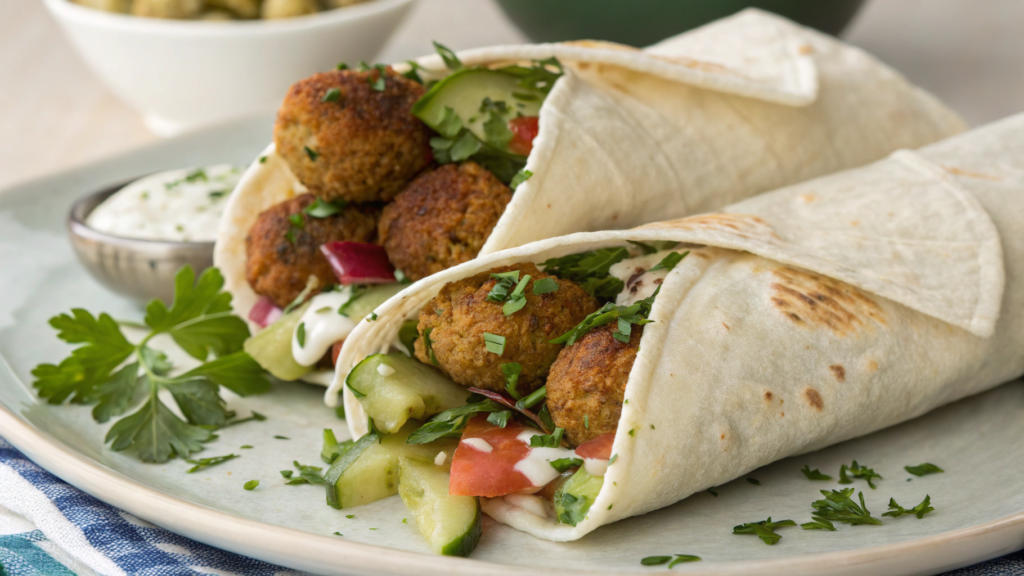
Falafel on its own is pretty rich: chickpeas, herbs, spices, and frying. It is tasty, but in a wrap, it really needs contrast. Pickles add salt, tang, and crunch. Toum adds garlic, richness, and heat without pepper. Together, they make the falafel feel less dry.
Mediterranean and Middle Eastern food often depends on exactly these little things. Not a huge portion of sauce on top, but the right tangy bite in each bite.
What to Order and How to Build the Wrap
- Order a falafel wrap. Pita or flatbread is easier for eating on the go: falafel, vegetables, pickles, and sauce are already tucked inside. A falafel plate is good too, but that is a different format.
- Ask to add pickles. Not one thin slice just for looks, but a real layer. The pickles should show up in several places, or their flavor will just get lost.
- Ask for toum. This is a garlic sauce. If the cafe adds it generously, you can ask for a little less, but do not remove it completely. Without it, falafel often feels a bit dry.
- Add fresh vegetables. Tomatoes, cucumber, lettuce, red onion, cabbage, or radish all work well. But I would not ask for everything at once. Too many fresh vegetables can quickly make the wrap wet and awkward to eat.
- Do not overload the wrap with hummus and toum at the same time. If there is already a lot of hummus inside, add the toum more moderately. Two thick sauces can cover up the falafel.
- Ask them to wrap it tightly. Falafel has an annoying habit of falling out right when you have taken your first proper bite. A tight wrap really matters here.
Tip. If you are taking the wrap with you, ask them not to spread the toum all over the flatbread, but to add it closer to the falafel. That way, the sauce gets into the filling, and the flatbread does not get soggy on the way.
Homemade Version for Your Kitchen
At home, it is better to build this wrap right before eating.
What You Need for 2 Wraps
- 2 large flatbreads or soft wraps, about 10–12 inches, or about 25–30 cm
- 8–10 small falafel balls
- 1 cup chickpeas, if making falafel from scratch, about 165 g dry chickpeas after soaking
- 1/2 cup parsley and cilantro, about 20–25 g
- 2 garlic cloves
- 1/4 small onion
- 1 tsp ground cumin, about 2–3 g
- 1/2 tsp ground coriander
- 1/2 tsp salt
- 1 tbsp flour or chickpea flour, about 8–10 g
- 2–3 tbsp oil for frying, about 30–45 ml
- 1/2 cup chopped pickles, about 70–80 g
- 1 cup chopped lettuce or cabbage, about 40–50 g
- 1 medium tomato, sliced thinly
- 1/4 red onion, thinly sliced
- 2–3 tbsp toum, a thick garlic sauce, about 30–45 g
- lemon juice, optional
How to Make the Homemade Version
- Prepare the chickpeas. If you are making falafel from scratch, use dry chickpeas that have been soaked overnight. Canned chickpeas are softer, and falafel made with them often falls apart.
- Make the falafel mixture. In a food processor, pulse the chickpeas, herbs, garlic, onion, cumin, coriander, and salt. The mixture should be fine, but not turn into a paste. If it is too wet, add a little flour or chickpea flour.
- Shape small balls. Do not make them huge. Smaller falafel works better for a wrap: it is easier to spread through the flatbread, and it does not break the whole structure.
- Fry the falafel. Heat oil in a pan and fry the balls for 3–4 minutes on each side, until they are browned. Move them to a paper towel. The falafel should be hot, but not wet with oil.
- Prepare the vegetables. Chop the lettuce or cabbage, tomato, red onion, and pickles. It is better to gently blot the tomato with a paper towel so it does not release too much juice into the flatbread.
- Warm the flatbread. Place it on a dry pan for 10–15 seconds on each side. It will get softer and will not tear when you wrap it.
- Add the toum. Spread a little toum closer to the center, without going all the way to the edges. You do not need to cover the whole flatbread. The sauce should be closer to the falafel, not turn the base into a wet napkin.
- Build the filling. Add lettuce or cabbage, then falafel, tomato, onion, and pickles. It is better to spread the pickles along the whole filling so they do not show up only at one end of the wrap.
- Wrap it tightly. Fold up the bottom edge, then fold in the sides and roll the wrap forward. If the filling is trying to escape, there is probably too much of it.
- Toast the outside if you want. You can place the wrap seam-side down on a dry pan for 1–2 minutes. The flatbread will set a little, and the wrap will be easier to hold.
At home, you decide how garlicky the wrap will be. In cafes, toum is sometimes added so generously that the smell of garlic follows you for the rest of the day.
I usually order this in places where the falafel is not fried in advance in the morning for the whole day, but at least served warm. Even garlic sauce will not save cold, dry falafel. But hot falafel, good pickles, and toum — that is already a completely different story.
9. Pho Vegetable Broth Bowl With Crispy Tofu and Chili Oil
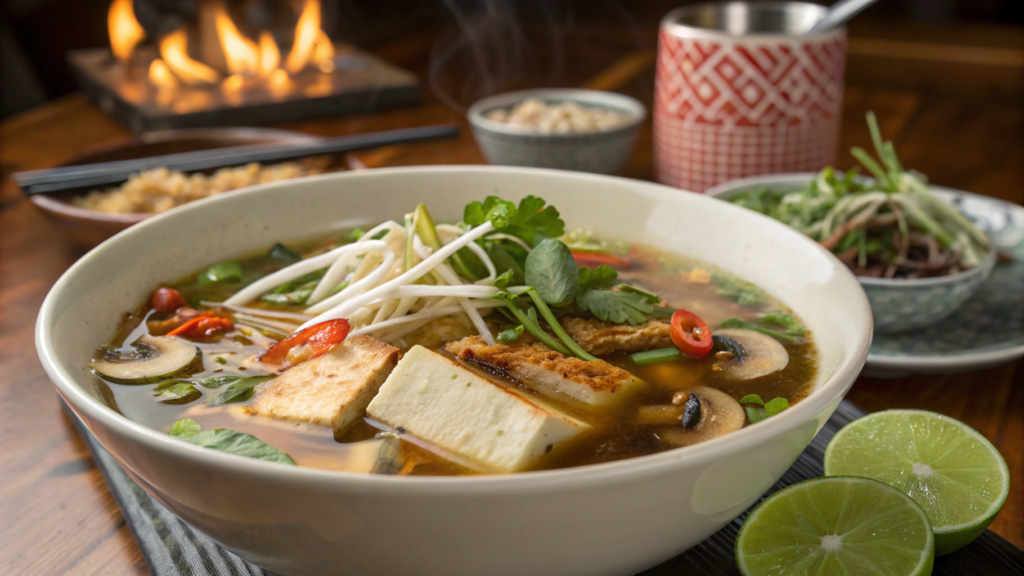
Pho Vegetable Broth Bowl With Crispy Tofu and Chili Oil is great because of its broth. In the meat version, the flavor often comes from long-simmered bones and spices. In the vegetable version, the restaurant has to work harder: it needs onion, ginger, spices, mushrooms, vegetables, sometimes seaweed or soy sauce. If the broth is weak, no tofu will save it.
What to Order and How to Build the Dish
- Order pho specifically with vegetable broth. Ask if the broth is not meat-based and has no fish sauce, if that matters to you. In some places, even the “vegetable” version may still be boosted with ingredients that are not fully plant-based.
- Ask for crispy tofu. It is better if they add it right before serving or pack it separately for takeout. In hot broth, the crust gets soft quickly.
- Ask for chili oil separately. This way, you control the heat yourself. Pho is better when you start with the clean broth first, then add heat gradually.
- Do not skip the herbs and lime. Basil, cilantro, green onion, sprouts, and lime make the broth fresher. Without them, pho can feel heavier and more dull in flavor.
- Add mushrooms if they have them. Shiitake, button mushrooms, or oyster mushrooms work well in vegetable broth. Especially in a vegetarian version, where the flavor needs more depth.
- Ask them not to overcook the noodles. Not every restaurant will follow this, but it is worth asking. Rice noodles soften quickly.
- For delivery, ask for the broth separately from the noodles. This is the most important part. If the noodles sit in hot broth for an hour, they swell up and lose their texture.
Homemade Version for Your Kitchen
What You Need for 2 Servings
- 6 oz rice noodles, about 170 g
- 14 oz firm tofu, about 400 g
- 1 tbsp cornstarch, about 8 g
- 2 tbsp oil for frying, about 30 ml
- 6 cups vegetable broth, about 1.4 L
- 1 medium onion, cut in half
- 1 3-inch piece ginger, about 7–8 cm, cut lengthwise
- 2 star anise pods
- 1 cinnamon stick
- 3–4 cloves
- 1 tsp coriander seeds
- 1 tbsp soy sauce, about 15 ml
- 1 cup mushrooms, about 70–90 g
- 1 cup bean sprouts, about 80–100 g
- 1/2 cup fresh herbs: basil, cilantro, green onion
- 1 lime, cut into wedges
- 1–2 tsp Fly By Jing Sichuan Chili Crisp, about 5–10 g
- salt to taste
How to Make the Homemade Version
- Brown the onion and ginger. Place the onion and ginger cut-side down on a dry hot pan. Let them darken for 4–5 minutes. Not until burned, but until they have clear dark spots. This gives the broth a deeper smell.
- Toast the spices. In the same pan, quickly toast the star anise, cinnamon, cloves, and coriander seeds for 30–40 seconds. The spices should become more fragrant, but not burn.
- Cook the broth. Pour the vegetable broth into a pot, then add the onion, ginger, spices, mushrooms, and soy sauce. Simmer over low heat for 35–45 minutes. Then strain it. You can keep the mushrooms for serving if they are not overcooked.
- Prepare the tofu. Press the tofu between towels for 10–15 minutes. Cut it into cubes, lightly salt it, and coat it in cornstarch. The cornstarch will help create a thin crust.
- Fry the tofu. Heat oil in a pan and fry the tofu for 6–8 minutes, turning the pieces until they are golden. Move them to a plate and do not cover them with a lid, or the crust will soften right away.
- Cook the noodles. Soak or boil the rice noodles according to the package instructions. Rinse them with warm water if they start sticking together. Do not keep them in water too long.
- Build the bowls. Put noodles, mushrooms, sprouts, herbs, and crispy tofu into each bowl. Pour the hot broth over everything right before serving.
- Add lime and chili oil. Taste the broth first without heat. Then add lime and a little chili oil. This way, you will know how much heat it actually needs.
At home, it is easier to keep pho neat: do not leave the noodles sitting in the broth, add the tofu at the very end, and put the chili oil straight into the bowl. With takeout, everything depends on the packaging. If the restaurant packs the broth separately, the chances of good texture are much better.
Vegetable pho is worth ordering in places where the broth does not feel like an afterthought. Good vegetable pho smells like spices, ginger, onion, and herbs even before you add the chili oil.
If everything is built well, you get hot, fragrant food with noodles, herbs, lime, and tofu.
10. Pizza Margherita With Hot Honey Style Chili Drizzle
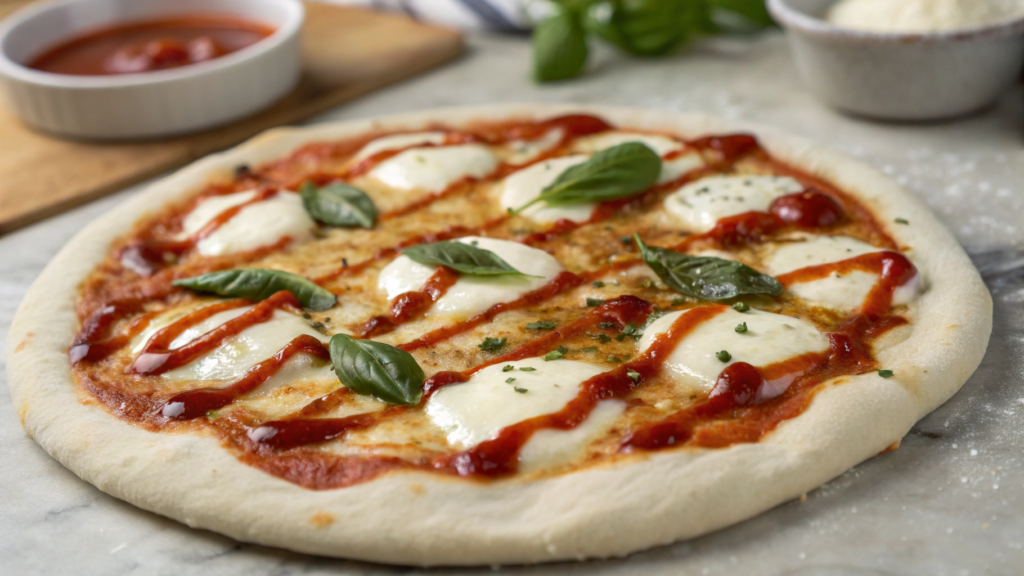
Pizza Margherita With Hot Honey Style Chili Drizzle keeps the base classic: dough, tomato sauce, mozzarella, and basil. And on top, a thin drizzle of sweet-spicy chili sauce, added after baking.
The important thing here is not to turn the Margherita into a sticky sweet pizza. You only need a little drizzle.
What to Order and How to Build the Pizza
- Order Pizza Margherita. Do not complicate the base: tomato sauce, mozzarella, basil, and good dough already give you the right base for a sweet-spicy chili drizzle.
- Ask for the sweet-spicy chili drizzle separately. If it is added ahead of time, the pizza can get soggy faster in the box. It is better to drizzle each slice right before eating.
- Add the drizzle right before eating. A couple of thin lines on a slice is enough. Half a container on one pizza is already too much.
- Do not add too many salty toppings. Olives, capers, or extra cheese can pull the flavor in a different direction. For this idea, it is better to keep the pizza simple.
- Keep the fresh basil if they have it. It adds a fresh herbal flavor and goes well with tomato, mozzarella, and the sweet-spicy drizzle.
- For delivery, ask them to bake the pizza well. Not burn it, of course. But with Margherita, a soft center and wet sauce can make it arrive too delicate. You need a crust that can handle the drizzle.
Homemade Version for Your Kitchen
What You Need for 1 Large Pizza
- 1 lb pizza dough, about 450 g
- 1/2 cup tomato sauce, about 120 ml
- 8 oz fresh mozzarella, about 225 g
- 1–2 tbsp olive oil, about 15–30 ml
- 6–8 fresh basil leaves
- 1–2 tsp chili honey, about 5–10 ml
- 1/4 tsp chili flakes, if you want it spicier
- a pinch of salt
- a little flour for rolling
How to Make the Homemade Version
- Preheat the oven high. Set the oven to 475–500°F or about 245–260°C. If you have a pizza stone or steel, preheat it with the oven. Pizza needs strong heat, or the dough will dry out before it browns properly.
- Prepare the dough. Dust the counter with flour and stretch the dough by hand or roll it out. Do not make the center too thick. The edges can be a little puffier, but the middle needs to hold the sauce and cheese.
- Add the tomato sauce. Spread a thin layer of sauce, leaving the edge clean. If you add too much, the center of the pizza will get wet.
- Add the mozzarella. Tear the mozzarella into pieces and spread it over the pizza. If the cheese is very wet, blot it with a paper towel. This removes extra water.
- Drizzle with oil and add salt. Add a little olive oil and a pinch of salt. Do not overdo it: the mozzarella and sauce already bring flavor, and the sweet-spicy topping will go on later.
- Bake until the edges are golden. Move the pizza to the oven and bake for 8–12 minutes, depending on the temperature and dough thickness. The edges should brown, and the cheese should melt and bubble a little.
- Add basil after baking. It is better to put the basil leaves on the hot finished pizza. That way, they stay brighter and do not turn into dark wet spots.
- Add the chili drizzle at the very end. Add thin lines of the sweet-spicy drizzle right before serving. If you want more heat, you can add a few chili flakes, but taste a slice without them first.
- Give the pizza a minute before slicing. Do not cut it straight from the oven. The cheese will set a little, and the slices will hold better. One minute is enough. Five already feels like a shame.
At home, it is easier to control how much sweetness and heat lands on each slice. With delivery, the sauce is often spread ahead of time, and the pizza arrives softened. In your own kitchen, you can keep the crust dry and golden, then add the drizzle right on the plate.
Margherita with a sweet-spicy chili drizzle does not require changing the whole pizza. You keep a normal cheese-and-tomato base and add exactly one accent that makes the flavor brighter. I like ordering pizza from a place that knows how to make good dough and does not drown Margherita in sauce.
Your Order Is Ready!
From everything above, it becomes clear: vegetarian takeout gets better when you do not just take it “as given,” but adjust it a little for yourself. Sauce separately, more vegetables, do not let the bread get soggy, do not drown the noodles… Ask for a real filling, not just to remove the meat.
What vegetarian takeout order do you get most often? And do you have your own little preferences — an add-on, sauce, swap, or request that makes the dish much better? I am sure the comments will have more than one order I will want to try myself.