In winter, our oven is on more often, something is slowly simmering on the stove, and the root vegetables, jars of preserves, and everything Lindy and I tried to save after harvesting from our land slowly start disappearing from the pantry.
Some things we cook from our own harvest, some ideas we find in old books, and some we adjust to suit ourselves. Sometimes one unusual detail makes all the difference — lingonberries in meatballs, lavender in cream, lime with carrots, or a little wine in dessert.
Here I tried to put together 10 winter recipes for you that you can easily make at home. I think you’re going to like them. There are old-fashioned dishes, some more unexpected combinations, and a few recipes I would definitely save for the coldest month of winter.
1. Hidden Alpine Hot Cocoa with Lavender Cream
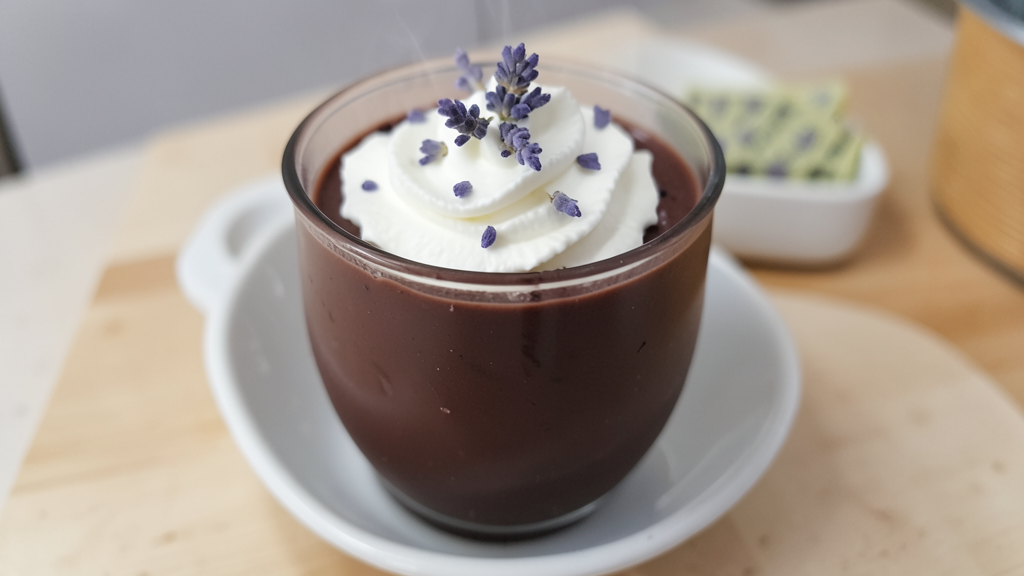
We love hot chocolate, and it shows up in our kitchen pretty often in winter, but this version is nothing like regular cocoa made from powder. It’s thick, made with real dark chocolate, and topped with cold whipped cream with just a hint of lavender. Even that sounds delicious!
And pay attention — I really mean “just a hint.” You have to be careful with lavender, otherwise a cup of hot chocolate can start suspiciously tasting like a drawer full of scented sachets. We definitely don’t want that.
For cooking, I only use dried culinary lavender, not flowers from a decorative bouquet.
Lindy and I once argued about whether lavender belongs in hot chocolate at all. In the end, we figured out that it’s better not to add it directly to the chocolate. But if you infuse the cream with it and then remove the flowers, the flavor becomes much softer. And the chocolate still tastes like chocolate.
Ingredients
For 2 large mugs, you’ll need:
- 2 cups whole milk (about 475 ml).
- 4 ounces dark chocolate with around 60–70% cocoa (about 115 g), finely chopped.
- 2 tablespoons unsweetened cocoa powder.
- 1–2 tablespoons brown sugar, depending on the chocolate.
- ¼ teaspoon vanilla extract.
- A small pinch of salt.
- ½ cup heavy cream (about 120 ml).
- ¼ teaspoon dried culinary lavender. I wouldn’t add more right away.
- 1 teaspoon powdered sugar for the cream.
How to make Alpine hot cocoa
1. Flavor the cream first. Pour the cream into a small saucepan, add the lavender, and heat over low heat for about 3–4 minutes. It should get hot, but not boil.
Take the saucepan off the heat and let the cream sit for another 5 minutes, then strain it through a fine sieve. Discard the lavender. The cream needs to cool completely, otherwise it won’t whip properly.
2. Make the chocolate base. In another saucepan, combine the milk, cocoa powder, sugar, and salt. Heat over medium heat, whisking constantly, until the cocoa blends into the milk.
Don’t let the mixture come to a hard boil. As soon as the milk starts steaming and small bubbles appear around the edges, it’s time to add the chocolate.
3. Add the real chocolate. Lower the heat and add the finely chopped dark chocolate. Stir for about 2 minutes, until it melts completely.
At this point, the drink becomes smooth and noticeably thicker. Add the vanilla at the end.
If the hot chocolate tastes too rich for you, just add a little more hot milk.
4. Whip the lavender cream. Mix the cold cream with the powdered sugar and whip it to soft peaks. There’s no need to turn it into a very stiff cream. It’s much better when the cream slowly starts melting into the hot chocolate right in the mug.
5. Put it all together. Pour the hot chocolate into two mugs and spoon a few dollops of lavender cream on top. You can stop there. I sometimes sift a little cocoa over the top or grate on a small piece of dark chocolate.
Lavender shouldn’t be the first flavor you notice in this recipe. First you get dark chocolate and cream, and only then a light floral note comes through. That’s exactly why I don’t recommend increasing the amount of lavender, even if a quarter teaspoon sounds almost ridiculously small.
2. Grandma’s Forgotten Root Stew from 1898
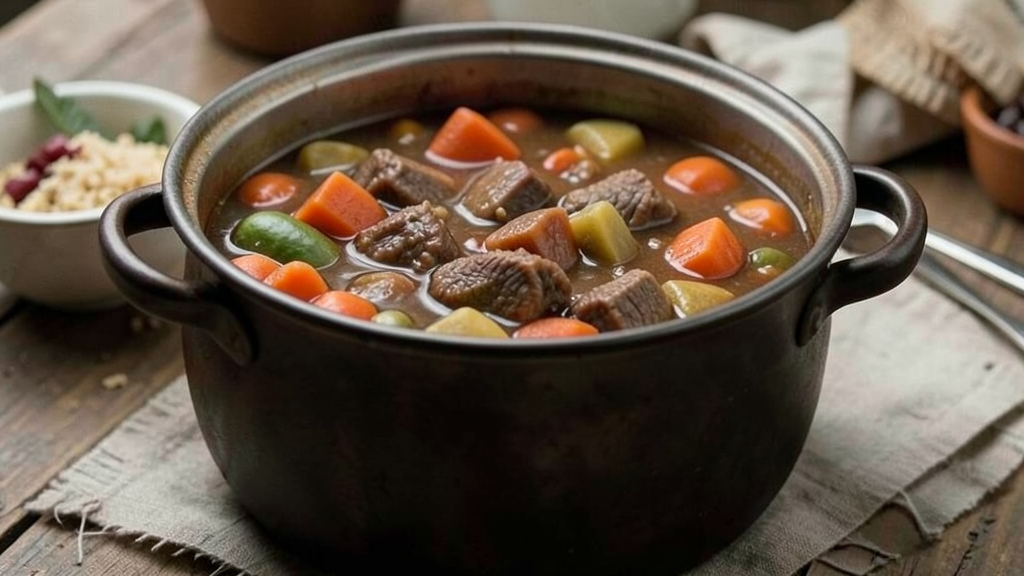
Grandma’s Forgotten Root Stew? It’s simple — take whatever keeps well through the cold months, put it in a heavy pot, and let time do its job. No rare ingredients, but a couple of hours later you get a thick, filling stew that will keep you full for a long time.
This is what I call a stew in the spirit of late 19th-century home cooking. Of course, I didn’t find some grandmother’s notebook with “1898” written on the cover. It’s just that the combination of root vegetables, beef, and broth feels very close to the way hearty winter meals were made before year-round supermarkets became normal.
You know, we grew turnips for a long time and honestly didn’t really know what to do with them. I’m not a big fan of them raw. Then we started adding them to soups and stews. Turns out, when they’re cooked with carrots and potatoes, their flavor becomes much milder.
Ingredients
For 6 servings, you’ll need:
- 1½ pounds stewing beef (about 680 g), cut into large cubes.
- 2 tablespoons butter.
- 1 large onion, roughly chopped.
- 3 medium carrots, cut into pieces.
- 2 parsnips, peeled and chopped.
- 2 small turnips, about 10 ounces (280 g), cut into cubes.
- 1 pound potatoes (about 450 g), cut into large pieces.
- 4 cups beef broth (about 950 ml).
- 1 tablespoon tomato paste.
- 1 teaspoon dried thyme.
- 1 bay leaf.
- ½ teaspoon black pepper.
- 1–1½ teaspoons salt, with some of it better added at the end.
- 1 tablespoon flour, optional, if you want the broth thicker.
For stews like this, a heavy cast iron pot with a lid is really convenient — Cast Iron Dutch Oven. It holds heat for a long time and lets you brown the meat first, then simmer everything in the same pot.
How to make old-fashioned root vegetable stew
1. Brown the meat well. Pat the beef pieces dry with a paper towel, then lightly season with salt and pepper. Melt the butter in a heavy pot and brown the meat in small batches for about 2–3 minutes per side.
Don’t crowd all the meat into the pot at once. It will start releasing water and end up steaming instead of browning. Transfer the browned pieces to a plate for now.
2. Add the onion and root vegetables. Add the onion to the same pot and cook for about 4 minutes, scraping up the browned bits from the bottom. Then add the carrots, parsnips, and turnips.
I cut the vegetables into fairly large pieces. With a long cooking time, smaller pieces can practically disappear into the broth, and we still want proper pieces of carrot and turnip, not mashed vegetables.
3. Put the stew together. Return the meat to the pot, then add the tomato paste, thyme, bay leaf, and broth. The liquid doesn’t need to completely cover everything.
Bring it to a gentle simmer, then turn the heat down to low and cover with a lid. The stew should simmer gently, not boil hard.
4. Give it time. Cook for about 1 hour 15 minutes, then add the potatoes and leave it for another 35–45 minutes. By then, the beef should pull apart easily with a fork, and the root vegetables should be soft without completely falling apart.
If you like a thicker sauce, mix one tablespoon of flour with two tablespoons of cold water, pour it into the pot, and let the stew simmer for another 5 minutes uncovered.
5. Taste before serving. Remove the bay leaf and only then adjust the salt and pepper. After a long simmer, the broth becomes more concentrated, so it’s better to be careful with the salt at the beginning.
This kind of stew tastes even better after a night in the fridge. The next day, the root vegetables absorb more of the broth, and the sauce gets thicker.
As you can see, the recipe is simple. Beef and a few winter root vegetables, which were completely ordinary ingredients a hundred years ago, can still make a really good homemade dinner today. No dozens of spices or complicated techniques. You just need to give the stew enough time.
3. Swedish Snowday Meatballs with Lingonberry Glaze
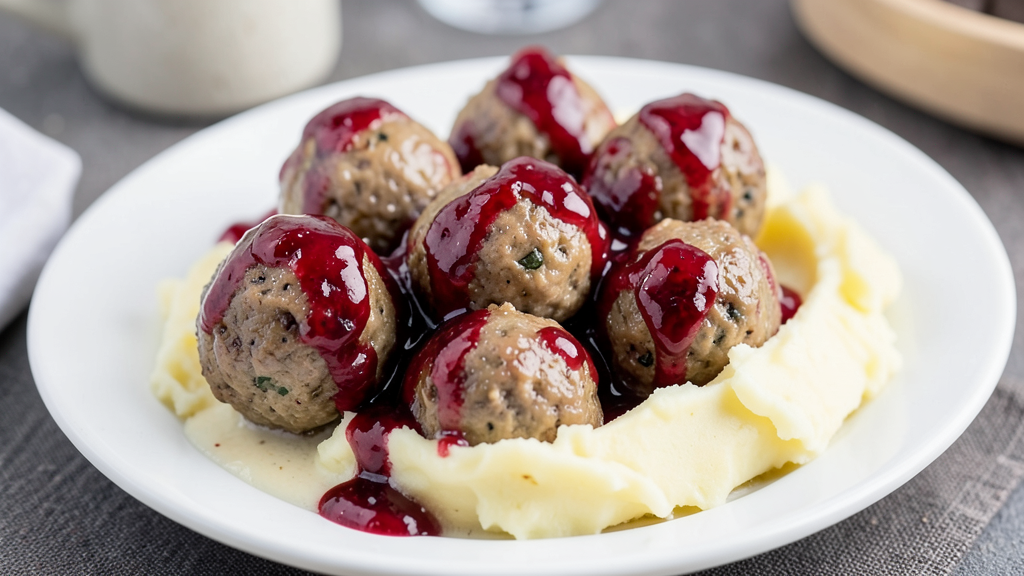
A lot of people recognize Swedish meatballs by their creamy sauce, but in winter I prefer a version with lingonberry glaze. It adds a little tartness and sweetness that works really well with the meat, especially when you serve it with mashed potatoes.
Ingredients
For 4–5 servings, you’ll need:
- 1 pound ground beef (about 450 g).
- ½ pound ground pork (about 225 g).
- ½ cup breadcrumbs.
- ⅓ cup milk (about 80 ml).
- 1 small onion, very finely chopped.
- 1 egg.
- ½ teaspoon ground allspice.
- ¼ teaspoon nutmeg.
- 1 teaspoon salt.
- ½ teaspoon black pepper.
- 2 tablespoons butter for frying.
For the glaze:
- ½ cup lingonberry jam.
- 2 tablespoons water.
- 1 tablespoon apple cider vinegar.
- 1 teaspoon honey.
- A pinch of salt.
How to make Swedish meatballs with lingonberry glaze
1. Prepare the base. Mix the breadcrumbs with the milk and leave them for about 5 minutes. They should absorb the liquid and soften. In a large bowl, combine the beef, pork, egg, onion, soaked breadcrumbs, allspice, nutmeg, salt, and black pepper.
Mix only until everything comes together. If you work the meat mixture for too long, the meatballs can become too dense.
2. Shape the meatballs. Form small balls about 1½ inches wide (around 4 cm). This amount of meat usually makes about 24–28 meatballs.
I lightly wet my hands with water. The meat sticks less, and the whole process goes faster.
3. Brown them. Melt the butter in a large skillet and cook the meatballs in batches for about 6–8 minutes, turning them from time to time.
They should get a good crust on the outside and cook all the way through inside. Transfer the finished meatballs to a plate for now.
4. Make the lingonberry glaze. In the same skillet, combine the lingonberry jam or preserves, water, apple cider vinegar, honey, and a pinch of salt. Warm over low heat for about 2–3 minutes, until the mixture becomes thinner and smoother.
It’s better to use lingonberry jam without extra spices or added flavors. The vinegar isn’t there to make the glaze sharp. It helps keep a little tartness and stops the glaze from becoming too sweet.
5. Return the meatballs to the skillet. Add them to the glaze and gently toss until each one is coated with a thin layer of sauce. Warm everything together for another 2 minutes.
It’s best to serve them right away while the glaze is still hot. Mashed potatoes are almost perfect here, but plain boiled potatoes with a little greenery work too.
The lingonberries don’t make this dish sweet, and this recipe definitely won’t get lost in a winter collection. There’s no complicated technique or long list of ingredients, but the lingonberry glaze really changes the flavor of familiar meatballs. That’s exactly why recipes like this are worth keeping.
4. Fireplace Baked Apples with Salted Toffee Butter

Baked apples are a simple winter dessert everyone knows, but with salted toffee butter, they taste much more interesting. The apples stay soft and juicy, with a warm caramel filling inside and a pinch of salt that keeps everything from getting too sweet.
For this recipe, it’s better to use firm apples that hold their shape after baking. Honeycrisp, Braeburn, or Granny Smith all work well. Very soft varieties can quickly turn into mush.
Ingredients
For 4 servings, you’ll need:
- 4 large apples.
- 4 tablespoons butter.
- ¼ cup brown sugar.
- 2 tablespoons heavy cream.
- ½ teaspoon vanilla extract.
- ¼ teaspoon sea salt.
- ½ teaspoon ground cinnamon.
- ¼ cup chopped walnuts, optional.
- 2 tablespoons rolled oats, optional.
- 2 tablespoons water for the baking dish.
How to make baked apples with salted toffee butter
1. Prepare the apples. Wash them and carefully remove the cores without cutting all the way through. Leave a little flesh at the bottom so the filling doesn’t leak out while baking.
I usually make the opening a little wider at the top. That way, you can fit in more filling, and the apple is easier to eat with a spoon later.
2. Make the toffee butter. Melt the butter in a small saucepan, then add the brown sugar and cream. Warm over low heat for about 2–3 minutes, stirring constantly. The sugar should dissolve and the mixture should become smooth. Then add the vanilla, sea salt, and cinnamon.
If you’re adding walnuts or oats, stir them into the warm mixture.
3. Fill the apples. Place the apples in a baking dish and spoon the toffee mixture into each one. If you have a little sauce left, pour it over the tops.
Pour 2 tablespoons of water into the bottom of the dish. This helps the apples stay juicy while they bake.
4. Bake until soft. Bake at 375°F (190°C) for about 30–40 minutes. The exact time depends on the size and variety of the apples.
Check them with a knife. It should slide easily into the flesh, but the apple should still hold its shape.
5. Spoon the juices over the apples. As they bake, a mixture of apple juice, butter, and sugar collects at the bottom of the dish. Make sure to spoon it over the apples before serving.
If you bake the apples over fireplace coals or in a wood-fired oven, it’s better to use covered cast iron cookware. The heat spreads more evenly, and the apples are less likely to burn on one side before they soften inside.
These apples are best served warm. The inside becomes almost creamy, while the salted toffee butter gathers in the center and slowly soaks into the flesh. Add a scoop of vanilla ice cream and you’ve got something close to a holiday dessert, even though the ingredients are really simple, right?
5. Cozy Cottage Pie with a Cheddar Crust
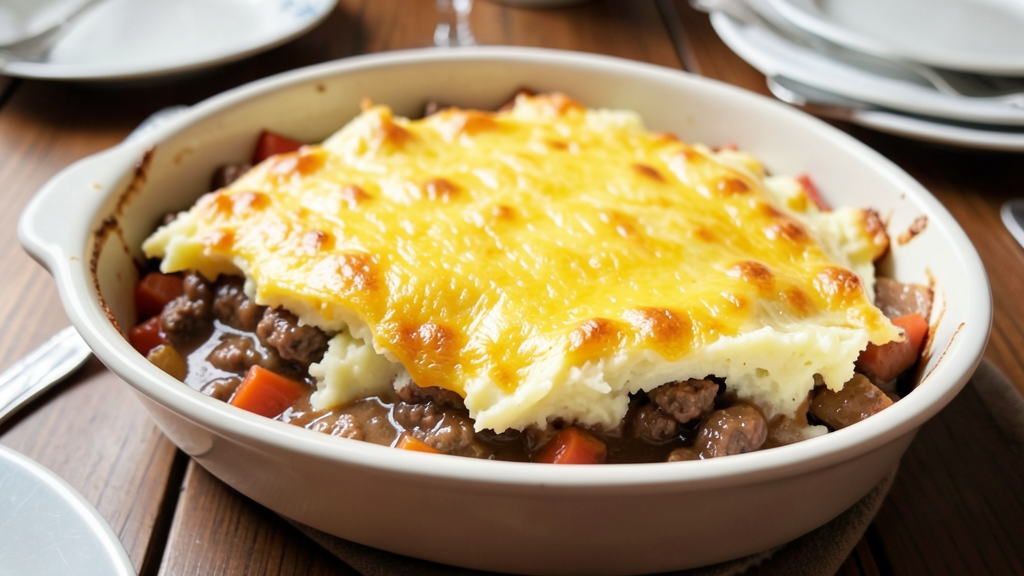
Shepherd’s pie and cottage pie often get mixed up, even though the difference is pretty simple. Cottage pie is traditionally made with beef, with a layer of mashed potatoes on top. In this version, I add a good aged cheddar to the potatoes, so you get a golden cheesy crust after baking.
A good winter dinner — meat with vegetables and thick gravy on the bottom, potatoes on top, and nothing else really needs to be served with it. Put the baking dish on the table and dinner is ready.
Ingredients
For 6 servings, you’ll need:
The meat filling:
- 1½ pounds ground beef (about 680 g).
- 1 tablespoon butter.
- 1 large onion, finely chopped.
- 2 carrots, cut into small cubes.
- 2 celery stalks, finely chopped.
- 2 garlic cloves, minced.
- 2 tablespoons tomato paste.
- 1 tablespoon flour.
- 1 cup beef broth (about 240 ml).
- 1 tablespoon Worcestershire sauce.
- 1 teaspoon dried thyme.
- ½ cup frozen green peas.
- Salt and black pepper.
For the potato layer:
- 2 pounds potatoes (about 900 g).
- 4 tablespoons butter.
- ½ cup milk (about 120 ml).
- 1 cup grated aged cheddar (about 4 ounces or 115 g).
- ½ teaspoon salt.
- A little black pepper.
It’s easiest to bake this pie in a deep ceramic baking dish.
How to make cottage pie with a cheddar crust
1. Start with the potatoes. Peel the potatoes, cut them into large pieces, and boil them in salted water for about 15–20 minutes, until soft.
Drain the water and return the potatoes to the hot pot for just a minute. The extra moisture will evaporate, and the mash will be thicker. Then add the butter, milk, half of the cheddar, salt, and pepper. Mash until smooth.
The mashed potatoes shouldn’t be too runny. They need to hold well on top of the meat layer.
2. Make the filling. Melt the butter in a large skillet and add the onion, carrots, and celery. Cook for about 6–7 minutes, until the vegetables soften a little.
Add the garlic and cook for another minute.
Now add the ground beef. Break up the larger pieces with a spatula and cook until the meat changes color completely and starts to brown slightly.
3. Thicken the sauce. Add the tomato paste and flour, mix well, and cook for about a minute. Then slowly pour in the broth and add the Worcestershire sauce and thyme.
Lower the heat and cook for about 8–10 minutes, until the liquid turns into a thick meat gravy. Add the green peas, salt, and pepper at the end.
The filling shouldn’t be swimming in liquid. Otherwise, once you cut into the pie, everything will just spread across the plate.
4. Assemble the pie. Transfer the meat mixture to the baking dish and spread it out evenly. Carefully spoon the mashed potatoes over the top. You can drag a fork across the surface to make small ridges. The raised parts will brown more in the oven.
Sprinkle the remaining cheddar over the top.
5. Bake until golden. Place the dish in an oven preheated to 400°F (205°C) for about 20–25 minutes. If you want a deeper crust, turn on the broiler for the final 2–3 minutes. Just keep an eye on it — the cheese can darken very quickly.
Let the pie rest for at least 10 minutes after it comes out of the oven. The meat layer will thicken a little more, and it will be much easier to serve neat portions.
I love the cheesy top. Regular mashed potatoes are good too, but cheddar adds a salty flavor and makes the top even richer and more golden.
And cottage pie is a perfect example of why some old winter dishes never really disappeared. It uses inexpensive, familiar ingredients, one baking dish, and gives you a very filling result. It’s easy to see why this recipe has stayed popular from one generation to the next.
6. Three-Ingredient Winter Tomato Soup from Tuscany

In winter, fresh tomatoes are rarely really good, so for a soup like this I have no problem using good canned tomatoes. They’re picked ripe, which means even in January they usually have a much brighter flavor than fresh tomatoes from the store.
This recipe has just three main ingredients — tomatoes, garlic, and olive oil. The result is a simple, thick soup in the spirit of Tuscan home cooking, where people knew how to get a lot of flavor out of just a few ingredients.
Ingredients
For 4 servings, you’ll need:
- 2 cans whole peeled tomatoes, 28 ounces each (about 794 g each).
- 4 large garlic cloves, thinly sliced.
- 3 tablespoons extra virgin olive oil.
- 1 cup water (about 240 ml), plus a little more if needed.
- ¾ teaspoon salt, or to taste.
- A little freshly ground black pepper.
If I’m buying tomatoes specifically for soup, I look for whole peeled tomatoes without a long list of additives — San Marzano Whole Peeled Tomatoes.
How to make winter tomato soup
1. Start with the garlic. Pour the olive oil into a pot and place it over low heat. Add the garlic and cook for about 1–2 minutes, stirring constantly.
The garlic should become fragrant and soften slightly, but it shouldn’t brown. If it gets dark, it can add unwanted bitterness to the soup.
2. Add the tomatoes. Pour the tomatoes into the pot along with all their juice. Crush them with a wooden spoon right in the pot, then add the water and salt.
Bring everything to a gentle simmer and cook uncovered for about 25–30 minutes. During that time, some of the liquid will evaporate and the tomato flavor will become more concentrated.
3. Blend the soup. Take the pot off the heat and blend everything with an immersion blender to the consistency you like.
You don’t have to blend it completely smooth. I actually like it better with a little tomato texture left in it. If the soup turns out too thick, add a little hot water.
4. Taste before serving. Add more salt if needed and a little freshly ground black pepper. You can also drizzle about a teaspoon of good olive oil over the top.
And yes, three main ingredients really can be enough for a good winter soup. If the tomatoes taste good and you let them simmer properly, the soup comes out thick and full of flavor, and with a thick slice of toasted bread, it’s seriously hard to beat.
7. Slow-Cooked Honey Carrots with Chili Lime Drizzle

We always have carrots on hand in winter. Lindy and I grow them ourselves, and we try to save part of the harvest for the colder months. Our garden has taught us to appreciate vegetables like this — easy to grow, easy to store, and useful in dozens of different dishes.
But this recipe also has honey, lime, and a little chili, which makes the flavor much more interesting than regular roasted carrots.
I’m sure a lot of people love the combination of sweet carrots and tart lime. And you only need a little chili here. It shouldn’t burn your tongue, it just needs to add a little heat at the end.
Ingredients
For 4–6 servings, you’ll need:
- 2 pounds carrots (about 900 g).
- 2 tablespoons butter, melted.
- 2 tablespoons honey.
- ½ teaspoon salt.
- ¼ teaspoon black pepper.
- 2 tablespoons water.
For the sauce:
- 1½ tablespoons fresh lime juice.
- 1 teaspoon honey.
- ¼ teaspoon red pepper flakes, or less.
- 1 teaspoon olive oil.
- A small pinch of salt.
- A little lime zest, optional.
If you cook vegetables this way regularly, you might find a small slow cooker useful — Small Slow Cooker. The carrots cook on their own while you work on the rest of dinner.
How to make slow-cooked honey carrots with lime
1. Prepare the carrots. Peel them and cut them into fairly large pieces of about the same size. Thin carrots can simply be sliced lengthwise, while larger ones can be cut in half first.
Don’t cut them too small. After a few hours, smaller pieces can become too soft.
2. Add the honey and butter. Transfer the carrots to the slow cooker. Mix the melted butter with 2 tablespoons of honey, salt, and black pepper, then pour it over the carrots.
Add the water and mix well so every piece is coated with a thin layer of butter and honey.
3. Leave the carrots in the slow cooker. Cover and cook on low for about 4–5 hours or on high for about 2–3 hours.
Start checking the carrots about 30 minutes before the end of the cooking time. They should be easy to pierce with a fork but still hold their shape.
4. Mix the lime sauce. In a small bowl, combine the lime juice, one teaspoon of honey, olive oil, red pepper flakes, and a pinch of salt.
Taste it. If the lime is very tart, add just a little more honey. If you don’t like much heat, start with only a few red pepper flakes.
5. Add the sauce before serving. Transfer the hot carrots to a serving dish and drizzle the lime mixture over them. You can grate a little lime zest over the top.
It’s better to add the lime sauce after cooking instead of leaving it in the slow cooker for several hours. That way, the citrus flavor stays fresh.
I think these carrots work really well with roasted chicken, pork, or a big winter dinner with several side dishes. Honey brings out the natural sweetness of the carrots, lime adds some tartness, and a little chili keeps the dish from becoming too sweet.
As you can see, these are still just ordinary carrots. But with three simple additions, they taste nothing like the boiled side dish so many people remember from childhood.
8. Italian Snowstorm Risotto with White Wine and Garlic
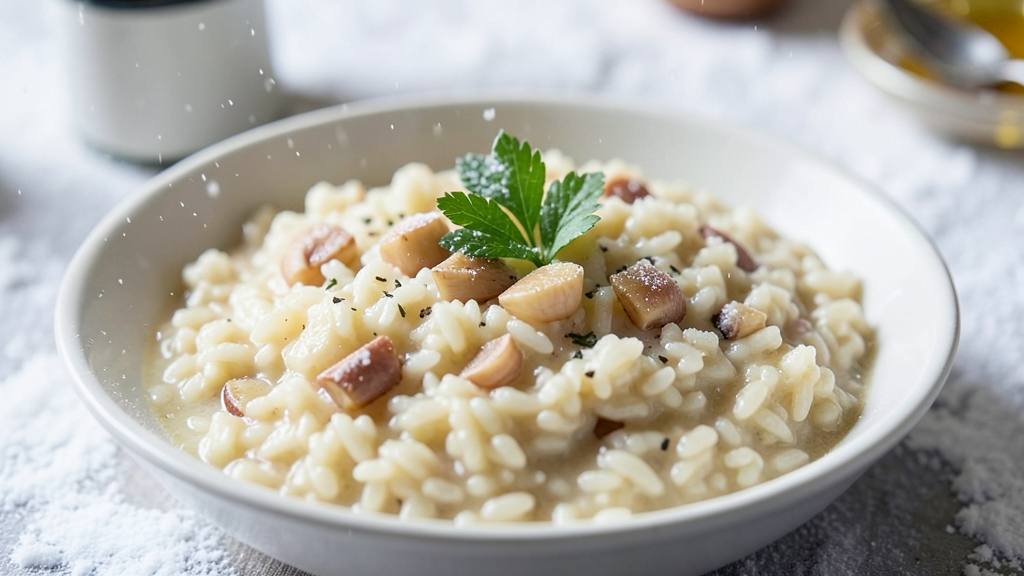
We make risotto pretty often in winter. It’s hot and creamy, with rice that slowly absorbs the broth and garlic that has time to become soft and fragrant, while white wine brings all the flavors together.
By the way, risotto needs attention. You can’t just put it on the stove and forget about it. But in just over twenty minutes, you get a really rich dish.
Ingredients
For 4 servings, you’ll need:
- 1½ cups Arborio rice.
- 4½–5 cups chicken or vegetable broth.
- ½ cup dry white wine.
- 3 garlic cloves, finely chopped.
- 1 small onion, very finely chopped.
- 2 tablespoons butter.
- 1 tablespoon olive oil.
- ½ cup grated Parmesan.
- ½ teaspoon salt, plus more to taste.
- A little freshly ground black pepper.
For risotto, it’s convenient to use a wide, heavy skillet or sauté pan.
How to make risotto with white wine and garlic
1. Warm the broth. Pour it into a separate saucepan and keep it over low heat. The broth should be hot when you start adding it to the rice.
If you pour in cold liquid, the temperature in the pan will drop each time, and the rice will cook less evenly.
2. Prepare the base. In a large skillet, melt 1 tablespoon of butter with the olive oil. Add the onion and cook for about 3–4 minutes, until it becomes soft.
Then add the garlic and cook for another 30 seconds. It’s important not to let it brown.
3. Add the rice and wine. Add the Arborio rice and stir for about 1–2 minutes, so every grain gets coated with oil.
Pour in the white wine and keep stirring until most of the liquid is absorbed. The smell of alcohol should almost disappear, while the rice keeps a light wine acidity.
4. Gradually add the broth. Pour in the hot broth about ½ cup at a time, waiting each time until the previous amount is almost fully absorbed.
Risotto needs to be stirred often. The main thing is not to let the rice dry out and not to pour in all the broth at once. This usually takes about 18–22 minutes.
5. Add the butter and cheese. When the rice is soft but still has a little firmness in the center, take the skillet off the heat.
Add the remaining 1 tablespoon of butter and the Parmesan. Mix well.
The finished risotto should be creamy and spread slightly across the plate instead of sitting in a firm mound. If it’s too thick, add another couple of spoonfuls of hot broth. Taste for salt before serving and add black pepper.
This risotto already has everything it needs for a rich flavor. White wine, garlic, Parmesan, and hot broth work really well together. One bowl of risotto is usually enough to make a full dinner, and the combination of rice, wine, garlic, and Parmesan makes it easy to understand why this recipe has stayed popular for decades.
9. Rustic Herb Bread Baked in Cast Iron
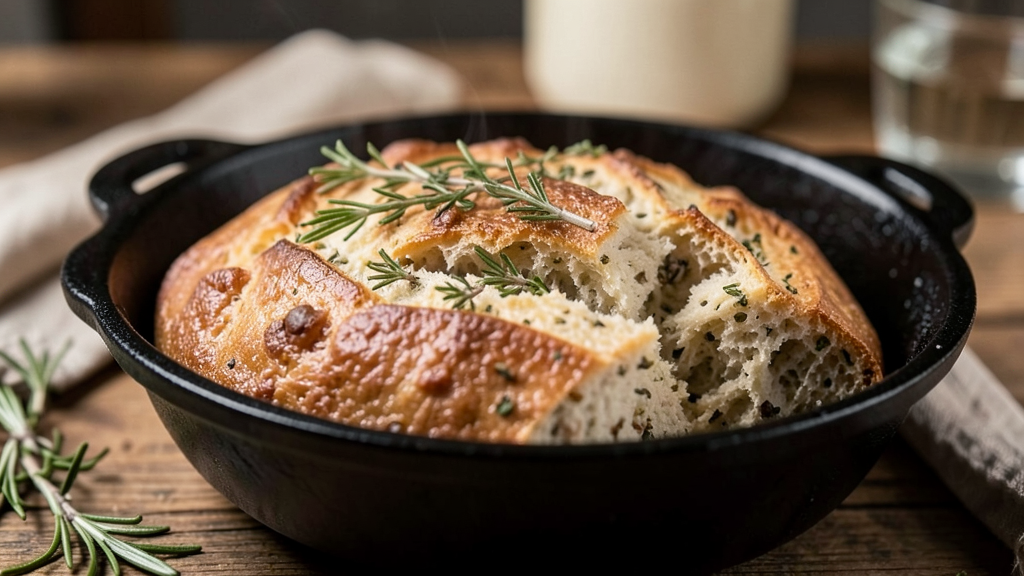
When Lindy and I bake bread in winter, the whole house smells different, and it instantly feels cozier. And you really don’t need anything else with your soup or stew. This bread has a crispy crust, a soft center, and herbs you can taste in every bite without overpowering the flavor of the bread itself.
I use rosemary, thyme, and a little garlic. You can use fresh herbs if you have some on hand, or dried ones if you’ve stocked up.
Ingredients
For 1 small loaf, you’ll need:
- 3 cups all-purpose flour (about 375 g).
- 1½ teaspoons salt.
- 1 teaspoon instant dry yeast.
- 1½ cups warm water (about 355 ml).
- 1 tablespoon olive oil.
- 1 teaspoon dried rosemary.
- 1 teaspoon dried thyme.
- ½ teaspoon garlic powder.
- A little coarse salt for topping, optional.
It’s convenient to bake this bread in a heavy cast iron pot with a lid.
1. Mix the dough. In a large bowl, combine the flour, salt, yeast, rosemary, thyme, and garlic. Pour in the warm water and olive oil. Stir with a spoon until almost no dry flour remains. The dough will be sticky and pretty soft. That’s exactly how it should be.
2. Let the dough rise. Cover the bowl with a towel or lid and leave it in a warm place for about 1½–2 hours. The dough should noticeably increase in size and become airier.
3. Prepare the cast iron pot. About 30 minutes before baking, put the empty pot with its lid in the oven and preheat it to 450°F (230°C).
The hot cast iron helps the crust form quickly, while the lid traps steam inside.
4. Shape the loaf. Turn the dough out onto a well-floured surface. Gently pull the edges toward the center and shape it into a round loaf.
There’s no need to knead it for long. Just a few movements are enough to bring the dough together. Transfer it onto a sheet of parchment paper and sprinkle a little coarse salt on top if you like.
5. Bake with and without the lid. Carefully take the hot pot out of the oven and lower the bread into it along with the parchment paper.
Cover with the lid and bake for 30 minutes. Then remove the lid and bake for another 10–15 minutes, until the crust is nicely golden brown.
Once it’s out of the oven, make sure to let the bread cool for at least 30 minutes. If you slice it right away, the inside might seem damp and sticky.
This bread is incredibly good with thick winter soups and stewed meat. The crispy crust, herbs, and warm, soft center are hard for anyone to resist. And you have to agree, there’s something really nice about putting bread you baked yourself on the table, especially when it’s cold outside and you don’t feel like going anywhere.
10. Frozen Vineyard Dessert Wine Pudding
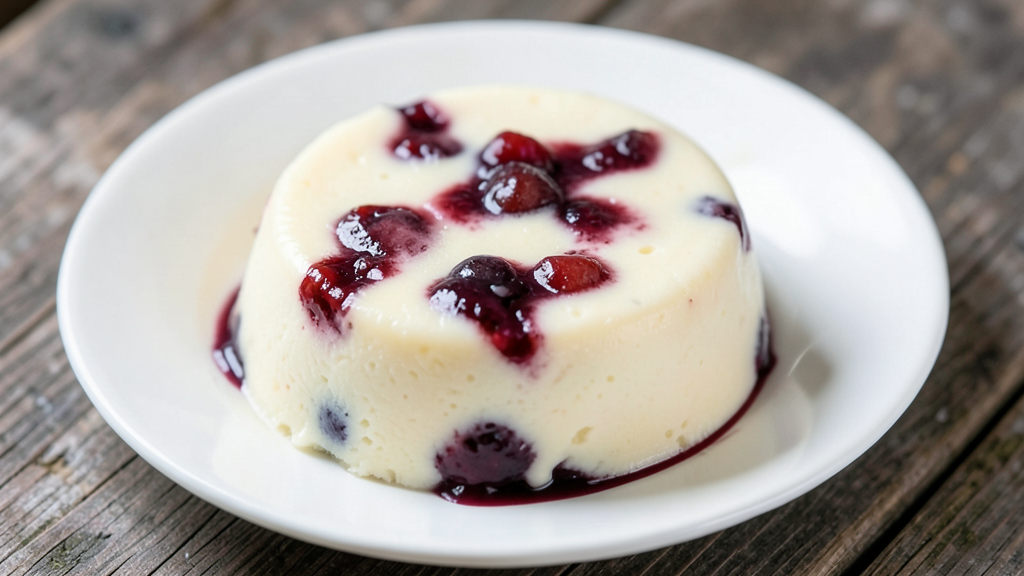
This recipe starts with dessert wine made from late-harvest grapes, and the pudding itself turns out cold, creamy, and slightly fruity and tart.
Dessert wines are made from very sweet grapes that are harvested later than usual, and some winter wines are made from grapes that have actually frozen right on the vine. Their flavor is concentrated, so you don’t need much wine for this dessert. And that’s a good thing, because a bottle like this is usually too good to casually pour half of it into a saucepan!
Ingredients
For 6 small servings, you’ll need:
- ¾ cup dessert white wine (about 180 ml).
- 1½ cups heavy cream (about 355 ml).
- ½ cup whole milk (about 120 ml).
- 4 egg yolks.
- ⅓ cup sugar.
- 1 teaspoon vanilla extract.
- 1 tablespoon cornstarch.
- A small pinch of salt.
- ½ cup fresh or frozen grapes, cut in half, optional.
For this recipe, I use small glass cups — Glass Dessert Cups. That way, the pudding can be frozen in individual portions and you can take out exactly as many as you need.
How to make dessert wine pudding
1. Reduce the wine a little. Pour it into a small saucepan and place it over medium heat. Once the wine starts to gently simmer, lower the heat and leave it for 5–7 minutes, until the volume is reduced by about a third.
This makes the flavor more concentrated while some of the liquid evaporates. There’s no need to let the wine boil hard.
2. Prepare the creamy base. In another saucepan, combine the cream and milk and heat until almost boiling. While they’re heating, whisk the egg yolks with the sugar, cornstarch, and a pinch of salt. The mixture should become lighter and smooth.
3. Combine the two mixtures. Slowly pour about half of the hot cream into the egg yolks, whisking constantly. Then pour everything back into the saucepan.
Cook over low heat for 3–5 minutes, stirring constantly. The pudding will gradually thicken and start coating the back of a spoon well.
It’s better to take it off the heat a little too early than too late. A strong boil can ruin the texture of the yolks.
4. Add the wine. Take the saucepan off the heat, pour in the reduced dessert wine, and add the vanilla. Mix well.
Taste it. You should be able to notice the wine, but it shouldn’t overpower the creamy flavor.
5. Chill and freeze. Pour the pudding into small cups. If you like, add a few halved fresh grapes to each portion.
First, chill the dessert in the refrigerator for about 2 hours, then move it to the freezer for another 2–3 hours. It should become very cold and firm around the edges without turning into a solid block of ice.
Before serving, leave the cups at room temperature for about 10 minutes.
After all the hot soups, stews, risotto, and freshly baked bread, cold creamy pudding with a grape flavor feels completely different on the table. It’s delicate, not too heavy, with a light wine note that comes through nicely once it’s chilled. Enjoy!
Tough choice
If I had to choose just one, I’d probably get stuck somewhere between hot chocolate with lavender cream and Swedish meatballs with lingonberry glaze. Although the cast iron bread makes the choice harder too…
Which one would you start with? Which of these ten recipes would you try first? Or maybe you have an old winter recipe of your own that almost nobody makes anymore?
Tell me in the comments. I genuinely love reading stories like that, especially when they involve family recipes, unusual ingredient combinations, or dishes that turned out much better than you expected.