In different countries, chocolate chip cookies easily turn into something completely different — spicy Moroccan cookies with cardamom, soft cookies with Greek yogurt, a version with Norwegian brown cheese, or even cookies made with good olive oil. These are exactly the kinds of variations that unexpectedly become the most memorable.
In this article, I gathered 10 unexpected chocolate chip cookie recipes. They all turn out differently, but they share one thing — they are incredibly delicious and unusual.
And honestly, you’ll end up making these cookies again and again.
1. Japanese Matcha Chocolate Chip Cookies
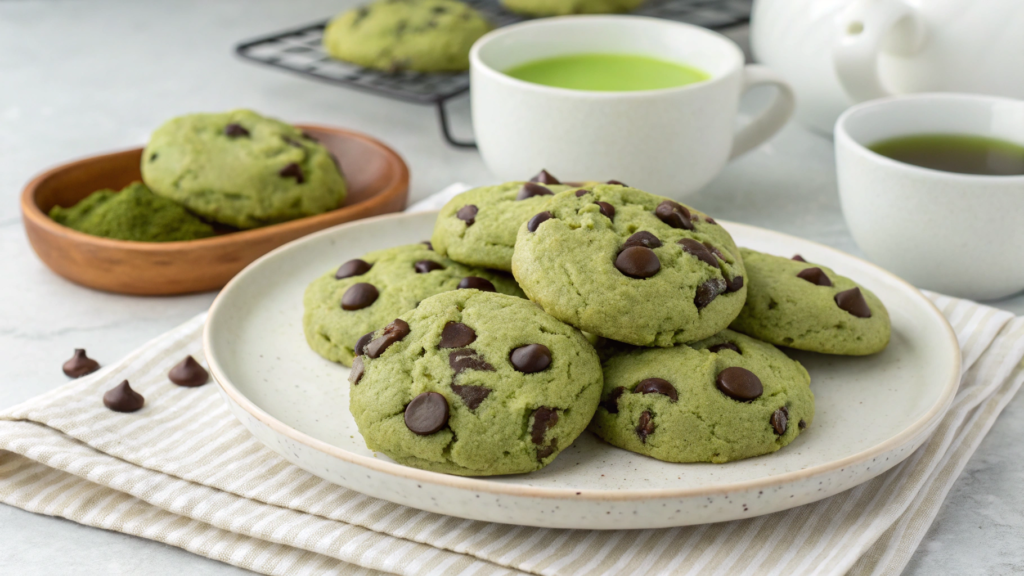
I didn’t expect matcha to pair so well with dark chocolate. Especially when you use good-quality matcha instead of some random powder from a supermarket shelf. The difference is huge. The color turns into a soft green instead of a dull gray-green, and the flavor never drifts into dry grassy notes.
Matcha contains antioxidants, including catechins. Of course, the cookies do not suddenly become a healthy dessert just because of green tea, but the flavor becomes much deeper and more interesting.
What You’ll Need
- 2 1/4 cups flour (280 g)
- 1 tablespoon matcha powder (8–10 g) — Japanese Matcha Powder on Amazon
- 1 teaspoon baking soda
- 1/2 teaspoon salt
- 3/4 cup butter, room temperature (170 g)
- 3/4 cup brown sugar (150 g)
- 1/2 cup white sugar (100 g)
- 2 eggs
- 2 teaspoons vanilla extract
- 1 1/4 cups dark chocolate chips or chocolate chunks (220 g)
How to Make Matcha Chocolate Cookies
- Combine the dry ingredients.
In a large bowl, combine flour, matcha powder, baking soda, and salt. It’s better to distribute the matcha powder carefully through the flour so you don’t end up with green clumps later. They only look nice for the first couple of seconds. - Beat the butter and sugars.
In a separate bowl, beat butter, brown sugar, and white sugar together. The mixture should become lighter and softer. Usually, two or three minutes is enough for the texture to turn creamy and smooth. - Add the eggs and vanilla.
Add the eggs and vanilla extract. At this point, the dough already starts smelling like homemade baked goods with a light tea aroma. - Mix the dry and wet ingredients together.
Gradually add the dry ingredients into the butter mixture. There’s no need to overmix. Once the dough becomes smooth and even, stop there. - Add the chocolate.
Add the dark chocolate chunks. I like leaving a little chocolate aside and pressing it into the tops before baking. The cookies look much more appetizing after they come out of the oven. - Chill the dough.
Place the dough in the refrigerator for at least 45 minutes. Chilled dough spreads less during baking, and the overall flavor becomes richer and deeper. - Prepare the oven and baking sheet.
Preheat the oven to 350°F (175°C). Place portions of dough onto a baking sheet, leaving space between the cookies so they can spread properly while baking. - Bake the cookies.
Bake the cookies for about 10–12 minutes. The center should stay slightly soft. After baking, the cookies continue setting on the hot baking sheet. - Let the cookies rest before serving.
Let the cookies rest for at least 10 minutes before serving. At this point, the chocolate inside is still soft, and the matcha flavor becomes especially pleasant.
How to Serve and Pair Them
These cookies pair perfectly with cold milk, homemade lattes, or vanilla ice cream. You can also serve them with hot unsweetened green tea. The contrast between sweet chocolate and the slight bitterness of tea becomes much more noticeable.
For serving, I use simple light-colored ceramics or wooden boards. The green-tinted dough and dark chocolate already look interesting on their own, so extra decoration is unnecessary.
It also works well to dust the finished cookies with a very thin layer of matcha powder through a sieve right before serving, but not too much, otherwise the bitterness on top becomes too sharp.
The dough keeps well in the refrigerator for about two days, and the finished cookies stay soft inside even the next day, especially if stored in an airtight container. If you try them, you’ll notice they really do feel different from regular chocolate chip cookies while still not requiring rare ingredients or complicated techniques.
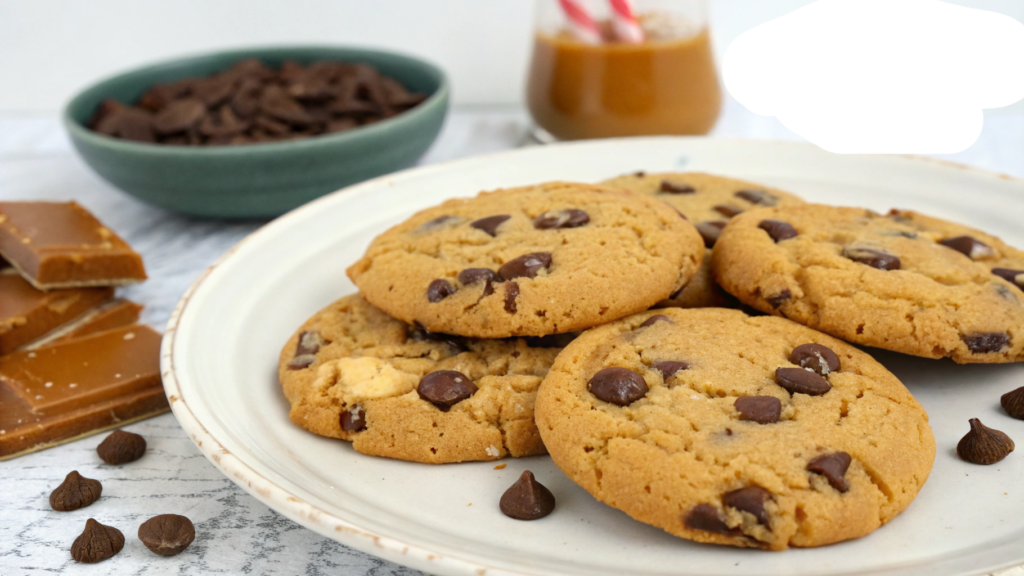
2. French Salted Butter and Dark Chocolate Cookies
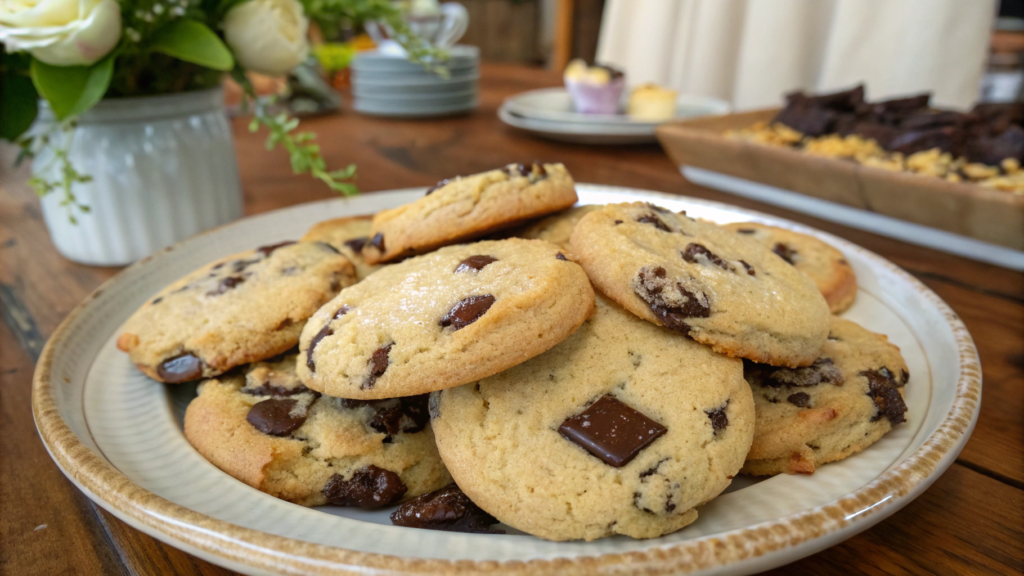
French cookies made with salted butter have a deeper buttery flavor, and the dark chocolate tastes much richer and more noticeable.
I absolutely loved cookies like these when I tried them in a small bakery during a trip along the Oregon coast. Since then, I almost always use salted French butter for cookies whenever I want rich dough without excessive sweetness.
European-style butter usually contains more milk fat than standard American butter. Because of that, baked goods often turn out richer in flavor and softer inside. King Arthur Baking Company wrote about this separately.
What You’ll Need
- 2 1/4 cups flour (280 g)
- 1 teaspoon baking soda
- 1/2 teaspoon salt
- 1 cup salted French butter, room temperature (227 g)
- 3/4 cup brown sugar (150 g)
- 1/2 cup white sugar (100 g)
- 2 eggs
- 2 teaspoons vanilla extract
- 1 1/2 cups dark chocolate chunks (260 g)
- flaky sea salt for topping
How to Make French Salted Butter and Dark Chocolate Cookies
- Combine the dry ingredients.
In a separate bowl, combine flour, baking soda, and salt. It’s better not to dump everything directly into the dough at once. When the baking soda is evenly distributed, the cookies rise more evenly and without strange aftertastes in certain spots. I usually whisk the dry mixture for about a minute. - Beat the butter and sugars.
In a large bowl, beat salted butter, brown sugar, and white sugar together. The butter should be soft but not melted. If it becomes too warm, the cookies will spread too much on the baking sheet later. Beat the mixture for about three minutes until it becomes lighter and slightly airy. - Add the eggs and vanilla.
Add the eggs one at a time and mix well after each addition. Then pour in the vanilla extract. The dough will become smooth and glossy. If the mixture looks slightly grainy, that’s completely fine — the texture will smooth out once the flour is added. - Mix the dry and butter mixtures together.
Gradually add the dry ingredients into the butter mixture. It’s better to do this in portions. Add a little flour, mix, and continue the same way. Once the dough becomes smooth, stop immediately. Overmixing makes the cookies dense, while here you want a soft center and slightly crisp edges. - Add the dark chocolate.
Mix in the dark chocolate chunks. Large chunks work much better than small chocolate chips. You get large melted pockets of chocolate inside, and the cookies look far more interesting after baking.
I like leaving part of the chocolate on top before baking. That way the cookies look almost like they came from a small French bakery. - Chill the dough.
Place the dough in the refrigerator for at least 1 hour. The butter becomes firm again, the flour absorbs moisture, and the dough develops a deeper flavor.
Sometimes I leave the dough in the refrigerator overnight. The cookies taste even better the next day. - Prepare the baking sheet and oven.
Preheat the oven to 350°F (175°C). Line a baking sheet with parchment paper and place large portions of dough onto it.
Make sure to leave space between the cookies because they will spread while baking.
Press a few extra pieces of chocolate on top and add just a couple flakes of sea salt. - Bake until the center stays soft.
Bake the cookies for about 11–14 minutes. The edges should become golden while the center may still look slightly soft. That’s completely normal.
If the cookies stay in the oven too long, they will become dry after cooling. - Let the cookies cool slightly.
Leave the cookies on the baking sheet for about 10 minutes. Right out of the oven they are very soft, but gradually the texture becomes perfect.
The chocolate inside stays warm and gooey while a thin crisp crust forms on top.
Serving
For a beautiful presentation, you can place the cookies on a wooden board next to pieces of dark chocolate and a small bowl of sea salt. Everything looks very simple but instantly creates the feeling of a small homemade bakery.
These cookies taste especially good with black coffee, espresso, or hot milk. Extra sweet drinks are unnecessary here.
These cookies also freeze very well. I often make a double batch of dough and keep part of the dough balls in the freezer. Later, you can simply bake a few fresh cookies in the evening in about fifteen minutes.
3. New York-Style Giant Bakery Cookies
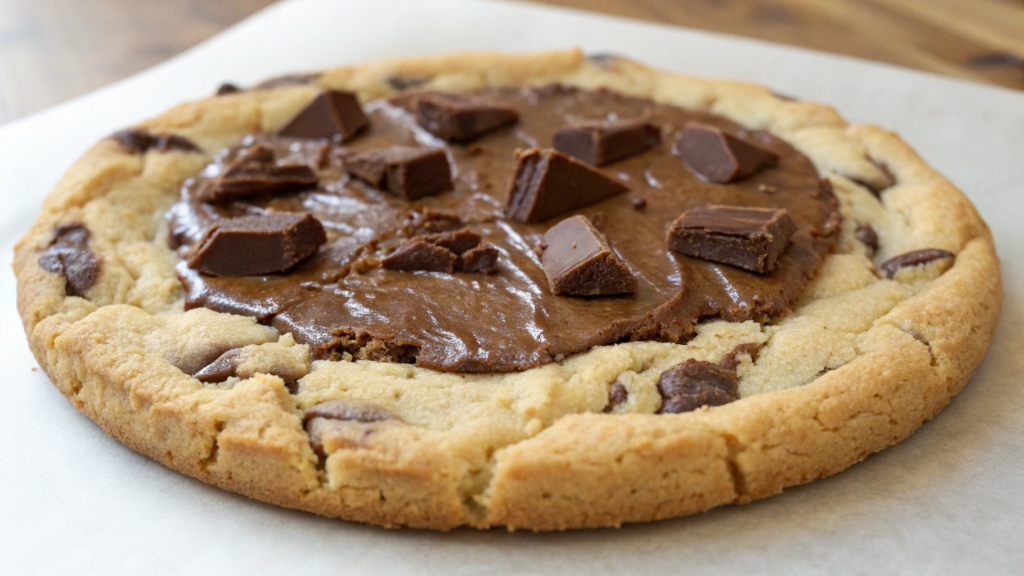
My version of these cookies often looks slightly uneven, cracked in places, with melted chocolate spreading across the top. Honestly, that’s exactly what makes them look appetizing. A light golden crust forms outside while the center stays soft even after cooling. This recipe uses a little more flour and large chocolate chunks instead of tiny chocolate chips.
What You’ll Need
- 3 cups flour (375 g)
- 1 teaspoon baking soda
- 1 teaspoon salt
- 1 cup butter, room temperature (227 g)
- 1 cup brown sugar (200 g)
- 1/2 cup white sugar (100 g)
- 2 eggs
- 2 teaspoons vanilla extract
- 2 cups large dark chocolate chunks (340 g)
- 1 tablespoon cornstarch
How to Make New York-Style Giant Chocolate Cookies
- Combine the dry ingredients.
In a large bowl, combine flour, baking soda, salt, and cornstarch. The cornstarch matters here for a reason. It helps keep the center soft even after the cookies cool completely. I usually whisk everything together for about a minute so the baking soda spreads evenly. - Beat the butter and sugars.
In another bowl, beat butter, brown sugar, and white sugar until the mixture becomes light and soft.
There’s no need to whip it into cake frosting consistency. It’s enough for the sugar to begin dissolving and the mixture to become slightly airy. Usually this takes around three minutes. - Add the eggs and vanilla.
Add the eggs one at a time, mixing well after each addition. Then add the vanilla extract.
The dough will become smooth, glossy, and slightly thick. Large cookies need a sturdier dough base. - Combine both mixtures.
Gradually add the dry ingredients into the butter mixture. Do not overmix. Once the dough becomes smooth, stop there. If you continue mixing too aggressively, the cookies will turn heavy and dense later. - Add the chocolate.
Mix in the large dark chocolate chunks.
It’s much better to use large chunks here instead of small chocolate chips. During baking, the chocolate melts unevenly, creating large soft pockets of chocolate inside.
You can leave some chocolate on top. The cookies look much more impressive after baking that way. - Shape large portions of dough.
Each portion of dough should be truly large — about half a cup of dough per cookie. Yes, it looks like too much at first. But the size is exactly what creates that thick soft center.
Don’t flatten the dough too much. Taller dough portions create a much better bakery-style shape after baking. - Chill the dough.
Place the dough portions into the refrigerator for at least 1 hour. If you bake them immediately, the butter will stay too soft and the giant cookies will spread into thin flat discs. After chilling, the dough holds its shape much better.
Sometimes I place the dough portions into the freezer for about twenty minutes before baking, especially during summer. - Prepare the oven and baking sheet.
Preheat the oven to 375°F (190°C). Line a baking sheet with parchment paper and place no more than three or four cookies on it at a time. These cookies become very large and need plenty of space. - Bake until the edges turn golden and let them cool.
Bake the cookies for about 14–18 minutes. The edges should turn golden while the center may still look slightly underbaked. That is exactly the result you want.
After baking, the cookies continue setting inside. If you wait for the center to become fully firm in the oven, the middle will turn dry later.
Leave the cookies on the baking sheet for at least 15 minutes. Right out of the oven they are extremely soft and may fall apart. Gradually the structure becomes firmer while the center stays tender and slightly gooey.
How to Serve and Pair Them
These giant cookies pair especially well with cold milk, strong coffee, or homemade hot cocoa. Usually one cookie is enough for two people.
You can break one warm cookie apart right before serving. The melted chocolate inside looks far more appetizing than any decoration.
If you slightly warm the cookies the next day for just a few minutes in the oven, the chocolate becomes soft again and the center feels almost like freshly baked cookies.
4. Greek Yogurt Chewy Chip Cookies
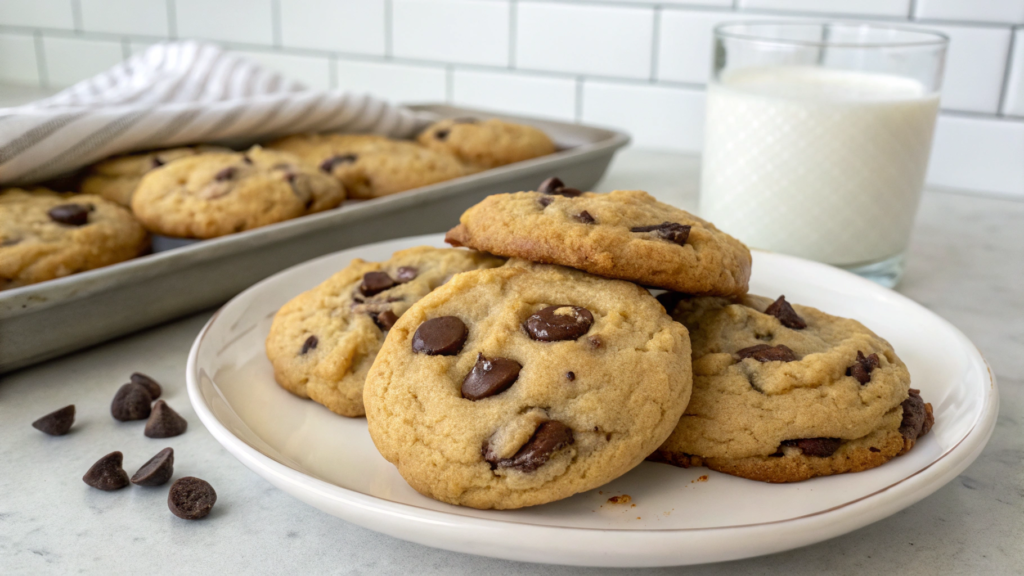
With Greek yogurt, the cookies turn out soft inside, slightly chewy, and very tender without feeling heavy or overly greasy. And the next day they do not turn into dry bricks the way regular chocolate chip cookies sometimes do.
Thick Greek yogurt helps baked goods stay soft longer and prevents them from drying out too quickly.
What You’ll Need
- 2 1/4 cups flour (280 g)
- 1 teaspoon baking soda
- 1/2 teaspoon salt
- 1/2 cup butter, room temperature (113 g)
- 3/4 cup brown sugar (150 g)
- 1/4 cup white sugar (50 g)
- 1/2 cup thick Greek yogurt (120 g)
- 1 egg
- 2 teaspoons vanilla extract
- 1 1/4 cups dark chocolate chunks (220 g)
How to Make Soft Greek Yogurt Chocolate Cookies
- Combine the dry ingredients.
In a separate bowl, combine flour, baking soda, and salt. It’s better to whisk the mixture well for about a minute so the baking soda distributes evenly through the flour. This helps the cookies rise more evenly without dense spots inside.
If the flour has been sitting in the pantry for a long time and feels compacted, it’s better to sift it first. The dough will turn out lighter and softer. - Beat the butter and sugars.
In a large bowl, beat butter, brown sugar, and white sugar until the mixture becomes light and soft. The butter should be soft, not melted. If it becomes too warm, the dough will turn runny and the cookies will spread too much in the oven.
Usually two or three minutes of mixing is enough. The mixture becomes fluffier and starts smelling slightly like caramel and cream. - Add the yogurt, egg, and vanilla.
Add the Greek yogurt, egg, and vanilla extract. After mixing, the dough becomes noticeably creamier and smoother than classic chocolate chip cookie dough.
It’s very important to use thick Greek yogurt without excess liquid. If a lot of whey has collected on top of the container, it’s better to pour it off first. - Combine the dry and wet mixtures.
Gradually add the dry ingredients into the butter mixture. It’s better to do this in several additions. Add part of the flour, mix, then continue with the next portion.
As soon as the dough becomes smooth and the flour disappears, stop immediately. Overmixing makes the finished cookies denser and less soft inside. - Add the chocolate chunks.
Mix the dark chocolate into the dough. Large chunks work much better here than tiny chocolate chips. During baking, the chocolate does not melt completely, creating soft melted chocolate pockets inside.
You can leave a few pieces on top before baking. The cookies look much more appetizing after coming out of the oven. - Chill the dough.
Place the dough in the refrigerator for at least 40–50 minutes. Because of the yogurt, the dough is softer than regular cookie dough, so chilling becomes especially important. Without it, the cookies may spread too much.
After chilling, the dough becomes firmer and the flavor turns deeper and richer. - Prepare the oven and baking sheet.
Preheat the oven to 350°F (175°C). Line a baking sheet with parchment paper and place small portions of dough onto it, leaving space between the cookies.
I usually shape the dough slightly taller than normal. That helps the centers stay especially soft after baking. - Bake until the center stays soft.
Bake the cookies for about 10–12 minutes. The edges should become lightly golden while the center may still look slightly soft and underbaked. That is exactly the result you want.
If you wait until the center becomes completely firm inside the oven, the cookies will turn drier after cooling. - Let the cookies cool slightly.
Leave the cookies on the baking sheet for about 10 minutes. Right out of the oven they are extremely soft and may seem too delicate. Gradually the structure becomes perfect — soft in the center, lightly firm around the edges, with warm melted chocolate inside.
Serving
These cookies pair perfectly with hot coffee, milk, or homemade hot cocoa. Because of the yogurt, the flavor becomes slightly creamier and softer, so even the dark chocolate tastes different.
For serving, you can add just a little flaky sea salt on top. The sweetness of the chocolate immediately becomes brighter.
The cookies stay soft for a long time. Even the next day the center still remains tender, especially if stored in an airtight container.
This recipe works especially well for everyday homemade baking. The ingredients are simple, the dough is easy to work with, and the result comes out consistently good even without much baking experience.
5. Brazilian Coconut Chocolate Chip Crunch
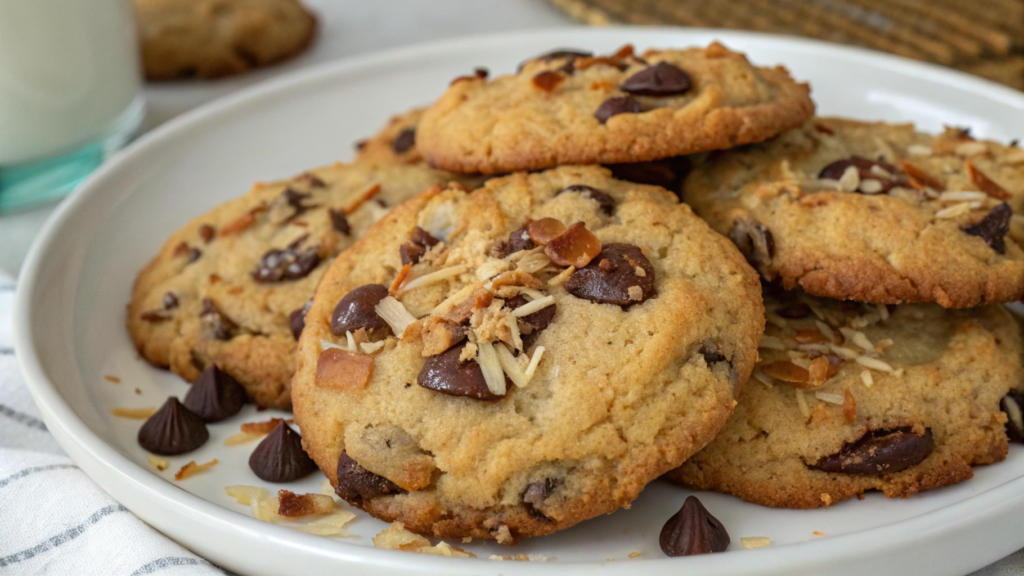
In my opinion, coconut is very underrated in cookies. Some people add too little of it, and it completely disappears into the dough. In this recipe, though, the coconut should be noticeable — with texture, a light crunch, and a warm aroma. The cookies do not turn out soft like cake. Instead, they develop crisp edges and a denser center because of the combination of toasted coconut, brown sugar, and dark chocolate.
I noticed a long time ago that lightly toasted coconut changes the flavor of baked goods completely. During heating, the natural sugars begin caramelizing, and the aroma becomes much deeper. That is exactly why regular coconut flakes smell completely different after coming out of the oven.
What You’ll Need
- 2 1/4 cups flour (280 g)
- 1 teaspoon baking soda
- 1/2 teaspoon salt
- 3/4 cup butter, room temperature (170 g)
- 3/4 cup brown sugar (150 g)
- 1/2 cup white sugar (100 g)
- 2 eggs
- 2 teaspoons vanilla extract
- 1 1/2 cups dark chocolate chunks (260 g)
- 1 1/4 cups coconut flakes (100 g)
How to Make Coconut Chocolate Cookies with Crispy Edges
- Toast the coconut flakes.
Preheat the oven to 325°F (160°C) and spread the coconut flakes in a thin layer on a baking sheet. Toast the coconut for about 5–7 minutes, stirring occasionally. It should become lightly golden, not dark brown.
Coconut often looks completely unchanged for several minutes and then suddenly darkens very quickly within a minute. After baking, let it cool completely. - Combine the dry ingredients.
n a separate bowl, combine flour, baking soda, and salt. It’s better to whisk the mixture well beforehand so the baking soda distributes evenly. This helps create a smoother cookie texture. - Beat the butter and sugars.
In a large bowl, beat butter, brown sugar, and white sugar together. The mixture should become lighter and slightly airy. Usually, two or three minutes is enough. The brown sugar matters especially here because it gives a light caramel flavor that pairs perfectly with coconut. - Add the eggs and vanilla.
Add the eggs one at a time, mixing well after each addition. Then add the vanilla extract. At this point, the dough already starts smelling like homemade bakery cookies from a small pastry shop. - Combine the dry and wet mixtures.
Gradually add the dry ingredients into the butter mixture. Do not overmix the dough. As soon as the flour disappears completely, stop there. Overmixing makes the cookies denser and heavier. - Add the coconut and chocolate.
Mix in the toasted coconut flakes and chocolate chunks. You can leave some coconut and chocolate on top before baking. The cookies look much prettier and more homemade after baking that way.
Toasted coconut adds not only flavor but also a light crisp texture around the edges. - Chill the dough.
Place the dough into the refrigerator for at least 40 minutes. After chilling, the butter becomes firm again, and the cookies spread less during baking. This step especially helps preserve a thicker center. - Prepare the baking sheet and oven.
Preheat the oven to 350°F (175°C). Line a baking sheet with parchment paper and place medium portions of dough onto it, leaving space between the cookies. During baking, they will spread slightly and become flatter. - Bake until the edges turn golden and let them cool slightly.
Bake the cookies for about 11–13 minutes. The edges should become golden and slightly crisp while the center may still remain a little soft. That contrast in textures is exactly what makes these cookies especially good.
Leave the cookies on the baking sheet for about 10 minutes. While they cool, the chocolate inside stays soft and the coconut aroma becomes even stronger.
Serving
These cookies taste especially good with hot coffee, cold milk, or homemade hot cocoa. Coconut and chocolate together create a rich flavor, so you really do not need anything overly sweet alongside them.
You can sprinkle a little extra toasted coconut on top right before serving, just not too much so the texture does not become overloaded.
The cookies stay crispy around the edges for a long time, especially if stored in a metal tin or glass container without excess moisture.
They are also convenient to make ahead for guests or quiet weekends at home. The ingredients are simple, the dough is easy to work with, and the flavor feels noticeably different from ordinary chocolate chip cookies.
6. Norwegian Brown Cheese Chocolate Cookies
Norwegian brown cheese gives the dough a caramel-like, slightly creamy, lightly salty flavor. When paired with dark chocolate, the result is not just a sweet cookie but a baked treat with deep flavor, almost as if caramel and dulce de leche had been added directly into the dough.
Brown cheese does not taste like regular cheese at all. Its flavor is much closer to sweetened condensed milk, creamy caramel, and light saltiness. In Norway, it is often eaten with bread, waffles, or crackers.
What You’ll Need
- 2 1/4 cups flour (280 g)
- 1 teaspoon baking soda
- 1/2 teaspoon salt
- 3/4 cup butter, room temperature (170 g)
- 3/4 cup brown sugar (150 g)
- 1/3 cup white sugar (65 g)
- 2 eggs
- 2 teaspoons vanilla extract
- 3/4 cup Norwegian brown cheese, grated or finely diced (90 g)
- 1 1/4 cups dark chocolate chunks (220 g)
How to Make Norwegian Brown Cheese Chocolate Cookies
- Prepare the brown cheese.
Grate the brown cheese using a coarse grater or cut it into very small cubes. If the cheese feels too soft and sticks to the knife, place it in the refrigerator for about ten minutes before cutting. That makes it easier to work with and prevents the pieces from turning into one caramel-like mass before mixing into the dough. - Combine the dry ingredients.
In a separate bowl, combine flour, baking soda, and salt. Whisk the mixture so the baking soda spreads evenly through the flour. This matters especially for dense dough like this because the cookies should rise evenly without heavy spots inside. - Beat the butter and sugars.
In a large bowl, beat butter, brown sugar, and white sugar until the mixture becomes soft and light. The brown sugar supports the caramel flavor of the cheese and helps keep the center more moist. The butter should be soft but not melted, otherwise the dough will become too loose. - Add the eggs and vanilla.
Add the eggs one at a time, mixing well after each addition. Then pour in the vanilla extract. The mixture will become smoother and glossier. At this stage, the aroma already starts resembling caramel cookie dough even though the recipe itself is not overly sweet. - Combine the dry and wet mixtures.
Gradually add the dry ingredients into the butter mixture. It’s better to do this in portions so the dough stays smooth and free of dry flour pockets. As soon as the flour disappears, stop mixing. Overmixing will make the cookies tougher, while this recipe needs a soft center. - Add the cheese and chocolate.
Fold in the brown cheese and dark chocolate. Do this gently with a spatula so the cheese pieces do not completely disappear into the dough. In the finished cookies, there should still be small caramel-like cheese pockets and soft melted chocolate pieces. That contrast is one of the most important parts of this recipe. - Chill the dough.
Place the dough in the refrigerator for at least 1 hour. The brown cheese and butter make the dough fairly soft, so chilling helps the cookies hold their shape better. After chilling, the flavor also becomes deeper and richer. - Prepare the oven and baking sheet.
Preheat the oven to 350°F (175°C). Line a baking sheet with parchment paper and place medium portions of dough onto it. Leave space between the cookies because they will spread slightly during baking. - Bake until the center stays soft and let the cookies rest.
Bake the cookies for about 10–12 minutes. The edges should become lightly golden while the center may still look soft. Do not overbake them. If the cookies become fully firm in the oven, they will lose that soft center after cooling.
Leave the cookies on the baking sheet for about 10 minutes after baking. Right out of the oven they will feel extremely soft, especially where the cheese has melted. After a few minutes, the structure becomes firmer and the flavor more developed.
Serving
I would not serve these cookies with overly sweet drinks because the flavor itself is already rich and layered. The brown cheese gives caramel depth while the dark chocolate adds slight bitterness. These cookies taste especially good with black coffee, strong tea, or warm milk.
For serving, you can break one cookie in half while it is still slightly warm. Inside, you will see soft melted chocolate and tiny caramel-like streaks from the cheese. It looks simple but incredibly appetizing.
These cookies are best stored in an airtight container. The next day, the flavor becomes even better because the cheese develops more fully inside the dough. If you want to bring back the softness, simply warm the cookies in the oven for a couple of minutes.
I honestly think the version with Norwegian brown cheese is worth trying at least once. People always remember it. The main thing is not to overdo the cheese in the first batch. It’s better to start with a moderate amount, understand the flavor first, and only then make it more intense later.
7. Turkish Coffee Chocolate Cookies
Lindy absolutely loves these cookies, and whenever I make them, she walks into the kitchen long before the cookies even make it into the oven. The smell of the dough is incredibly rich.
Turkish coffee works perfectly here because it is ground extremely fine and opens up quickly in the dough. And when you add a little cinnamon and vanilla, the flavor becomes even deeper. These cookies are especially good for people who prefer desserts that are not overly sweet.
What You’ll Need
- 2 1/4 cups flour (280 g)
- 1 teaspoon baking soda
- 1/2 teaspoon salt
- 3/4 cup butter, room temperature (170 g)
- 3/4 cup brown sugar (150 g)
- 1/2 cup white sugar (100 g)
- 2 eggs
- 2 teaspoons vanilla extract
- 1 1/2 tablespoons very finely ground Turkish coffee — Turkish Coffee on Amazon
- 1/2 teaspoon cinnamon
- 1 1/4 cups dark chocolate chunks (220 g)
How to Make Turkish Coffee Chocolate Cookies
- Combine the dry ingredients.
In a separate bowl, combine flour, baking soda, salt, and cinnamon. Then add the Turkish coffee and whisk everything together well. It’s important to use an extremely fine grind here. Large coffee particles feel unpleasant inside the finished cookies.
Even at this stage, the mixture already smells like a really good coffee shop. - Beat the butter and sugars.
In a large bowl, beat butter, brown sugar, and white sugar until the mixture becomes light and soft. The brown sugar matters especially here because it creates a deeper, slightly caramel flavor that pairs beautifully with coffee.
Usually two or three minutes of mixing is enough. - Add the eggs and vanilla.
Add the eggs one at a time, mixing well after each addition. Then pour in the vanilla extract.
The mixture becomes smooth and slightly thicker. At this point, the coffee aroma starts opening up even more. - Combine the dry and wet mixtures.
Gradually add the dry ingredients into the butter mixture. It’s better to do this in portions and avoid overmixing the dough. As soon as the flour disappears completely, stop there. Overmixing makes the cookies heavier and denser. - Add the chocolate.
Mix in the dark chocolate chunks. Large chocolate pieces work especially well here instead of tiny chocolate chips. During baking, soft melted chocolate pockets appear, and the coffee flavor tastes much more interesting alongside them.
You can leave a few chocolate pieces on top before baking. - Chill the dough.
Place the dough in the refrigerator for at least 45 minutes. During that time, the coffee develops more deeply in the dough while the butter becomes firmer. After chilling, the cookies hold their shape better and develop a richer flavor. - Prepare the oven and baking sheet.
Preheat the oven to 350°F (175°C). Line a baking sheet with parchment paper and place medium portions of dough onto it, leaving space between the cookies.
I like making these cookies slightly thicker than usual because the centers stay softer that way. - Bake until the center stays slightly soft.
Bake the cookies for about 10–12 minutes. The edges should become lightly golden while the center may still look soft. That is completely normal. After baking, the cookies continue setting for several more minutes. - Let the cookies cool slightly.
Leave the cookies on the baking sheet for about 10 minutes. Right after baking, the coffee aroma becomes especially intense. The chocolate inside stays soft while the edges develop a light crisp texture.
Serving
Serve these cookies with espresso, hot milk, or strong black tea. A small scoop of vanilla ice cream also works really well.
Some people like adding a very light dusting of finely ground coffee or cocoa powder on top through a sieve. The important thing is to keep the layer extremely thin so the flavor does not become too bitter.
The next day, these cookies can be warmed in the oven for just a couple of minutes. The coffee aroma becomes stronger again, and the chocolate inside softens slightly.
This recipe tends to be especially popular with adults. The flavor is rich and balanced, with the taste of real coffee rather than just a faint coffee smell inside the dough.
8. Australian Macadamia-Loaded Cookies
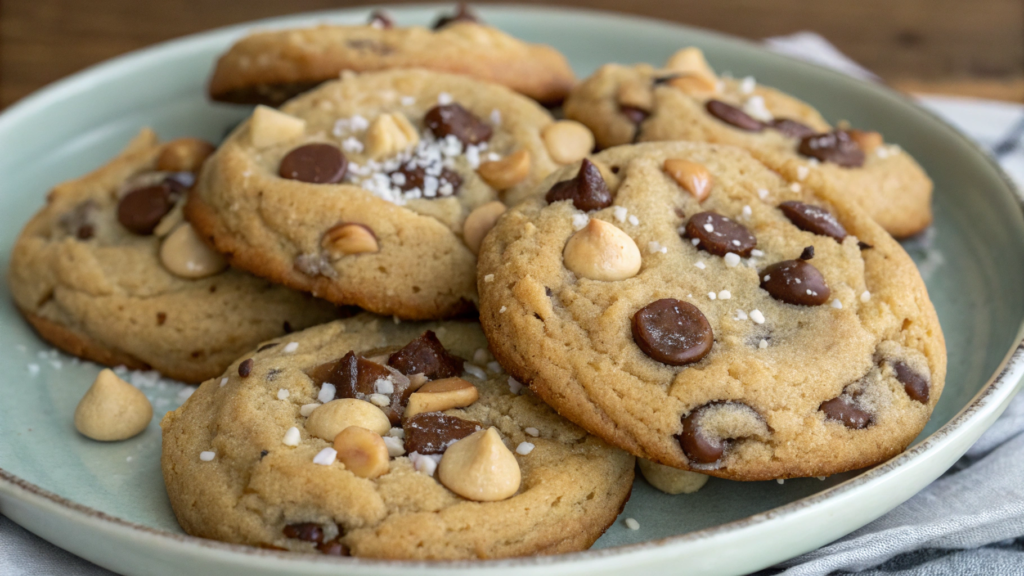
Macadamia nuts have a very soft buttery flavor and a high fat content, so they behave completely differently in baking compared to walnuts or almonds. And when you combine them with dark chocolate and a little sea salt, the cookies end up with a rich center and lightly crisp edges.
This is not the recipe where you should save money on the nuts. The macadamia should actually be noticeable in every cookie instead of appearing once every three bites.
What You’ll Need
- 2 1/4 cups flour (280 g)
- 1 teaspoon baking soda
- 1/2 teaspoon salt
- 3/4 cup butter, room temperature (170 g)
- 3/4 cup brown sugar (150 g)
- 1/2 cup white sugar (100 g)
- 2 eggs
- 2 teaspoons vanilla extract
- 1 1/4 cups macadamia nuts (170 g), roughly chopped
- 1 1/4 cups dark chocolate chunks (220 g)
- a little flaky sea salt for topping
How to Make Macadamia Chocolate Cookies
- Prepare the nuts.
Roughly chop the macadamia nuts. Do not chop them too finely because larger pieces create a much more interesting texture and are easier to notice in the finished cookies.
If the nuts are raw, you can lightly toast them in the oven for about 5–6 minutes. After that, the flavor becomes noticeably richer and creamier. - Combine the dry ingredients.
In a separate bowl, combine flour, baking soda, and salt. Whisk the mixture well so the baking soda distributes evenly. This dough becomes fairly dense because of the nuts and chocolate, so an even texture matters here. - Beat the butter and sugars.
In a large bowl, beat butter, brown sugar, and white sugar until the mixture becomes soft and light. Usually two or three minutes is enough. The brown sugar helps keep the center soft while the white sugar creates slightly crispier edges. - Add the eggs and vanilla.
Add the eggs one at a time, mixing well after each addition. Then pour in the vanilla extract.
The dough will become smoother and creamier. - Combine the dry and wet mixtures.
Gradually add the dry ingredients into the butter mixture. Do this in portions and avoid overmixing the dough. As soon as the flour disappears, stop there. If you continue mixing too aggressively, the cookies will become heavier and denser later. - Add the chocolate and macadamia nuts.
Mix in the dark chocolate and macadamia nuts. The dough will feel quite thick and heavily filled with mix-ins, and that is completely normal. You can leave a few pieces of chocolate and nuts on top before baking so the cookies look more appetizing after coming out of the oven. - Chill the dough.
Place the dough in the refrigerator for at least 45 minutes. Because of the large amount of oil inside the nuts, the dough becomes softer than regular cookie dough, so chilling helps the cookies keep a better shape.
After chilling, the flavor also becomes richer. - Prepare the oven and baking sheet.
Preheat the oven to 350°F (175°C). Line a baking sheet with parchment paper and place medium portions of dough onto it, leaving space between the cookies.
You can sprinkle just a couple flakes of sea salt on top. It highlights the flavor of both the macadamia nuts and the chocolate especially well. - Bake the cookies and let them cool slightly.
Bake the cookies for about 11–13 minutes. The edges should become lightly golden while the center may still remain soft. Do not overbake them because the texture becomes firmer on its own after cooling.
After baking, leave the cookies on the baking sheet for about 10 minutes. The chocolate inside stays soft while the nuts become especially aromatic.
Serving
Lindy and I love eating these cookies with black coffee, homemade lattes, or cold milk. Macadamia nuts already give the cookies a rich buttery flavor, so there is no need for overly sweet drinks alongside them.
Break one warm cookie open right before serving guests. Inside, you can see melted chocolate and large nut pieces, and honestly it looks far more appetizing than any decoration.
These cookies stay soft inside for a long time, especially if stored in an airtight container.
9. Moroccan Spice Chocolate Chip Cookies
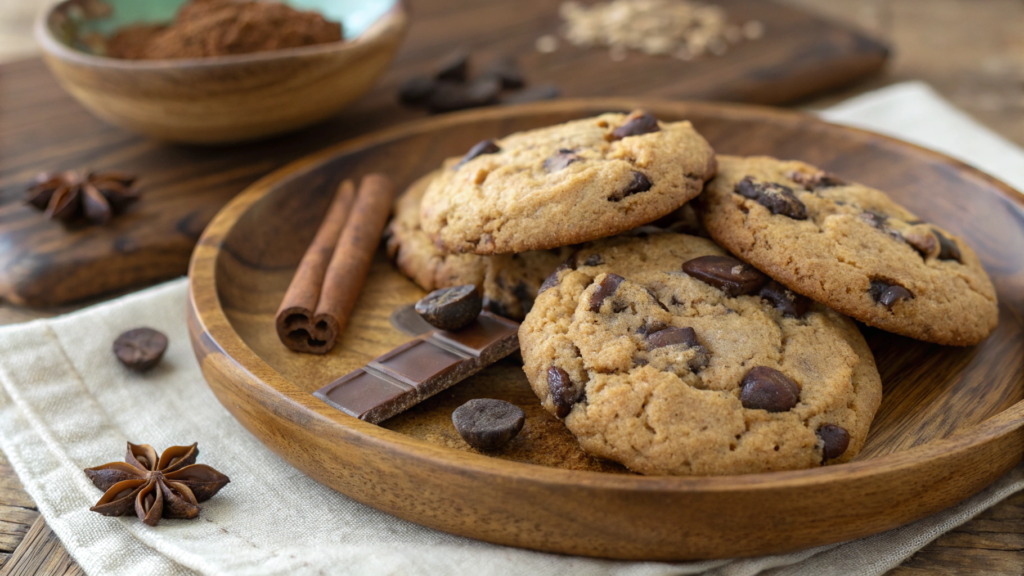
With these cookies, it is very important not to overdo the spices. This is not gingerbread or holiday baking. The spices should only make the chocolate flavor deeper and more interesting instead of completely overpowering it.
When I baked these cookies, I loved how cinnamon, cardamom, and dark chocolate created such a warm and rich flavor without feeling heavy. And with hot coffee or strong tea, they taste especially good.
What You’ll Need
- 2 1/4 cups flour (280 g)
- 1 teaspoon baking soda
- 1/2 teaspoon salt
- 3/4 cup butter, room temperature (170 g)
- 3/4 cup brown sugar (150 g)
- 1/2 cup white sugar (100 g)
- 2 eggs
- 2 teaspoons vanilla extract
- 1 teaspoon cinnamon
- 1/4 teaspoon ground cardamom
- a pinch of ground cloves
- 1 1/4 cups dark chocolate chunks (220 g)
- a little flaky sea salt for serving
- Moroccan spice blend for baking — Moroccan Spice Blend on Amazon
How to Make Moroccan Spice Chocolate Cookies
- Combine the dry ingredients.
In a separate bowl, combine flour, baking soda, salt, cinnamon, cardamom, and cloves. Whisk the mixture well so the spices distribute evenly. It’s especially important not to increase the amount of cloves here. Even a small excess quickly makes the flavor too sharp. - Beat the butter and sugars.
In a large bowl, beat butter, brown sugar, and white sugar until the mixture becomes soft and light. Usually, two or three minutes is enough. The brown sugar pairs especially well with the spices and gives the dough a deeper caramel flavor. - Add the eggs and vanilla.
Add the eggs one at a time, mixing well after each addition. Then add the vanilla extract. Even at this stage, the dough already smells rich with chocolate, spices, and warm buttery dough all at once. - Combine the dry and wet mixtures.
Gradually add the dry ingredients into the butter mixture. Do this in portions and avoid overmixing the dough. As soon as the flour disappears, stop there. Overmixing will make the finished cookies denser. - Add the chocolate.
Mix in the dark chocolate. Large chocolate chunks work especially well here because the flavor becomes much richer and deeper alongside the spices.
You can leave a few chocolate pieces on top before baking. The cookies look much prettier after coming out of the oven that way. - Chill the dough.
Place the dough in the refrigerator for at least 40–50 minutes. During that time, the spices open up more fully while the butter becomes firmer. After chilling, the flavor becomes smoother and more balanced. - Prepare the oven and baking sheet.
Preheat the oven to 350°F (175°C). Line a baking sheet with parchment paper and place small portions of dough onto it, leaving space between the cookies.
If you want a prettier surface, lightly press a few chocolate chunks onto the tops before baking. - Bake until the edges turn golden.
Bake the cookies for about 10–12 minutes. The edges should become lightly golden while the center may still stay soft. After baking, the cookies continue setting, so there is no reason to wait for the center to become fully firm inside the oven. - Let the cookies cool slightly and serve them.
Leave the cookies on the baking sheet for about 10 minutes. While they are still warm, you can sprinkle a couple flakes of sea salt on top.The salt highlights the chocolate and makes the spices brighter without making the flavor harsh.
Serving
Because of the spices, the flavor already feels rich enough, so there is no need for overly sweet drinks. These cookies pair especially well with strong black coffee, hot milk, or spiced tea.
Arrange the cookies on a wooden board or a dark ceramic plate. The warm color of the dough, the chocolate chunks, and the light spice texture already look beautiful without extra decoration.
Even several hours after baking, the kitchen still smells like chocolate and spices. That smell instantly makes the house feel warmer and more alive. And if the cookies sit overnight in a container, the flavor becomes even better. The spices fully develop while the chocolate starts tasting noticeably deeper.
10. Mediterranean Olive Oil Chocolate Cookies
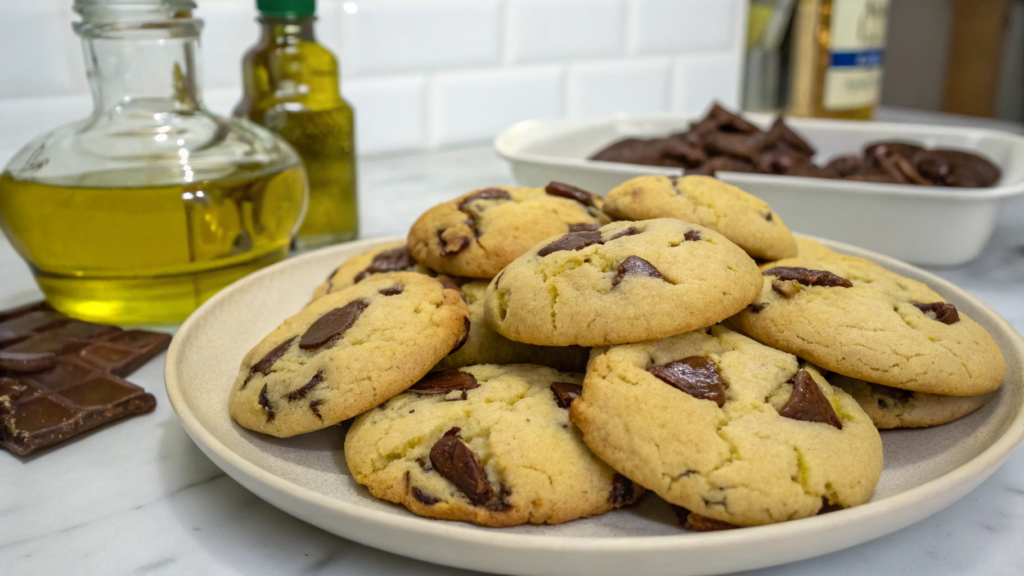
Good olive oil makes the dough softer, richer, and slightly fruity in flavor. The most important thing here is using genuinely good oil with a smooth taste. Oil that is too sharp or bitter immediately starts overpowering the chocolate. A softer fruity olive oil, though, makes the dough feel deeper and more interesting.
Even the next day, the cookies still stay tender inside. And honestly, that is one of the best things about this type of baking.
What You’ll Need
- 2 1/4 cups flour (280 g)
- 1 teaspoon baking soda
- 1/2 teaspoon salt
- 3/4 cup olive oil (180 ml)
- 3/4 cup brown sugar (150 g)
- 1/2 cup white sugar (100 g)
- 2 eggs
- 2 teaspoons vanilla extract
- 1 1/4 cups dark chocolate chunks (220 g)
- 1/2 teaspoon cinnamon
- a little flaky sea salt
- extra virgin olive oil — Extra Virgin Olive Oil on Amazon
How to Make Olive Oil Chocolate Cookies
- Combine the dry ingredients.
In a separate bowl, combine flour, baking soda, salt, and cinnamon. Whisk everything together well so the baking soda distributes evenly.
Only a small amount of cinnamon is needed here. It should not dominate the flavor and should simply support the chocolate and olive oil. - Mix the oil and sugars.
In a large bowl, combine olive oil, brown sugar, and white sugar. Unlike butter-based dough, this mixture will not become fluffy and airy. It will look smoother and more liquid, which is completely normal.
Stir for about two minutes until the sugar starts dissolving slightly. - Add the eggs and vanilla.
Add the eggs one at a time, mixing well after each addition. Then add the vanilla extract.
The dough will become thicker and shinier. At this stage, the aroma becomes especially interesting — chocolatey, slightly fruity, and lightly caramel-like at the same time. - Combine the dry and wet mixtures.
Gradually add the dry ingredients into the oil mixture. Do this in portions and avoid overmixing the dough. As soon as the flour disappears completely, stop there.
Because of the olive oil, the dough naturally turns out slightly softer than classic cookie dough, and that is completely fine. - Add the chocolate.
Mix in the dark chocolate. Chocolate with a higher cocoa percentage works especially well here because it pairs better with the rich flavor of olive oil. You can leave a few chocolate chunks on top before baking so the cookies look more beautiful after coming out of the oven. - Chill the dough.
Place the dough in the refrigerator for at least 40 minutes. After chilling, it becomes firmer and spreads less during baking. This step is especially important for olive oil dough because it is naturally softer than regular cookie dough. - Prepare the oven and baking sheet.
Preheat the oven to 350°F (175°C). Line a baking sheet with parchment paper and place medium portions of dough onto it, leaving space between the cookies.
You can sprinkle a few flakes of sea salt on top. It highlights the chocolate and gives the flavor more depth almost immediately. - Bake until the center stays soft.
Bake the cookies for about 10–12 minutes. The edges should become lightly golden while the center may still stay soft. Do not overbake the cookies. After cooling completely, the texture becomes firmer on its own. - Let the cookies cool slightly and serve them.
Leave the cookies on the baking sheet for about 10 minutes. While still warm, the chocolate inside stays soft and the light olive oil aroma becomes especially noticeable.
Serving
Many people prefer these cookies with espresso, black coffee, or hot milk. For more of a Mediterranean feel, you can serve them with a little orange zest or fresh berries on the side.
Simply place the cookies onto light-colored ceramic plates and sprinkle a few flakes of sea salt on top right before serving. That immediately makes the chocolate flavor brighter.
Honestly, it surprises people every time. Most do not expect chocolate cookies made with olive oil to taste this rich and flavorful without any butter at all.
Unexpected Combinations
I did not save these recipes “for later.” I actually tried almost all of them, and now I make many of them regularly because they feel homemade, understandable, and completely different from one another.
You can bake very different cookies without changing the basic idea of chocolate chip cookies. One evening you might want something soft and buttery with macadamia nuts, while another day calls for rich coffee flavor or warm spices with dark chocolate.Which recipe sounds the most interesting to you? Tell me in the comments. Everyone’s favorites usually end up being completely different.