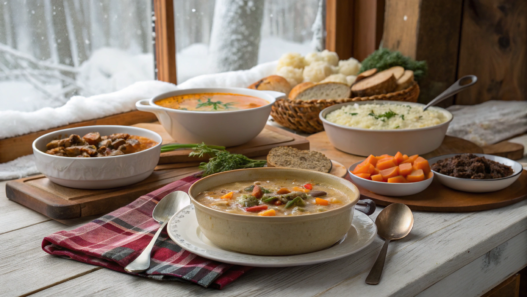
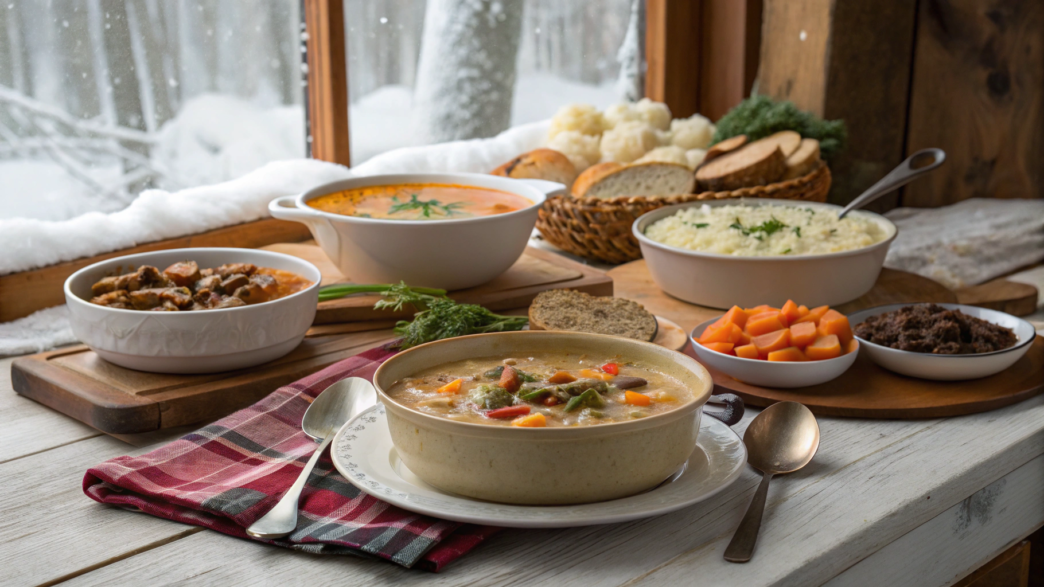
Here I’ll try to introduce you to hot, filling dishes for the cold season: with protein, vegetables, thick sauces without heavy cream, and a simple homemade taste.
I generally like simple dishes. They should warm you up, fill you up, and give you a normal portion of protein, vegetables, and flavor. But they should not leave you feeling like you just ate very heavy food.
When Lindy and I lived on our small piece of land in Idaho, and then in the Pacific Northwest, we came to the conclusion that cooking should not make our life harder. That’s why there are a lot of dishes here that you can cook in one skillet, pot, or baking dish. Less dishes and, accordingly, less kitchen fuss.
In these recipes, I focus on beans, turkey, chicken, mushrooms, root vegetables, greens, sweet potatoes, cauliflower, and simple sauces without heavy cream. Nothing strange or extraordinary, just normal ingredients that fit well into our winter menu.
1. Creamy White Bean & Chicken Skillet (No Cream)
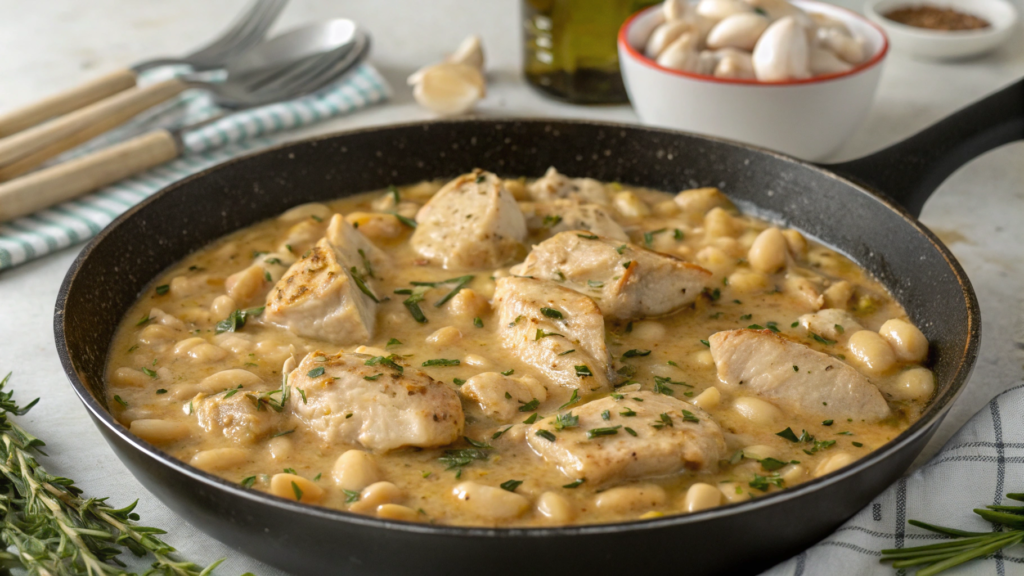
Creamy White Bean & Chicken Skillet (No Cream) — this recipe has everything I like: one skillet, tender chicken, a thick sauce, garlic, herbs, and beans that make the dish filling without cream. Everything is simple here: brown the chicken, add the beans, mash some of the beans right in the skillet — and the sauce becomes almost creamy on its own.
White beans give the dish thickness, add plant-based protein and fiber, so it turns out filling even without cream. Harvard Nutrition Source also notes that legumes are a good source of protein, complex carbohydrates, and fiber.
What You’ll Need
For 4 servings:
- 1 1/2 lb boneless, skinless chicken thighs or chicken breast, cut into large pieces (about 680 g)
- 2 cans white beans, 15 oz each, rinsed and drained (about 425 g each)
- 1 1/2 cups chicken broth (360 ml)
- 1 small yellow onion, finely chopped
- 4 garlic cloves, minced
- 1 tablespoon olive oil
- 1 tablespoon butter, optional
- 1 teaspoon dried thyme
- 1/2 teaspoon dried rosemary, preferably rubbed between your fingers
- 1/2 teaspoon smoked paprika
- 1/2 teaspoon salt, plus more later if needed
- 1/4 teaspoon black pepper
- 1 teaspoon Dijon mustard
- 1/3 cup grated Parmesan (about 35 g)
- 2 cups baby spinach or finely chopped kale (about 60–70 g)
- 1 tablespoon lemon juice
- 1 teaspoon lemon zest, if you have it
- fresh parsley for serving
For cooking dishes like this, it’s better to use a skillet with a thick bottom. It holds heat better, the chicken browns instead of starting to stew right away, and it works well for recipes where you first need to give the meat some color, and then build the sauce in the same skillet.
How to Cook
- Brown the chicken.
Cut the chicken into large pieces, pat it dry with a paper towel, and season with salt, pepper, smoked paprika, and half of the thyme. - Sear it in one layer.
Heat the skillet over medium heat and add the olive oil. Place the chicken so the pieces are not sitting on top of each other. If the skillet is small, cook it in two batches. Sear for about 3–4 minutes on one side, then flip and cook for another 2–3 minutes. The chicken does not need to be fully cooked at this point. Transfer it to a plate. - Make the onion, garlic, and herb base.
Add the butter to the same skillet, if using. Do not remove the browned bits from the bottom — they will give the sauce a deeper flavor. Add the onion and cook for 4–5 minutes, until it softens. Then add the garlic, rosemary, and remaining thyme. Cook for another 30–40 seconds, just until fragrant. - Add the beans.
Add the rinsed white beans and stir them with the onion, garlic, and herbs. Mash about one third of the beans right in the skillet with a wooden spoon or potato masher. Do not turn everything into puree: some of the beans should stay whole so the dish has a nice texture. - Build the sauce.
Pour in the chicken broth, add the Dijon mustard, and stir well, scraping up everything that browned on the bottom. The sauce will look thin at first, but the beans will quickly start making it thicker. - Return the chicken to the skillet.
Put the chicken back in, along with the juices left on the plate. Reduce the heat to medium-low and cook for 8–10 minutes, until the chicken is cooked through and the sauce becomes thicker. If the sauce thickens too quickly, add a little broth. If it seems too thin, let it simmer uncovered for a couple more minutes. - Add the greens.
When the chicken is ready, add the spinach or kale. Spinach will need 1–2 minutes, while kale will need about 3–4 minutes. The greens should soften, but not turn into a dark mush. - Finish with Parmesan and lemon.
Remove the skillet from the heat and stir in the Parmesan. Do not boil the dish after adding the cheese, so the sauce does not turn grainy. At the end, add the lemon juice and zest. Taste and add more salt if needed. The broth and Parmesan already add salt, so it’s better to adjust the flavor at the very end.
Serving
I often do not transfer the finished dish to another serving dish, and just put the skillet right on the table. Sometimes that’s exactly how I want dinner to be. You can serve it with toasted sourdough bread, a simple green salad, roasted broccoli or Brussels sprouts, brown rice if you want a more filling dinner, roasted squash, or sweet potatoes.
But you can also serve it as is. The beans already make it nicely filling. If you are feeding very hungry people, offer some bread. In our house, this is usually simple: I put the bread nearby, and everyone decides for themselves.
Small Tips From Personal Experience
- It’s better to rinse white beans, especially if you are using canned ones. This makes the flavor cleaner, and the sauce does not get extra saltiness from the can.
- If you do not have white beans, use cannellini beans, great northern beans, or chickpeas. Chickpeas will give a firmer texture, but it will still taste good.
- Chicken thighs are more convenient here than breast: they are juicier and handle reheating better. Chicken breast will work too, just watch the timing and do not keep it on the heat longer than needed.
- If you are making this dish for a few days, do not add all the greens at once. It’s better to stir spinach or kale into the hot portion right before serving — this way the greens keep their color and taste. Store leftovers in the refrigerator for 3–4 days in a closed container. When reheating, add a little broth or water, because the beans will continue to absorb liquid.
This recipe is convenient because it comes together from ingredients that are often already at home: chicken, beans, broth, and greens. The beans make the sauce thick without cream, the dish reheats well the next day, and everything cooks in one skillet. Normal working food for working weekdays.
2. Turkey & Sweet Potato Winter Bake with Sage
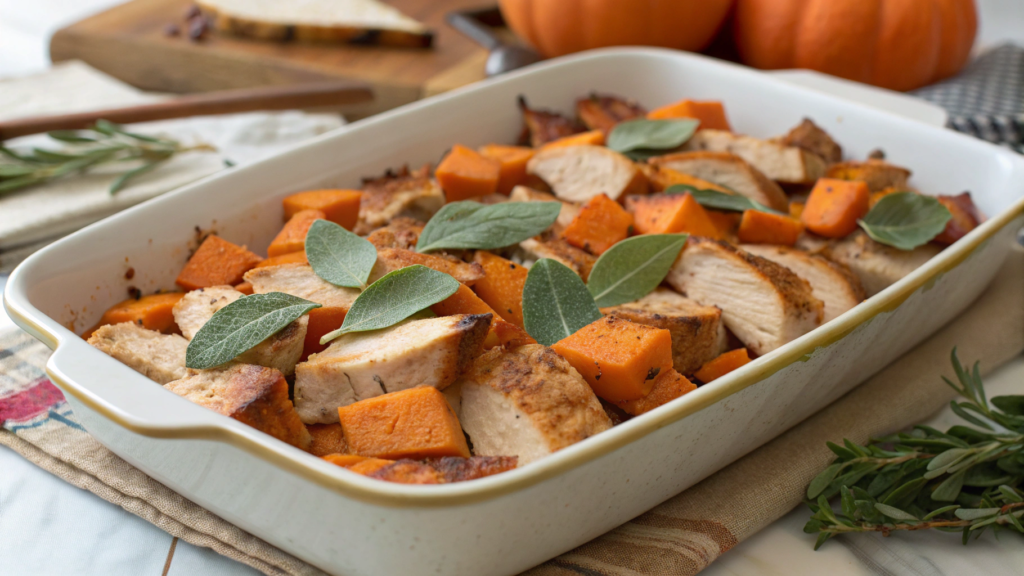
Turkey is definitely lighter than beef, but it still gives this dish a good protein base. Sweet potatoes add softness, color, and natural sweetness, while sage makes this bake a little more interesting, which is why Lindy and I often use sage in different dishes.
What You’ll Need
For 4–6 servings:
- 1 1/2 lb ground turkey (about 680 g)
- 2 large sweet potatoes, peeled and cut into cubes (about 900 g)
- 1 tablespoon olive oil
- 1 small yellow onion, finely chopped
- 2 carrots, cut into small cubes
- 2 celery stalks, finely chopped
- 3 garlic cloves, minced
- 1 teaspoon dried sage or 1 tablespoon fresh finely chopped sage
- 1/2 teaspoon dried thyme
- 1/2 teaspoon smoked paprika
- 1/2 teaspoon salt, plus more later if needed
- 1/4 teaspoon black pepper
- 1 tablespoon tomato paste
- 1 cup chicken or vegetable broth (240 ml)
- 1 tablespoon Worcestershire sauce, optional
- 1/2 cup frozen peas (about 70 g)
- 1/3 cup plain Greek yogurt or milk for the sweet potato mash (80 ml)
- 2 tablespoons butter or olive oil for the mash
- 1/4 cup grated Parmesan, optional (about 25 g)
A Few Swaps, If You Want
If you do not have ground turkey, you can use ground chicken. It will be a little milder in flavor, so I would add a little more sage, garlic, and black pepper.
Sweet potatoes can be replaced with a mix of sweet potatoes and regular potatoes. This will make the top layer less sweet and more familiar in flavor. I sometimes do exactly that when I’m cooking for people who do not really love sweet vegetables in savory dishes.
Peas can be replaced with corn, finely chopped green beans, or spinach. The main thing is not to overdo it with vegetables that release a lot of liquid, otherwise the filling will become watery and the bake will not hold its shape as well.
How to Cook
- Boil the sweet potatoes for the top layer.
Put the chopped sweet potatoes into a pot, cover with water, add a pinch of salt, and bring to a boil. Cook for about 12–15 minutes, until the pieces are soft and easy to pierce with a fork.
Drain the water and let the sweet potatoes sit for 2–3 minutes without a lid. This helps extra steam escape. If you mash the sweet potatoes while they are too wet, the top layer can turn watery. - Make the sweet potato mash.
Mash the sweet potatoes with Greek yogurt or milk, butter or olive oil, a pinch of salt, and pepper. The mash should be soft, but not runny. If it seems too thick, add another 1–2 tablespoons of milk or broth. - Prepare the vegetable base.
Heat a large skillet over medium heat and add the olive oil. Add the onion, carrots, and celery. Cook for 6–7 minutes, until the vegetables soften and start to smell a little sweet. - Add the garlic, sage, and tomato paste.
Add the garlic, sage, thyme, smoked paprika, salt, and black pepper. Stir and cook for about 30–40 seconds, until the garlic and herbs become fragrant.
Then add the tomato paste and cook for another 1 minute, stirring. The tomato paste should darken slightly. This gives the filling a richer flavor instead of just a sharp tomato note. - Brown the turkey.
Add the ground turkey to the skillet. Break it up with a spoon into small pieces and cook for 6–8 minutes, until the meat is no longer pink. - Make the juicy filling.
Pour in the broth, add the Worcestershire sauce if using, and stir well. Cook uncovered for 4–5 minutes, until the liquid reduces a little and the filling becomes juicy, but not watery. At the end, add the frozen peas. They do not need much time — they will finish cooking in the oven. Taste the filling and add more salt or pepper if needed. - Assemble the bake.
Preheat the oven to 400°F (200°C). Transfer the meat filling to a baking dish and spread it out evenly. Spoon the sweet potato mash on top and gently spread it with a spoon. You can make small waves or grooves on the surface. They will brown better later. If using Parmesan, sprinkle it over the top layer. - Bake until the top is golden.
Place the dish in the oven and bake for 18–22 minutes, until the edges start to bubble slightly and the top becomes firmer and browned in spots. If you want a more golden crust, turn on the broiler for 1–2 minutes at the very end. Just do not walk away. The top browns quickly and can burn. - Let the bake rest before serving.
Take the dish out of the oven and let it sit for 8–10 minutes. During this time, the filling will set a little, and the portions will be easier to serve. If you cut into it right away, the filling may run, especially because of the juicy meat layer and soft sweet potato.
Serving
This bake is already pretty filling, so it does not need a complicated side dish. It is better to add something fresh or green, so the plate does not feel too soft in texture. You can serve it with a simple green salad with lemon dressing, braised cabbage, roasted Brussels sprouts, cucumbers with apple cider vinegar and dill, or sauerkraut if you want a tangy note next to the sweet potato.
Some people do not like the strong flavor of sage, so start with a smaller amount. It tastes good, but it should not argue with the whole dish.
Small Practical Tips
- It is better not to overcook the sweet potatoes. If they absorb too much water, the mash becomes loose and heavy. Cook only until soft, drain the water, and give them a couple of minutes to release extra steam.
- If you want more protein, you can add 1 cup cooked lentils to the meat base. They mix well with the turkey and make the filling thicker. Just add a little more broth so the bake does not turn out dry.
- Store leftovers in the refrigerator for 3–4 days. The easiest way to reheat is in the oven at 350°F (175°C) for about 15–20 minutes, or in portions in the microwave.
Turkey cooks quickly, sweet potatoes give the dish a soft top without a heavy sauce, and sage adds a warm herbal note that works well with poultry and sweet vegetables. You can assemble the bake ahead of time in a baking dish, cover it, put it in the refrigerator, and bake it in the evening. For busy days, that is a very convenient option.
3. High-Protein Mushroom Stroganoff (No Heavy Cream)
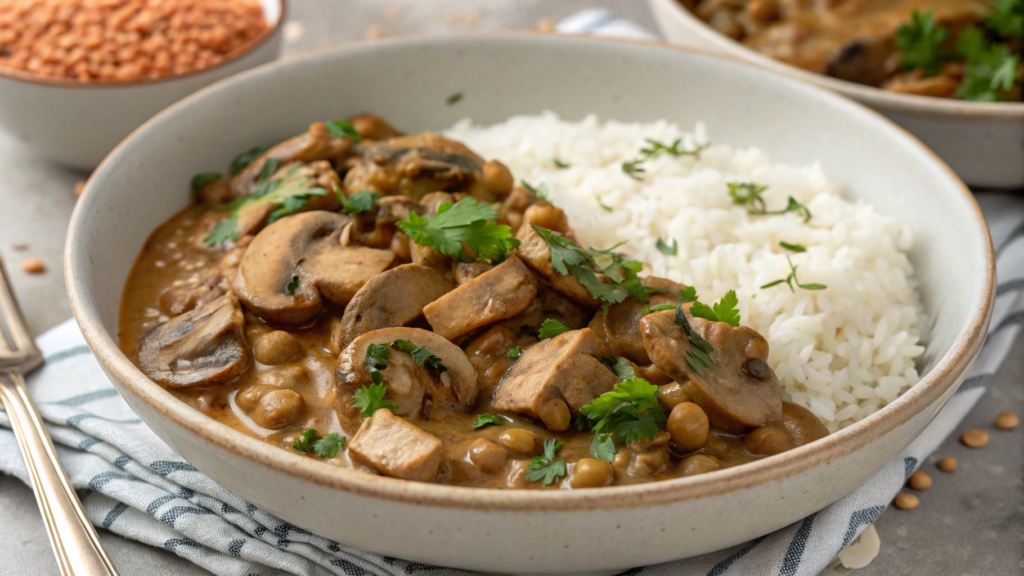
I love mushrooms, especially in winter. If you brown them well in a skillet, they immediately give the dish a rich flavor, without a complicated sauce or long cooking.
There is no heavy cream in this recipe. The creaminess comes from Greek yogurt, and the protein comes from mushrooms, lentils, or chicken — depending on which version you choose.
I usually make it with lentils when I want a more plant-based dinner, and with chicken when I need to feed very hungry people. Both versions are good and get eaten completely.
What You’ll Need
For 4 servings:
- 1 lb cremini mushrooms or button mushrooms, sliced (about 450 g)
- 1 cup cooked green or brown lentils (about 200 g)
or 1 lb chicken breast, sliced into thin strips (about 450 g) - 1 tablespoon olive oil
- 1 tablespoon butter
- 1 small yellow onion, thinly sliced
- 3 garlic cloves, minced
- 1 tablespoon flour
- 1 1/2 cups vegetable or chicken broth (360 ml)
- 1 teaspoon Dijon mustard
- 1 tablespoon Worcestershire sauce, optional
- 1/2 teaspoon dried thyme
- 1/2 teaspoon smoked paprika
- 1/2 teaspoon salt, plus more later if needed
- 1/4 teaspoon black pepper
- 1/2 cup plain Greek yogurt (about 120 g)
- 1 teaspoon lemon juice
- 2 tablespoons finely chopped parsley
- 8 oz whole wheat egg noodles, pasta, or soba noodles for serving (about 225 g)
A Few Swaps, If Needed
If you do not have cremini mushrooms, use regular button mushrooms. If you want a deeper flavor, add a little shiitake or portobello. Even a handful of more flavorful mushrooms changes the whole sauce.
Greek yogurt can be replaced with lower-fat sour cream, but add it just as carefully: do not boil it hard, or the sauce may curdle.
It is better to use green or brown lentils. Red lentils break down too quickly and turn the stroganoff into a mush. Tasty, of course, but it will not be the same recipe.
How to Cook
- Prepare the protein base. If you are using lentils, simply drain any extra liquid and set them aside. If you are cooking with chicken, slice it into thin strips, season with salt and pepper, and quickly sear it in a skillet with a little oil for 3–4 minutes, until the pieces set on the outside. You do not need to cook it all the way through. It will finish later in the sauce. Transfer the chicken to a plate.
- Brown the mushrooms without rushing. Heat a wide skillet over medium heat, then add the olive oil and butter. Add the mushrooms in one layer as much as possible. Do not salt them right away. Let them get some golden color first. Cook for 7–9 minutes, stirring from time to time. First they will release moisture, then the liquid will evaporate, and only after that proper browning begins.
- Add the onion and garlic. When the mushrooms are browned, add the onion. Cook for another 4–5 minutes, until it softens. Then add the garlic, thyme, smoked paprika, salt, and pepper. Stir and cook for about 30 seconds, so the garlic becomes fragrant but does not turn bitter.
- Thicken the base. Sprinkle the flour over the mushrooms and stir well. Cook for about 1 minute. The flour should coat the mushrooms and onion in a thin layer. This will help the sauce become thick without cream. You do not need to add a lot of flour. We want a smooth sauce, not a thick gravy.
- Pour in the broth and build the sauce. Gradually pour in the broth, stirring constantly. Add the Dijon mustard and Worcestershire sauce, if using. Scrape up everything that browned on the bottom. Cook the sauce for 4–6 minutes, until it thickens slightly. It should coat a spoon, but still stay pourable.
- Return the protein to the skillet. Add the lentils or seared chicken. If using lentils, warm them in the sauce for 2–3 minutes. If using chicken, cook for 5–6 minutes, until it is fully cooked inside. If the sauce gets too thick, add a couple of tablespoons of broth.
- Stir in the yogurt without boiling. Reduce the heat to low or remove the skillet from the stove for a minute. Stir in the Greek yogurt carefully, one spoonful at a time, stirring after each addition. Do not boil the sauce after adding the yogurt. This keeps it smooth and creamy. At the end, add the lemon juice.
- Serve with noodles or another side. Cook the noodles or pasta according to the package instructions. Save a little cooking water. If the stroganoff becomes too thick, you can add 1–2 tablespoons of that water and stir until the texture is right.
Tips
- Do not wash the mushrooms ahead of time or leave them wet. Quickly wipe them with a damp towel, or rinse them and dry them well right away. Extra water gets in the way of proper browning.
- It is better to add salt after the mushrooms have browned a little. If you salt them right away, they will release juice faster, and it will be harder to get good color.
- If you are making the stroganoff ahead of time, leave the yogurt for the final step and add it when reheating. This will make the sauce taste better.
You can easily adjust this dish to your mood. Need a more plant-based version — use lentils. Need more protein and a thicker bite — add chicken. The mushrooms bring the flavor, the yogurt makes the sauce creamy without heavy cream, and everything cooks very quickly and simply.
4. Roasted Root Vegetable Stew with Garlic-Thyme Broth
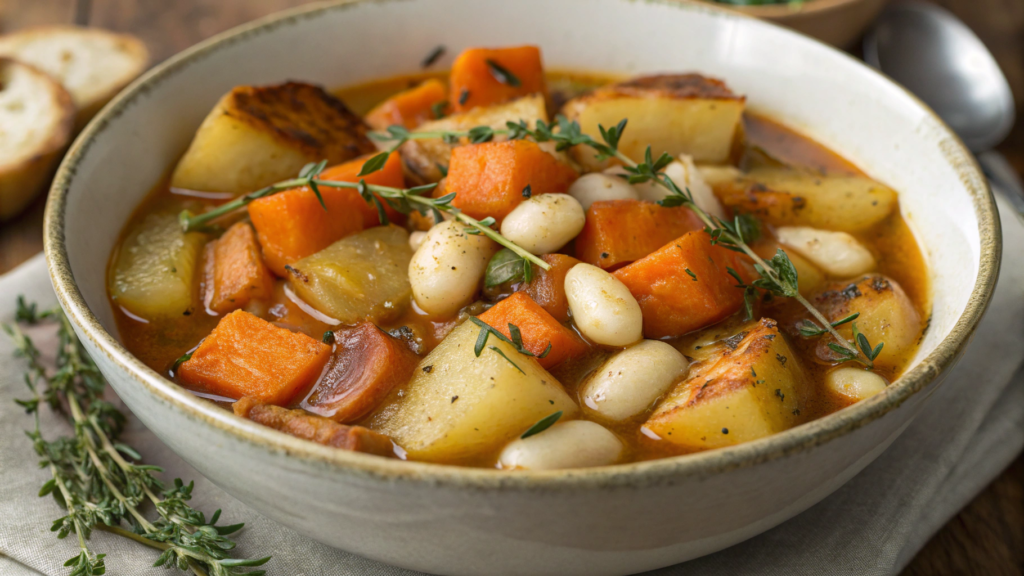
In Roasted Root Vegetable Stew with Garlic-Thyme Broth, the vegetables are not just boiled in a pot. They are roasted first until the edges turn golden. And that is the whole point of the dish.
Carrots, parsnips, potatoes, turnips, or rutabaga become deeper in flavor, a little sweet, with firm centers and browned edges. Then they go into a hot broth with garlic, thyme, and white beans — and you get a thick vegetable stew without meat, but with a very rich flavor.
What You’ll Need
For 4–5 servings:
- 3 medium carrots, cut into large pieces
- 2 parsnips, cut into large pieces
- 2 medium potatoes, cut into cubes
- 1 small turnip or rutabaga, cut into cubes, optional
- 1 large yellow onion, cut into wedges
- 1 head of garlic
- 2 tablespoons olive oil
- 1 teaspoon dried thyme or 1 tablespoon fresh thyme
- 1/2 teaspoon dried rosemary, optional
- 1/2 teaspoon salt for roasting
- 1/4 teaspoon black pepper
- 4 cups vegetable broth (960 ml)
- 1 can white beans, 15 oz, rinsed and drained (about 425 g)
- 1 tablespoon tomato paste
- 1 teaspoon Dijon mustard, optional
- 1 bay leaf
- 2 cups chopped kale or spinach (about 60–70 g)
- 1 tablespoon lemon juice or apple cider vinegar
- fresh parsley for serving
How to Cook
- Preheat the oven and prepare the vegetables. Preheat the oven to 425°F (220°C). Cut the carrots, parsnips, potatoes, turnip, or rutabaga into large pieces. Try to make them about the same size, otherwise some vegetables will already be browned while others stay firm.
Cut the onion into wedges. Slice the top off the head of garlic so the cloves are visible. The garlic will roast right in its skin, and then turn into a soft base for the broth. - Roast the root vegetables until the edges are golden. Spread the vegetables and onion on a large baking sheet. Drizzle with olive oil, then sprinkle with salt, pepper, thyme, and rosemary, if using. Place the head of garlic cut side up and lightly brush it with oil too.
Spread the vegetables in one layer. If they sit too close together, they will steam in their own moisture, and we need browned edges. Roast for 25–30 minutes, stirring once around the middle. - Make the garlic-thyme base. When the vegetables are ready, take the baking sheet out of the oven. Carefully squeeze the soft garlic cloves out of the skin into a small bowl and mash them with a fork. In a large pot, heat 1 teaspoon olive oil, add the tomato paste, and cook for 1 minute, stirring.
Then add the mashed roasted garlic, Dijon mustard if using, and a little broth. Stir well to make a fragrant base. - Add the broth and beans. Pour in the remaining vegetable broth, then add the bay leaf and white beans. Bring to a gentle simmer.
I like to lightly mash some of the beans right in the pot. Not all of them, about a quarter. This makes the broth a little thicker, but the stew does not turn into puree. This is especially nice if you do not want to add cream, flour, or starch. - Transfer the roasted vegetables to the pot. Add the roasted root vegetables and onion to the broth. Stir gently so the vegetables do not fall apart. Cook over low heat for 8–10 minutes, so the flavors come together.
Do not let the stew boil too hard. The vegetables are already cooked from the oven, so they do not need to “cook through.” They just need to soak up some of the broth. - Add the greens at the very end. Stir in the kale or spinach. Kale needs 3–4 minutes, and spinach needs 1–2 minutes. The greens should soften, but not disappear completely into the pot. If the broth seems too thick, add a little water or broth. If you want it thicker, mash a few more pieces of potato or beans right in the pot.
- Add acid and fresh herbs. Remove the pot from the heat and add the lemon juice or apple cider vinegar. Root vegetables are sweet, and roasted garlic is also soft and a little sweet, so the acid makes the flavor brighter.
This stew is filling enough on its own, but it goes really well with something crunchy or tangy, like toasted sourdough bread, a spoonful of Greek yogurt on top, or sauerkraut.
Tips From Personal Experience
- Do not cut the vegetables too small. Small pieces dry out quickly in the oven and then fall apart in the broth. For stew, larger pieces work better.
- If the vegetables stick to the baking sheet after roasting, do not ignore those browned spots. Add a little hot broth to the baking sheet, gently scrape everything up with a spatula, and pour it into the pot. There is a lot of flavor there, and it would be a shame to throw it away.
- If you do not have parsnips, add more carrots or potatoes. If you do not like turnips or rutabaga, just skip them. Here, you can adjust everything to your taste and your own judgment.
- White beans can be replaced with chickpeas or green lentils. Chickpeas will make the stew firmer, while lentils will make it softer and thicker. If you are using already cooked lentils, add them closer to the end so they do not fall apart.
In this dish, the oven does the main work: it gives the root vegetables color, sweetness, and a deeper flavor. After that, you just bring everything together in broth with garlic, beans, and greens. The result is a practical dinner from everyday ingredients, quick and tasty.
5. Parmesan Cauliflower Mash Bowl with Crispy Toppings
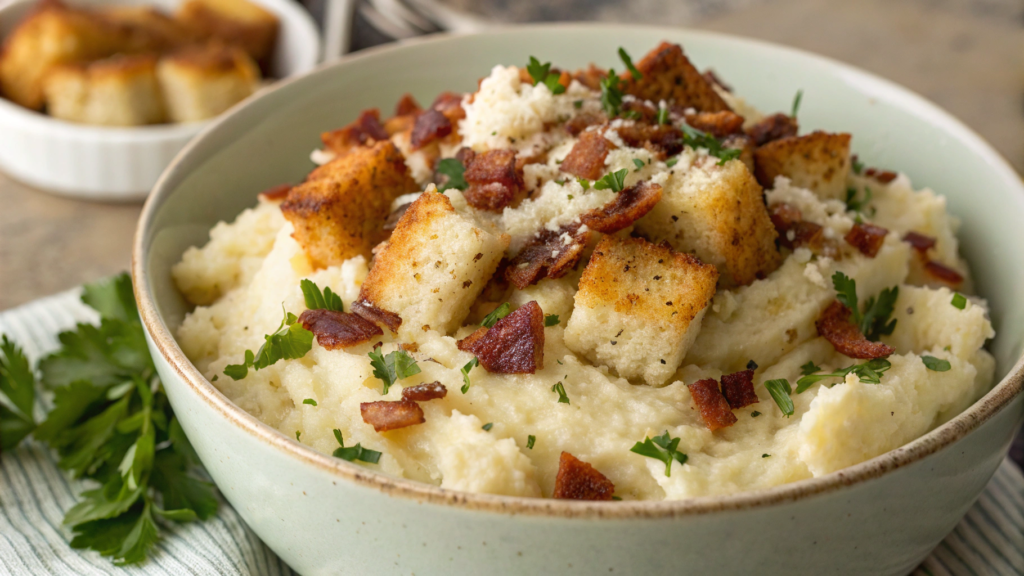
I love cauliflower, but only when it is treated right. If you just boil it, the taste is not great. But if you add garlic, Parmesan, a little oil, mash it well, and put something crispy on top — that is a completely different story. Lindy and I often make these bowls when we do not need a heavy side dish, but still want the meal to feel complete.
What You’ll Need
For 4 servings:
- 2 large heads of cauliflower, broken into florets (about 2 1/2–3 lb or 1.1–1.4 kg)
- 3 garlic cloves
- 1/2 cup grated Parmesan (about 50 g)
- 2 tablespoons butter or olive oil
- 1/4 cup plain Greek yogurt or milk (60 ml)
- 1/2 teaspoon salt, plus more later if needed
- 1/4 teaspoon black pepper
- 1/4 teaspoon garlic powder, optional
- 1 teaspoon lemon juice
For the protein part:
- 1 lb boneless, skinless chicken breast or thighs (about 450 g)
or 4 eggs
or 1 1/2 cups cooked chickpeas (about 250 g) - 1 tablespoon olive oil
- 1/2 teaspoon smoked paprika
- 1/2 teaspoon salt
- 1/4 teaspoon black pepper
Crispy toppings:
- 1/2 cup panko or whole wheat breadcrumbs (about 30 g)
- 1 tablespoon olive oil or butter
- 2 tablespoons pumpkin seeds or walnuts
- 2 tablespoons finely chopped parsley
- 1/4 teaspoon smoked paprika
- a pinch of salt
For serving:
- 1 cup chopped spinach, arugula, or kale (about 30 g)
- a little lemon juice
- extra Parmesan, if you want
- chili flakes, optional
A good immersion blender can help make the cauliflower mash, for example, KitchenAid Variable Speed Corded Hand Blender on Amazon.
How to Cook
- Cook the cauliflower. Break the cauliflower into florets and place them in a large pot. Add the garlic, cover with water, salt it, and bring to a boil. Cook for 10–12 minutes, until the cauliflower becomes very soft.
You do not need to keep it “al dente” here. For mash, cauliflower should be easy to crush with a fork. But you also should not overcook it into a watery mush. - Remove extra moisture. Drain the water from the pot with the cauliflower. Return the pot with the cauliflower to low heat for 1–2 minutes and gently stir without a lid, so the extra steam can escape. This way, the mash will turn out thicker and will not become watery.
- Make the mash. Add the Parmesan, butter or olive oil, Greek yogurt or milk, salt, pepper, and lemon juice. Blend with an immersion blender or in a food processor until you get the texture you want.
- Prepare the protein part. If you are using chicken, cut it into pieces, season with salt, pepper, and smoked paprika. Heat a skillet with olive oil and cook for 6–8 minutes, until the pieces become golden and fully cooked inside.
If you choose eggs, boil them hard or make eggs with a soft yolk. If you are using chickpeas, dry them well and quickly pan-fry them with paprika, salt, and a little oil until lightly crisp. - Make the crispy topping. In a small skillet, heat the oil, then add the panko, pumpkin seeds or nuts, smoked paprika, and a pinch of salt. Cook for 3–4 minutes, stirring often, until the crumbs turn golden.
- Prepare the greens. Drizzle the spinach, arugula, or thinly sliced kale with lemon juice and toss lightly. This is not a full salad, but a fresh layer for the bowl. It is there to give the dish balance: soft mash, warm protein, crunch, and a little freshness.
- Assemble the bowls. Divide the cauliflower mash between bowls. Add chicken, egg, or chickpeas on top. Place the greens on the side. Sprinkle with crispy crumbs, then add a little Parmesan and black pepper. For heat, add chili flakes. If the flavor feels too mild, add a couple more drops of lemon juice right into the bowl.
I think it is convenient to serve everything separately: mash, protein, greens, crumbs, and cheese. Then everyone builds their own portion according to their taste and preferences.
Small Tips
- It is better to add Parmesan while the cauliflower is hot. This way, it melts faster and blends into the mash more evenly.
- If you want a thicker mash, replace part of the cauliflower with one medium potato. The flavor will still be light, but the texture will be closer to classic mashed potatoes.
- Parmesan can be replaced with Pecorino for a saltier and brighter flavor. Just be more careful with the salt.
- For the crispy part, panko is not the only option. You can use crushed crackers, chopped nuts, roasted chickpeas, or toasted seeds. The main thing is to add something that will be different from the soft base.
This dish can be made in different ways: with chicken, egg, chickpeas, greens, or leftover roasted vegetables. I think this is very convenient, because it is not a strict recipe, but a base you can adjust to what you already have at home.
6. Healthy Shepherd’s Pie with Ground Turkey & Lentils
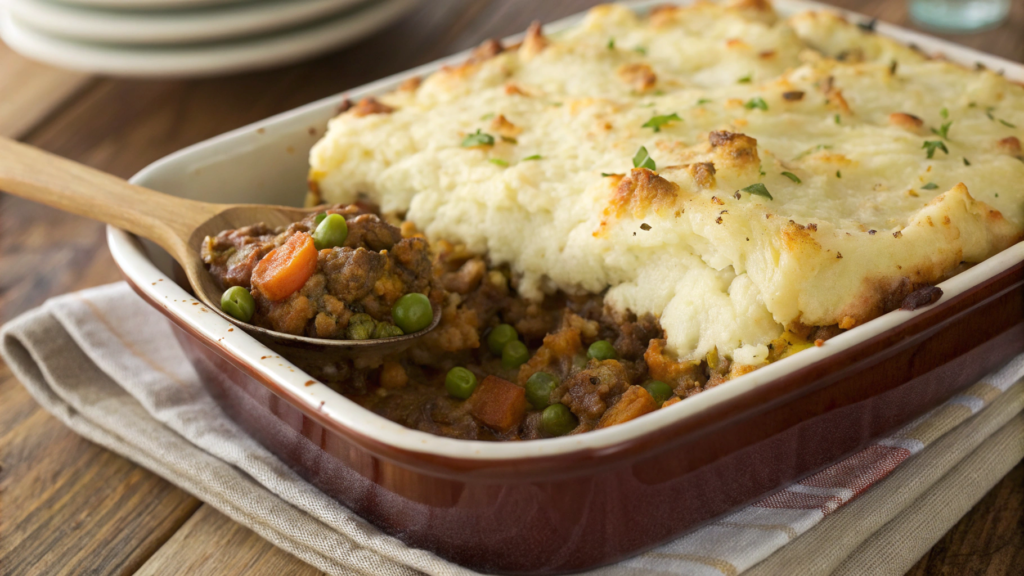
In the filling of our shepherd’s pie, unlike the classic version, there is ground turkey, lentils, vegetables, and a little broth, while the potato top turns out soft without a lot of butter and cream.
Lindy really loves bakes like this, and they often saved us on days when it was cold outside, there was a pile of house work, and I wanted to put dinner in the oven and not think about it every five minutes.
What You’ll Need
For 6 servings:
- 1 lb ground turkey (about 450 g)
- 1 cup cooked green or brown lentils (about 200 g)
- 2 lb potatoes, peeled and cut into large pieces (about 900 g)
- 1/3 cup milk or chicken broth for the mash (80 ml)
- 2 tablespoons butter or olive oil
- 1/4 cup plain Greek yogurt, optional (60 g)
- 1/4 cup grated Parmesan, optional (about 25 g)
- 1 tablespoon olive oil
- 1 small yellow onion, finely chopped
- 2 carrots, cut into small cubes
- 2 celery stalks, finely chopped
- 3 garlic cloves, minced
- 1 tablespoon tomato paste
- 1 cup chicken or vegetable broth (240 ml)
- 1 tablespoon Worcestershire sauce, optional
- 1 teaspoon dried thyme
- 1/2 teaspoon smoked paprika
- 1/2 teaspoon salt, plus more later if needed
- 1/4 teaspoon black pepper
- 1/2 cup frozen peas (about 70 g)
- 1/2 cup frozen corn, optional (about 80 g)
How to Cook
- Boil the potatoes for the top layer. Put the potatoes in a pot, cover with cold water, add salt, and bring to a boil. Cook for 15–18 minutes, until the pieces are soft and easy to pierce with a fork. Drain the water and return the potatoes to the hot pot for a minute. Extra steam will escape, and the mash will not turn watery.
- Make the mash. Mash the potatoes with milk or broth, butter, Greek yogurt if using, salt, and pepper. The mash should be soft, but firm enough to hold as the top layer. If you want a more golden top, stir in a little Parmesan or sprinkle it over the bake before it goes into the oven.
- Cook the vegetables for the filling. Heat a large skillet over medium heat and add the olive oil. Add the onion, carrots, and celery. Cook for 6–8 minutes, until the vegetables soften.
- Add the garlic, tomato paste, and spices. Add the garlic, thyme, smoked paprika, salt, and pepper. Stir and cook for 30–40 seconds. Then add the tomato paste and heat it for about 1 minute.
- Add the ground turkey. Add the ground turkey to the skillet and break it into small pieces with a spoon. Cook for 6–8 minutes, until the meat is no longer pink. Turkey can dry out easily, so do not cook it too long on its own. Once the meat has set, it is better to move on to the broth and lentils.
- Make the thick filling. Add the cooked lentils, broth, and Worcestershire sauce if using. Stir and cook uncovered for 5–7 minutes, until the liquid reduces a little and the filling becomes juicy, but not runny. If the filling looks dry, add a couple more spoonfuls of broth.
If it is too runny, let it simmer for a few more minutes. At the end, stir in the peas and corn. They do not need much time; they will finish cooking in the oven. - Transfer the filling to the baking dish. Preheat the oven to 400°F (200°C). Spoon the meat filling into a baking dish and spread it out evenly. Gently spread the potato mash on top. It is better to add it in small portions across the surface first, then connect everything with a spoon. This way, the filling will not mix with the top layer.
- Make the top a little textured. Run a fork over the mash to make small grooves. They will brown better than a perfectly smooth surface. If you are using Parmesan, sprinkle a little on top. You do not need much. We just want flavor and a light crust.
- Bake until the filling is hot and the top is golden. Bake for 20–25 minutes, until the edges start to bubble slightly and the top becomes firmer and golden in spots.
- Let the bake rest a little. Take the dish out of the oven and let it sit for 10 minutes. During this time, the filling will become firmer, and the portions will be easier to serve. If you cut it right away, the hot layer may run. It will not ruin the taste, but it will look less neat.
Serving
Shepherd’s pie already has meat, lentils, vegetables, and potatoes, so it does not need a heavy side dish. It is better to add something fresh, tangy, or green, like a simple green salad with lemon dressing, sauerkraut, cucumbers with apple cider vinegar, or braised cabbage.
Small Tips From Personal Experience
- The filling should be juicy, but not runny. If there is too much liquid, the potato layer will start to fall apart. And the other way around, if the filling is too dry, the dish will turn crumbly, less pleasant in texture, and the potato top will not save the situation.
- It is better to cook the lentils ahead of time or use ready canned lentils, rinsing them well before adding. This makes the recipe come together faster.
Now you can see that this version of shepherd’s pie stays filling, but does not get overloaded with a lot of butter, cream, or cheese. Turkey gives the base, lentils add thickness and help stretch the dish into more servings, and the vegetables make the filling taste better.
And honestly, it is just convenient: you make one baking dish and get dinner, plus leftovers for the next day. Excellent!
7. Cozy Spinach & Ricotta Stuffed Shells (Light Version)
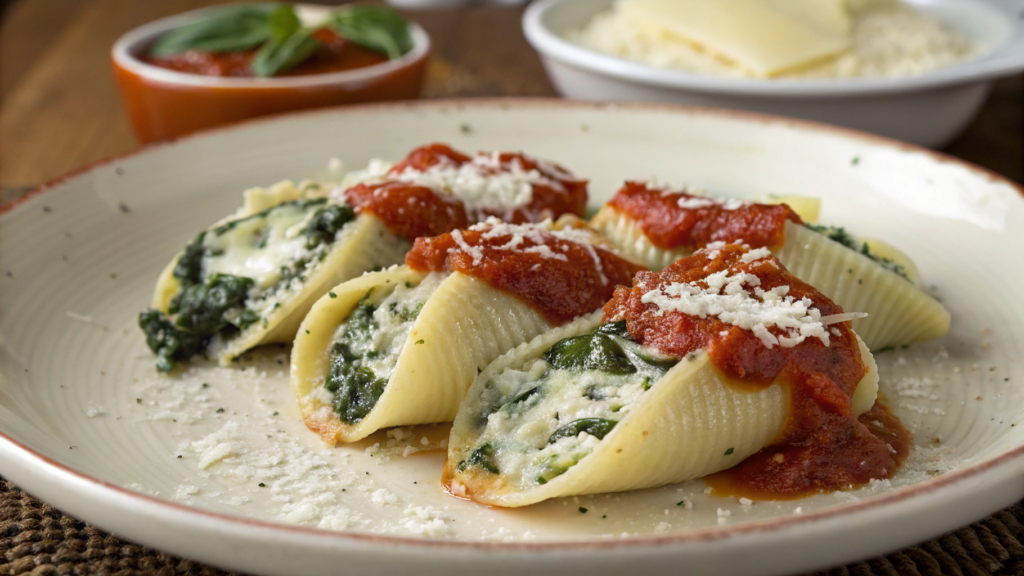
In spinach and ricotta stuffed shells, the filling is soft, with greens and ricotta, the sauce is a simple tomato sauce, and on top there is a little mozzarella and Parmesan, just for flavor.
Lindy and I make this dish pretty often. It looks nice and tastes really good: big shells, a spoonful of filling, sauce, oven, and that is it. Nothing else needed.
What You’ll Need
For 4–5 servings:
- 20–24 large pasta shells
- 15 oz ricotta (about 425 g)
- 2 cups fresh spinach, finely chopped (about 60 g)
or 10 oz frozen spinach, thawed and well squeezed (about 280 g) - 1 egg
- 1/2 cup shredded mozzarella (about 55 g)
- 1/4 cup grated Parmesan (about 25 g)
- 2 cups tomato sauce with no added sugar (480 ml)
- 2 garlic cloves, minced
- 1 teaspoon olive oil
- 1/2 teaspoon dried oregano
- 1/2 teaspoon dried basil
- 1/2 teaspoon salt, plus more later if needed
- 1/4 teaspoon black pepper
- a pinch of chili flakes, optional
- 1 tablespoon fresh parsley or basil for serving
If you often make pasta bakes, it is convenient to have a baking dish with high sides. For this recipe, Pyrex Deep 9×13-Inch Glass Baking Dish with Lid on Amazon works well. It is convenient because you can put the leftovers in the refrigerator without moving them to a container.
How to Cook
- Boil the shells until half-cooked. Bring a large pot of water to a boil, salt it well, and cook the shells for 1–2 minutes less than the package says. They will still bake in the sauce, so you do not need to cook them all the way through.
Drain the water and carefully spread the shells on a plate or baking sheet so they do not stick together. You can lightly drizzle them with olive oil, but only a little. - Prepare the spinach. If you are using fresh spinach, finely chop it. You can add it straight to the filling if the leaves are young and tender. If the spinach is larger, it is better to quickly warm it in a skillet for 1–2 minutes, so it wilts. If you are using frozen spinach, thaw it and squeeze it very well.
Extra water in the filling will make the shells watery, and the sauce will become too thin. - Make the filling. In a bowl, mix the ricotta, egg, spinach, half of the mozzarella, Parmesan, salt, pepper, oregano, and basil. Stir with a spoon until smooth. The filling should be thick and soft, not runny. If it seems too loose, add another spoonful of Parmesan. If it is too thick, add 1 tablespoon of tomato sauce or milk.
- Warm the tomato sauce with garlic. In a small skillet, heat the olive oil, add the garlic, and warm it for 30 seconds. Pour in the tomato sauce, add a pinch of salt, pepper, and chili flakes if using. Warm for 3–4 minutes. You can use ready-made sauce and leave it as it is, but garlic makes the flavor fresher.
- Prepare the baking dish. Preheat the oven to 375°F (190°C). Pour about 1 cup of tomato sauce onto the bottom of the dish and spread it with a spoon. This layer helps the shells not stick to the bottom and not dry out while baking.
- Fill the shells. Take one shell and place 1–2 tablespoons of filling inside, depending on the size of the pasta. Do not overfill it. The filling should be generous, but not falling out.
Place the shells in the dish with the open side up. Try to arrange them fairly close together so they support each other, but do not press them down. - Add the sauce and cheese on top. Spoon the remaining tomato sauce over the shells. You do not need to completely drown them in sauce. Let some of the filling stay visible on top. Sprinkle with the remaining mozzarella. You can add a little more Parmesan, but not too much. In the light version, it is important that the filling and spinach do not disappear under the top layer.
- Bake until the center is hot. Cover the dish with foil and bake for 20 minutes. Then remove the foil and bake for another 8–10 minutes, until the sauce starts to bubble slightly and the cheese on top melts. For a more golden top, turn on the broiler for 1–2 minutes at the end. Watch it closely, because cheese darkens quickly.
- Let the dish rest before serving. Take the dish out of the oven and let it sit for 5–7 minutes. During this time, the filling will become firmer, the sauce will settle a little, and the shells will be easier to move to plates. Sprinkle with parsley or basil before serving.
Fresh herbs fit really well here. These shells are already pretty filling, but they go well with a green salad with lemon dressing, cucumber and radish salad, or roasted broccoli.
Small Details
- Be sure to remove extra moisture from the spinach, especially if it is frozen. I squeeze it by hand through a clean kitchen towel or cheesecloth. Yes, it does not look very elegant. But the filling holds together the way it should.
- Do not overcook the shells. Soft pasta tears easily when you fill it, and after the oven it can become too loose. It is better if the shells stay a little firm after boiling.
- If you want to add more vegetables, you can stir finely chopped mushrooms, zucchini, or bell pepper into the sauce. Just cook them first so the extra liquid can evaporate.
- Ricotta can be replaced with a mix of cottage cheese and a small amount of Greek yogurt if you do not have ricotta. Just do not use yogurt that is too runny, or the filling will spread.
You can fill the shells ahead of time, put them in the refrigerator, and bake them right before dinner. Ricotta makes the filling soft, spinach adds greens, and tomato sauce keeps the pasta from drying out in the oven. The dish turns out hot and filling, but without a heavy cream sauce and without last-minute stress.
8. One-Pot Chicken & Barley Soup with Hidden Greens
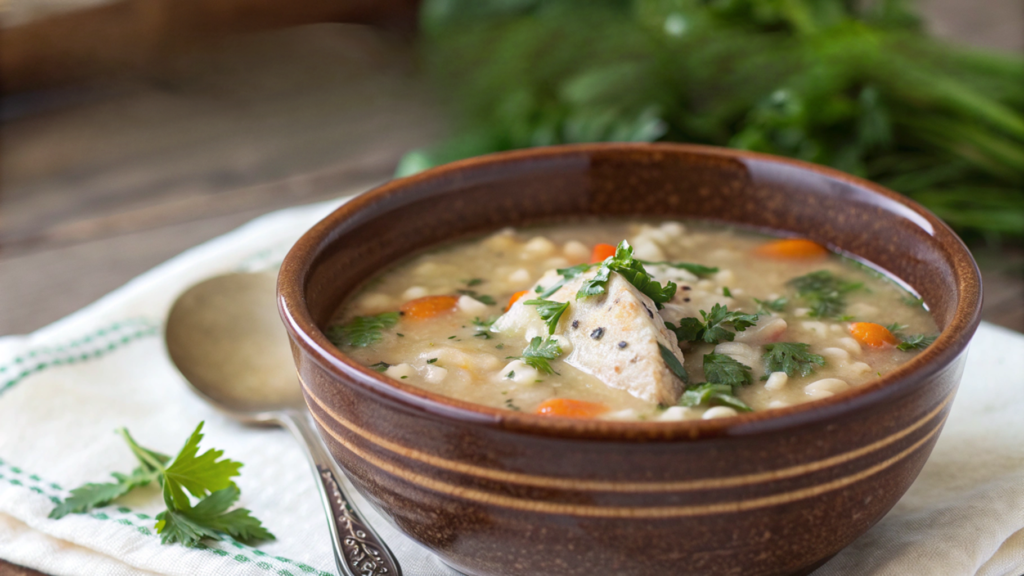
This thick winter soup can easily work as a full dinner. It has chicken, vegetables, barley, broth, and greens that simply blend into the soup, adding color and flavor. Barley makes the soup more filling, but it does not turn it into a heavy porridge if you do not overcook it.
You can hide the greens in the soup in two ways: finely chop them and add them at the end, or blend part of the greens with a little broth and stir the mixture back in. The second option works well for people who look suspiciously at big green leaves in soup.
What You’ll Need
For 5–6 servings:
- 1 1/2 lb boneless, skinless chicken thighs or chicken breast (about 680 g)
- 3/4 cup barley (about 150 g)
- 1 tablespoon olive oil
- 1 large yellow onion, finely chopped
- 3 carrots, diced
- 2 celery stalks, diced
- 4 garlic cloves, minced
- 7 cups chicken broth (about 1.7 l)
- 1 bay leaf
- 1 teaspoon dried thyme
- 1/2 teaspoon dried rosemary, optional
- 1/2 teaspoon salt, plus more later if needed
- 1/4 teaspoon black pepper
- 3 cups spinach, kale, or chard, finely chopped (about 90 g)
- 1 tablespoon lemon juice
- 2 tablespoons fresh parsley
- 1/4 cup grated Parmesan for serving, optional (about 25 g)
For a soup like this, a large pot with a thick bottom is useful. It holds heat more evenly, and the vegetables do not burn in patches at the beginning. This kind of cookware is heavy, but it is very useful for winter cooking.
How to Cook
- Rinse the barley. Rinse the barley under cold water. If you have time, soak it for a few hours or overnight — this will help it cook faster. If the package says 40–50 minutes, you can add the barley straight to the soup.
If your barley takes 1.5–2 hours to cook, it is better to boil it separately until almost done and add it to the soup closer to the end, for the last 15–20 minutes. - Brown the chicken. Cut the chicken into large pieces, then season with salt and pepper. Heat the pot over medium heat, add the olive oil, and place the chicken in one layer. Sear for 3–4 minutes on each side, until browned edges appear.
The chicken does not need to be fully cooked yet. Transfer it to a plate. If the chicken leaves browned bits on the bottom of the pot, that is great — they will go into the broth later. - Make the vegetable base. In the same pot, add the onion, carrots, and celery. Cook for 6–7 minutes, stirring, until the vegetables soften.
- Add the garlic and herbs. Add the garlic, thyme, rosemary if using, and the bay leaf. Cook for about 30 seconds, just until the garlic becomes fragrant.
- Pour in the broth and return the chicken. Pour in the chicken broth and stir well, scraping up everything that browned on the bottom of the pot after the chicken and vegetables. Return the chicken to the pot. Bring the soup to a boil, then reduce the heat to low.
- Cook the soup until ready. If you are using barley that can go straight into the soup, cook everything together until the grain becomes soft. If the barley was boiled separately until almost done, add it closer to the end and cook it with the soup for another 15–20 minutes.
Watch the texture: the barley should become soft, but not turn into mush, and the chicken should be fully cooked and easy to pull apart with a fork. - Shred the chicken. When the chicken is fully cooked, take it out of the soup and shred it with forks. Return it to the pot.
- Add the greens so they do not take over the soup. If you want to simply add the greens, stir in the finely chopped spinach, kale, or chard at the end and cook for 2–4 minutes, until the leaves soften. Or take 1–2 cups of hot broth from the pot, add some of the greens, and blend until smoother.
Stir the mixture back into the soup. The color will get a little deeper, the taste will be fresher, but there will be almost no big leaves in the bowl. - Add lemon juice and parsley before serving. Remove the soup from the heat, add the lemon juice and parsley. Taste and add more salt if needed.
You can serve this soup with toasted sourdough bread or whole grain crackers. If the soup becomes too thick the next day, that is normal. Barley keeps absorbing broth even after cooking. Just add a little water or broth when reheating, and taste for salt one more time.
Tips From Personal Experience
- It is better not to overcook barley until it becomes a completely soft mush. In a good soup, it should be tender, but still have a little texture. This makes the dish feel more filling and keeps it from turning into one thick mass.
- If you are making the soup ahead of time, you can add greens only to the part you are going to eat now. Keep the rest without greens and stir them in when reheating. This keeps the flavor fresher and the color nicer.
- If you do not have barley, you can use farro, brown rice, or short pasta. Just remember that the cooking time will be different. Farro usually behaves a lot like barley, rice can make the soup softer, and pasta is better added closer to the end.
This soup is easy to adjust to the ingredients you already have at home. Barley can be replaced with another grain, greens can be added at the very end, and you can use whatever chicken you have on hand: thighs, breast, or already cooked meat. The next day, the soup will become thicker, so when reheating, just add a little broth or water and taste for salt again.
9. Sweet Potato & Black Bean Chili (5-Ingredient Magic)
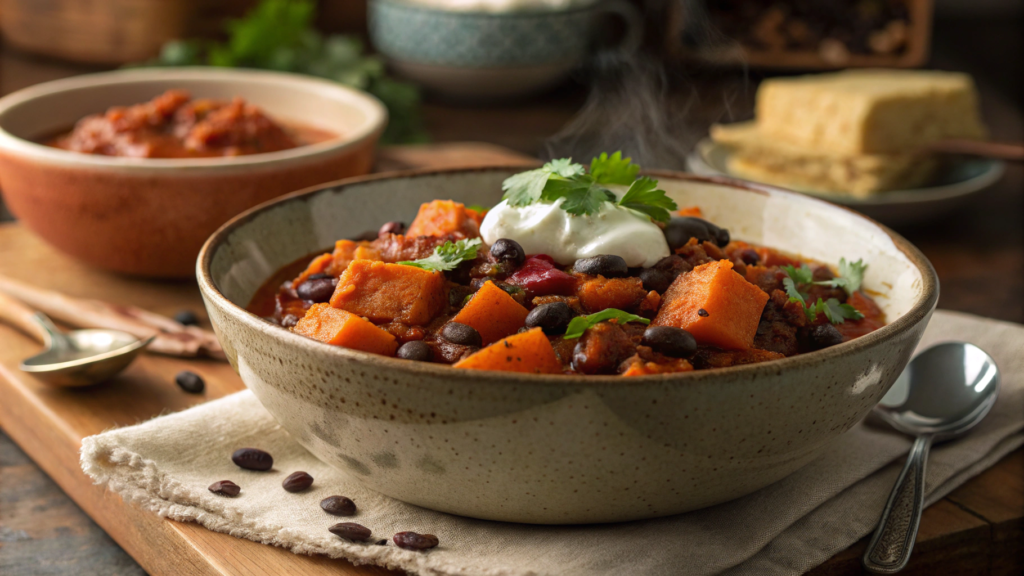
Sweet Potato & Black Bean Chili is a good recipe for the cold season. You do not need to marinate anything ahead of time, soak anything, or look for twenty ingredients. You look into the pantry, find a can of beans, a can of tomatoes, a couple of sweet potatoes, and if you also have chili powder or smoked paprika at home — that’s it, dinner is almost ready.
There are only 5 main ingredients here, but I will add a few optional little things for flavor. The recipe still has every right to exist without them, but with them — it is definitely tastier.
What You’ll Need
For 4–5 servings:
- 2 medium sweet potatoes, peeled and cut into cubes (about 1 1/2 lb or 680 g)
- 2 cans black beans, 15 oz each, rinsed and drained (about 425 g each)
- 1 can crushed tomatoes, 28 oz (about 800 g)
- 1 large yellow onion, finely chopped
- 2 tablespoons chili powder
- 1 tablespoon olive oil
- 3 garlic cloves, minced, optional
- 1 teaspoon smoked paprika, optional
- 1 teaspoon ground cumin, optional
- 1/2 teaspoon salt, plus more later if needed
- 1/4 teaspoon black pepper
- 1 1/2 cups vegetable broth or water (360 ml)
- 1 tablespoon lime or lemon juice
- fresh cilantro or parsley for serving, optional
For chili like this, a deep pot with a thick bottom is useful, so the onion does not burn and the sweet potato can soften calmly in the tomato base. You can look at Lodge 6 Quart Enameled Cast Iron Dutch Oven on Amazon.
How to Cook
- Cut the sweet potatoes into even cubes. Peel the sweet potatoes and cut them into cubes about 1/2 inch (about 1.5 cm). Do not make the pieces too large, otherwise the beans will already be ready while the sweet potato is still firm inside.
- Cook the onion for the base. Heat the pot over medium heat, add the olive oil and onion. Cook for 5–6 minutes, until the onion becomes soft and a little sweet in flavor.
- Add the garlic and spices. Add the garlic, if using, chili powder, smoked paprika, cumin, salt, and pepper. Cook for 30–40 seconds, stirring constantly.
- Add the sweet potatoes, tomatoes, and broth. Add the sweet potatoes, crushed tomatoes, and broth or water. Stir well, scraping up anything that may have stuck to the bottom after the onion and spices. Bring to a boil, then reduce the heat.
- Cook until the sweet potato is soft. Cover the pot only partially and cook for 18–22 minutes, until the sweet potato becomes soft.
- Add the black beans. Stir in the rinsed black beans and cook for another 8–10 minutes, so they warm through and have time to absorb the flavor of the tomato base. You can mash some of the beans right in the pot.
This will make the chili thicker without flour, cream, or long simmering. I usually mash about 1/2 cup of beans, not more, so the texture stays lively. - Adjust the thickness. If you want a thicker chili, cook it uncovered for another 5 minutes. If you want more broth, add a little water or vegetable broth. Personally, I usually make it thick, because the next day it gets even better.
- Add lime or lemon juice. Remove the pot from the heat and add the lime or lemon juice. Taste and add more salt if needed.
Serving
You can eat this chili straight from a bowl, but the toppings are really needed here. They add freshness, crunch, acidity, or creamy softness — depending on what the bowl is missing.
You can serve it with Greek yogurt instead of sour cream, sliced avocado, green onion, cilantro or parsley, thinly sliced cabbage, corn chips, or brown rice if you want a more filling dinner.
Tips
- It is better to add the sweet potatoes before the beans, because they need more time. If you add everything at once, the beans may become too soft while the sweet potato finishes cooking.
- If the chili turns out too spicy, add a little Greek yogurt when serving or stir in more tomatoes. If it is too sweet, add more lime, salt, and smoked paprika.
- Black beans can be replaced with red beans or pinto beans. The flavor will be a little different, but the idea of the dish will stay the same.
- If the sweet potato is too sweet for your taste, replace part of it with regular potato. I like a one-to-one mix when I want a more neutral flavor.
I love this recipe because you only need basic pantry ingredients to make it: beans, tomatoes, sweet potatoes, and spices. You do not need to cook a base for a long time, make a separate sauce, or come up with a side dish. Everything cooks in one pot, the sweet potato makes the chili thicker and softer, and the beans add filling power. The next day, the dish becomes even richer and tastier, so you can easily save the leftovers for lunch.
10. High-Protein Creamy Polenta with Sautéed Mushrooms
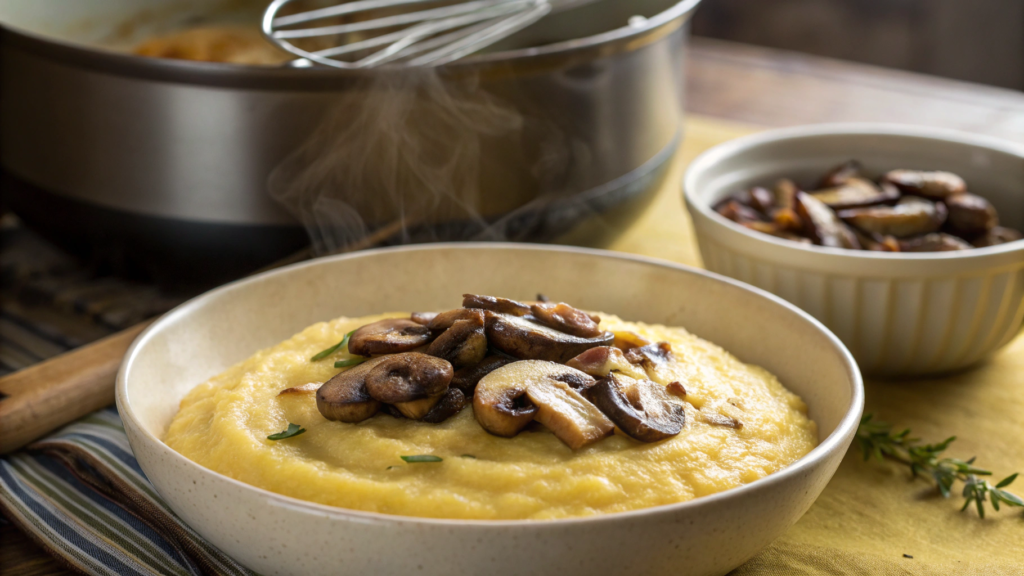
Creamy polenta with mushrooms is pretty nourishing. A pot, a whisk — and in just a few minutes you get a warm base that can take almost anything on top. Mushrooms, greens, egg, leftover chicken, beans, fried onion.
What You’ll Need
For 4 servings:
- 1 cup cornmeal for polenta (about 160 g)
- 3 cups vegetable or chicken broth (720 ml)
- 1 cup milk (240 ml)
- 1/2 teaspoon salt, plus more later if needed
- 1/4 teaspoon black pepper
- 1/2 cup plain Greek yogurt (about 120 g)
- 1/3 cup grated Parmesan (about 35 g)
- 1 tablespoon butter or olive oil
Mushrooms:
- 1 lb cremini mushrooms, button mushrooms, or mixed mushrooms, sliced (about 450 g)
- 1 tablespoon olive oil
- 1 tablespoon butter, optional
- 1 small yellow onion, thinly sliced
- 3 garlic cloves, minced
- 1 teaspoon fresh thyme or 1/2 teaspoon dried thyme
- 1/2 teaspoon salt
- 1/4 teaspoon black pepper
- 1 teaspoon balsamic vinegar or lemon juice
- 2 tablespoons parsley for serving
For extra protein, choose one:
- 4 eggs
- or 1 1/2 cups cooked white beans (about 250 g)
- or 1 lb chicken breast or thighs, already cooked and sliced (about 450 g)
- or 1/2 cup cottage cheese, blended until smooth, to stir into the polenta (about 120 g)
How to Cook
- Prepare the mushrooms. Wipe the mushrooms with a damp towel or quickly rinse them and dry them well. Slice them. Wet mushrooms will take a long time to sauté, and we need browned edges and a clear mushroom flavor.
- Sauté the mushrooms in a wide skillet. Heat the skillet over medium heat, then add the olive oil and butter if using. Spread the mushrooms in one layer as much as possible. If there are too many mushrooms, it is better to cook them in two batches. Sauté for 7–9 minutes, without stirring every second.
First the mushrooms will release moisture, then it will evaporate, and only after that normal browning will begin. Add salt closer to the middle of cooking, when some of the moisture has already gone. - Add the onion, garlic, and thyme. When the mushrooms are more browned, add the onion and cook for another 4–5 minutes, until it softens. Then add the garlic, thyme, black pepper, and another pinch of salt if needed. Cook for about 30 seconds, just until fragrant. At the end, add the balsamic vinegar or lemon juice.
- Start cooking the polenta. In a pot, bring the broth, milk, and salt to a gentle simmer. Reduce the heat to medium-low. Slowly pour in the cornmeal in a thin stream, whisking constantly. Do not add it all at once. Polenta quickly forms lumps if you give it a chance. And it will, if we get too confident.
- Cook until the texture is soft. Cook the polenta for 15–20 minutes, stirring often. The time depends on the grind of the cornmeal. Quick polenta will cook faster, while regular polenta needs more time. If the polenta becomes too thick before the grains are soft, add a little hot broth or milk. Good polenta should be creamy and loose, not standing like a solid block in the pot.
- Add the cheese and protein part. Remove the pot from the heat. Stir in the Parmesan, Greek yogurt, and butter. If you want to add cottage cheese for more protein, use cottage cheese blended until smooth and stir it in a little at a time. Do not boil the polenta after adding yogurt or cottage cheese. This keeps the flavor softer and the texture from turning grainy.
- Prepare the extra protein, if using. If serving with eggs, make soft-yolk eggs, poached eggs, or regular fried eggs. If using white beans, warm them with the mushrooms for the last 2–3 minutes. If using cooked chicken, add it to the mushrooms and warm it until hot.
- Assemble the bowls. Divide the hot polenta between bowls. Add the mushrooms with onion and thyme on top. Add egg, beans, or chicken if using. Sprinkle with parsley, black pepper, and a little Parmesan. If the polenta has been sitting and became thick, stir in a little hot broth before serving. It thickens quickly, and that is normal.
If you are cooking for a family where everyone has their own preferences, you can serve the polenta separately, the mushrooms separately, and the protein options separately. One person takes egg, another takes chicken, another takes beans. And nobody stands over the plate looking like they were given the wrong dinner. I promise, this is the most peaceful way to serve it.
Small Tips
- Polenta thickens very quickly, especially as it cools. Do not worry if it becomes thicker after ten minutes. Just add a little hot broth or milk and stir.
- If you do not have milk, you can cook the polenta only with broth. It will be less soft, but still tasty. At the end, you can add a little more yogurt or Parmesan.
- You can use any mushrooms you have. Regular button mushrooms will work too, but if you add even a little shiitake or portobello, the flavor will become deeper.
Polenta cooks quickly, and the protein can be chosen depending on the situation: egg, beans, chicken, or cottage cheese stirred into the base. You get a filling dinner from simple ingredients that does not require a lot of dishes and easily works with leftovers in the refrigerator.
Reliable Winter Dinner Options
I love recipes that cook in one skillet or one pot. In the evening, I really do not want to wash a pile of dishes in the kitchen or come up with a complicated side dish. And if there is a little more time, you can make a bake, because it gives you several portions at once and often tastes even better the next day.
It is good to have a few reliable options ready: soup for a couple of days, a bake for tomorrow, a quick weekday dinner, something with mushrooms, and something with beans.
What dish do you cook most often at home on winter evenings? Write in the comments — I am always looking for new ideas for cool evenings, especially without a mountain of dirty dishes.