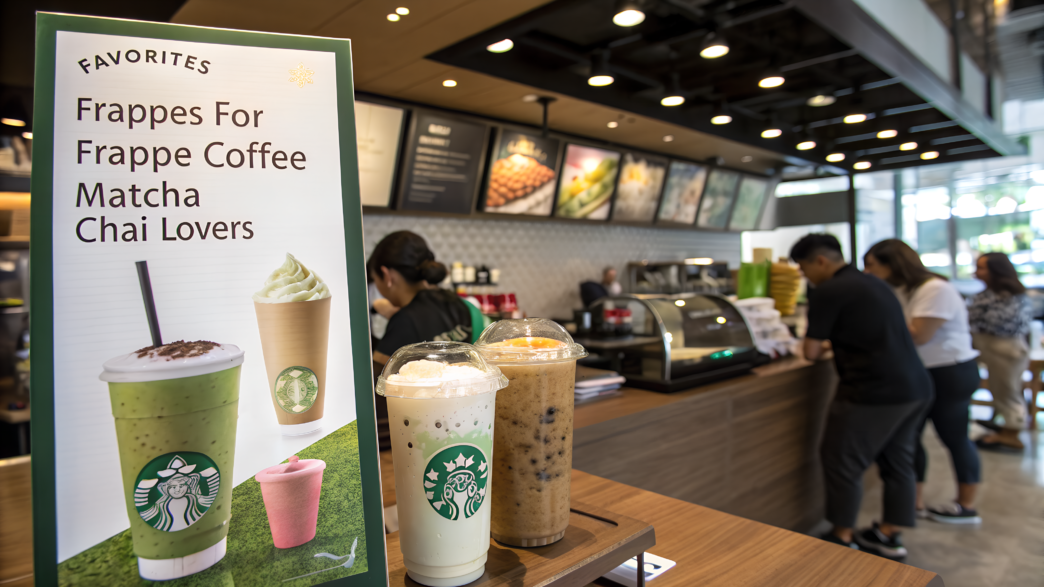
The Starbucks menu has drinks for completely different tastes and moods. Some are thick and creamy, others keep a strong coffee base, while a few are built around tea, spices, or fruit.
Many familiar combinations can be made with simple ingredients, without premade coffee mixes or a whole collection of syrups. You can chill the coffee ahead of time, blend berries into a purée, and create chocolate or spiced flavors with cocoa, vanilla, and whole spices.
These 10 drinks inspired by popular Starbucks flavors and formats each have a small twist that makes the recipe more interesting without making it harder to prepare. Try them and enjoy!
1. Caramel Frappé With Sea Salt and Brown Butter Notes
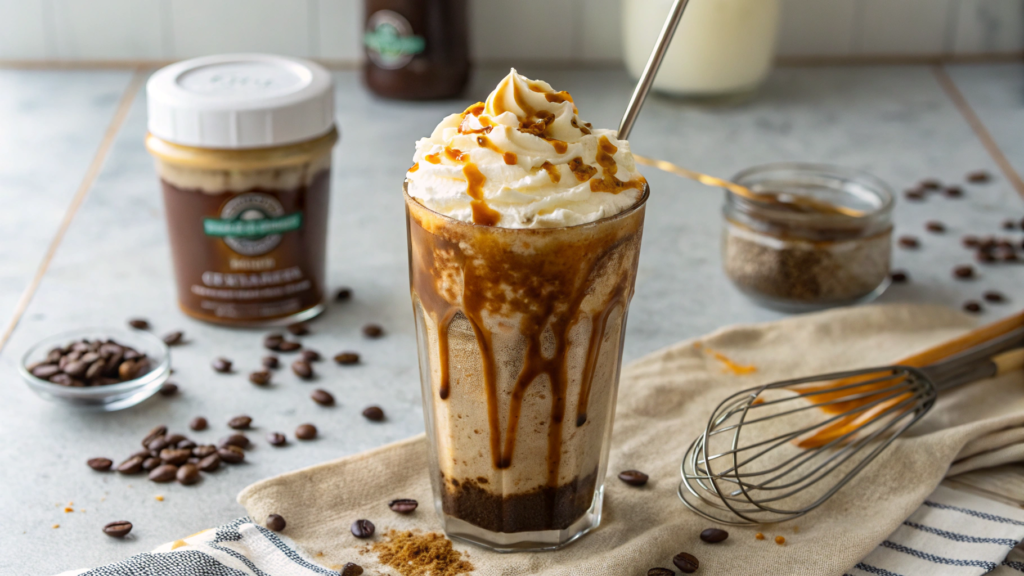
You can make a sea salt caramel frappé at home without using a premade coffee mix. It is similar to the caramel drinks many people stop by Starbucks for, but here the sweet caramel is paired with strong chilled coffee, a few flakes of salt, and a small amount of browned butter. The butter adds a light nutty note without making the frappé greasy.
We often have some brown butter left in the kitchen after baking cookies or a loaf cake, and sometimes I brown just one teaspoon specifically for coffee. It is very easy to do, but it gives the caramel a much richer flavor.
What You’ll Need
- 1 cup strong chilled coffee (240 ml);
- 1½ cups ice cubes;
- ½ cup whole milk (120 ml);
- 3 tablespoons caramel sauce;
- 1 teaspoon butter;
- 1–2 teaspoons brown sugar;
- ¼ teaspoon vanilla extract;
- a few flakes of sea salt;
- whipped cream, optional.
If you have some coffee left in the refrigerator from the day before, it will work perfectly. I often pour leftover coffee into ice cube trays. Coffee ice cubes do not water down the frappé, so the flavor stays rich even after the drink has been sitting for a little while.
How to Make the Caramel Frappé
- Brown the butter. Place 1 teaspoon of butter in a small saucepan and heat it over low heat. It will melt first and then begin to foam. Once small brown bits appear on the bottom and the butter starts to smell like toasted nuts, remove the saucepan from the heat. Another 30 seconds could turn that pleasant flavor bitter.
- Prepare the caramel mixture. Add 2 tablespoons of caramel sauce to the warm saucepan and mix well. Do not pour the butter directly into cold coffee because it will collect on the surface in small droplets. The caramel sauce helps distribute it evenly throughout the drink.
- Add everything to the blender. Place the ice in the blender, then pour in the chilled coffee and milk. Add the caramel mixture, vanilla, and 1 teaspoon of brown sugar.
- Blend until thick. About 30–40 seconds is usually enough. There should be no large pieces of ice left. If the frappé is too thin, add a few more ice cubes. If the blender blades are barely moving, pour in 1–2 tablespoons of milk.
- Check the sweetness. Caramel sauces vary. Some are already so sweet that no extra sugar is needed. I start with one teaspoon, taste the drink, and only then decide whether to add more.
Sea Salt
Do not add the salt to the blender with the other ingredients. Its flavor is less noticeable at first in an icy drink, so it is easy to add too much.
Start with just a few thin flakes. They slightly reduce the sweetness of the caramel and make the coffee flavor easier to notice. After a couple of sips, you will know whether the drink needs more salt.
Serving. Pour the frappé into a tall glass, add whipped cream on top, and drizzle it with the remaining tablespoon of caramel sauce. Finish with a few flakes of sea salt. This keeps them noticeable instead of letting them disappear into the drink.
The frappé is especially good right after blending, while the ice is still finely crushed and the thick foam stays on top. If the drink has started to separate, simply blend it again for a few seconds.
2. Chocolate Frappé With Coffee Ice Cubes
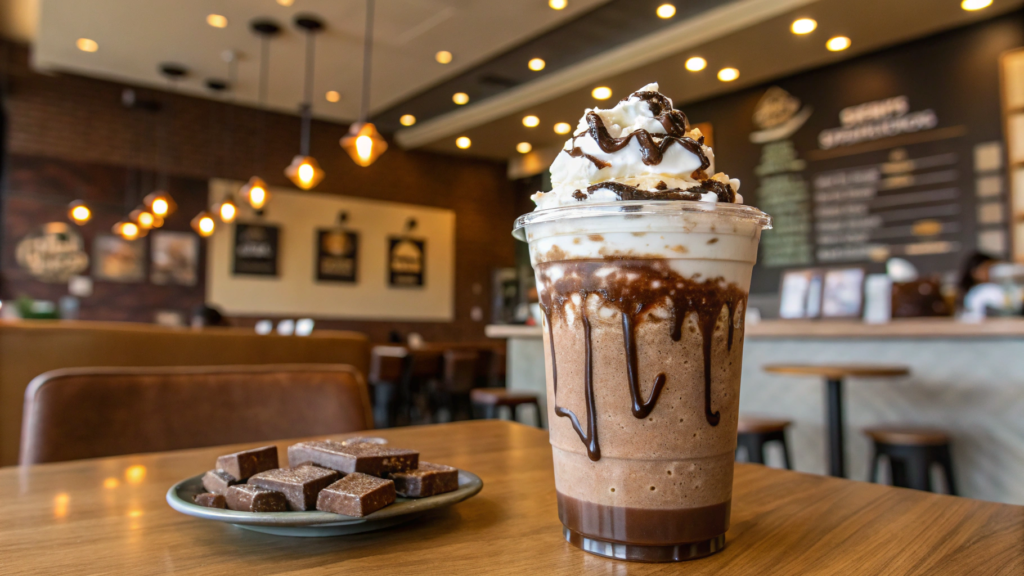
Chocolate frappés have long been among the most recognizable drinks on the Starbucks menu. Frozen espresso cubes help preserve a rich coffee flavor even after the ice begins to melt. Cocoa and chocolate sauce add deeper chocolate flavor without overpowering the coffee. The result is a sweet, creamy frappé with a coffee base that still comes through clearly.
When there are a few sips of coffee left in the coffee pot, I do not pour them out. I pour the leftovers into a Silicone Mini Ice Cube Tray for the Freezer and place it in the freezer. Lindy used to laugh at my collection of frozen leftovers, but now she happily uses them whenever she wants an iced coffee.
Prepare the Coffee Cubes First
Brew 2 shots of espresso or make ½ cup of very strong coffee (120 ml). Let it cool slightly, pour it into an ice cube tray, and freeze it for at least 4 hours. It is more convenient to do this in the evening so everything is ready in the morning.
What You’ll Need
- 8–10 frozen espresso cubes;
- ½ cup cold milk (120 ml);
- ¼ cup chilled strong coffee (60 ml);
- 2 tablespoons chocolate sauce;
- 1 tablespoon unsweetened cocoa powder;
- 1–2 tablespoons sugar;
- ¼ teaspoon vanilla extract;
- ½ cup regular ice;
- whipped cream, optional;
- a little grated chocolate, optional.
I use unsweetened cocoa powder because you can always add more sweetness later. Hot chocolate mixes usually already contain sugar and sometimes powdered milk and flavorings. When you use one of those mixes, the frappé can easily become too sweet, and the coffee flavor becomes less noticeable.
How to Make the Chocolate Frappé
- Mix the cocoa with the coffee. Pour ¼ cup of chilled coffee into a small cup, add the cocoa powder, and stir well. If you add dry cocoa directly to cold milk, some of the powder may stick to the sides of the blender or form small lumps.
- Add the ingredients to the blender. Add the coffee cubes and regular ice. Pour in the milk, the coffee mixed with cocoa, the chocolate sauce, and the vanilla. Start with 1 tablespoon of sugar.
- Blend until smooth. This usually takes 30–45 seconds. Coffee cubes are harder than regular ice, so you may need to stop the blender and gently shake it.
- Check the thickness and sweetness. If the drink is too thick, add a little milk. For a thicker frappé, add a couple more coffee cubes. Add the second tablespoon of sugar only after tasting the frappé.
Chocolate sauce adds sweetness and makes the frappé slightly thicker, while unsweetened cocoa powder strengthens the chocolate flavor. A small pinch of salt softens the bitterness of the cocoa and helps bring out the chocolate. Just a few grains are enough, so the salt will not be noticeable in the finished drink.
Sometimes I add a tiny pinch of salt to the blender, but not to make the drink taste salty. It slightly softens the bitterness of the cocoa and helps the chocolate come through more clearly. You only need a couple of grains.
Serving. Pour the chocolate frappé into glasses right after blending, while it is still thick and cold. You can add a small swirl of whipped cream on top, drizzle it with a little chocolate sauce, and finish with some grated dark chocolate.
The coffee ice cubes continue to melt slowly inside the drink, so the flavor does not become weaker after ten minutes. Instead, the coffee gradually moves to the front. Finally, the ice is not ruining anything here.
3. Vanilla Bean Frappé With Toasted Sugar Shortcut
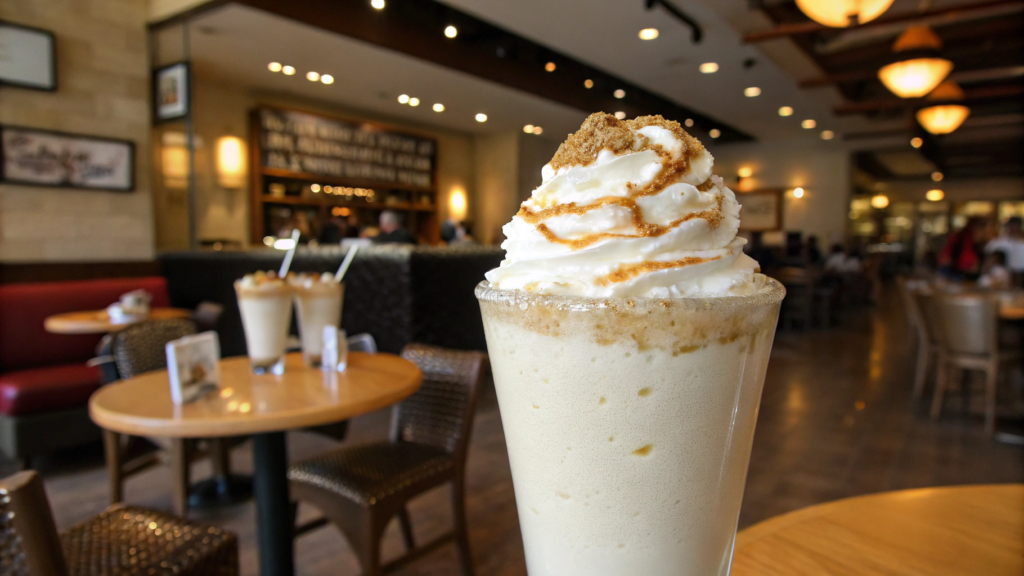
Vanilla frappé is one of those soft, creamy drinks that is easy to imagine among the favorites at Starbucks. But there is no coffee, chocolate, or caramel sauce here to hide a weak flavor. That is why good vanilla, a thick base, and sugar that does more than just add sweetness matter so much.
Regular white sugar can be lightly toasted in a dry skillet. It turns beige and develops a mild caramel note. In my opinion, this small step makes a simple vanilla drink much more expressive.
What You’ll Need
- 1 cup whole milk (240 ml);
- 1½ cups ice cubes;
- 3 tablespoons heavy cream;
- 2 tablespoons white sugar;
- 1 teaspoon vanilla bean paste, such as Nielsen-Massey Madagascar Bourbon Pure Vanilla Bean Paste;
- ¼ teaspoon vanilla extract;
- a small pinch of salt;
- whipped cream, optional.
Vanilla bean paste usually contains crushed vanilla seeds and comes through more clearly in a cold milk base than extract alone.
A Quick Way to Toast Sugar
Pour 2 tablespoons of sugar into a small dry skillet and place it over low heat. Leave the sugar alone for the first minute. Then begin stirring it slowly with a spatula so the crystals heat evenly.
After about 3–5 minutes, the sugar will turn light beige and begin to smell slightly caramelized. It should not melt or turn into a dark syrup. We need dry toasted sugar that still pours easily.
Transfer it from the skillet to a plate right away. If you leave the sugar in the hot pan, it will continue to darken even after the heat is turned off. A light beige color is enough.
Making the Vanilla Frappé
- Dissolve the toasted sugar. Transfer it to a small cup, add 2 tablespoons of warm milk, and stir. This keeps any crunchy sugar crystals from remaining in the finished drink.
- Add everything to the blender. Add the ice, the remaining milk, heavy cream, sugar mixture, vanilla bean paste, vanilla extract, and a small pinch of salt.
- Blend for about 30 seconds. The frappé should become thick but still soft enough to drink through a wide straw.
- Check the thickness. If the drink is too thin, add a few more ice cubes and blend again. If it is too thick and the blender is struggling to mix it, pour in 1–2 tablespoons of milk.
There is only a small amount of cream here, but it makes a noticeable difference in the thickness. I add it directly to the blender with the milk. This makes the frappé thicker and smoother, and the ice does not turn it into a watered-down milk drink after just a few minutes.
Serving. Pour the vanilla frappé into a chilled glass, leaving a little room at the top. You can leave it undecorated because the dark vanilla specks already stand out nicely against the pale drink.
You can also add a little whipped cream and sprinkle it with a pinch of toasted sugar. It adds a little more caramel flavor and complements the vanilla nicely.
We usually divide this drink between two small glasses. A large serving looks tempting, but vanilla frappé is quite filling because of the milk and cream. Although Lindy often takes my glass too. No guarantees there.
4. Classic Iced Coffee With Orange Peel and Cinnamon

Classic iced coffee remains one of the simplest and most familiar drinks on the Starbucks menu. It does not require a blender or much preparation. What matters more is chilling the coffee well, using only a little cinnamon, and preparing the peel correctly. We want a fresh citrus aroma without pieces floating in the glass or adding unnecessary bitterness.
What You’ll Need
- 1 cup strong chilled coffee (240 ml);
- ½ cup ice cubes;
- 2–4 tablespoons milk or cream;
- 1–2 teaspoons brown sugar or maple syrup;
- 2 wide strips of orange peel without the white pith;
- ⅛ teaspoon ground cinnamon;
- 1 small cinnamon stick, optional.
For this drink, it is better to use strong coffee made with medium- or dark-roast beans. Weak coffee quickly loses its flavor after you add ice and milk. Leftover coffee from the pot will also work, as long as it was refrigerated in time and stored in a sealed jar.
Prepare the Orange Peel
Wash the orange well and remove two wide strips of the top orange layer. A vegetable peeler works best. Try not to include the white pith because it can make the drink bitter.
Gently squeeze one strip over the glass with the orange side facing down. This releases the fragrant oils from the peel directly onto the surface of the coffee. Then place the same strip in the drink.
Leave the peel in the glass for about 5–10 minutes, then taste the coffee. Once the orange aroma is noticeable enough, remove it. Do not leave it in the drink for too long, especially if some white pith is still attached.
Save the second strip for serving. There is no need to finely grate the peel. Small pieces will float in the coffee and get into the straw. Orange juice is unnecessary here too. It will change the flavor significantly, and the acidity may cause the milk to curdle.
How to Make Iced Coffee With Orange Peel and Cinnamon
- Mix the coffee with the cinnamon. Pour the chilled coffee into a glass or small jar. Add the ground cinnamon and stir well. It will not dissolve completely, and that is normal.
- Sweeten the drink. Add the maple syrup and stir well. It dissolves easily even in cold coffee. When using brown sugar, dissolve it first in 1 tablespoon of hot water, then add the syrup to the glass.
- Add the ice and milk. Place the ice cubes in the glass, then pour in 2 tablespoons of milk or cream. Taste the coffee and add a little more when you want to soften its strength.
- Add the orange peel. Place the prepared strip of peel in the coffee and leave it for 5–10 minutes. Then taste the drink and remove the peel once the orange aroma is noticeable enough.
It is easy to add too much ground cinnamon, so ⅛ teaspoon is enough for one large glass. If you use more, some of the powder will settle at the bottom and leave a dry taste in the last few sips.
Sometimes I use a cinnamon stick and reduce the amount of ground cinnamon. It slowly releases its aroma while the coffee sits, and it is also convenient for stirring the drink.
Serving. Stir the coffee once more before taking the first sip because some of the cinnamon may have settled at the bottom. Gently twist the second strip of orange peel and place it on the rim of the glass.
The orange peel and cinnamon give the coffee a light spiced citrus aroma while still allowing the flavor of the beans to come through. Serve the drink right away, before the ice begins to melt too much. If the coffee has been sitting and tastes less intense, add a little more chilled coffee.
5. Cold Brew Coffee With Cocoa Nib Foam
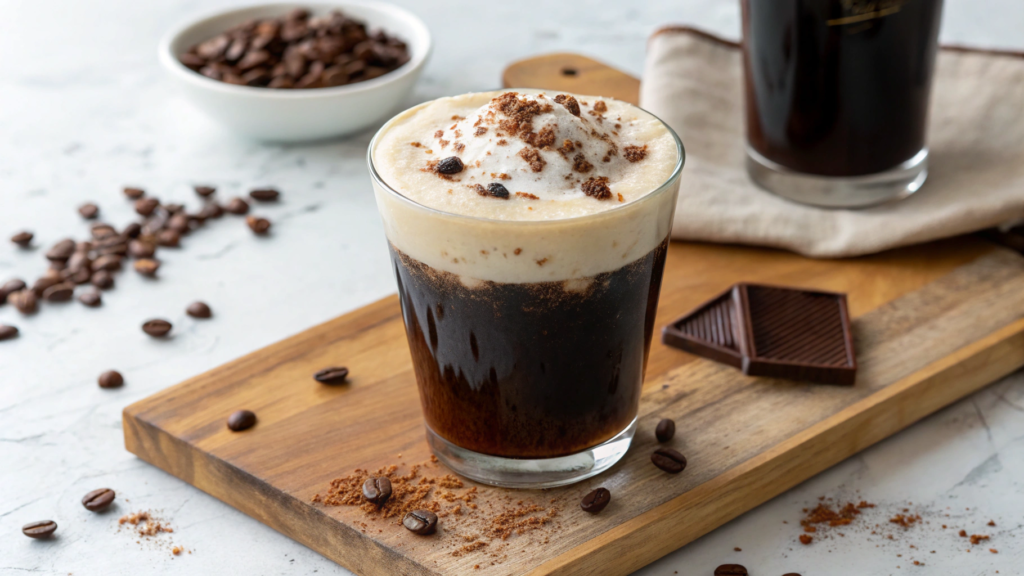
Cold brew coffee with cocoa nib foam combines strong coffee, soft creamy foam, and a light bitterness. There is no need for chocolate syrup here. The cocoa nibs infuse the cream during a short steep, so the foam tastes chocolatey without becoming too sweet.
Cold brew remains one of the most popular drinks at Starbucks. In our version, it is topped with cocoa nib foam, which adds a light chocolate aroma without chocolate syrup.
We usually add cocoa nibs to granola, oatmeal, and cookie dough. One day, I simply sprinkled some on top of my coffee. It looked good right up until the pieces started getting into the straw. Now I steep them in the cream first and strain everything afterward. It works much better, trust me.
What You’ll Need
For the Cold Brew
- ⅓ cup coarsely ground coffee (about 30 g);
- 1½ cups cold water (360 ml);
- ½ cup ice cubes;
- 1–2 teaspoons maple syrup, optional.
For the Foam
- 2 tablespoons heavy cream (30 ml);
- 2 tablespoons milk (30 ml);
- 1 tablespoon cocoa nibs, such as Organic Raw Cacao Nibs. Check the ingredients before buying. The package should not contain sweeteners, chocolate coating, or flavorings;
- 1 teaspoon maple syrup;
- a small pinch of salt.
Preparation
- Cover the coffee with cold water. Add the coarsely ground coffee to a jar, pour in 1½ cups of water, and stir with a spoon. Close the jar and refrigerate it for 12–16 hours. I usually do this in the evening so the coffee is ready in the morning.
- Strain the coffee. Pour it through a regular sieve first, then through a paper filter or several layers of cheesecloth. After straining, you will have about 1 cup of cold brew. Avoid using a very fine grind, or sediment may remain in the drink.
- Prepare the cream base. Lightly crush the cocoa nibs with a spoon or the flat side of a knife. Pour the cream and milk into a small saucepan, add the crushed nibs, and warm over low heat for about 3 minutes. The mixture should become warm, but it does not need to boil.
- Let the cream steep. Remove the saucepan from the heat and leave the mixture for 10 minutes. Then strain it through a fine sieve and let it cool completely. The cocoa nibs have already released their aroma, so there is no need to add them back to the foam.
- Whip the foam. Add 1 teaspoon of maple syrup and a small pinch of salt to the chilled mixture. Froth it with a handheld milk frother for 20–30 seconds. The foam should become airy and slightly thicker, while still flowing easily from a spoon.
For this small amount, a handheld milk frother works best. A large blender is not very practical because most of the mixture will stay on the sides of the jug.
Serving. Add ice to a glass and pour in the cold brew. Taste it and stir in a little maple syrup when you want it sweeter. Start with one teaspoon because the foam already contains syrup.
Spread the cocoa nib foam over the surface of the coffee. There is no need to mix it right away. The first sips will have more of the creamy top layer, and then the coffee will come through more clearly. The foam will gradually mix into the drink and make it softer.
6. Matcha Latte With Oat Milk and a Pinch of Vanilla
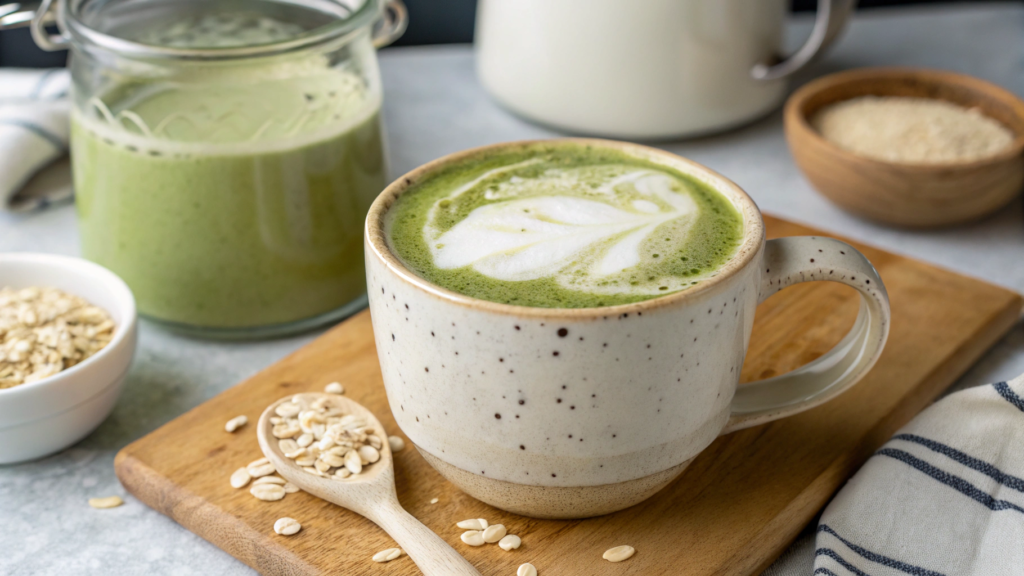
Matcha latte with oat milk has long been one of those drinks many people stop by Starbucks for. It is also easy to make at home, especially when you want to choose the amount of syrup yourself and keep the drink from becoming too sweet.
In this version, we will add just a little vanilla. It softens the slight bitterness of the matcha and pairs well with the flavor of oat milk, while still allowing the matcha flavor to come through.
I prepare a small base with matcha and water first, then add the milk. A few extra movements with the whisk really do make a difference.
What You’ll Need
- 1 teaspoon matcha powder;
- 2 tablespoons hot water (30 ml);
- 1 cup oat milk (240 ml);
- 1 teaspoon vanilla syrup;
- 1 teaspoon maple syrup, optional;
- a small pinch of salt, optional.
Choose pure matcha without sugar, powdered milk, or flavorings. Premade mixes are often already sweetened, and the drink can easily turn out much sweeter than you planned.
Preparation
- Sift the matcha. Pass the powder through a small sieve directly into a cup. This keeps dense green lumps out of the finished drink.
- Whisk the base well. Start by stirring slowly so the powder combines with the water. Then whisk more quickly for 15–20 seconds. The mixture should become smooth, with a thin layer of foam on top.
- Heat the oat milk. Pour it into a small saucepan and keep it over low heat until the milk is hot. There is no need to bring it to a boil.
- Add a little vanilla. Stir 1 teaspoon of vanilla syrup into the milk. This is enough for the vanilla to come through without overpowering the matcha.
- Combine the matcha with the milk. Slowly pour the hot oat milk into the cup and stir gently. Taste the drink. If the oat milk is already sweet, you will not need to add anything else. You can stir 1 teaspoon of maple syrup into unsweetened milk.
The vanilla is just a small addition here. One teaspoon of syrup softens the flavor and adds a familiar coffee-shop aroma.
Serving. Pour the matcha latte into a warm mug and leave a little milk foam on top. If you like, sift a very small amount of matcha over it. Avoid adding a thick layer because the dry powder will taste bitter and stick to your lips.
I usually serve this latte right after making it. Lindy likes to leave the foam on top, while I almost always stir it into the drink after the first two sips.
7. Iced Matcha With Strawberry Purée Swirl
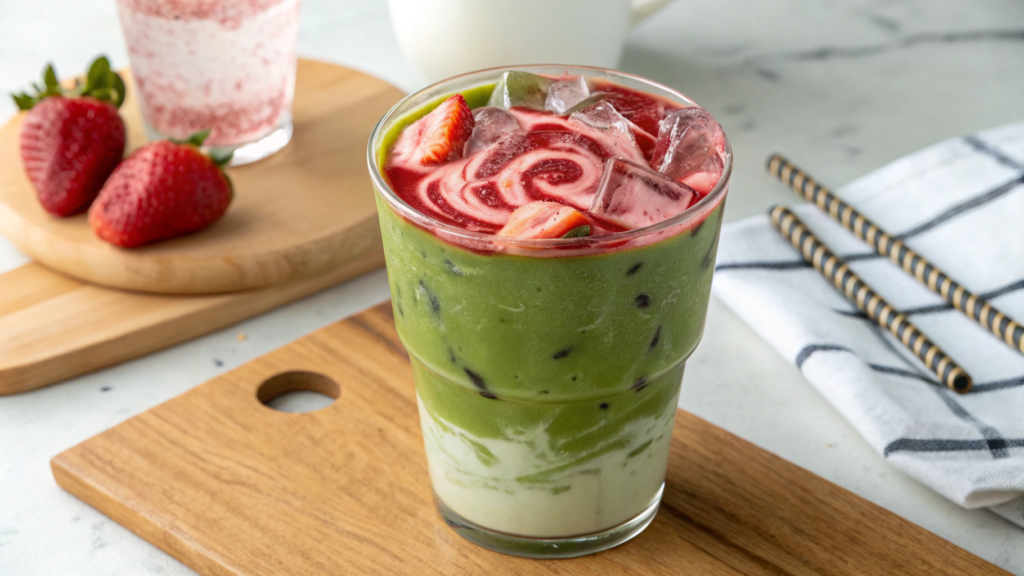
Iced matcha with strawberry purée combines the grassy flavor of green tea, the sweetness of berries, and cold milk. Bright drinks like this are easy to imagine on the Starbucks menu, but at home you can make the strawberry layer with real fruit and avoid adding too much sugar.
I use soft strawberries that no longer look perfect in sauces, oatmeal, and drinks like this. They work very well for purée. No one will see the bruised side after blending anyway.
What You’ll Need
For the Strawberry Purée
- ½ cup fresh or thawed strawberries (about 75 g);
- 1–2 teaspoons sugar or maple syrup;
- 1 teaspoon lemon juice.
For the Matcha
- 1 teaspoon matcha powder;
- 2 tablespoons hot water (30 ml);
- ¾ cup cold milk (180 ml);
- ½–1 cup ice cubes;
- 1 teaspoon maple syrup, optional.
You can use cow’s milk, oat milk, or coconut milk. I usually choose oat milk because it slightly softens the bitterness of the matcha without overpowering the strawberry flavor.
Use pure matcha without added sugar. Premade sweetened mixes do not work well here because the strawberry layer already contains sugar.
Preparation
- Make the strawberry purée. Remove the stems and place the berries in a small blender cup. Add 1 teaspoon of sugar or maple syrup and the lemon juice. Blend into a thick purée.
- Check the sweetness of the berries. Ripe summer strawberries often need only one teaspoon of sugar. Frozen or slightly tart berries may need a little more. The purée should still taste fresh rather than like jam.
- Sift the matcha. Pass the powder through a small sieve into a separate cup. This keeps green lumps out of the drink.
- Whisk the matcha with water. Add hot but not boiling water. Stir the powder gently at first, then whisk for 15–20 seconds. A thin layer of foam should appear on top.
- Add the milk. Pour the cold milk into the matcha and stir. Taste the mixture before assembling the drink. Add 1 teaspoon of maple syrup when needed, but remember that the strawberry purée is already sweet.
How to Make the Strawberry Swirl
Add 2–3 tablespoons of strawberry purée to the glass first. Use a spoon to spread some of the purée along the inside walls of the glass. Do not try to make the lines perfectly even. They will spread slightly after you add the ice, and the pattern will look more natural.
Add enough ice to fill the glass about two-thirds of the way. Then slowly pour in the matcha milk. It is easier to direct the stream onto an ice cube instead of pouring it straight into the strawberries. This keeps the layers from mixing right away.
Serving. Serve the drink immediately while the strawberry and green layers are still clearly visible. I usually do not strain the purée because the small seeds do not bother us. If it is too thick, add 1 tablespoon of water.
8. Chai Latte With Black Tea Concentrate and Clove

This chai latte with strong black tea and clove turns out spicy, milky, and rich enough. The base is strongly brewed black tea with cinnamon, ginger, cardamom, and cloves. This method is similar to familiar Starbucks drinks, but at home it is easy to adjust the amount of spices to your own taste.
We love spiced tea on cold and rainy days. Once, I decided to double all the spices because I wanted a stronger flavor. The amount of cinnamon worked well, but the cloves overpowered both the tea and the other spices. Since then, I have added them especially carefully.
What You’ll Need
The Tea Base
- 1½ cups water (360 ml);
- 3 black tea bags;
- 1 cinnamon stick;
- 3 whole cloves;
- 3 lightly crushed cardamom pods;
- 4 thin slices of fresh ginger;
- ¼ teaspoon ground cinnamon;
- 2 tablespoons brown sugar or maple syrup.
For Two Servings of Latte
- 1 cup prepared tea base (240 ml);
- 1 cup milk (240 ml);
- a little milk foam, optional;
- a pinch of ground cinnamon for serving.
For this drink, it is easier to use whole spices instead of only ground spices. They are easier to strain, and they do not leave a thick layer of powder at the bottom of the cup.
Preparation
- Prepare the spices. Gently press the cardamom pods with the flat side of a knife so they open. Cut the ginger into thin slices. Leave the cloves and cinnamon stick whole. There is no need to grind everything into a powder, or it will be difficult to make a clear drink without sediment.
- Heat the spices in the water. Pour 1½ cups of water into a small saucepan. Add the cinnamon, cloves, cardamom, and ginger. Bring the water to a gentle boil, then reduce the heat and let the spices simmer for about 5 minutes. It is better to cover the saucepan with a lid so the aroma does not escape with the steam.
- Add the black tea. Remove the saucepan from high heat and place 3 tea bags in the water. Leave them for 4–5 minutes. Do not steep the tea for longer because extra bitterness will appear along with the stronger flavor. You can leave the spices in the saucepan during this time.
- Sweeten the tea base. Remove the tea bags without squeezing them too hard. Add the brown sugar or maple syrup and stir until the sugar is fully dissolved. Taste a small spoonful of the tea base. It should taste strong and spicy because the milk will dilute it later.
- Strain the tea. Pour the contents of the saucepan through a fine sieve into a jar or measuring jug. Discard the cinnamon stick, cloves, ginger, and cardamom. After straining, you will have about 1 cup of tea base, enough for two small servings or one large latte.
- Heat the milk. Pour the milk into a clean saucepan and warm it over low heat. It should become hot but should not boil. When milk boils strongly, a thick skin forms on the surface and the flavor changes.
- Mix the tea with the milk. Divide the tea base between two cups and add the same amount of hot milk. This gives you a simple one-to-one ratio. For a stronger drink, add a little more tea. For a softer, milkier flavor, increase the amount of milk.
- Taste before serving. Sometimes 2 tablespoons of sugar are enough for the entire tea base, especially when the milk is naturally a little sweet. Add syrup directly to each cup only after tasting. This keeps the sweetness from hiding the spices.
Three cloves give a strong enough aroma for 1½ cups of water. Ground cloves work less well in this recipe. Whole cloves make it easier to control the flavor, and you can remove them before the other spices when the aroma already seems strong enough.
The prepared tea base can be stored in a sealed jar in the refrigerator for up to three days. The next day, the clove and cinnamon flavors may seem slightly stronger, even after all the spices have been removed. Taste the tea base before preparing another cup.
Serving. I sometimes prepare the tea base in the evening and simply reheat it with the milk in the morning. I like drinking this latte on cold, rainy days when I want to make something warm quickly without taking out all the spices again.
In the finished drink, you can clearly taste the black tea first, followed by the cinnamon and cardamom. The cloves add a light spicy note without overpowering the other flavors.
9. Chocolate Cream Cold Foam With Dark Cocoa Powder
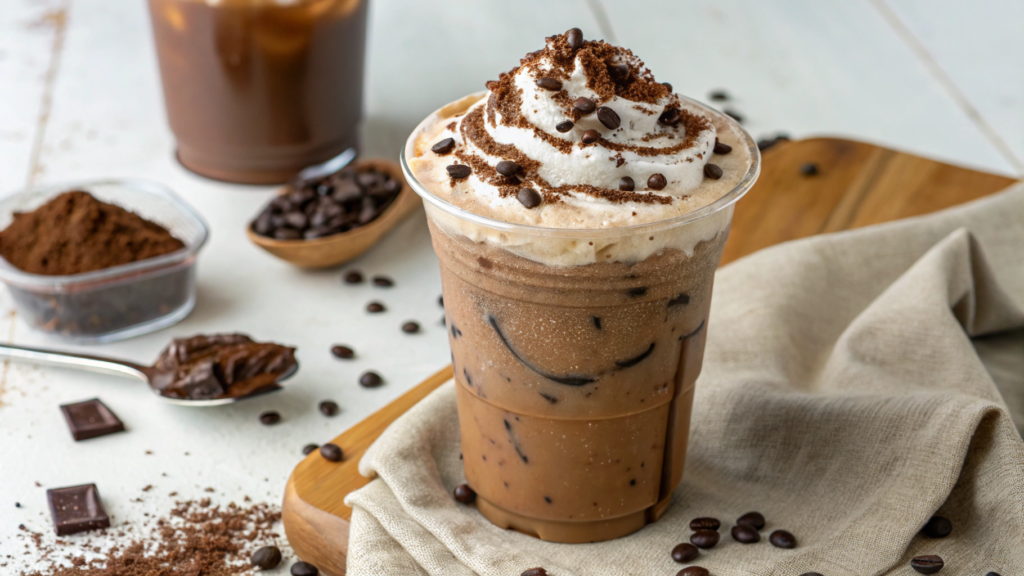
This iced coffee is topped with a thick chocolate foam made with dark cocoa. It adds a rich chocolate flavor without making the coffee itself too sweet.
Creamy cold foams like this often appear on the Starbucks menu. The chocolate foam is easy to make in small batches, and you can adjust the amount of sugar and cocoa to your taste.
What You’ll Need
For One Large Glass
- ¾ cup chilled coffee (180 ml);
- ½ cup ice cubes;
- ¼ cup heavy cream (60 ml);
- 2 tablespoons cold milk;
- 1 tablespoon dark unsweetened cocoa powder;
- 1–2 teaspoons maple syrup or simple syrup;
- ¼ teaspoon vanilla syrup;
- a small pinch of salt.
It is better to use dark unsweetened cocoa powder. It gives a stronger chocolate flavor than a premade hot cocoa mix, which may already contain sugar, powdered milk, and flavorings.
Preparation
- Mix the cocoa with the syrup. Add the dark cocoa powder to a small cup and pour in 1 teaspoon of maple syrup or simple syrup. Stir with a spoon until a thick paste forms. There should be no dry spots left.
- Add the milk. Pour in the 2 tablespoons of cold milk a little at a time. Stir well after each addition. The cocoa will gradually become smooth and stop forming lumps.
- Add the cream. Pour in the heavy cream, vanilla syrup, and a small pinch of salt. Stir everything with a spoon before frothing so the chocolate mixture does not stay at the bottom.
- Froth the mixture. Use a handheld milk frother for about 20–30 seconds. The mixture should become airy and increase slightly in volume. Do not froth it for too long, or it may turn into a thick cream instead of a pourable foam.
- Check the sweetness. Taste a small spoonful. Dark cocoa can be quite bitter, so add another teaspoon of syrup when needed and quickly froth the mixture again. It is better to adjust the sweetness now than to mix syrup into the foam after it is already on the coffee.
The finished chocolate cold foam should slowly run off a spoon and stay on the surface of the coffee. It should be soft and airy, but not as thick as whipped cream.
If the foam immediately mixes into the coffee, froth it for another 10 seconds. If it becomes too thick, add 1 teaspoon of milk and froth it briefly again.
Serving. Fill a glass with ice and pour in the chilled coffee, leaving a little room at the top. Gently spoon the chocolate foam over the coffee and lightly dust it with dark cocoa, if you like. Serve right away without stirring. The foam will gradually mix into the coffee on its own.
You can add the chocolate foam not only to iced coffee but also to plain cold milk. It is best to make it right before serving while it is still light and stays well on the surface of the drink.
10. Christmas Style Peppermint Mocha With Hidden Coffee Boost

Christmas peppermint mocha is easy to recognize by its combination of chocolate, mint, and whipped cream. This kind of drink often appears on the Starbucks holiday menu, and at home you can make it a little less sweet while still keeping the flavor rich.
The extra serving of coffee does not make the drink too strong. It simply balances the sweetness of the syrup and the rich flavor of the cocoa.
I remember one time when I added too much peppermint extract. The drink was so strong that it tasted like liquid toothpaste mixed with coffee. Since then, I have measured the mint especially carefully.
What You’ll Need
- 1 shot of espresso;
- ¼ cup very strong coffee (60 ml);
- ¾ cup milk (180 ml);
- 1 tablespoon unsweetened cocoa powder;
- 1½ tablespoons chocolate sauce;
- 1–2 teaspoons sugar;
- 2–3 drops pure peppermint extract;
- ¼ teaspoon vanilla extract;
- a small pinch of salt;
- whipped cream, optional;
- a little crushed peppermint candy for serving.
Peppermint extract is very concentrated, so measure it carefully. Start with 2 drops. Taste the drink and add one more if needed.
Preparation
- Mix the cocoa with a little milk. Pour 2 tablespoons of milk into a small saucepan, then add the cocoa, chocolate sauce, sugar, and salt. Stir over low heat until the mixture becomes smooth. If you add the cocoa directly to a full cup of milk, the lumps will be more difficult to break up.
- Add the remaining milk. Pour it in gradually and continue stirring. The mixture should become hot, but there is no need to boil it. If the milk boils too strongly, a skin may form on the surface, and the chocolate may begin sticking to the bottom.
- Prepare the coffee. Brew one shot of espresso and separately prepare ¼ cup of very strong coffee. Coffee from a drip machine, pour-over, or French press will work. The main thing is that it should not be watery.
- Combine the coffee with the chocolate milk. Pour the espresso and strong coffee into a mug first, then add the hot chocolate mixture. Stir well so the chocolate does not remain at the bottom.
- Add the mint and vanilla. Stir in 2–3 drops of peppermint extract and the vanilla. Taste the drink right away. Do not add more mint until you have taken at least two sips. Its flavor becomes more noticeable gradually.
- Check the sweetness. The chocolate sauce already contains sugar, so you may not need the second teaspoon. When the coffee is strong enough, a little bitterness is helpful here. It keeps the chocolate and mint balanced.
Serving. Pour the mocha into a mug, leaving a little room at the top. Add whipped cream, if you like, drizzle it with a thin stream of chocolate sauce, and sprinkle with finely crushed peppermint candy.
I like to drink this mocha right away while it is still hot. If some of the cocoa or chocolate sauce settles at the bottom, I simply stir it with a spoon.
I do not make this mocha very often, usually only closer to the winter holidays. For me, it is the kind of drink I want to make in the evening, turn on the string lights, sit down after a busy day, and dream about something pleasant.
My Drink
These recipes keep the familiar Starbucks flavors and formats while leaving enough room for small changes based on your own taste.
Lindy and I rarely make two completely identical cups. She adds more cinnamon, I choose a less sweet version, and sometimes the decision depends only on what we already have in the kitchen.
Start with a recipe that does not require you to buy many new ingredients. Let me know in the comments how yours turned out and whether you liked it. After the first successful cup, the other ideas come to life much faster.