I used to think drying herbs was easy. Snip it, hang it, forget it. But the more I got into it, the more I realized — herbs have their surprises. And drying them right, without losing flavor or aroma, is definitely not just “a couple of days in the pantry.”
In this article, I’ve rounded up methods that actually work. Some are a bit weird, some super practical. But every single one was tested by Lindy and me — on basil, sage, rosemary, and those last-minute bundles we grabbed right before the first frost.
So if you want your herbs to smell good, steep well, and make you happy — keep reading. There are a few tricks here that Pinterest only recently started whispering about.
1. How to Dry Basil in the Microwave Without Burning It
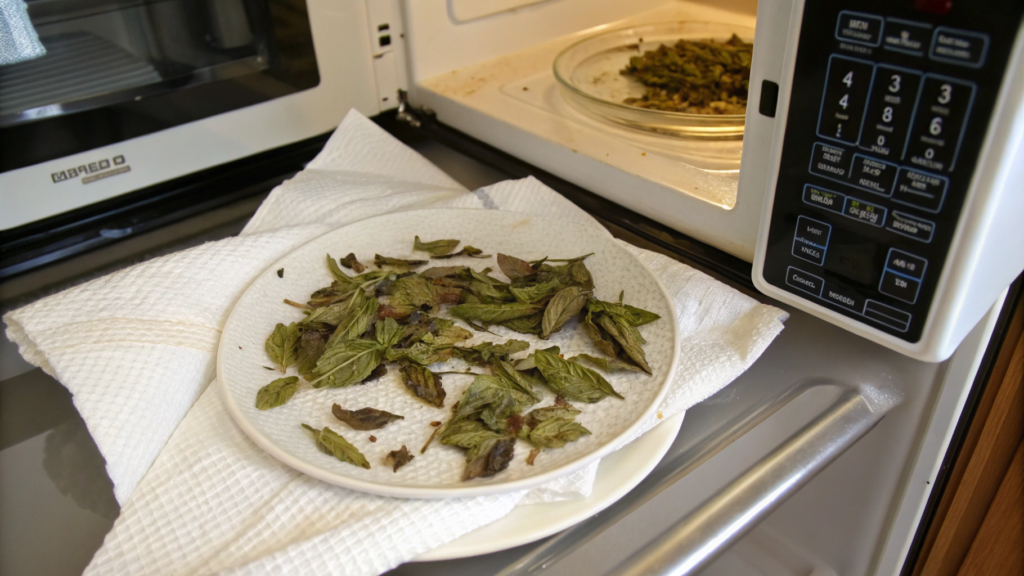
When I first heard about drying basil in the microwave, I legit scoffed — seriously? basil? in the microwave? I was sure it’d just turn to powder or, worse, start smelling like burnt popcorn.
But then I tried it — and now it’s one of the fastest ways to keep your summer harvest tasting fresh and bold.
If you do it right, nothing burns. Took me a few tries too, before I figured out what makes it work.
Why even use the microwave to dry basil?
- It keeps a vibrant green color (unlike the oven, where it usually darkens).
- It takes just 1–2 minutes to dry completely.
- No need to wait for days like with air drying.
- Perfect when you’ve harvested just a few sprigs, not a whole bucket.
What you’ll need:
- Paper towels
- A microwave with a turntable
- Fresh-cut basil (preferably not right after watering — let it rest a bit)
- The will to not burn your kitchen down
- Optional: a microwave crisper rack — really helps for even drying
Steps that actually work in 2025 (and won’t torch your herbs):
- Lay the basil out on a paper towel in a single layer — no overlapping. It’s best to remove stems and dry only the leaves.
- Cover with another paper towel — this helps prevent curling and overdrying.
- Microwave on low power (or 30% of full power) — this is the magic. If your microwave is 1000W, go with 300W.
- Start with 30 seconds. Pause. Check. If things look good, continue in 15–20 second bursts, checking each time. On average, basil takes 1.5–2 minutes to dry, but it depends on the variety, humidity, and your microwave.
- Done when the leaves snap easily between your fingers and feel dry to the touch.
Let them cool completely before transferring to a jar.
A few of my personal tips:
- Never dry more than 15–20 leaves at once — too much, and they’ll start steaming instead of drying.
- Younger leaves dry cleaner and with less bitterness.
- Store immediately in an airtight jar and keep it away from direct sunlight — don’t leave it on your sunny kitchen shelf.
According to research, microwave drying preserves chlorophyll and oils better than oven drying, which tends to overheat and degrade herbs.
Just keep in mind: this method won’t replace traditional air drying for large harvests — like when you’re growing basil for half the neighborhood (I know you’re out there!).
But for daily cooking, homemade teas, and infused salts — it’s absolutely my go-to method.
2. This DIY Hanging Rack for Herbs Took Over Pinterest
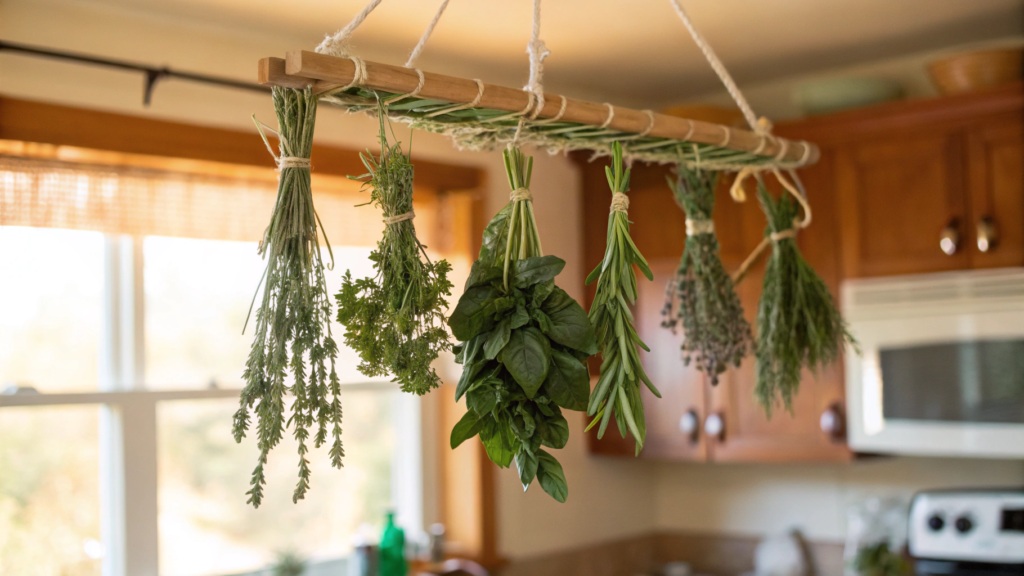
When I first saw this rack on Pinterest, I thought it was just another pretty picture…
But then we hung our first one in the kitchen — and it instantly became more than just handy. It’s practically a cult object in our house now.
Basically, it’s a DIY rack where you hang small bundles of fresh herbs — rosemary, mint, sage, basil, whatever you’ve got. They dry peacefully right overhead — it’s beautiful, convenient, and not a single leaf ends up buried in the pantry corners.
What you’ll need:
- An old wooden frame (could be from a picture, mirror, or window)
- A set of hooks or simple S-hooks
- Twine, jute, or thin wire
- A few screw-in eyelets (if you want to hang the rack from the ceiling)
- A couple of screws and a drill (or Command hooks if you want to skip the drill)
How I make this rack:
- Pick a spot. Ideally over your workspace or near a window — just not in direct sun.
- Take your old frame, screw in hooks evenly spaced — I usually do about five on each side.
- Hang the frame from the ceiling using twine or chains — make sure it’s level.
- Make small herb bundles, tie them up, and hang them from the hooks.
- That’s it! Just watch your herbs dry beautifully and magazine‑cover ready.
A few tricks I’ve learned:
- Don’t make the bundles too thick — they’ll mold inside.
- If your rack hangs near the stove, cover the herbs with a light cloth to protect them from grease.
- For extra charm, I sometimes hang small glass jars with bay leaves or cinnamon sticks on the empty hooks.
Just wrap some twine or wire around the neck, make a loop, and hang them next to your herbs.
The way the light hits the glass? Total vintage apothecary vibes.
I alternate bundles of herbs and jars—it creates a visual rhythm. Herbs, glass, herbs, glass.
According to research in the Journal of Essential Oil Bearing Plants, vertical drying with good airflow preserves up to 80% of essential oils, especially in rosemary and thyme.
On Pinterest, this rack is a full-on viral star. I’ve seen all kinds of versions — rustic, minimal, colorful. But my favorite is still the old window frame, painted white, with brass hooks and fresh mint bundles. No big-box store nonsense — all handmade. That’s my kind of style.
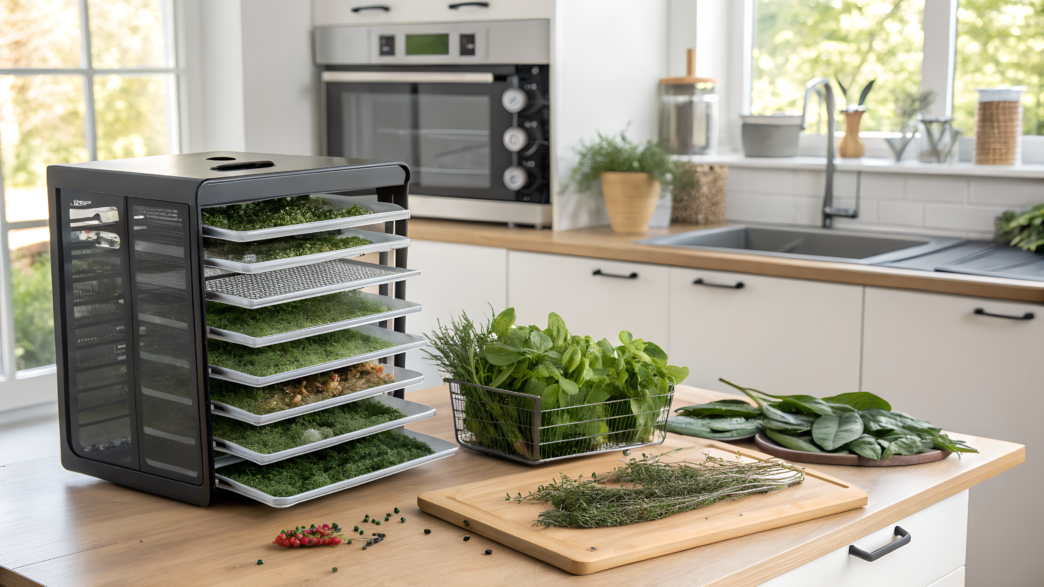
3. The Air Fryer Hack That Dried My Sage in Under 10 Minutes

I used to avoid air fryers. I figured it was just a trendy oven swap, and honestly — in our tiny house, we didn’t have room. But then we won one in a local farm co-op raffle (yep, those are real!).
And, well, the experiments began.
The first thing I shoved in there? Sage.
And it turned out to be the fastest and cleanest drying method I’ve used in 10 years.
Why? Because the hot air flow inside an air fryer works almost like a dehydrator — only 3–4× faster. Especially great for sage, which has thick, fleshy leaves that hate sun drying (you lose oils, get bitterness).
How I dry sage in the air fryer:
- Rinse and pat the sage leaves dry. No stems — just clean, healthy leaves.
- Lay them in a single layer on the air fryer rack. No paper towels — airflow matters.
(This herb-friendly mesh rack works great Air Fryer Rack for Herbs & Veggies on Amazon) - Set to 95–105°F (35–40°C) — this is key. Don’t go higher.
- Timer: 8 minutes. Check at 5 — if the leaves snap easily, they’re done.
- Let them cool, then transfer to a jar with a tight lid.
Pro tip. If your air fryer doesn’t have temperature control, use the lightest setting and crack the lid open slightly — it helps reduce overheating.
According to a study in Industrial Crops and Products (2021), hot-air drying sage at 40°C for 10 minutes preserved up to 88% of thujone and camphor — the key components of sage essential oil.
That’s twice as much as what’s retained in shade-dried samples, where oxidation causes major losses.
Now I also dry mint, thyme, and even garlic scapes in the air fryer. But sage? Still my favorite.
The smell stays strong, the texture is crisp, and even the tea tastes rich without bitterness.
4. Why Dehydrating Lavender Like This Preserves the Aroma

One wrong move, and instead of that soft herbal lavender scent, you end up with… something that smells like grandma’s dresser sachet.
And trust me, I’ve ruined more than a few bundles before I realized — you can’t dry lavender like just any herb.
The key to preserving lavender’s scent is drying it upside down in tight bundles, in full shade, with steady airflow.
My tried-and-true method:
- I cut the lavender early in the morning, right as the buds begin to open. That’s when essential oils are at their peak.
- I make tight bundles of 15–20 stems, tied with sturdy twine, leaving a long loop for hanging.
- I hang them upside down in a dark, well-ventilated space (our spot is a nook between the pantry and the kitchen — best airflow in the house).
- I always cover each bundle with cheesecloth or thin fabric — keeps out dust and sunlight.
- I wait 10–14 days. No rushing. Once the stem snaps with a crisp break, they’re ready.
Why sun drying is a no-go:
Sun drying is lavender’s worst enemy. The essential oils evaporate, the buds fade, and the smell turns “boiled.” I’ve tried — and regretted it.
In a study published in the Journal of Applied Research on Medicinal and Aromatic Plants (2020), researchers compared various lavender drying methods.
Result: shade drying at 25–30 °C preserved up to 90% of linalyl acetate and linalool — the key aromatic compounds in lavender.
In contrast, sun drying caused losses of 48–60%.
To make hanging easier, I use bamboo rails with hooks. They’re neat, lightweight, and don’t snag on fabric.
I even hang lavender in the bathroom sometimes — because truly, nothing smells like freshly dried lavender from the shade.
5. Drying Herbs for Tea? This Method Keeps the Flavor 3x Longer

You know how it goes: you lovingly dry your mint, thyme, chamomile, store them in jars — and then two months later, you brew a cup and it tastes like… hot water with hay.
And it’s not your fault. The drying method makes all the difference if you want your tea to be truly flavorful and aromatic — not like something from a dusty drugstore shelf in 2004.
So which method keeps the flavor longer?
Drying in paper bags at room temperature. Not hanging, the dehydrator. Not the oven.
This was my biggest discovery back on our first little plot in Idaho, when we tried drying mint.
Here’s how I do it:
- I harvest herbs in the morning, before the sun pulls out the oils.
- I trim only clean leaves and blossoms, no stems.
- I spread them in a single layer inside brown paper bags, fold the tops, and poke a few holes for airflow.
- I place the bags in a dark, dry space — for us, that’s the bottom shelf in the pantry. No sunny windowsills!
- After 5–7 days, I check: leaves should snap easily, not crumble into powder.
The paper absorbs excess moisture, and the closed space protects against light and oxidation.
This helps preserve more volatile aroma compounds, which give herbal teas their signature flavor.
A review published in Critical Reviews in Food Science and Nutrition (2020) highlights that low-temperature shade drying is one of the most effective ways to retain flavor, aroma, and active compounds in herbs meant for tea.
Terpenes, flavonoids, and essential oils are especially well-preserved in mint, thyme, and lemon balm.
While there aren’t many studies on paper bags specifically, this method creates the exact conditions science recommends for preserving taste.
Ever since I started using this method, the flavor in my teas holds for months — especially with mint and lemon balm.
6. How to Dry Chamomile for Sleep Tea (Without Losing Oils)

Chamomile isn’t as simple as it looks. Those fluffy flower heads are adorable — until you try drying them and suddenly… dust, crunch, and tea that just tastes like hay.
I once over-dried a whole tray, and since then, I’ve been searching for a way to preserve the essential oils — especially bisabolol and chamazulene, the ones that help you unwind and fall asleep.
The ideal method: dry on a rack, flower side up
Sounds simple, but that tiny detail — flowers facing up — makes all the difference.
And no hanging, no dehydrator, no oven. Just a rack and stable airflow.
Here’s how I do it:
- I pick chamomile in the morning, when the flowers are fully open but it’s still cool out.
- I don’t wash them (!) — just shake off dust. Chamomile soaks up water like a sponge and loses oils with excess moisture.
- I lay them on a fine mesh drying rack, flowers facing up — that way, the oils settle into the flower center instead of seeping into fabric.
- I place the rack in a dark, airy space (for us, it’s a doorless corner cabinet — works perfectly).
- After 5–7 days, the flowers are dry and crisp — but not brittle.
Important: if the flower center crunches like popcorn, you waited too long.
What about using a dehydrator?
You can, but only on low setting — under 95 °F (35 °C), and with a mesh insert to keep the heads from flattening. I use it when I’m in a rush, but I still prefer the rack-and-shade combo.
A recent study published in MDPI (2023) found that shade drying chamomile at 20–25 °C preserved the highest levels of essential oils, flavonoids, and polyphenols.
High-heat methods (60–105 °C) led to up to 50% loss of active compounds.
Now, when I brew our dried chamomile before bed — it’s always a slow, fragrant ritual.
Not store-bought powder, but something that grew just outside our window.
7. The Hanging Rosemary Hack That Keeps Leaves From Falling
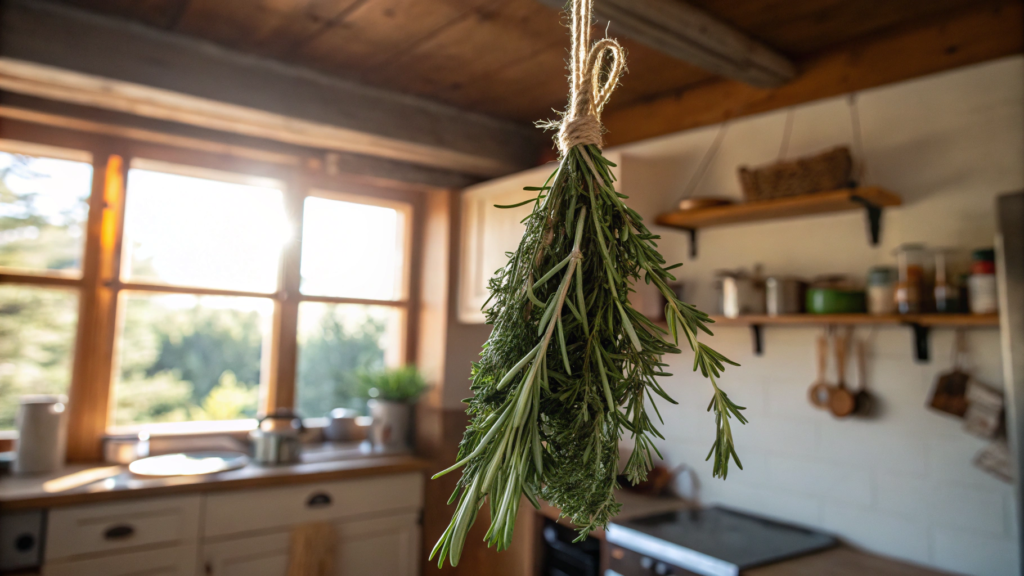
If you’ve ever dried rosemary, you know how it goes… It looks great for the first three days.
Then: plink! plink! plink! — the needles start dropping like a Christmas tree in February.
Especially if you brush past the bundle or crack open a window.
One day — totally by accident — I figured out a trick that saved my nerves (and saved me from sweeping the floor every day).
Here’s the trick. You hang the rosemary as usual, but wrap the leafy end in a little mesh or cheesecloth bag. This keeps the leaves from falling off while drying, and especially when storing or moving the bundle later.
Here’s how I do it:
- I tie a bundle of 8–10 rosemary sprigs together by the stems with twine.
- I wrap the leafy bottom part in a square of cheesecloth or a breathable nut milk bag Reusable Cotton Mesh Bags (Amazon)
- I fasten the wrap with a clip or more twine and hang the bundle in a shaded spot.
- After 7–10 days, I take it down, unwrap the mesh — and all the needles are still inside.
Nothing scattered on the shelves, floor, or inside your jars.
An alternative:
If you don’t want to deal with mesh, you can also hang bundles inside a paper bag with a few ventilation holes.
Air circulates, and any fallen bits stay neatly in the bag.
Studies show that minimal handling and good airflow during herb drying help preserve both mass and essential oils.
Physical protection (like a mesh wrap) can reduce mechanical losses — exactly what happens when rosemary starts shedding.
8. DIY Moon-Charged Herb Drying: Yes, It’s a Thing

I know how it sounds. Drying herbs by moonlight? Seriously?
And here’s what I’ll say: Yes. Seriously.
Not because I believe lavender becomes twice as calming under a full moon (though… who knows?), but because there’s a ritual, a rhythm, and even a tiny bit of logic behind it.
Where did this idea come from?
Since ancient times, people have harvested herbs according to lunar phases. Romans, Celts, folk healers — all believed the moon influenced plant juices.
Some only dried herbs during the waning moon, others swore by full moon rituals.
I would’ve brushed it off, until one August evening, we decided to dry a batch of mint, St. John’s wort, and sage under the moon, just for fun.
Now, every August, we do a “moon batch.”
How we do it:
- We harvest in the evening, just before or during the full moon. Weather must be dry.
- We bundle herbs the usual way — 8–10 stems tied with natural twine.
- We hang them outside in an open, covered space. Our back terrace works great: moonlight comes in, but no dew or moisture.
- We leave them out overnight, then bring them inside in the morning to finish drying indoors, in the shade.
What does it actually do?
- The aroma feels softer. Really.
- The color stays brighter compared to usual drying.
- And yes, it’s just nice. Under the full moon, hanging up herb bundles — you feel like a witch. Or a forest healer.
Or just someone who listens to nature, not just a calendar.
No serious scientific journal has compared “moon-dried” sage to that dried during the waning phase.
But! Some research does suggest that essential oil levels and bioactive compounds in herbs fluctuate based on time of day and season.
The moon phase effect? Still in the realm of traditional wisdom, not lab data.
Want to try it?
It’s simple. Just wait for a clear full-moon night, hang your favorite bundle under cover —
and in the morning, see what feels different.
And don’t forget to label the jar: “Moon Batch – August 2025.” Ours sit on their own shelf. Because yes — they are special.
9. Why This Pegboard Herb Wall Is All Over Pinterest
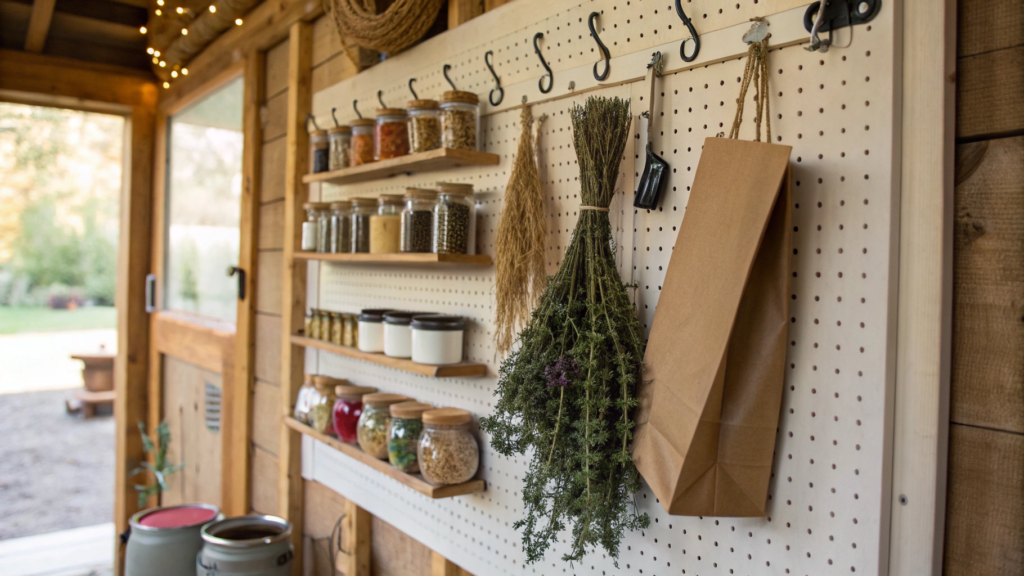
If you’ve been reading Rooted Revival for a while, you know one thing: Everything here has to work — not just look pretty in photos.
But here’s the thing… this Pinterest idea? It’s not just pretty. It’s brilliant.
A pegboard is a perforated wall panel with hooks. You can hang anything on it — herb bundles, spice jars, paper drying bags.
We’ve got one hanging in the utility shed by the back door — and it might just be the most organized spot on the whole farm.
How we use it:
- The board itself is 24×36 inches, mounted with 4 screws.
- We arranged hooks and mini-shelves:
bottom: mesh herb bundles
top: finished jars
side: twine, scissors, and tags - Every bundle hangs on S-hooks or is clipped by the stem.
And yes — it still looks beautiful. But more importantly? Everything breathes, nothing hides in boxes, and we see exactly what we have.
Why a pegboard is better than just a hook rail:
- Flexibility. Move hooks around, add shelves, hang baskets.
- 2-in-1 use. Dry fresh bundles and store jars on the same board.
- Space-saving. A vertical panel fits perfectly in small kitchens, greenhouses, or sheds.
- All-in-one access. Tools, string, scissors — right there when you need them.
- Clean and organized. No random bundles in corners. Everything is visible and neat.
We use this one Wood Pegboard Organizer Wall Set (on Amazon) — neat, geometric, sturdy.
Now it’s home to more than rosemary and mint. Lavender bouquets, onion braids, garlic scapes — they all hang out here.
It lives with us. And changes with the seasons.
10. The Best Way to Dry Mint for Tea That Doesn’t Taste Dusty

I hate tea that smells like cardboard. And mint? It’s one of the trickiest herbs out there.
Overdry it — and you lose both flavor and aroma.
Underdry it — and you get that musty, “I-left-the-jar-open-since-June” kind of smell.
Somewhere between those extremes, finally found the perfect middle ground.
Why does mint get that dusty taste?
That “dusty” flavor? It’s just broken cells and lost essential oils. It usually happens when:
- Leaves get overdried at high temps
- Drying is too slow or the conditions are wrong
- After drying, the leaves turn to powdery flakes instead of staying fresh and structured
Here’s what works for me:
Flat-drying on a mesh rack, single layer, moderate temps. No hanging, no oven, no dehydrator.
Step-by-step:
- I harvest mint in the morning, after the dew dries
- Wash the leaves and dry them thoroughly — trapped water can cause mold
- Strip the leaves from the stems and spread them in a single layer on a mesh rack
- Place the rack in the shade, with good air circulation — ours sits under the porch roof near the kitchen
- After 3–5 days, the leaves should be crisp, but not crumbling into dust
If you rub a leaf between your fingers and it bends instead of snapping? Give it another day
Since I started drying mint this way, my tea has become a winter ritual. Sometimes I mix it with lavender, other times with dried orange peel.
The taste is clean, cool, minty — and not even a hint of that dusty vibe.
Do you like herbal tea?
Have you tried any of these drying methods? Or maybe you’ve got a totally unique one — the kind Pinterest hasn’t even seen yet?
Drop it in the comments. I genuinely read every single one — and every season, I discover something new thanks to you.If this post was helpful, save it — or send it to a friend who collects lavender on weekends.
Because homemade herbs aren’t just tea. They’re a way of life.