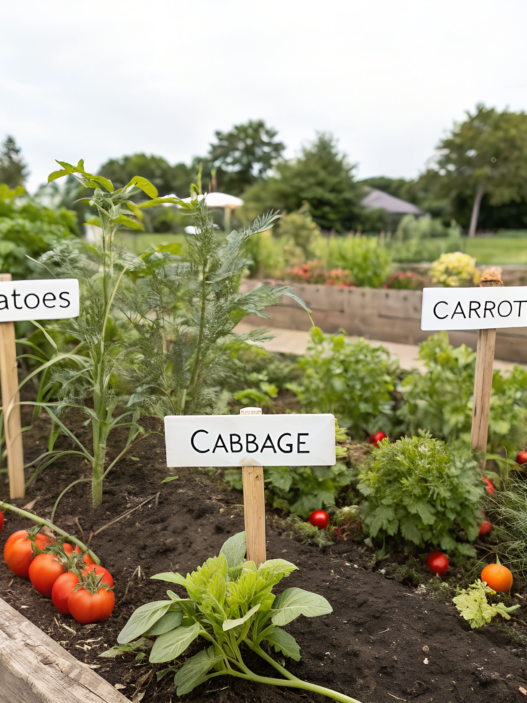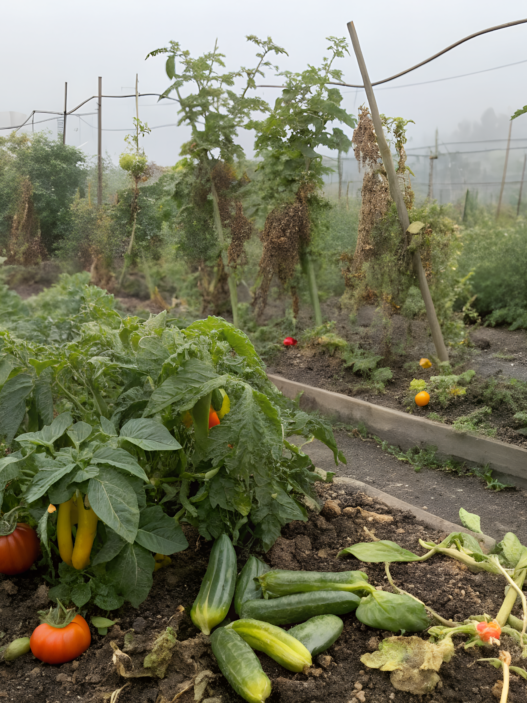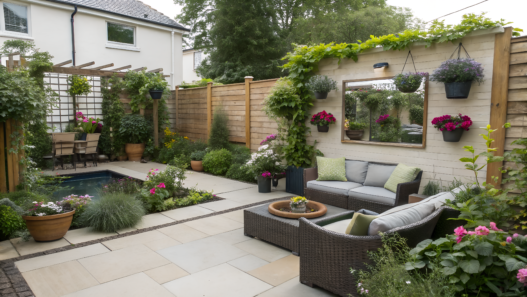
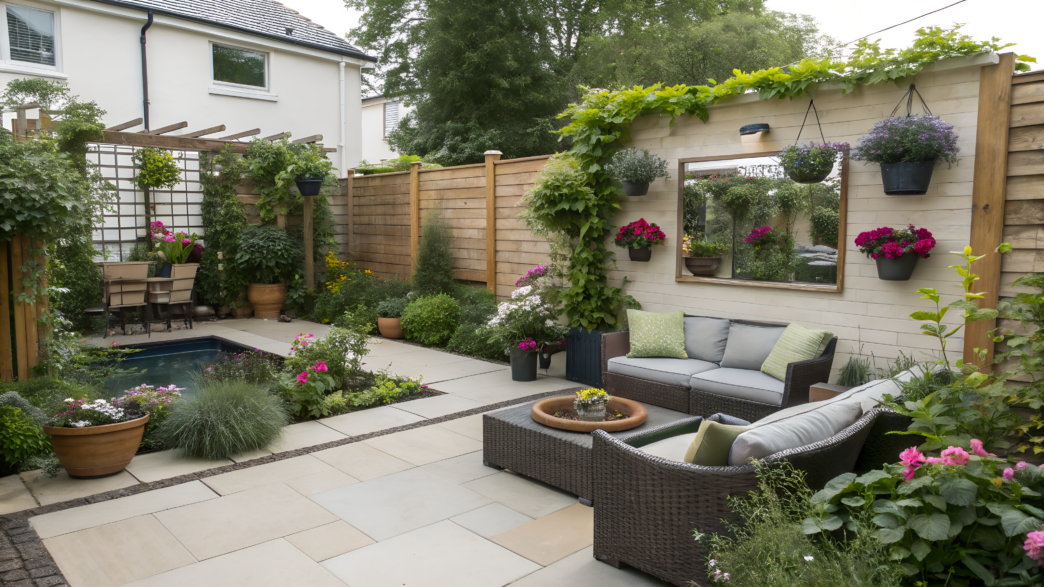
You don’t need much to set up a small patio garden. Sometimes one chair, a couple of long containers, a wall, a railing, or a corner by the door is enough to turn a small space into a useful garden.
A small patio, balcony, or narrow courtyard quickly shows which solutions actually work and which ones only looked good in your head. If a pot blocks the walkway, you’ll notice it on the very first day, and if your herbs are too far from the kitchen, you’ll use them less often. No way around it.
Here are 10 ideas for small patios and balconies that show how to get the most out of a small space. First, you need to understand how you’ll use this spot, and only then choose pots, stands, trellises, and plants.
1. The Balcony Bistro Layout for One Chair and Ten Plants
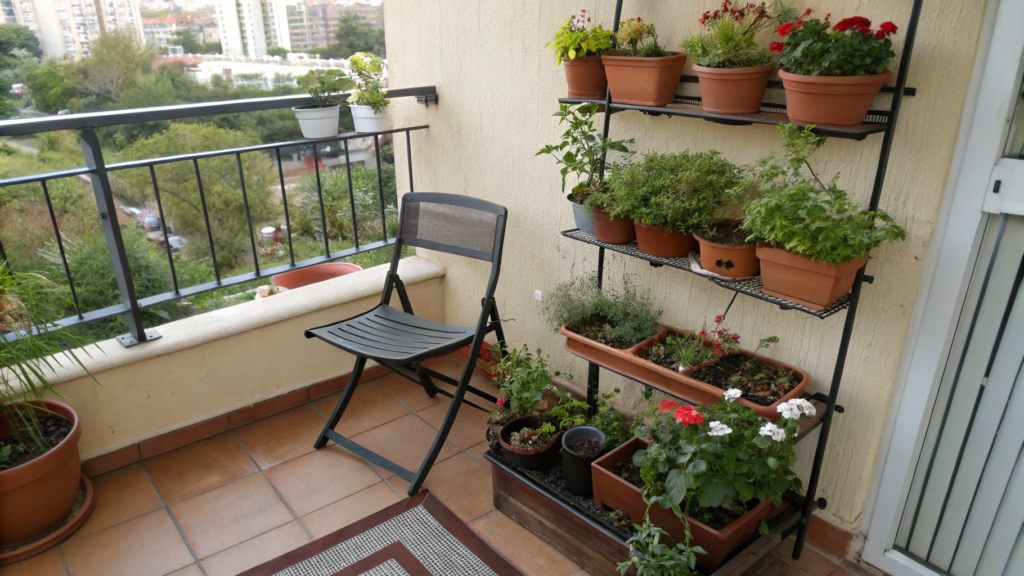
You can create a small balcony garden even in a place where only one chair fits. Here, it’s important to arrange the plants on different levels: place some at the bottom, lift some onto a stand, and move some to the railing or wall. This way, the balcony still has space for a person, not just for plants.
For this idea, I think a balcony from 4 × 6 ft (about 1.2 × 1.8 m) will work. It’s better to choose a folding or narrow chair, about 18–22 in (46–56 cm) deep. You can place it in a corner and arrange the plants around it so you have normal access to every pot.
How to Arrange One Chair and Ten Plants
- Place the chair on the side, not in the center. The best spot is in a corner, with the back facing a wall or railing. This keeps the walkway open, and you won’t have to move pots every time you just want to step out onto the balcony. If the balcony is very narrow, choose a folding chair: you can move it away when you water or rearrange the plants.
- Put the two largest plants on the floor. For example, a dwarf tomato in a 5 gal (19 L) pot and rosemary, lavender, or pepper in a 3 gal (11 L) pot. Larger pots are better kept at the bottom: they are heavier, more stable, and less likely to fall over in the wind. Place them closer to the corners or the wall so they don’t get in the way of your feet.
- Use a narrow stand for 4–5 plants. You can place basil, parsley, thyme, lettuce, and nasturtium on it in 6–8 in (15–20 cm) pots. A stand helps lift plants up instead of taking up the whole floor. For this format, a narrow metal plant stand works well, for example, KMOTASUO 3 Tier Tall Metal Plant Stand. Put the more sun-loving plants on the top tier, and the ones that tolerate light shade lower down.
- Add 2–3 lightweight pots to the railing. Mint, oregano, or strawberries will work well there. These plants don’t need deep containers and look good on the edge of the balcony. Just check the fastenings: railing pots need to hold securely, especially if the balcony is open and windy. It’s better to plant mint separately: it grows fast and can crowd out nearby plants.
- Place herbs closer to the door. If basil, parsley, or green onions are near the kitchen, you actually use them. I would keep the most needed herbs within arm’s reach of the door, and place the more decorative plants farther away.
- Plan watering and saucers right away. Every pot should have a saucer under it, especially if there are neighbors below the balcony. For different sizes, it’s convenient to get a set of plant saucers. It’s better to leave at least 2–3 in (5–8 cm) between the pots so it’s easy to check the soil, remove dry leaves, and water without puddles on the floor.
What to Plant
If the balcony gets more than 6 hours of sun a day, you can choose tomatoes, peppers, basil, rosemary, thyme, strawberries, and lavender.
If it gets about 3–4 hours of sun, it’s better to choose parsley, mint, lettuce, green onions, nasturtium, and oregano.
There’s no need to start with rare or fussy plants. For the first season, it’s enough to put together a simple set: five herbs, one tomato, one flowering plant, and a few compact pots of greens. After a couple of weeks, it will be clear where the plants get enough light, where the soil dries out, and what is actually easy to care for.
Tip
Add one edible flowering plant. For example, nasturtium. It trails nicely over the edge of the pot, blooms, works well in salads, and helps make the balcony feel like a small living garden, not just a set of pots.
Before buying plants, check three things: where the chair will stand, where the water will drain after watering, and whether you can reach every pot without moving half the balcony around. If yes, your layout is workable.
2. The Townhouse Skinny Corridor Garden With a Mirror Wall
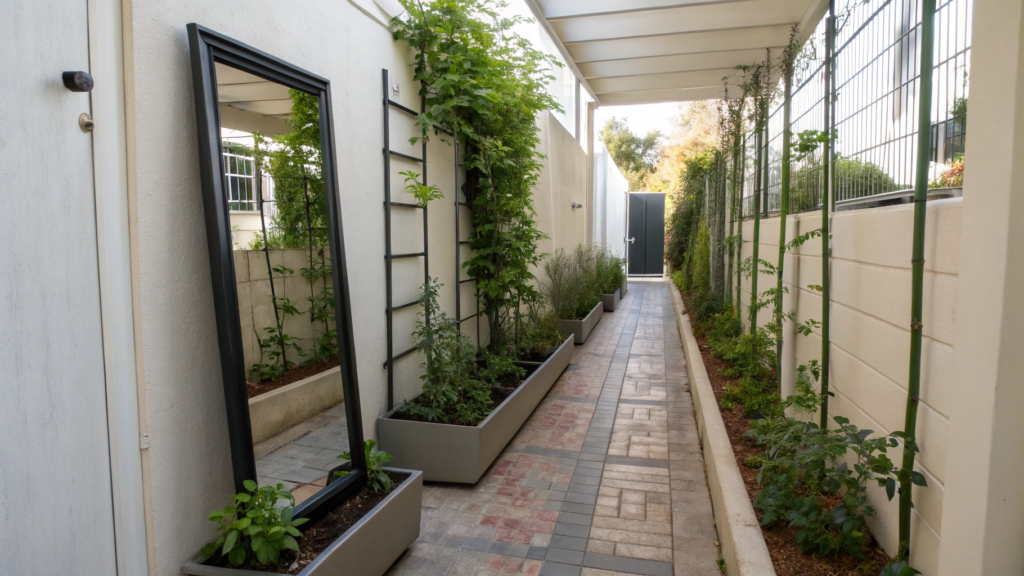
Usually, this is a passage to the backyard, patio, garage, or the spot where the trash bins are kept. But if the passage is at least 2.5–4 ft (76–122 cm) wide, you can create a small garden there with long containers, vertical supports, and one mirror panel.
You don’t need to place the mirror along the whole wall here. One large panel about 24 × 36 in (61 × 91 cm), or two narrow panels side by side, is enough. They will visually widen the passage and add reflected light. The main thing is to secure the mirror well and place it where it reflects some kind of plant, not an empty wall or a utility area.
How to Build a Narrow Garden Passage With a Mirror Wall
- First, leave space for walking. Don’t take up the whole width with containers. Leave at least 24–30 in (61–76 cm), so you can walk through calmly with a watering can, a bag from the car, or a basket for greens. In a place like this, nothing should get in your way every day.
- Place the containers along one side. It’s better to choose long, narrow boxes about 8–12 in (20–30 cm) deep. You can plant lettuce, green onions, parsley, Swiss chard, nasturtium, or compact flowers in them. Narrow rectangular containers work well for this kind of passage. They are easy to place along a wall or fence without blocking the walkway.
- Secure the mirror on the wall or fence across from the plants. This should not be one long mirrored strip along the whole corridor. One panel is enough to make the space look wider. It’s better to choose an outdoor acrylic mirror, which is lighter than glass and safer for outdoor use. Secure it with screws, brackets, or strong outdoor fasteners, depending on the surface. If the wall is brick or concrete, you’ll need anchors. If it’s a wooden fence, you can use wood screws.
- Don’t point the mirror at direct midday sun. Before fastening it, hold the mirror against the wall and see where the reflection falls at different times of day. We need to softly add light to a dark passage, not send a bright sun glare straight onto the leaves or into a window. It’s best when the mirror reflects greenery, the sky, or a bright part of the yard.
- Place the vertical support separately from the mirror. Install it to the side of the mirror or in one of the containers, so climbing plants don’t cover the reflective surface. A narrow garden trellis will work for peas, beans, sweet peas, or nasturtium. In a narrow passage, one neat vertical support is better than several stakes that constantly catch on your clothes.
- Choose plants based on the amount of sun. Usually, in a townhouse side passage, the sun appears either only in the morning or closer to the evening, while the middle of the day stays shaded because of the house wall or fence. Before planting, simply watch the passage for one day: how many hours of direct sunlight does it get?
- Plan watering and water runoff. If the passage is paved with tile, stone, or concrete, water can collect under the containers after watering. So it’s better to place saucers or shallow drainage trays under the boxes. Leave at least 2–3 in (5–8 cm) between the containers, so you can remove leaves, check the soil, and avoid moving the whole row every time you water.
What Plants to Plant
For a narrow passage where sunlight only appears for a short time — in the morning or evening — I would choose this set:
- parsley;
- green onions;
- lettuce;
- Swiss chard;
- mint in a separate pot;
- nasturtium;
- viola;
- strawberries, if there is at least a few hours of light a day.
If the passage is bright and the sun stays there for most of the day, you can add basil, dwarf pepper, or one compact tomato. But I wouldn’t start with heavy pots along the whole length. First, it’s better to check how quickly the soil dries out, whether the containers get in the way, and whether it’s easy to water the plants.
Tip
Before securing the mirror permanently, place it in the chosen spot for a few hours and see what it reflects. The best option is greenery, sky, or a bright part of the garden. If the reflection doesn’t work, simply move the mirror higher, lower, or slightly to the side. In a narrow space, even a few inches change the look.
This kind of garden should not block the passage. If you can walk through calmly, water the plants, cut some greens, and avoid hitting the containers or trellis every time, the layout works, and you’ll enjoy it every time you walk through this corridor.
3. The Apartment Rail Planter Herb Bar With Clip On Pots
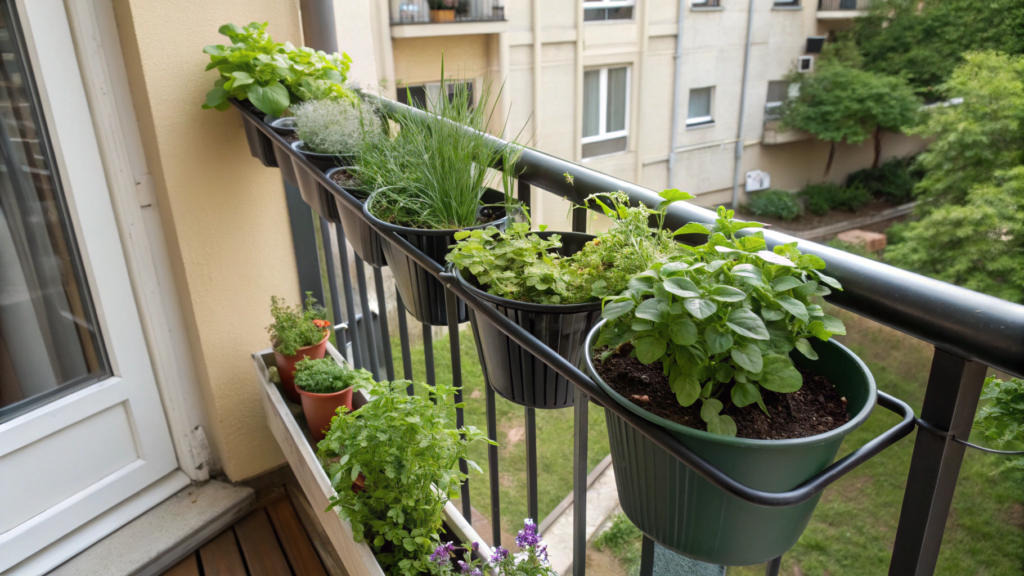
This is a common option for an apartment where there is no room for large containers. You don’t need to place pots on the floor, move a chair, or look for a separate stand. The plants attach right to the railing, and near the door you get a small herb shelf for cooking.
You can grow basil, parsley, green onions, thyme, oregano, mint, and a couple of small flowering plants. Not a huge harvest, of course. But for a salad, sauce, omelet, or pasta, it’s enough.
How to Make a Herb Bar on the Railing
- First, check the railing itself. The pots need to attach securely, especially if the balcony is open and gets windy. It’s better not to use heavy ceramic planters. Lightweight plastic or metal containers with fastenings work better for railings. If you’re not sure, choose several separate pots instead of one long box, because it’s easier to distribute the weight.
- Choose pots that attach to the railing. The easiest option is clip-on pots, which hook onto the railing without drilling. For herbs, pots about 6–8 in (15–20 cm) deep will work. You can use hanging pots for railings. They don’t take up floor space and let you arrange several herbs in a row.
- Place the most needed herbs closer to the door. Basil, parsley, green onions, and mint are better placed where you can easily reach them from the kitchen or the balcony. If it’s easy to cut an herb in 10 seconds, you’ll use it more often. Don’t put the most needed plants in the far corner, because in real life, you usually don’t want to go there while cooking.
- Don’t plant all the herbs in one large container. Different plants have different habits. Mint grows quickly, rosemary likes drier soil, and basil needs more water. So it’s better to use separate pots or at least divide the plants into groups. Mint always goes separately. It looks harmless, but it quickly takes over all the available space.
- First, see how much sunlight reaches the railing during the day. Before planting, watch the balcony for one day. It’s important to understand whether the sun stays there most of the day or only appears for a short time — in the morning or evening. This will affect which herbs are better to choose and how often you’ll need to water them.
- Plan watering right away. Pots on railings dry out faster than large containers on the floor. Especially in summer and on a windy balcony. Check the soil with your finger: if the top 1 in (2.5 cm) is dry, it’s time to water. You can place self-watering inserts in each pot, for example, Blumat Classic Plant Watering Stakes. They help the plants get through a couple of days without constant checking.
- Leave space between the pots. Don’t hang them tightly against each other. It’s better to leave at least 2–3 in (5–8 cm) between containers, so the leaves don’t stay damp, air can move more freely, and it’s easy for you to remove the pots for transplanting or washing.
What to Plant
For railings where the sun stays 6+ hours a day, you can plant:
- basil;
- thyme;
- oregano;
- rosemary;
- sage;
- nasturtium for flowers and salads.
For railings where sunlight only appears for a short time — in the morning or evening — these will work better:
- parsley;
- green onions;
- mint in a separate pot;
- cilantro;
- lettuce;
- viola.
If space is limited, start with four herbs: basil, parsley, green onions, and mint. This is the simplest set for the kitchen. Later, you can add thyme, oregano, or rosemary if the balcony gets enough sun.
Tip
Label the pots with small markers. Especially if you’re planting from seed. In the first few weeks, parsley, cilantro, and some flowers can look too similar, and it’s easy to forget what is growing where.
A herb bar on the railing should be simple: secure fastenings, lightweight pots, access to water, and plants you actually use in food. Then it’s not just “greenery for looks,” but a small kitchen zone right on the balcony.
4. The Budget Crate Cascade With Hidden Drainage Trays
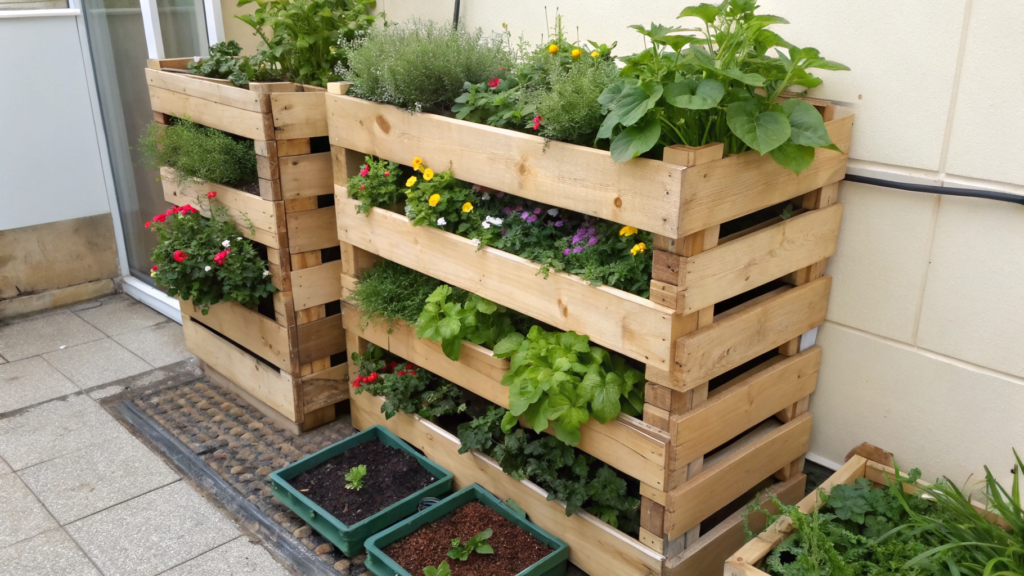
A crate cascade garden doesn’t require building a structure for years ahead. You can start with 3–5 crates, see how the plants feel, and then add one more level or rearrange everything differently.
How to Build a Crate Cascade
- Choose crates of the same or similar size. This will make the structure more stable. For a small garden, crates about 16–18 in (41–46 cm) long and 10–12 in (25–30 cm) deep will work. You can use wooden crates if the garden will be under a cover, or plastic ones if the spot is open and often gets wet.
- Place the crates like steps, not like a flat wall. The bottom row should be the most stable. You can place one or two crates on top at an angle or shift them back a little to create a cascade. Don’t make the structure too tall: for a balcony or small patio, 2–3 levels are usually enough. This way, the plants are visible, but the garden doesn’t turn into a shaky tower.
- Hide the trays inside or under the crates. Water after watering should not run across the floor. You can place a shallow tray inside each crate, and then put the pots on top of it. If the crate is open at the bottom, it’s better to place the tray on the floor under it. For different pots, it’s convenient to use a set of clear plant saucers.
- Don’t fill the crates directly with soil. It’s better to place separate pots inside. This makes it easier to change plants, remove sick leaves, take out a pot for transplanting, and control water. If you plant everything directly into the crate, the wood will get wet faster, and a plastic crate can become too heavy after watering.
- Place heavy plants at the bottom. On the bottom level, you can place peppers, dwarf tomatoes, lavender, or rosemary in 2–3 gal (7.5–11 L) pots. On the middle level, place herbs and greens. On top, it’s better to place lightweight pots with thyme, oregano, nasturtium, viola, or strawberries.
- Leave access to every pot. It’s better to leave at least 2–3 in (5–8 cm) between the plants. Then you can calmly check the soil, remove dry leaves, and take out a separate pot without taking apart the whole cascade. This is especially important if the structure stands against a wall or in a corner.
- Set up the empty crates, press gently on each level, and see if the structure wobbles. If the crates are standing on tile, you can place anti-slip pads under the bottom row. If the spot is windy, it’s better not to place tall plants on top.
What to Plant
A sunny spot where the light stays for more than 6 hours a day, I would choose:
- dwarf tomato, pepper, basil, thyme, oregano, lavender, nasturtium.
For a spot where the sun appears only for a short time — in the morning or evening — these will work better:
- parsley, green onions, lettuce, mint in a separate pot, viola, strawberries, if there is at least a few hours of light.
For pots, it’s better to use a light potting mix for containers, not regular garden soil. It compacts less after watering and lets extra water pass through more easily. If the mix feels heavy, you can add a little perlite, especially for herbs and plants in small pots.
Start with a simple set: parsley, basil, green onions, thyme, and nasturtium. These plants are easy to place in small pots, and they quickly show whether the spot works for this kind of garden.
Tip
Before placing the plants, pour a little water into the trays and check whether they are easy to remove. If a tray is hidden so deep that it’s hard to reach, in a couple of weeks there will be dirt, leaves, and extra water there. It’s better to leave a little access from the side or front right away.
As you can see, this kind of structure can be put together cheaply and without complicated tools. Crates add height, trays protect the floor, and separate pots let you change the planting without fully reworking the whole corner. In my opinion, that’s very convenient.
5. The Zero Drill Trellis Wall Using Tension Poles
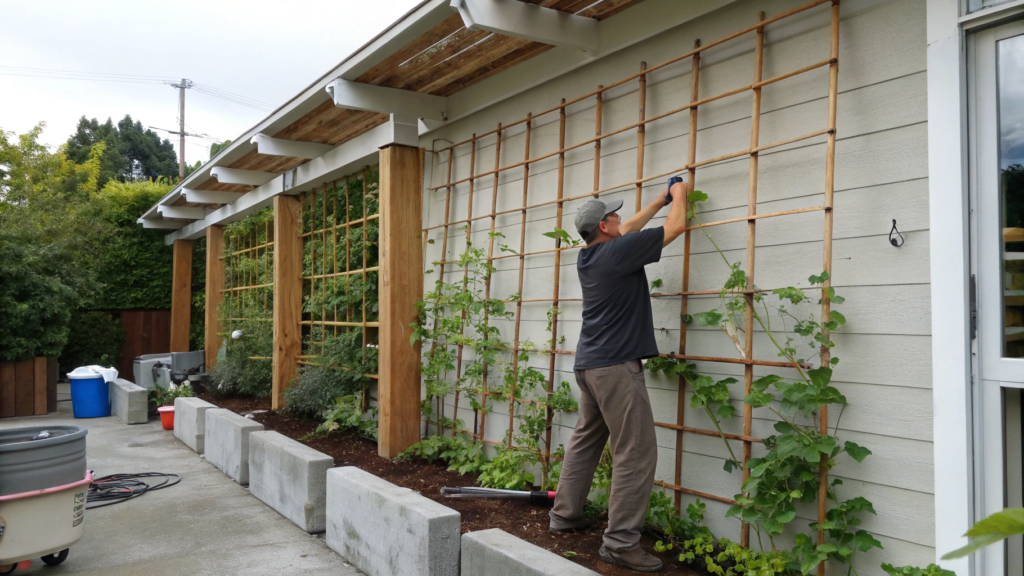
A vertical trellis without drilling makes sense in places where you can’t drill into the facade or simply don’t have a proper wall for fasteners. The support is held by telescoping tension poles that press between the floor and ceiling, an upper beam, or a cover.
Of course, this is not an option for a huge pumpkin. But for peas, beans, sweet peas, nasturtium, a compact cucumber variety, or climbing flowers, it’s a very workable setup.
How to Make a Trellis Without Drilling
- First, check whether there is a place for the poles to press against. Tension poles only work where there is a solid surface above and below: floor + balcony ceiling, floor + cover, floor + upper beam. If there is open sky above, this setup will not work. In that case, it’s better to use a freestanding trellis in a heavy container.
- Choose a spot along a wall or railing. It’s better to place the trellis along one side, not in the middle of the walkway. Leave at least 24–30 in (61–76 cm) of free passage, so you can walk through calmly, water the plants, and avoid catching on the vines. If the space is narrow, make the trellis taller, not wider.
- Place two tension poles 24–36 in (61–91 cm) apart. This is enough for a small vertical garden bed. Telescoping tension poles will work for this kind of structure. Before buying, check the height: the poles need to fit the distance from the floor to the ceiling or beam.
- Stretch netting or twine between the poles. The simplest option is garden netting for climbing plants. You can secure it with zip ties or soft garden wire. Don’t stretch the netting too tightly, so it doesn’t warp as the plants grow.
- Place the pots right at the base of the trellis. For peas, nasturtium, and sweet peas, a container about 8–10 in (20–25 cm) deep will be enough. For beans or compact cucumber, it’s better to use a 3–5 gal (11–19 L) pot. The larger the plant, the heavier the container should be. This will make the lower part of the structure more stable.
- Don’t plant too many plants in one row. For a space 24–36 in (61–91 cm) wide, 3–5 plants are enough, depending on the crop. If you plant more, the leaves will quickly cover each other, air will move through worse, and watering will become inconvenient. Fewer plants with good access to light is better.
- Check the fastening after wind and watering. Tension poles stay in place because of pressure, so sometimes they need to be tightened. Especially if the balcony is open or the floor is a little slippery. If the poles stand on tile, you can place rubber pads under the bottom so they don’t shift.
What Plants to Plant
A sunny spot where there is more than 6 hours of sun a day, you can plant:
- climbing beans;
- compact cucumber;
- nasturtium;
- sweet peas;
- Malabar spinach, if the summer is hot.
For a spot where the sun appears only for a short time — in the morning or evening — these will work better:
- regular peas;
- nasturtium;
- sweet peas;
- ivy geranium;
- mint in a separate pot, if you want greenery at the base.
For containers, it’s better to use a light potting mix for pots, not soil from the yard. In small containers, regular garden soil quickly compacts after watering. If the mix feels too heavy, you can add a little perlite, especially for cucumbers and beans.
If you’ve only just gotten into this idea, start with nasturtium or peas. They quickly grab onto the support, don’t need complicated training, and show right away how well the spot works.
Tip
Don’t place this kind of trellis where you will constantly hit it with your shoulder, bag, or door. Plants on a vertical support only look neat when they have a little space. Before planting, walk past the structure several times and check whether it gets in the way of normal movement.
A good trellis without drilling should hold firmly, come down easily at the end of the season, and leave no marks on the walls. For a small space, this is one of the neatest ways to add height without repairs or extra holes.
6. The Chef Herb Corner Inspired by Alice Waters’ Kitchen Garden
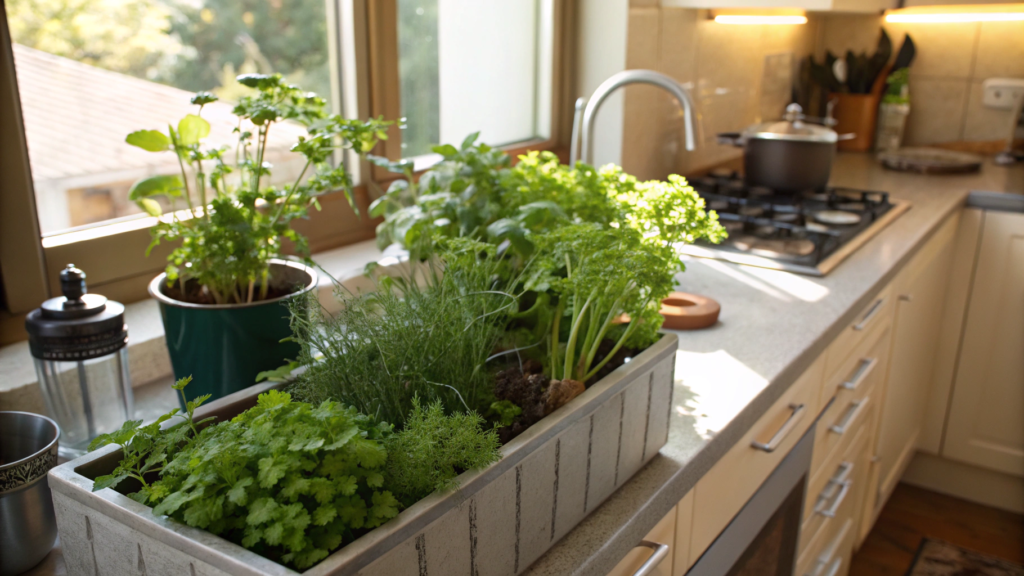
I’ve wanted to have a kitchen herb corner for a long time, because I was inspired by Alice Waters’ approach: simple seasonal food and fresh herbs right at hand.
And you don’t need much space for a corner like this. A spot around 3 × 3 ft (about 90 × 90 cm), one large container, or several separate pots is enough. But you shouldn’t plant everything at once. Plant the herbs that will actually end up in your food.
How to Build a Kitchen Herb Corner
- Choose a spot close to the kitchen. It’s best if you can reach the herbs in just a few steps. This kind of spot is usually by the door, on the patio, next to the grill, or on the balcony. If you need to walk across the whole yard for basil, you’ll remember it only after dinner.
- Decide whether you’ll use one large container or several pots. For one shared container, a size around 24–30 in (61–76 cm) wide and 10–12 in (25–30 cm) deep will work. But separate pots are often more convenient for herbs: it’s easier to move the plants around and adjust watering. Terracotta herb pots work well for this kind of corner.
- Group the herbs by care. Basil, parsley, cilantro, and green onions like more steady moisture. Rosemary, thyme, sage, and oregano are better kept separately because they need drier soil. Plant mint only in a separate pot. It grows fast and easily crowds out its neighbors.
- Place the most needed herbs closer to the kitchen. Basil, parsley, and green onions are better kept by the door or near the place where you cook. Rosemary, thyme, and sage can be placed a little farther away: they are usually used less often and in smaller amounts.
- Herb scissors. Herbs are better cut with a clean tool, not torn by hand. This way, the stems are damaged less, and the plants grow new shoots faster. In the kitchen, it’s good to always have garden scissors for herbs.
- Cut a little, but often. With basil, it’s better to cut the tops so it branches out. With parsley and green onions, take the outer stems. With rosemary and thyme, don’t cut the plant down to old woody stems. This corner should keep giving greens, not recover after one big trim.
What Plants to Plant
If the spot gets more than 6 hours of sun a day, basil, thyme, rosemary, oregano, sage, and green onions will work well.
If the sun appears only for a short time — in the morning or closer to the evening — it’s better to choose parsley, cilantro, mint in a separate pot, green onions, lettuce, and viola.
For pots, choose a light potting mix for containers, not soil from the yard. In small pots, regular garden soil quickly compacts after watering. For rosemary, thyme, and oregano, you can add a little perlite so the soil releases extra water faster.
Always start with a simple set: basil, parsley, green onions, thyme, and mint in a separate pot. That’s already enough for salads, omelets, sauces, potatoes, soups, and summer drinks.
This kind of corner doesn’t need to be big. It should be close to the kitchen, always within reach, and give you greens exactly when you need them.
7. The Secret Courtyard Citrus Setup Using One Oversize Pot
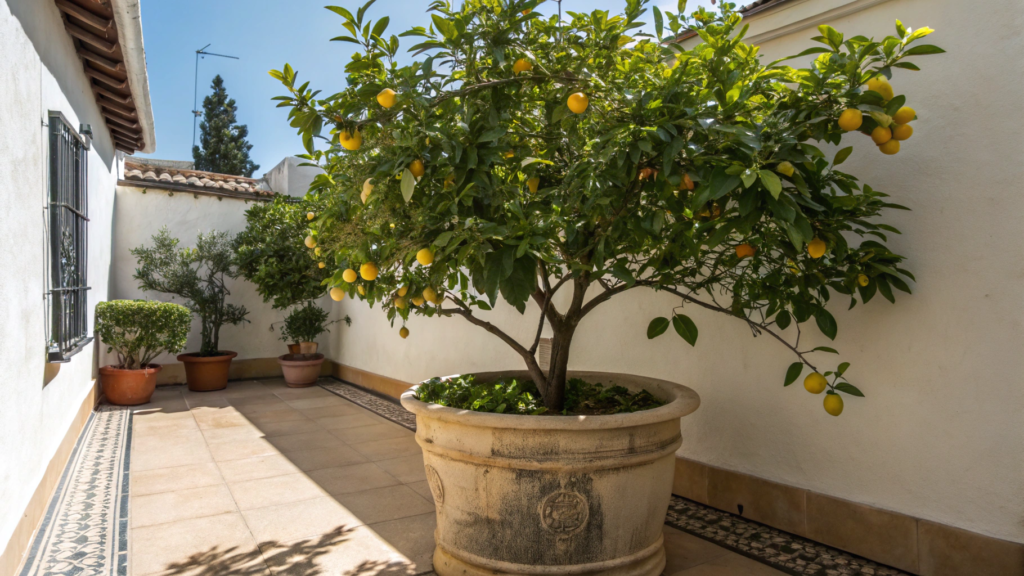
Imagine that you can grow a citrus tree in a small courtyard, too. For this idea, you need one large pot, a good spot by a wall, and a variety that does well in a pot.
One lemon, lime, or kumquat in a large pot will give you a better chance of success than three weak trees in small containers. With citrus, pot size, light, and watering matter a lot.
How to Build a Citrus Corner in One Large Pot
- Choose the brightest spot in the courtyard. Citrus trees need a lot of sun, ideally more than 6 hours of direct light a day. If the sun only reaches the courtyard in the morning or only in the evening, the tree will produce fewer fruits. It’s good if there is a wall nearby, because it protects from wind and holds a little warmth.
- Take one large pot. For a young dwarf citrus tree, a pot around 15–20 gal (57–76 L) will work. It should be heavy, stable, and have drainage holes. A large outdoor tree pot will work for this project. Before planting, place it in its permanent spot right away, because once it’s filled with soil, moving a pot like this will be inconvenient.
- Use a potting mix for citrus. Regular garden soil is not right for this kind of pot,
because it quickly compacts and can hold too much water. It’s better to use a citrus and palm mix, for example, Miracle-Gro Cactus, Palm & Citrus Potting Mix. If the mix feels heavy, you can add a little perlite so water moves through the roots faster. - Plant the tree at the same depth it was growing in the nursery. Don’t bury the trunk deeper. The top of the root ball should stay about level with the new soil. After planting, water the pot well so the mix settles around the roots, but don’t leave the pot standing in water.
- Leave free space at the top for watering. Don’t fill the pot with soil all the way to the edge. Leave about 1–2 in (2.5–5 cm) so water doesn’t spill over the sides. This is especially important in a large pot: it’s better to water slowly and deeply than to keep adding a little bit often.
- Add low plants. You can plant thyme, alyssum, or nasturtium around the edge of the pot. But don’t cover the whole surface. The citrus needs air, light, and access to the soil so you can check the moisture. I would leave at least half of the surface open.
- Plan for winter ahead of time. If your region gets frosts, place the pot on a heavy-duty plant caddy with wheels. This way, you can move the tree closer to a wall, under a cover, or into a more protected spot.
What to Plant
For one large pot, it’s better to choose a dwarf citrus variety. Good options are:
- Meyer lemon;
- Bearss lime;
- Nagami kumquat;
- calamondin;
- dwarf mandarin, if there is enough sun.
Personally, I would choose Meyer lemon or kumquat. They are easier to care for and better suited to a small courtyard than large orange trees or regular lemon trees.
Tip
Check the soil not right near the trunk, but closer to the edge of the pot. In a large pot, the top layer can look dry even when there is still enough moisture inside. Before watering, put your finger 2 in (5 cm) into the soil: if it’s dry there, it’s time to water.
Everything will be fine if the citrus gets enough light, stands in a large stable pot, and doesn’t compete with extra plants. In a small courtyard, one well-chosen citrus tree often looks better and grows more steadily than several weak plants in tight pots.
8. The Night Garden Plan With White Blooms and Solar Spots
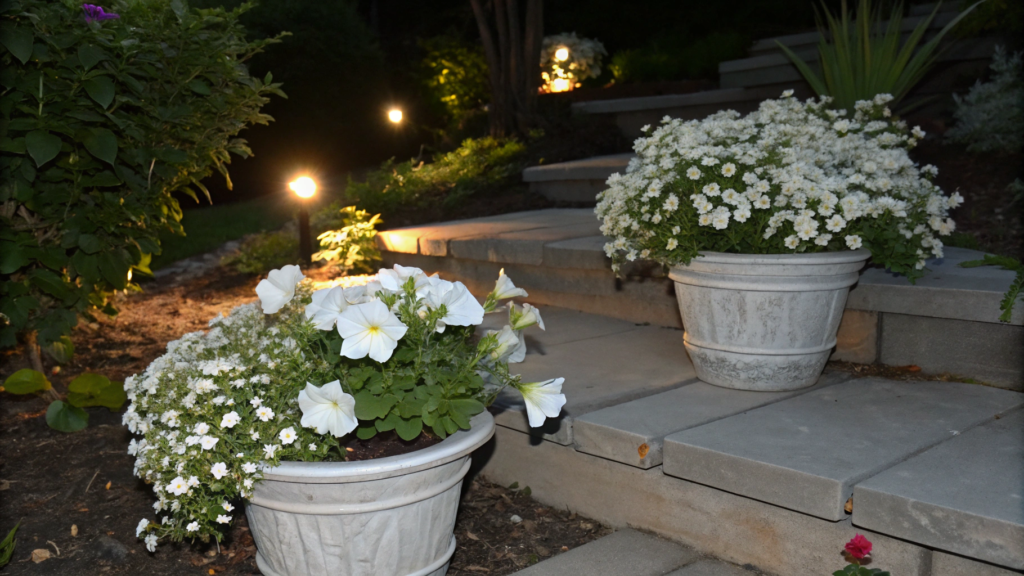
For a night garden with white flowers and solar lights, you don’t need many plants. 2–4 pots with white petunias, alyssum, bacopa, or violas, a little greenery for the background, and a few low solar lights are enough. The lighting in this kind of garden should highlight the path, the edge of a step, or the plants, not shine straight into your eyes.
How to Create a Night Garden With White Flowers
- Choose a place where you spend time in the evening. This can be a patio corner, a balcony next to a small table, a path to the door, or a small courtyard by a wall. There’s no point in making a night garden somewhere you almost never go. It’s better to design one small zone that you can see from the window or where you actually sit in the evening.
- Place white flowers closer to the edge of the zone. In the dark, white is more noticeable than dark red, purple, or blue. Pots with white flowers can be placed along a path, by the balcony entrance, near a bench, or around a small table. For containers, pots 10–14 in (25–36 cm) wide will work.
- Choose 2–3 types of plants, not ten at once. White petunias, alyssum, violas, bacopa, white geraniums, or dwarf zinnias look good. If the place is warm and sunny, you can add flowering tobacco or white lavender. Too many different plants in a small evening garden will look random.
- Add greenery for the background. White flowers are easier to see when there is dark or dense greenery nearby. You can add thyme, sage, oregano, ivy, or ornamental grass in a separate pot. Don’t fill the containers only with flowers: a little greenery makes the planting look neater and helps the flowers stand out in the evening.
- Place solar lights low. For this kind of garden, it’s better to choose small solar spotlights or stake lights. Place them not in the center of the pot, but next to the containers, directing the light toward the plants or the path. Solar garden spotlights will work, for example, InnoGear Solar Lights Outdoor Waterproof. Usually, 2–4 lights are enough for a small zone.
- Don’t point the light at your face. The light should highlight the flowers, the edge of the path, or the wall behind the plants. If it shines directly at the place where you sit, it quickly gets annoying in the evening. Before placing the spotlights permanently, turn them on after sunset and move them around a little.
- Use a light potting mix for containers. For pots, it’s better not to use regular garden soil. It compacts quickly and lets water pass through worse. White annuals like petunias, alyssum, and bacopa grow better in a light container mix. If the pots stand outdoors, be sure to check the drainage holes.
What Plants to Plant
For a sunny place where the light stays for more than 6 hours a day, white petunias, alyssum, white geraniums, bacopa, dwarf zinnias, and white lavender will work well.
For a place where the sun appears only for a short time — in the morning or closer to the evening — it’s better to choose white violas, alyssum, bacopa, ivy, and a little decorative greenery.
I like white petunias, alyssum, and bacopa most. These plants are easy to find, they grow well in containers, and in the evening their white flowers are more visible against dark greenery.
Tip
First, place the lights without the plants and see in the evening where the light falls. Then arrange the pots. This makes it easier to understand where the white flowers will be more noticeable, and where the light is just shining on an empty floor or wall.
A night garden doesn’t need to be bright. 2–4 pots with white flowers, a little greenery, and soft light in the right places are enough. Then in the evening, it won’t be just a dark corner, but a small zone where it feels nice to step outside after a hot day.
9. The Pollinator Strip With Compact Natives in Two Troughs
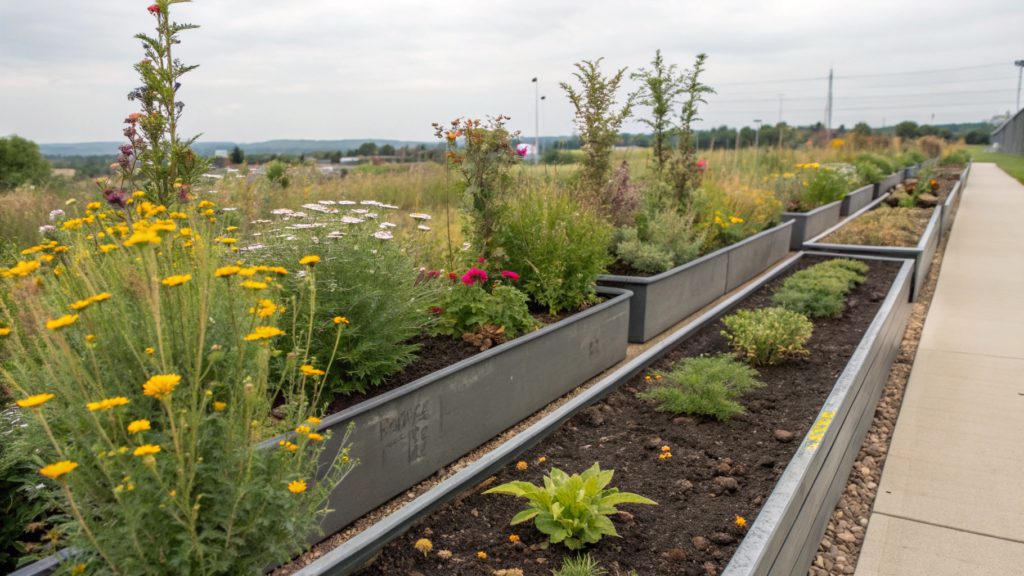
A pollinator strip in two long containers creates a small flowering zone for bees, butterflies, and other helpful insects.
And you don’t need much soil here. Even two containers can work as a small “island” for pollinators if you choose plants with different bloom times. One type finishes blooming, another starts. This way, insects have somewhere to fly to for quite a long time.
How to Build a Pollinator Strip in Two Containers
- Choose two long containers. It’s better to use trough containers about 24–36 in (61–91 cm) long and 10–12 in (25–30 cm) deep. In boxes that are too shallow, the soil dries out faster, and the roots will feel cramped.
- Place the containers in one line or in a slight curve. If the space is narrow, simply place them along a wall, railing, or the edge of the patio. If there is a little more room, you can move one container slightly forward so the planting looks more natural. The main thing is to leave a walkway of at least 24–30 in (61–76 cm) if people often walk nearby.
- Choose compact native plants. For small containers, it’s better to use low-growing varieties that won’t spill over the edge or cover the whole walkway. Compact coneflowers, coreopsis, penstemon, bee balm, sage, blanket flower, asters, and milkweed can work if they suit your region. Native plants matter because local pollinators often recognize them better.
- Combine plants with different bloom times. In one container, you can plant early and summer flowers, and in the second one, summer and fall flowers. This way, the planting won’t look good for only two weeks. For example, violas, sage, or penstemon can bloom in spring and early summer, coneflowers, coreopsis, and blanket flowers in summer, and compact asters closer to fall.
- Don’t plant too densely. In a long 24–36 in (61–91 cm) container, 3–5 plants are usually enough, depending on their size. Leave space between the plants so air can move freely and the leaves don’t lie on top of each other after rain. Empty spaces at the beginning of the season are normal. In a few weeks, the plants will fill in.
- Use a light potting mix for containers. Regular garden soil in boxes like these quickly compacts after watering. It’s better to use a container potting mix and add a little compost. If the plants prefer drier conditions, you can add perlite so extra water drains away faster.
- Water deeply, not a little bit every day. Pollinator containers should get well watered, down to the lower layer of soil. Then let the top 1 in (2.5 cm) dry out. If you keep watering in small amounts, the roots will develop closer to the surface, and the plants will handle heat worse.
- Don’t remove all spent flower heads right away. You can cut some flowers to extend blooming. But it’s better to leave a few seed heads for birds and insects. Especially on coneflowers, coreopsis, and asters. In a small garden, these details still matter.
What to Plant
For a sunny spot, compact coneflower, coreopsis, blanket flower, sage, penstemon, bee balm, and asters will work well.
And where the sun appears only for a short time — in the morning or closer to the evening — it’s better to choose viola, compact asters, penstemon, heuchera, alyssum, and some low native flowers that suit your region.
Good options are coneflower, coreopsis, sage, and compact asters. They give you different flower shapes, different bloom times, and look good in long containers.
Tip
Before buying plants, check which native flowers work best for your region. Not all “pollinator plants” are equally useful everywhere. It’s better to get a few compact native varieties from a local nursery than a random seed mix with a pretty picture on the package.
This kind of strip won’t take up much space, but it will add life to a small garden. Two long containers, a few right plants — and bees, butterflies, and movement start appearing near the patio in a way a regular row of decorative pots won’t give you.
10. The Self Watering Container Mix That Survives Long Weekends
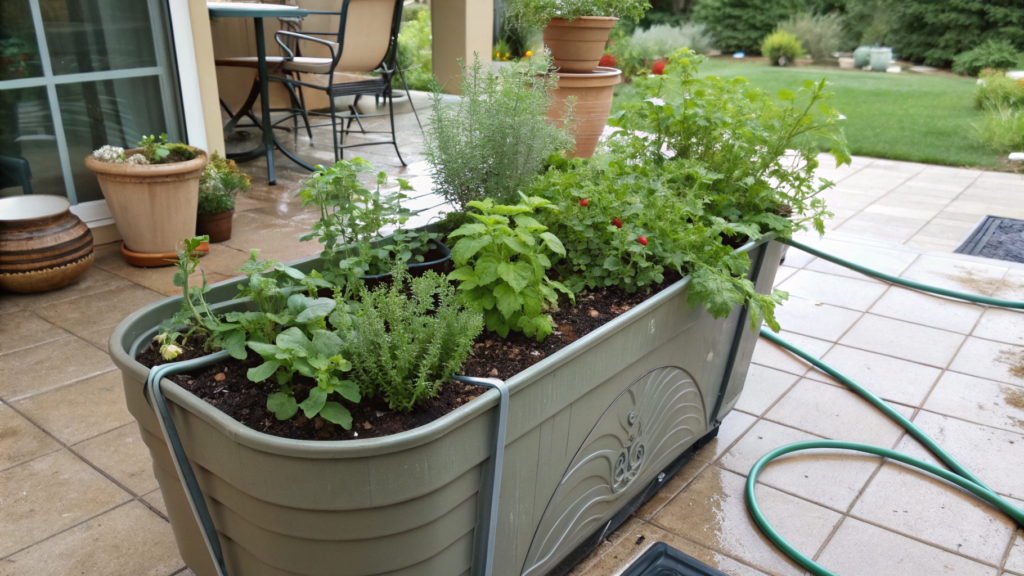
If you travel often or forget to water your plants, a self-watering container garden is a real find. Here, the right mix of plants matters: it’s better to choose plants that like a similar watering routine and don’t start suffering after one hot day.
Of course, even a self-watering garden still needs care. But it gives you a water reserve for a few days and helps the plants survive long weekends without daily checking.
How to Build a Self-Watering Container Mix
- Choose a container with a water reservoir. The easiest option is a self-watering box or pot where water is stored in the lower part, and the roots gradually take moisture through the soil. For herbs and greens, a container about 24–32 in (61–81 cm) long and 10–12 in (25–30 cm) deep will work.
- Don’t mix plants with different habits. Basil, parsley, green onions, lettuce, and cilantro like more steady moisture. Rosemary, thyme, sage, and lavender prefer drier soil. So for a self-watering container, it’s better to choose the first group. Herbs that like drier soil can be kept separately in regular pots.
- Use a light potting mix. Heavy garden soil is not right for this kind of container. It compacts after watering and may not let water pass through well. It’s better to use a container potting mix and add a little perlite if the mix feels dense. The soil should hold moisture, but not turn into a wet lump.
- Plant with normal spacing. In a container 24–32 in (61–81 cm) long, 4–6 plants are usually enough. For example: basil, parsley, green onions, lettuce, and nasturtium. Don’t plant everything too tightly. In a couple of weeks, the leaves will grow out, and the plants will need air.
- Fill the reservoir before you leave. Before a long weekend, water the soil well from the top, and then fill the lower reservoir. This way, the roots get moisture right away, and the water reserve will work for the next few days. If the container stands in a very hot spot, it’s better to move it somewhere with morning sun and light shade in the afternoon.
- Add mulch on top. A thin layer of straw, shredded leaves, or coconut mulch helps the soil dry out more slowly. A layer of about 0.5–1 in (1–2.5 cm) is enough. Don’t pile mulch right against the stems, so extra moisture doesn’t sit at the base of the plants.
- Test the system before your trip. Don’t fill the reservoir for the first time right before leaving. It’s better to test the container a week ahead. This way, you’ll see how quickly the water goes down, whether it sits too long, and whether the soil gets too wet. You’ll understand how much water your plants actually need.
What to Plant
For a self-watering container, it’s better to choose plants that do well with steady moisture:
- basil;
- parsley;
- green onions;
- cilantro;
- lettuce;
- nasturtium.
If the container stands in the sun for more than 6 hours a day, you can add basil, nasturtium, and compact pepper.
If the sun appears only for a short time — in the morning or closer to the evening — it’s better to choose parsley, green onions, lettuce, cilantro, and mint in a separate pot.
Basil, parsley, green onions, and lettuce grow fast, are often used in the kitchen, and show you pretty quickly how convenient the self-watering container is for you. So start with these herbs.
Tip
Before leaving, don’t put the container in the hottest spot “just in case, so it gets more sun.” For long weekends, it’s better to choose a place where the plants get morning light but don’t stand in direct sun all day. This way, the water reserve will last longer, and the leaves will wilt less.
Setting Up Your Patio
Start with one container, one wall, one corner by the door, or a couple of pots on the railing. This makes it easier to understand where there is enough sun or not enough sun, how quickly the soil dries out, and which plants actually fit into your everyday life.
I would start with the simplest option: a container with herbs near the kitchen, one large pot with citrus, or a self-watering container for greens. If the space is very narrow, it’s better to choose a vertical trellis or two long containers along the wall.
Share in the comments which small space you would like to improve — a balcony, patio, side passage, or courtyard? And where would you start?