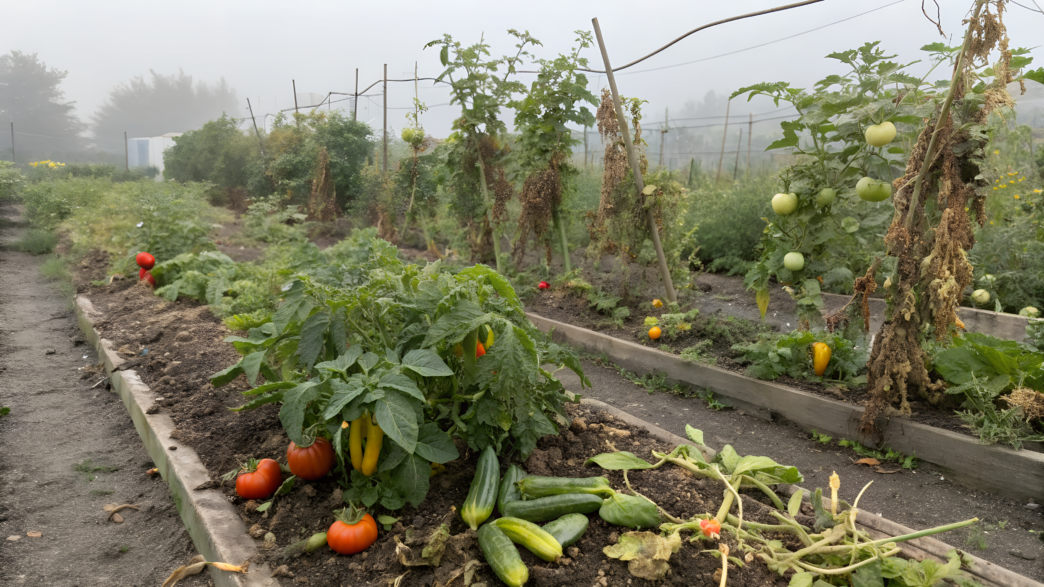
Companion planting mistakes are rarely obvious in spring. The seedlings are small, there is plenty of space between the plants, and the garden bed looks perfectly reasonable.
The problems show up later. One plant starts blocking sunlight from another, roots compete for water, leaves stay wet longer, and the harvest ends up smaller than it could have been.
Lindy and I are no exception. We have also made plenty of mistakes when choosing neighbors for companion plantings. Sometimes we trusted planting charts too much, and sometimes we tried to use every available patch of soil.
In this article, we will look at 10 companion plantings that seem like good ideas at first but start causing extra problems by the middle of the growing season.
1. Pairing Tomatoes With Cabbage Family Plants
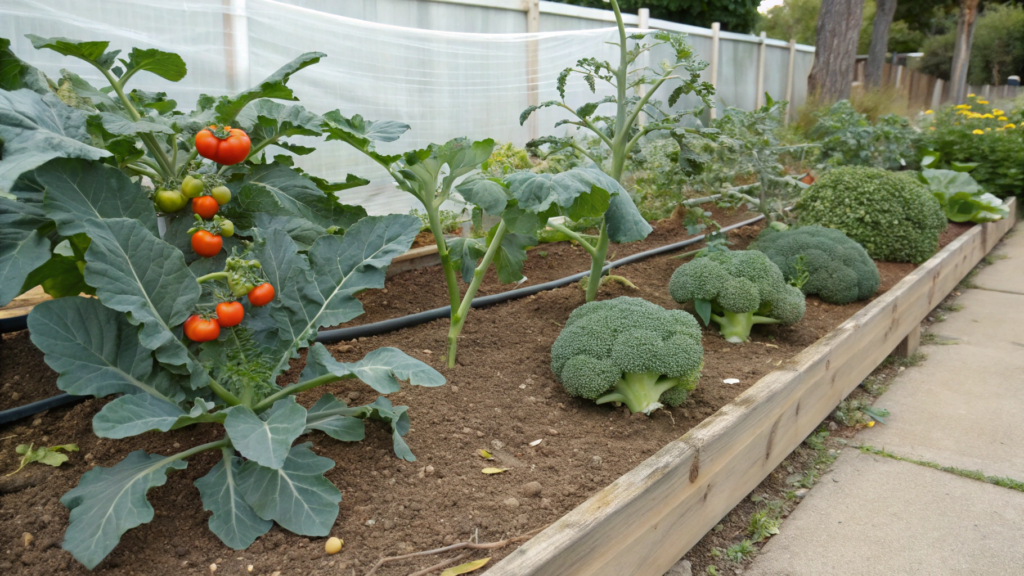
Tomatoes and cabbage family plants often end up in the same garden bed because we want to use every available patch of soil. Especially in spring, when the small seedlings look harmless and there is so much empty space between them!
On our first small homestead in Idaho, planting broccoli between young tomatoes seemed perfectly reasonable to me. We would harvest the broccoli first, and the tomatoes would only spread out later. In reality, the broccoli stayed in the bed longer than I expected, while the tomatoes quickly grew from tidy little seedlings into huge plants.
Cabbage, broccoli, cauliflower, Brussels sprouts, and kohlrabi belong to the same group of crops. Many of them develop wide leaves and large root systems. Tomatoes also need sunlight, water, nutrients, and steady airflow between their leaves.
Why These Plants Start Running Out of Space
At first, the plants may look perfectly fine, but after a few weeks, their leaves begin touching and their roots take up more and more space. If you plant tomatoes and cabbage family crops too close together, you may run into these problems:
- Large cabbage leaves shade the lower part of the tomato plant.
- Both crops pull water and nutrients from the same patch of soil.
- Dense foliage prevents air from moving freely between the plants.
- The leaves stay wet longer after rain or watering.
- Tying up tomatoes, checking the plants for pests, and harvesting become more difficult.
This does not mean that tomatoes and cabbage will necessarily die when grown next to each other. But in a small bed, they really can start getting in each other’s way. This is especially true when you pair a tall tomato plant with late-season Brussels sprouts.
Companion planting charts can help you notice combinations that may cause problems. But it is also important to understand why and consider not only the names of the crops, but also the mature size of the plants, their need for sunlight, water, and open space. With tomatoes and cabbage family crops, crowding is usually the main risk.
How to Plant Them When Space Is Limited
The easiest option is to grow these crops in separate beds. Near tomatoes, you can plant leaf lettuce, green onions, basil, or compact nasturtiums. They take up less space and do not block sunlight from the tomato plants.
Cabbage, broccoli, and cauliflower can grow near beets, celery, or lettuce. But even suitable neighbors need enough room. The planting should not turn into one solid wall of leaves.
If you do not have enough separate beds, you can grow these crops one after another in the same space:
- Plant broccoli or kohlrabi in early spring. Choose loose soil that drains well. Before planting, you can add a little mature compost and mix it into the top layer of soil.
- Try to harvest before the summer heat arrives. Do not wait too long to harvest the broccoli or kohlrabi if tomato seedlings are already growing nearby. Even one large plant can quickly block sunlight from a young tomato.
- Clear the space after harvesting. Remove the thick stem and the large root ball. Small roots can stay in the soil because they will gradually break down and will not interfere with the next planting.
- Add 1–2 in (2.5–5 cm) of mature compost. Gently mix it into the top 3–4 in (8–10 cm) of soil. There is no need to dig the entire bed deeply.
- Plant the tomato and water it well. The soil should be loose and moist, but not waterlogged. If the seedling has become leggy, you can bury part of the stem. The tomato will grow additional roots along it.
It is best to leave about 24–36 in (61–91 cm) between a large tomato plant and a cabbage family plant. For tall tomato varieties, I would choose a distance closer to 36 in (91 cm).
Keep in mind that you should not immediately add more fertilizer if the plants are growing slowly or look weaker than expected. The reason may not be poor soil. It could be not enough sunlight, crowding, or uneven watering.
For a simple home check, you can use a soil testing kit → Luster Leaf 1601 Rapitest Test Kit for Soil pH, Nitrogen, Phosphorous and Potash. It helps check the soil’s acidity and gives an approximate reading of its nitrogen, phosphorus, and potassium levels.
In spring, a small tomato plant and compact broccoli may look like good neighbors. But when planting, it is always worth imagining how much space each plant will take up by midsummer. A couple of extra feet between them usually does more good than another vegetable squeezed into an empty corner of the bed.
2. Planting Onions Next to Beans and Peas
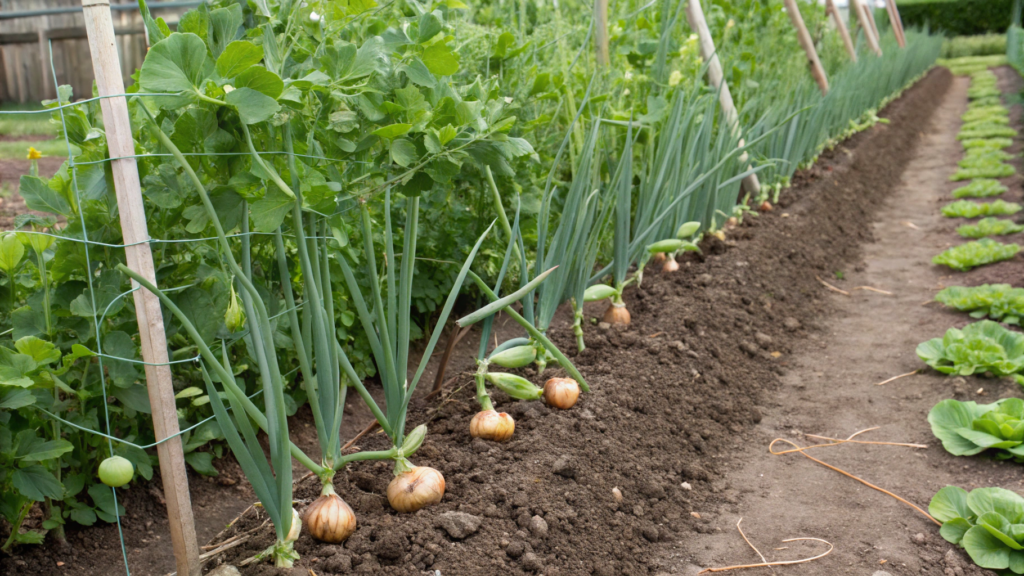
In a companion planting setup, onion bulbs take up very little space, while beans and peas grow upward, especially when you give them a support. At first glance, the bed looks very efficiently planned.
Beans and peas are legumes. Bacteria live on their roots and help the plants get nitrogen from the air. For this process, the roots need loose soil and good conditions for growth. Onions have shallow roots, but they form a dense root network in the top layer of soil, right where young bean and pea roots begin to develop.
Why This Combination Can Cause Problems
The main problem starts when onions are planted too close to bean or pea seeds or young legume plants. Their roots quickly meet in the same small layer of soil, and the plants begin sharing water, space, and available nutrients.
With this type of planting, you may notice the following:
- Bean or pea seeds sprout unevenly.
- Young plants grow more slowly.
- The stems stay thin.
- Peas produce fewer side shoots.
- The soil between the rows dries out faster.
- Pulling onions can easily damage the roots of the legumes.
Some sources claim that onions always suppress beans and peas through substances they release. In laboratory studies, onion seed extracts did slow the germination and early growth of peas, but the results of a laboratory experiment cannot be fully applied to a regular garden bed. They only suggest that very close planting may not be the best choice.
In the garden, the more obvious problem is usually much simpler: onions, beans, and peas are all trying to develop their roots in the same small patch of soil. And if the bed dries out quickly, young bean and pea plants usually suffer first.
How to Space Onions, Beans, and Peas
I prefer to leave at least 12–18 in (30–46 cm) between onions and legumes. That is not a huge gap, but it gives the roots enough room so they are not growing right against each other from the beginning.
If space is limited, you can do this:
- Plant peas or beans near a support. The soil should be loose and drain well. If the soil is heavy, add a little mature compost, but do not overload the bed with nitrogen fertilizer.
- Leave an open strip in front of the row. A distance of about 12–18 in (30–46 cm) is usually enough for maintenance, watering, and healthy root growth.
- Plant onions on the other side of the path or along the edge of a nearby bed. They will still be close, but they will not grow directly among the roots of the beans and peas.
- Water legumes deeply instead of giving them a little water every day. The water should soak the soil to a depth of about 6–8 in (15–20 cm). This encourages the roots to grow deeper instead of staying near the surface.
- Do not pull mature onions next to fruiting bean plants. If the plants ended up close together, gently loosen the bulb by hand and pull it upward without digging around it.
Near beans and peas, it is better to plant carrots, radishes, lettuce, or cucumbers, as long as every plant gets enough light. Good neighbors for onions include beets, carrots, lettuce, or tomatoes.
Watching the moisture level is especially important during the first few weeks after the seedlings appear. You can check the soil surface by hand, while a soil moisture meter can help you see whether the soil has dried out deeper down near the roots.
You do not need to move onions to the other end of the garden. But I would no longer plant them directly between pea or bean seeds. A little extra space is more useful here than trying to fill every empty spot in the bed.
3. Putting Fennel Anywhere Near Your Vegetable Beds
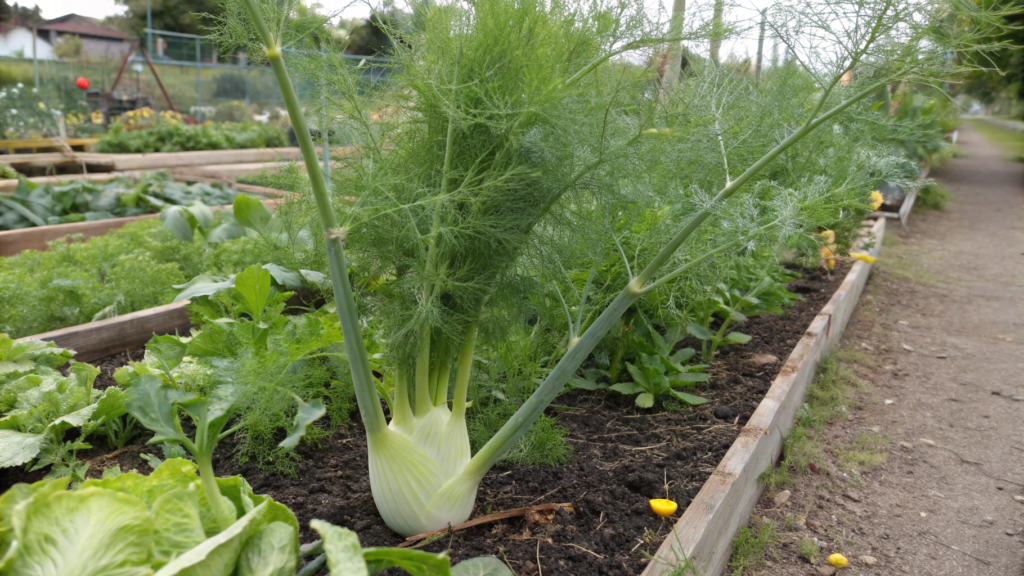
Fennel is often planted near vegetables because it looks good, smells great, and attracts beneficial insects. Then it grows to 4–6 ft (1.2–1.8 m), spreads its leaves outward, and starts taking up much more space than we expected.
Why Fennel Is Considered a Difficult Neighbor
Fennel is often described as having allelopathic properties. This means the plant may release substances that affect seed germination and the growth of other plants.
In studies, fennel extracts did slow the germination and early growth of some plant species. But most of these experiments were carried out under controlled conditions, where seeds were treated with concentrated plant extracts. Regular garden soil is much more complex, so we cannot confidently say that one fennel plant will stop every nearby vegetable from growing.
Even so, I would not sow sensitive vegetables right next to fennel roots.
Besides the possible chemical effect, there are also simpler and much more obvious problems. Mature fennel:
- grows tall and may shade smaller vegetables;
- develops a large root system;
- takes water from plants growing very close to it;
- makes it harder to care for the edge of the bed;
- self-seeds easily if the flower heads are not removed in time.
The last point is especially important. One flower head left in place can produce plenty of seeds, and the following year, young fennel plants may appear nowhere near the spot you planned.
Where to Grow Fennel Instead
You do not need to give up fennel completely. It is a useful plant that produces edible leaves, seeds, and bulbs. Its flowers also attract bees, hoverflies, lacewings, and small predatory wasps that help keep aphids and some caterpillars under control.
I simply do not place fennel inside a tightly packed vegetable bed. Instead, you can do this:
- Give fennel its own area. A sunny spot near a fence, shed wall, or the outer edge of the garden works well. The main thing is to make sure the mature plant does not block sunlight from low-growing vegetables.
- Do not sow tiny seeds nearby. Carrots, lettuce, radishes, and other crops that germinate directly in the soil are better planted farther away from the base of the fennel. This keeps young seedlings from competing with its roots right away.
- Leave at least 24–36 in (61–91 cm) around the plant. This is especially important if you are growing perennial herb fennel, which becomes large and stays in the same place for several years.
- Use a container in a small garden. Fennel needs a pot at least 18–24 in (46–61 cm) deep and wide, with drainage holes. That is usually enough for one plant, although the container will need more frequent watering in hot weather.
- Cut off the flower heads before the seeds mature. Leave a few umbels for beneficial insects, but remove them when the flowers begin to dry. Otherwise, the wind will decide where fennel grows next year.
Fennel does not need to be treated as harmful to the entire garden. But it is a large plant that may affect seed germination, shade nearby crops, and self-seed aggressively. A separate corner or a large container lets you get all of its benefits without testing how far its influence may spread across your own vegetable beds.
4. Growing Potatoes Beside Tomatoes and Peppers
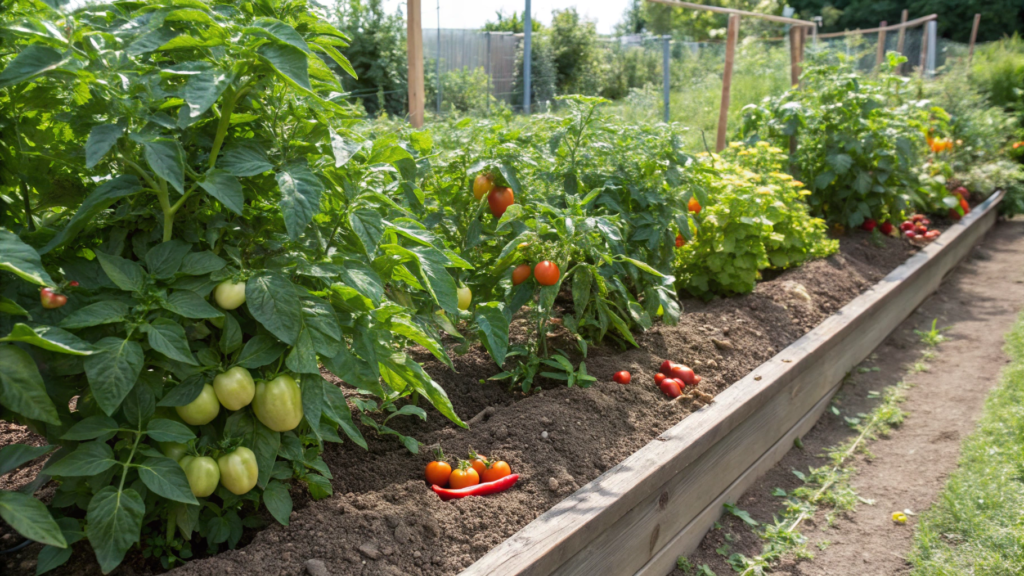
It seems logical to plant potatoes, tomatoes, and peppers next to each other because they like similar conditions: plenty of sun, fertile soil, and regular watering.
But all three crops belong to the nightshade family. Because of this, they can share the same diseases and pests. If the plants grow right next to each other, a problem that starts on the potatoes gets a short path to the tomatoes and peppers.
Why Related Plants Are Better Kept Apart
One of the main risks is late blight. It develops especially quickly in cool, wet weather, affecting the leaves and stems of potatoes and tomatoes. Peppers usually suffer from it less often, but planting nightshades close together still creates a dense area where diseases and pests can move from one plant to another.
There are also other problems you can notice even in a healthy garden:
- Potato foliage shades the lower leaves of tomatoes and peppers.
- Dense foliage gets poor airflow and dries more slowly after rain.
- Colorado potato beetles can move more easily between suitable crops.
- The plants pull water and nutrients from the same patch of soil.
- Hilling potatoes near tomato roots becomes difficult.
- Digging up the tubers can damage nearby plants.
The last point is often underestimated. You cannot simply pick potatoes from a plant. You have to move or lift the soil with a garden fork, a hand trowel, or your hands. By then, the roots of mature tomato plants may already reach quite far from the stem. So you are looking for potatoes and find a tomato root instead. Not the best surprise…
How to Grow Potatoes More Safely
It is better to give potatoes their own row or garden bed. You do not have to send them to the other end of the property, but you should leave enough room between them and the tomatoes for walking and maintenance.
Here is how you can organize the planting:
- Prepare loose soil for the potatoes. It should drain well and allow the tubers to grow freely. Before planting, add about 1–2 in (2.5–5 cm) of mature compost and lightly mix it into the top layer of soil.
- Leave room for hilling. It is best to keep about 3–4 ft (91–122 cm) between the potatoes and the nearest tomato or pepper plants. This distance leaves space for a path and lowers the risk of damaging nearby roots.
- Do not let the foliage turn into one solid wall. Tie up the tomatoes and make sure the potato foliage does not fall over the neighboring plants. The leaves should be able to dry properly after rain and watering.
- Check the nightshades at least once a week. Look for dark spots, yellowing, beetle damage, and leaves that wilt unusually fast. The sooner you notice a problem, the fewer plants it can affect.
- Do not plant nightshades in the same place the following season. After potatoes, it is better to grow beans, peas, carrots, lettuce, or cabbage family crops. Move the potatoes to a spot where plants from a different family grew the year before.
If your garden is small, potatoes are easy to grow in fabric potato grow bags, such as VIVOSUN 5-Pack 10 Gallon Grow Bags, Heavy Duty Thickened Nonwoven Fabric Pots with Handles, with a capacity of 10–15 gal (38–57 L).
The containers can be placed away from the tomatoes, and you will not have to dig near their roots when harvesting.
Near potatoes, you can plant beans, lettuce, radishes, or cabbage, while keeping enough space between the plants. Near tomatoes and peppers, it is more convenient to grow basil, green onions, or leaf lettuce. They take up less room and do not make it harder to reach the main plants.
From Our Experience
Lindy and I usually harvest together. One of us works with the plants above the soil, while the other handles the soil and baskets below. When the potatoes grew almost under the tomato branches, we kept getting in each other’s way. We had to hold the plants aside, move the supports, and make sure the garden fork did not get too close to the roots.
Now the potatoes get their own bed or large containers. This makes it easier to care for all three crops, spot problems sooner, and harvest without extra trouble. As you can see, similar growing needs do not mean the plants should share the same bed.
5. Pairing Cucumbers With Aromatic Herbs Like Sage
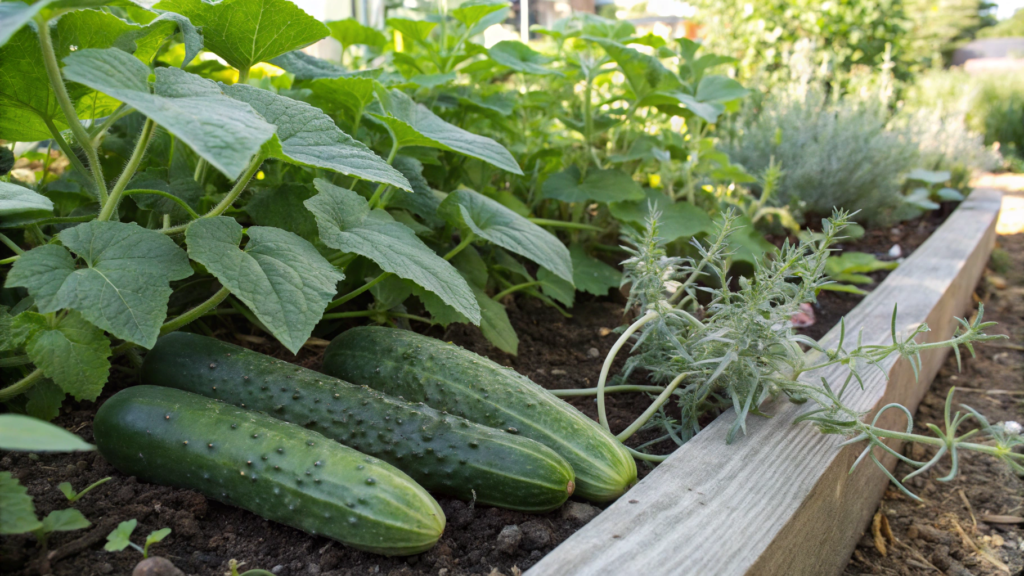
Cucumbers and sage both like full sun. On top of that, sage’s strong scent is often seen as a natural form of pest protection. But these crops have very different needs when it comes to water, soil, and open space.
Cucumbers grow quickly, send out long vines, and need consistently moist soil. Sage, on the other hand, does better in drier soil and does not handle having wet roots for long periods.
So the problem is not that sage necessarily releases some substance that harms cucumbers. The main issue is their different care routines. When these plants share one small bed, one of them almost always has to put up with unsuitable conditions.
Why Cucumbers and Sage Struggle to Share One Bed
During flowering and fruit production, cucumbers need especially large amounts of water. If the soil dries out, the fruit may grow more slowly, become misshapen, or develop a bitter taste. Sage comes from drier regions and handles short periods without watering better than constantly wet roots.
If you plant them too close together, you may run into these problems:
- Frequent watering for cucumbers keeps the soil around sage too wet.
- Dense cucumber foliage blocks sunlight from the sage.
- The vines catch on its branches and make harvesting the leaves more difficult.
- Air moves less freely between the plants.
- Leaves stay wet longer after rain or watering.
- Large cucumber roots and the roots of perennial sage take up the same patch of soil.
Close planting becomes especially inconvenient in the second half of summer. A small sage plant is still easy to notice in spring, but later cucumber vines can cover it almost completely. And looking for an herb under prickly cucumber leaves is, I think, not exactly enjoyable.
You should also not expect sage’s strong smell to automatically protect cucumbers from every insect. A strong scent alone does not make a plant a good neighbor for every vegetable crop (University of Minnesota).
What to Plant Near Cucumbers Instead of Sage
It is better to move sage to a separate bed with other perennial herbs or grow it in a container. Near cucumbers, leave plants that can handle more frequent watering.
You can choose:
- dill, as long as you do not let it spread too much;
- nasturtiums trailing along the edge of the bed;
- sweet alyssum, which attracts small beneficial insects;
- radishes, which can be harvested before the cucumbers take up much space;
- leaf lettuce, especially early in the season;
- beans, if they have their own support.
It is best to train cucumbers onto a sturdy trellis from the beginning. Growing them vertically frees up ground space, improves airflow around the leaves, and makes ripe fruit easier to spot. Leave at least 18–24 in (46–61 cm) between the base of a cucumber plant and the nearest large perennial.
You can prepare the bed like this:
- Add mature compost to the soil. Spread a layer about 1–2 in (2.5–5 cm) thick and mix it into the top part of the soil. Cucumbers need fertile soil that holds moisture without becoming waterlogged.
- Install the support before planting. It will be harder to add later because you may damage the roots or break young vines. For most varieties, a trellis about 5–6 ft (1.5–1.8 m) tall will work.
- Leave open space around the base of the plants. Do not fill every gap near the stems with herbs. This makes it easier to water the cucumbers and check the lower leaves.
- Add mulch after the soil warms up. A layer of straw or shredded leaves about 2–3 in (5–8 cm) thick will help the soil hold moisture longer. Leave a small gap around the stem.
- Water the soil, not the leaves. Cucumbers need deep, even watering. Try to soak the soil to a depth of about 6–8 in (15–20 cm) instead of lightly wetting the surface every day.
From Our Experience
Lindy and I grow sage where we can water it separately from the vegetables. Usually, that is along the edge of the property with other perennial herbs. There, it can spread, flower, and attract insects without making us choose between dry soil for sage and regular watering for cucumbers.
Our cucumber bed usually looks like this: a support, compost, mulch, and a few small annual companions. Lindy is usually the first to notice vines heading in the wrong direction, and she guides them back onto the trellis before they reach the neighboring bed.
Sage is not a bad neighbor on its own. Its habits simply do not match the needs of cucumbers very well. By separating them, we get healthier plants and much less trouble with watering.
6. Planting Carrots Too Close to Dill
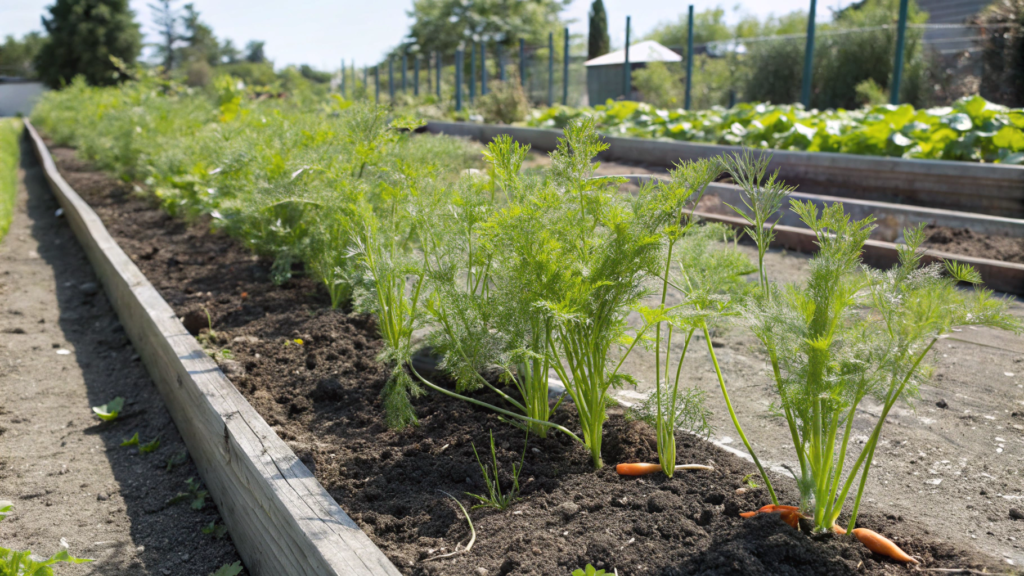
Carrots and dill look like an almost perfect pair for the same garden bed. Both plants like full sun, both can be sown directly into the soil, and the fine dill foliage barely shades young carrot seedlings at first.
But dill grows tall quickly, sends out side branches, and under good conditions can reach 3–5 ft (91–152 cm). Carrots stay low while developing most of their harvest underground. If the crops are sown too close together, young carrots have to share light, moisture, and root space with the dill.
When Helpful Herbs Start Getting in the Way
Dill is often recommended for the garden because of its flowers. They provide nectar and pollen for hoverflies, ladybugs, and small parasitic wasps. These insects can help keep aphids and some caterpillars under control. In that sense, dill really is useful.
But it does not need to grow right inside the carrot row to attract insects.
When planted too close together, these problems can come up:
- Fast-growing dill seedlings shade slow-developing carrots.
- The roots pull moisture from the same small patch of soil.
- Thick foliage makes the row harder to weed.
- Cutting dill can easily damage young carrot tops.
- Mature stems may fall over the carrots after wind or rain.
- Self-seeded dill makes the next carrot row too crowded before the season even begins.
Carrots are especially sensitive to crowding during the first few weeks. Their seeds may take 14–21 days to germinate, and sometimes even longer in cool soil. Dill can come up earlier and quickly make its presence known. You are still trying to spot the carrot seedlings, while the dill is already acting like the whole bed belongs to it.
Some people believe that mature dill always suppresses carrot growth. But there is not much convincing field evidence to support such a definite conclusion. In practice, shading, competition for water, and simple overcrowding are much easier to see as the real risks.
Where to Plant Dill
You do not need to separate carrots and dill completely. Dill can stay nearby, but it is better to sow it in a separate small patch or a short row on the north side of the bed. That way, the tall stems will not block sunlight from the carrots.
On our property, we usually mark out a place for dill in advance because once it self-seeds, it shows up wherever it wants. I leave a few strong plants to flower and remove any extra seedlings near the carrot row right away.
Here is how you can arrange these crops:
- Prepare loose soil for the carrots. Remove rocks and hard clumps to a depth of about 10–12 in (25–30 cm). Do not add fresh manure right before sowing: excess nitrogen and partially decomposed material can lead to forked and uneven roots. Mature compost is a better choice.
- Sow carrots in separate shallow rows. The seeds are usually planted about ¼ in (6 mm) deep. The soil should stay evenly moist until the seedlings appear, or germination may be uneven.
- Plant dill at least 12–18 in (30–46 cm) from the carrot row. This is enough space to keep the foliage from hanging directly over the seedlings or getting in the way when thinning.
- Thin the carrots after the true leaves appear. Leave about 2–3 in (5–8 cm) between plants, depending on the variety. It is better to cut extra seedlings with small scissors instead of pulling them out and disturbing nearby roots.
- Control dill self-seeding. You can leave a few flowering umbels for beneficial insects and seeds. Cut the rest before mature seeds scatter across the entire carrot bed.
You can also plant green onions, chives, lettuce, or radishes near carrots. Radishes mature quickly and help mark the row while the slow carrot seeds are only beginning to sprout.
Dill is useful not when there is a lot of it, but when it grows in the right place. Give it a spot along the edge of the bed, let a few plants flower, and the carrots will still get enough light and space while beneficial insects will still find their way to the fragrant umbels.
7. Mixing Strawberries With Cabbage Family Crops
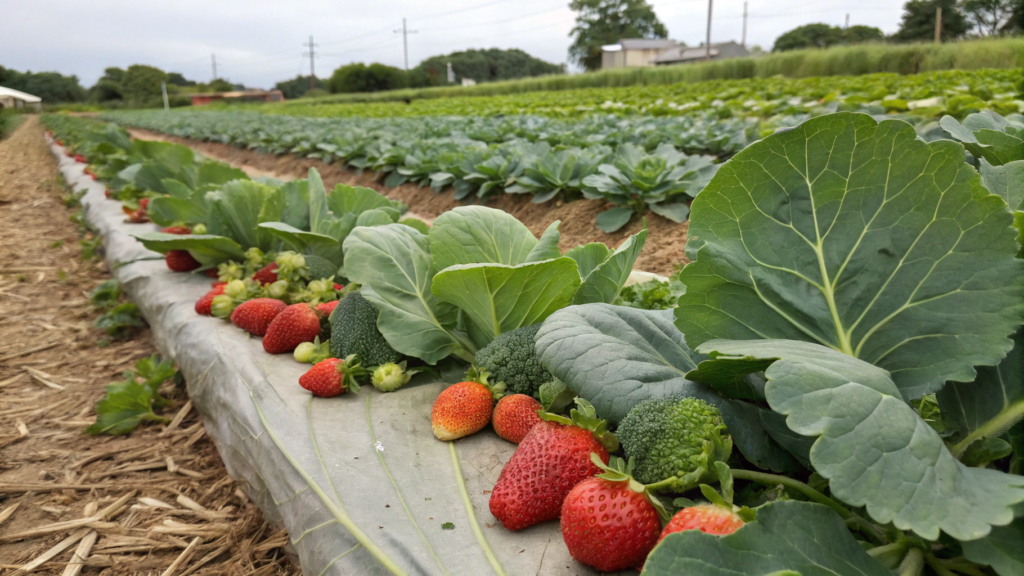
Strawberries and cabbage family crops sometimes end up next to each other because we want to use the open space between young plants. But these crops grow in very different ways. Strawberries stay in the same place for several years, gradually send out runners, and form a low, dense ground cover. Cabbage, broccoli, cauliflower, and Brussels sprouts grow large leaves in a single season and need plenty of space around them.
The problem is not that these plants somehow “cannot tolerate” each other. The real issues are crowding, shade, and different maintenance needs.
Strawberries Quickly End Up Under the Leaves
A large broccoli or cabbage plant can spread 18–30 in (46–76 cm) wide. Even if there is open soil between the crops at planting time, cabbage leaves begin hanging over the strawberries by the middle of the season.
Possible problems include:
- Strawberries get less direct sunlight.
- Their leaves and berries dry more slowly after rain.
- The risk of fruit rot increases when berries rest near damp soil.
- Slugs and damaged berries become harder to spot.
- Cabbage leaves get in the way during harvesting.
- Removing large plants can easily damage strawberry runners and shallow roots.
Harvesting the berries becomes very inconvenient. To find the strawberries, you have to lift heavy cabbage leaves and step between the plants. A few berries are almost guaranteed to stay hidden, become overripe, and start spoiling. And slugs find those spots much faster than we do!
Strawberries need good airflow. They are usually grown in a sunny area with well-drained soil and enough space for the plants to develop. If large neighbors cover the plants and trap moisture, even suitable soil cannot solve the whole problem.
Different Care Routines Matter Too
Strawberries are perennial plants. Once planted, you do not want to disturb them constantly. Their roots grow fairly close to the surface, and new plants often take root from runners near the mother plant.
Cabbage family crops are grown differently. They are planted, hilled, checked for caterpillars, and usually pulled out after harvest together with a thick stem and a large root ball.
When removing broccoli in fall, you can accidentally pull out a young strawberry plant. And when treating cabbage for pests, you have to make sure the product is also suitable for berries that may already be ripening nearby.
How to Separate These Crops
You do not need to place cabbage family crops and strawberries at opposite ends of the garden. The important thing is to keep large leaves from hanging directly over the berries and leave easy access to every plant.
You can organize the planting like this:
- Give strawberries a permanent bed. Choose a sunny spot with loose, well-drained soil. Before planting, add about 1–2 in (2.5–5 cm) of mature compost and mix it into the top layer of soil.
- Leave enough space between strawberry plants. For most varieties, about 12–18 in (30–46 cm) works well. You can guide the runners into open spaces or remove them if the bed is already full.
- Plant cabbage family crops in a neighboring bed. Leave a path at least 18–24 in (46–61 cm) wide between the beds. This makes it easier to harvest berries and care for the large vegetables.
- Do not plant cabbage south of the strawberries. In the Northern Hemisphere, tall plants on the south side can block a large amount of sunlight from low-growing plants. It is better to place them farther north or leave a wide path between the crops.
- Add clean mulch under the strawberries. A layer of EZ-Straw Seeding Mulch with Tackifier about 2–3 in (5–8 cm) thick helps keep the berries off the soil and reduces mud after rain. Do not cover the center of the plant with mulch.
Near strawberries, it is more convenient to grow green onions, chives, thyme, or small annual flowers. They do not create heavy shade or make harvesting difficult. Cabbage is better grown in a separate row where its wide leaves have enough space.
Lindy and I no longer plant cabbage right next to strawberries. A few extra feet between them give the berries more sun and give us easy access to the harvest.
8. Pairing Peppers With Beans
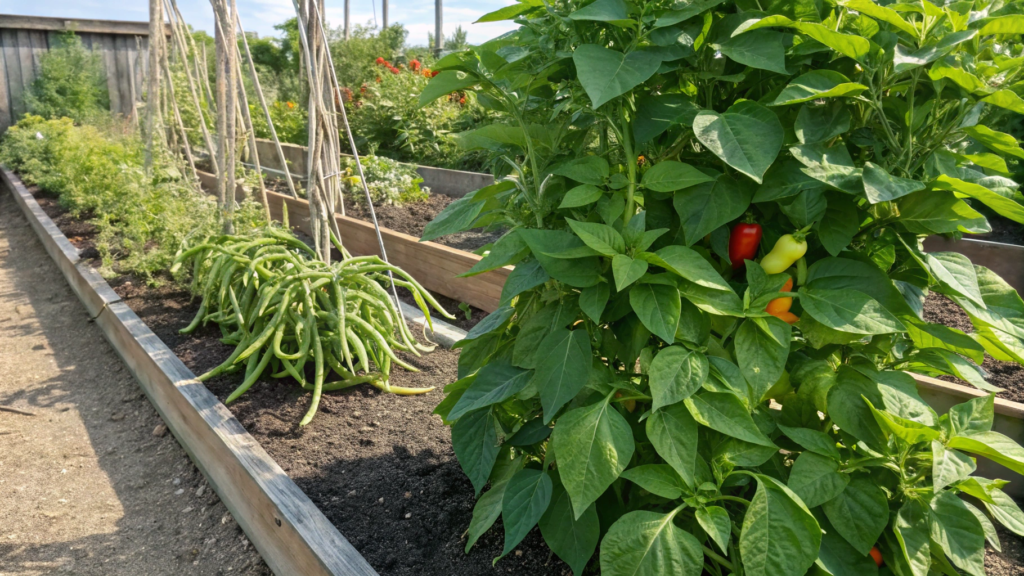
Peppers and beans may seem like a good companion planting pair. Both crops like warm weather, and beans fix nitrogen with the help of bacteria on their roots. Because of this, it is easy to assume that growing them together will automatically benefit the peppers.
But most of that nitrogen stays inside the growing bean plants and becomes available to other crops mainly after the roots and plant material begin to break down. A pepper plant does not get a constant free supply of fertilizer just because beans are growing nearby.
This combination becomes especially inconvenient when too many bush beans are planted around the peppers or pole beans are trained up a support directly above them.
When Beans Start Blocking Sunlight From Peppers
Peppers need at least 6–8 hours of direct sunlight a day. In partial shade, a plant may look perfectly healthy but flower more slowly and produce fewer fruits.
Bush beans usually grow to about 18–24 in (46–61 cm). They are not very tall, but they quickly become dense. Pole beans can climb 6–10 ft (1.8–3 m) and create a thick green wall.
If that support is placed south of the peppers, the plants may end up in shade during the second half of the season, right when the fruits are ripening.
Other problems can also appear when the crops are planted too close together:
- Beans cover the lower part of the pepper plants.
- Air moves less freely between the leaves.
- The soil and foliage dry more slowly after rain.
- The plants begin sharing water in the top layer of soil.
- Harvesting bean pods without brushing against pepper branches becomes difficult.
- Fallen leaves stay between the plants and hold moisture.
Not every one of these issues will necessarily ruin the harvest. But together, they can turn a convenient mixed bed into an area where it is difficult to inspect the plants properly and reach the fruit.
Wet Soil
Peppers do not like sitting in wet soil. Beans also grow better in well-drained ground. If both crops are planted densely in a low area, water can remain between the plants after heavy rain, while thick foliage prevents the area from drying quickly.
Peppers and beans can both be affected by Phytophthora blight. The pathogen can infect roots, stems, leaves, and fruit, and it develops especially actively at around 75–85°F (24–29°C) in wet soil. Raised beds and good drainage can help reduce the risk of disease.
For this reason, I would not plant peppers and beans together in an area where puddles remain for a long time after rain. Even good companions cannot fix heavy soil and poor drainage.
How to Keep Both Crops in the Same Bed
You do not need to separate peppers and beans completely. You just need to choose the right type of bean and avoid filling every open space with it.
- Plant peppers in the sunniest spot. Leave about 18 in (46 cm) between plants and around 30–36 in (76–91 cm) between rows.
- Use a few bush bean plants. Sow them in a separate short row instead of making a ring around every pepper plant. Leave at least 12–18 in (30–46 cm) between the beans and the base of the pepper plants.
- Place pole beans on the north side. This way, the tall support will not block most of the daytime sun from the peppers. Give the beans their own trellis about 6–8 ft (1.8–2.4 m) tall.
- Prepare well-drained soil. Add about 1–2 in (2.5–5 cm) of mature compost and mix it into the top layer of soil. If the area is low and wet, it is better to build a raised bed at least 8–12 in (20–30 cm) high.
- Water at the base of the plants. The soil should stay evenly moist but not constantly wet. Do not spray water onto dense foliage or leave the plants wet overnight.
Lindy and I usually grow beans and peppers in neighboring sections of the same bed instead of mixing them together. This lets us give the beans a support without shading the peppers and makes it easier to walk between the plants with a basket. This becomes especially important near the end of summer, when pepper branches are already loaded with fruit and can break from one careless movement.
You can also plant basil, green onions, lettuce, or low-growing sweet alyssum near peppers. These plants are easier to control and do not turn into a tall wall above the pepper plants.
Beans do not necessarily harm peppers. The mistake starts when we count on them as fertilizer, plant them too densely, or allow a tall support to block sunlight from the peppers. A little extra space matters more here than a pretty companion planting layout.
9. Crowding Companions Until Airflow Disappears
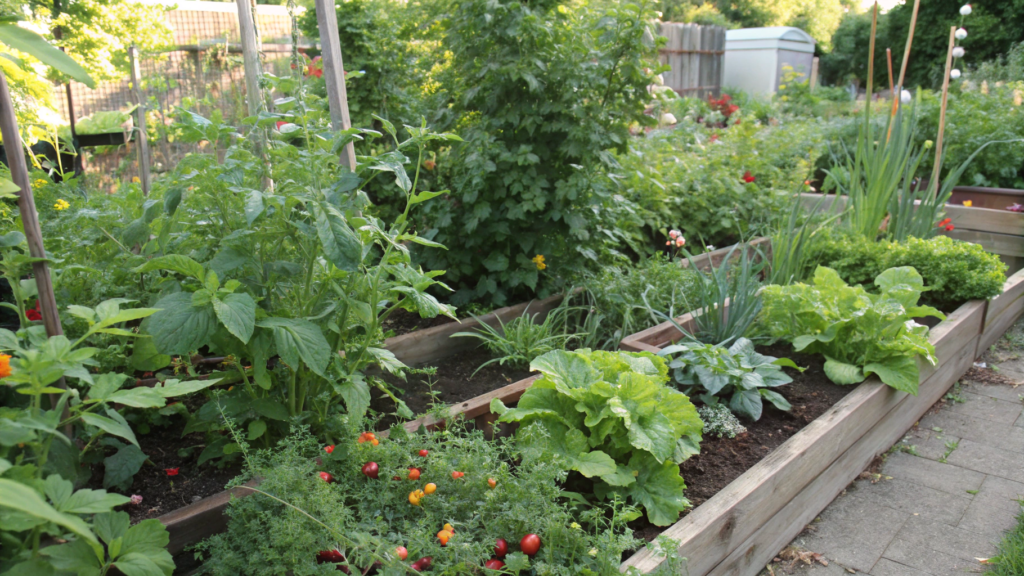
Wanting to fill every open spot in the garden bed can easily lead to overcrowding. We add basil near tomatoes, plant lettuce between peppers, sow flowers along the edge, and fill the remaining gaps with radishes or onions. Each plant may work well on its own, but together they can cover the entire surface of the bed.
In spring, a bed like this looks great, and it seems like there is enough room for everything. By midsummer, the leaves are touching, the branches are tangled, and it is impossible to reach the base of the plants without brushing against their neighbors.
Good companion plants are not helpful if air cannot move between them.
What Happens Inside an Overcrowded Bed
When plants are packed too closely together, moisture from rain or morning dew gets trapped between them, and the inside of the bed stays wet longer.
These conditions help fungal and bacterial diseases spread more quickly. Plants need enough space, cucumbers, beans, and tomatoes should be trained onto supports, and water should be directed toward the soil instead of the leaves (University of Minnesota).
When plants are too crowded:
- Lower leaves stay wet for a long time.
- Spots and damage are harder to notice early.
- Branches rub against each other and break.
- Plants shade their neighbors.
- Slugs and other pests get more hiding places.
- Harvesting becomes inconvenient.
Watering also becomes more difficult. Water reaches the outer part of the bed but does not always make it to the plants in the middle. One crop gets too much moisture while the one next to it stays almost dry.
The Mature Size of the Plants
Seed packets usually list spacing for one crop. But in a mixed planting, you need to consider the size of several plants at once.
For example, there may be enough space between two tomato plants. But if you completely fill that gap with basil, nasturtiums, and flowers, the lower part of the tomato plants will still end up covered.
Lindy and I check the beds after heavy rain. If everything inside is still wet a few hours later and the leaves are lying on top of each other, the plants have become too crowded. Sometimes it is enough to remove a few lower leaves or guide the vines onto a support, while other times one of the neighboring plants has to be moved.
Lindy usually notices the problem before I do. I still see a “full and productive bed,” while she can no longer fit her hand between the plants to pick a pepper. That is a pretty reliable test!
How to Keep Air Moving
Companion plantings can still be dense. You just need to consider the future size of the plants and guide their growth in time.
- Place the main crop first. Plant tomatoes, peppers, cabbage, or cucumbers at the spacing recommended for the variety. Only then add neighboring plants.
- Choose low-growing companions. Near tall vegetables, it is better to grow lettuce, radishes, green onions, thyme, or low-growing sweet alyssum.
- Lift vines off the ground. Train cucumbers, pole beans, and tall tomatoes onto supports. This helps the leaves dry faster and keeps the paths open.
- Remove old leaves and weeds. Start with yellow, damaged, and ground-level leaves. They hold moisture and make it harder to inspect the plants.
- Water in the morning and at the roots. If the leaves get wet, they will have time to dry before evening. Drip irrigation is especially useful for densely planted beds.
There is no single spacing that works for every planting. A dwarf tomato and a tall variety take up very different amounts of space. So do not look only at the numbers on the seed packet. Also consider the actual size of the plants by the middle of the season.
Do not worry, a few empty inches in the bed are not being wasted. They help the leaves dry faster and give you enough room to inspect the plants and harvest without trouble.
10. Assuming Flowers Help Every Vegetable in Every Spot
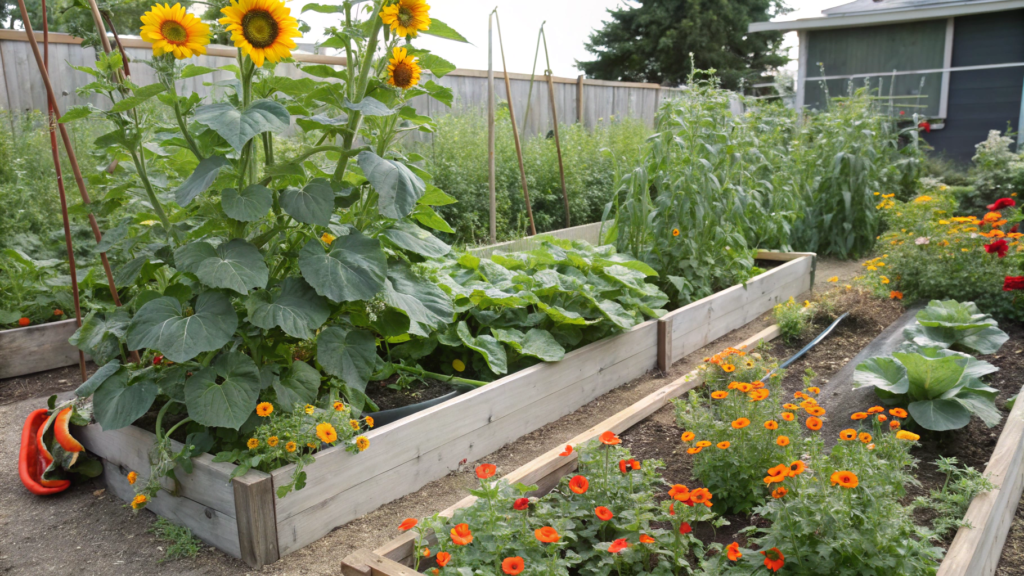
Flowers attract pollinators and beneficial predatory insects, make garden beds more attractive, and sometimes help fill open spaces. But that does not mean you can plant any flower next to any vegetable and automatically get a better harvest.
The benefit depends on which flower you choose, where you plant it, and what job you want it to do. A tall sunflower near peppers can block their sunlight. Fast-growing nasturtiums can cover young seedlings. And flowers that attract butterflies will not necessarily attract the insects that eat aphids.
First, Decide Why You Need Flowers
Decide whether you need pollinators, beneficial predatory insects, a trap crop, or simply a low flowering border. It is better to choose the goal in advance.
For example:
- Sweet alyssum attracts small hoverflies and parasitic wasps.
- Calendula flowers for a long time and provides insects with pollen.
- Nasturtiums can work as a trap crop for aphids.
- Marigolds attract beneficial insects and may draw slugs away, but large varieties take up quite a lot of space.
- Zinnias and sunflowers attract pollinators but can heavily shade vegetables.
Flowering plants really do support pollinators, but different insects use different flower shapes. Because of this, one species cannot help the entire bed equally well.
Location Matters as Much as the Flower Itself
Before planting, look at how large the plant will become in summer. A flower that grows 3–6 ft (91–183 cm) tall should not be placed south of low-growing peppers, strawberries, or lettuce. A wide nasturtium is better trained along the edge, where its vines will not cover young vegetables.
Also check the watering needs. A moisture-loving flower next to rosemary or sage will create the same problem as an unsuitable vegetable neighbor: one plant will be too dry, while the other will stay too wet.
I do not plant flowers in a bed just to make it look pretty. First, I look at what is missing. Sometimes the bed needs low-growing alyssum near cabbage or a few flowers for bees near cucumbers. Other times, it is better to leave the open space completely empty.
How to Use Flowers Without Creating Extra Problems
- Choose one purpose. Decide whether you need pollinators, beneficial predators, a trap crop, or simply a low flowering border.
- Consider the mature size of the flowers. Place low-growing flowers closer to vegetables and tall ones on the north side or along a separate edge of the bed.
- Do not block access to the harvest. Leave enough room to pick cucumbers, peppers, and tomatoes without stepping on flowers or breaking their stems.
- Choose several species with different flowering times. This keeps food available for insects for most of the season instead of only one week.
Flowers can noticeably improve a garden. But they should serve a specific purpose and should not stop the main crop from getting sunlight, water, and airflow. Sometimes one carefully chosen row of flowers is more useful than ten different plants squeezed between vegetables.
The Garden Bed in Midsummer
A companion planting should be evaluated not on planting day, but two or three months later. By that point, leaves have spread, vines have taken over the paths, and roots are already sharing the soil.
Now Lindy and I place the main crops first and only then add neighboring plants. Sometimes an open space really is worth filling. Other times, it is better to leave it covered with mulch.
When plants have enough sunlight, water, airflow, and room, they do much better, and caring for them becomes much easier too.
If you have already tried any of these combinations, tell us in the comments what happened in your own garden bed. Conditions are different for everyone, and real experience is often more useful than any ready-made chart.