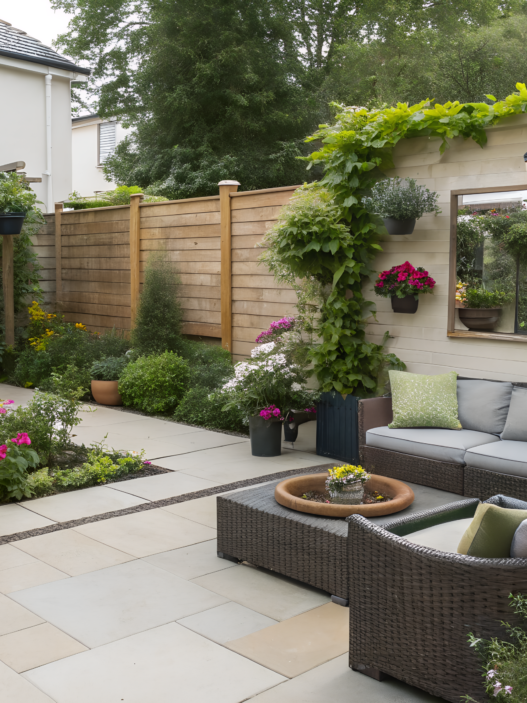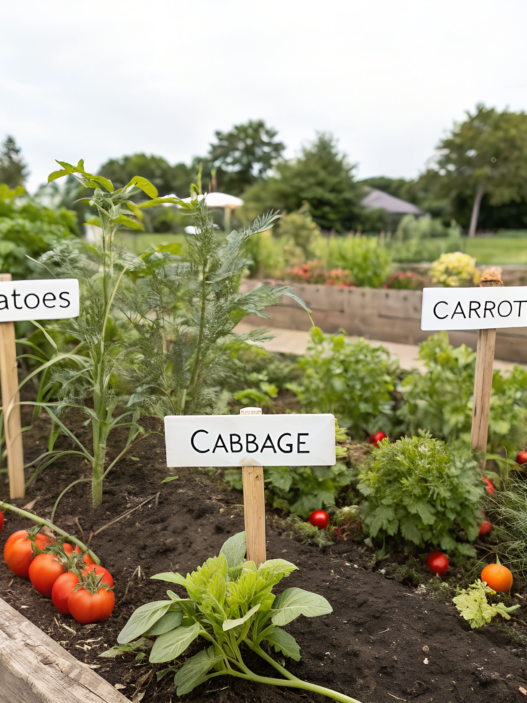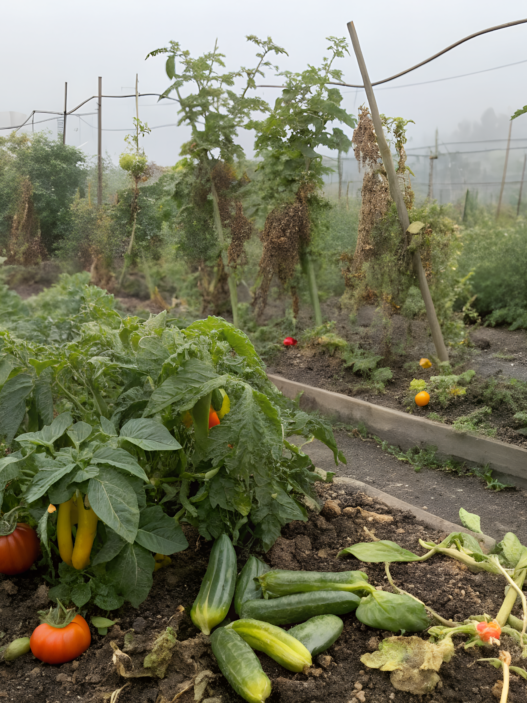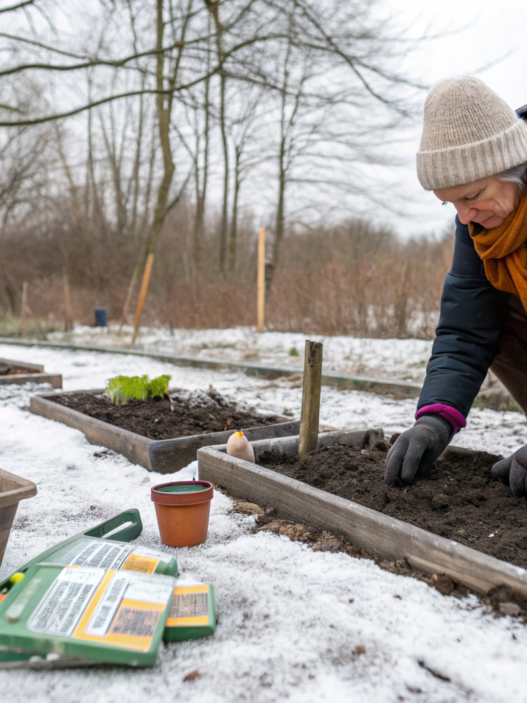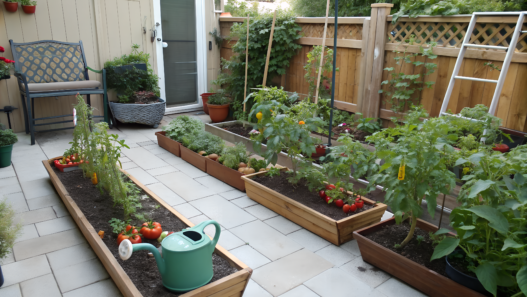
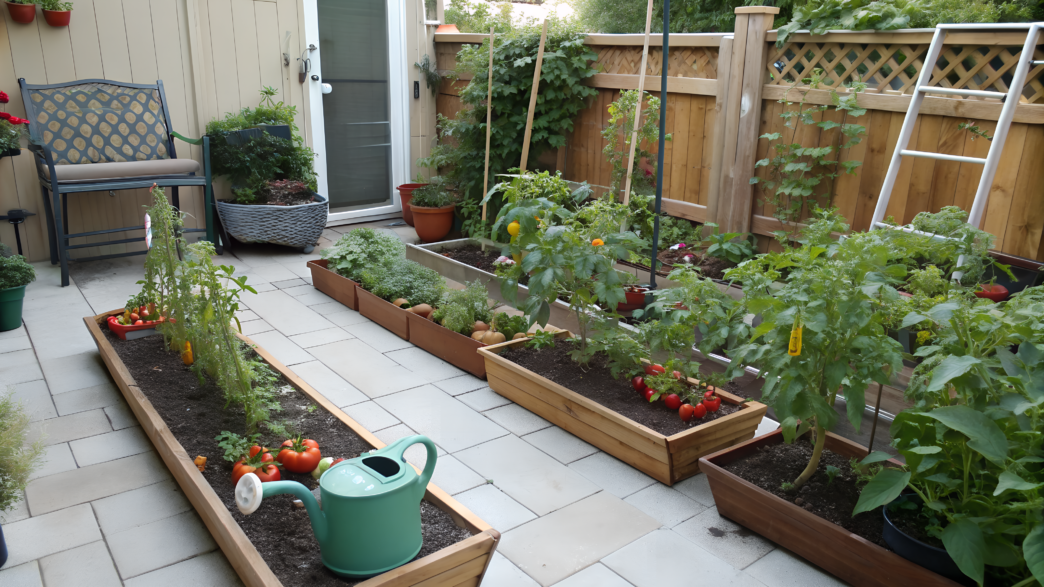
Small patio vegetable garden setups can be much more useful than just a few pots by the wall. Even on a small patio, you can grow greens, vegetables, and berries in a way that makes them easy to use every day. For that to happen, the harvest needs to be close enough to the kitchen so it actually gets used for cooking, instead of being forgotten.
Lindy and I quickly understood that a small space does not forgive random decisions. Sometimes the best option is to move the planting upward, and sometimes it is to give the roots more depth…
In this article, I will try to show 10 simple and flexible ideas that you can adjust to your own space.
1. One crate salad bar with cut and come again greens
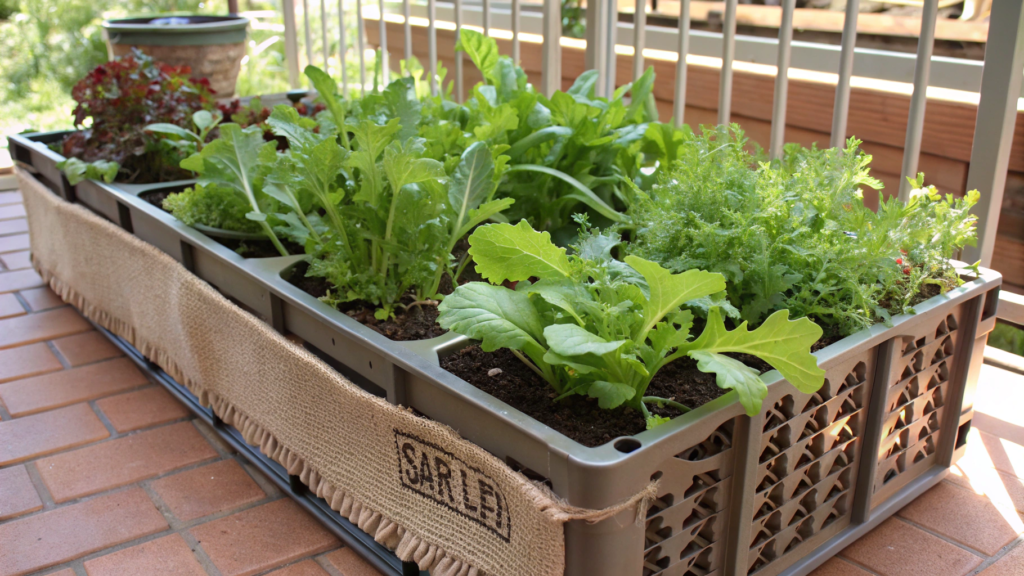
Here we are talking about a small salad crate for the patio, where greens are not pulled out completely, but cut again and again. Leaf lettuce, arugula, mizuna, spinach, mustard greens — all of this can grow even near the door, if you have one decent crate, a little sun, and the habit of watering.
For this kind of crate, a plastic or wooden container about 18–24 in long, 12–16 in wide, and 8–10 in deep (45–60 × 30–40 × 20–25 cm) will work. Of course, do not forget to make drainage holes. Without them, the roots will sit in wet soil, and the lettuce will start to spoil quickly.
If you use a milk crate or a container with gaps, line it with burlap or a fabric liner for convenience.
What to plant in one salad crate
It is better to choose greens that can be cut leaf by leaf or in small bunches. For an 18–24 in crate, 3–4 types will be enough, otherwise the plants will start getting in each other’s way.
A good mix:
- leaf lettuce — mild flavor and fast growth;
- arugula — a little sharpness;
- mizuna — tender leaves;
- young spinach — good in spring and fall;
- red mustard greens — color and a little heat;
- baby-leaf chard — if you want slightly larger leaves.
Sow in strips, leaving 3–4 in (7–10 cm) between them. This makes it easier to understand what is growing where, and more convenient to cut the harvest.
Soil decides everything
Greens need a light container potting mix. It is better not to use heavy garden soil, because in a crate it quickly compacts after watering.
You can mix:
- container potting mix;
- a little compost;
- a handful of perlite, if the mix is dense;
- a small amount of gentle organic fertilizer.
The soil should stay evenly moist, but not wet. University of Maryland Extension describes the cut-and-come-again method as a way to cut young salad greens close to the base of the plant, let them regrow, and harvest again. Usually, a second harvest is possible in about 3–4 weeks, and sometimes even a third one works.
So the soil here is not just “filler for the crate.” It affects how quickly the greens start growing again after cutting, and how well they handle several harvests in a row.
How to cut it properly
Do not pull the plants out completely if you want another harvest. When the leaves reach 4–6 in (10–15 cm), cut the outer leaves and leave the young center.
I usually do it like this:
- I look for the leaves that are already large.
- I cut the outer leaves with clean scissors.
- I do not touch the young center.
- I remove yellow or damaged leaves.
- I water if the top layer of soil has dried out.
The main rule. At one time, I cut only the leaves that have already grown to a normal size. I leave the youngest ones in place so the greens can keep growing calmly after harvest.
A good spot for this kind of crate on the patio is where there is morning sun and light shade after lunch. For example, by a wall, near a railing, or under the edge of an awning.
In spring, you can give the greens 5–6 hours of sun. In summer, especially on a concrete patio, it is better to protect them from the strongest afternoon heat. Crates, unlike garden beds, are convenient exactly because you can move them.
A simple planting layout
For a 24 × 16 in crate, you can do it like this:
- back strip — plant chard or spinach;
- middle — leaf lettuce;
- front edge — arugula and mizuna;
- one corner — red mustard greens.
Two to three weeks after the first sowing, you can add a few more seeds into the open spaces. This way, the harvest will come in waves, instead of one big batch that has to be eaten urgently in two days.
Of course, one salad crate will not replace a full garden, but for a patio, it is very practical. If the crate stands close to the kitchen, it is easier to use every day, and there is a higher chance that you will actually cut the greens, add them to dinner, and sow new greens when free space appears.
2. Five gallon bucket tomato tower with basil underplanting
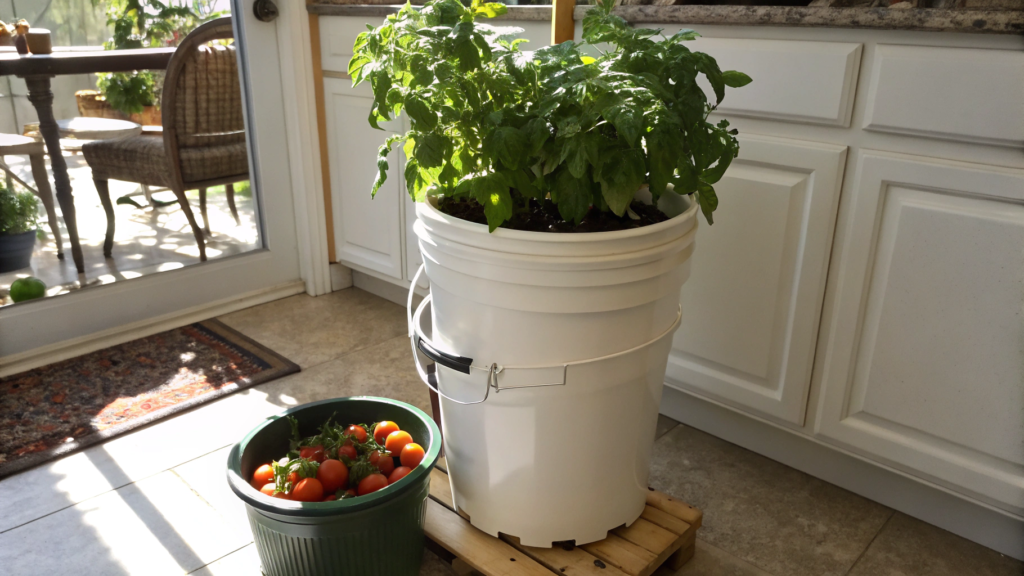
This is a tomato tower in a 5 gal bucket, where the tomato grows upward on a support, and basil fills the lower layer. This kind of planting is convenient to place near the kitchen. Tomatoes are always useful in salads and sauces, and basil goes right there too. A useful garden pair.
A 5 gal bucket is almost the minimum volume for one compact tomato. For a patio, it is better to choose determinate or dwarf varieties: ‘Patio Choice Yellow’, ‘Tiny Tim’, ‘Bush Early Girl’, ‘Tumbling Tom’, or ‘Celebrity’.
In a container that is too small, the soil dries out quickly, and the roots overheat more easily. A 5 gal bucket gives the tomato more room for roots and holds moisture better than a small pot. But you still need to check the soil moisture often, especially if the bucket stands on a concrete patio.
Be sure to make drainage holes in the bottom. A ⅜ in drill bit (about 1 cm) will work. If water sits in the bucket, the tomato roots start to go bad.
How to make a tomato tower
Put the bucket right away in the spot where it will stay all season. After planting and watering, it will be inconvenient to move.
Fill the bucket with container potting mix, add a little compost and perlite if the mix is dense. For support, a tomato cage 33–42 in tall, such as K-Brands Tomato Cage Plant Supports for Garden Pots, or three bamboo stakes will work.
The setup:
- put the support into the bucket;
- plant the tomato in the center;
- bury the stem 2–4 in (5–10 cm) deeper if the seedling has stretched;
- water the soil well;
- leave 1–2 in (2.5–5 cm) of free space at the top for watering.
Tomatoes can form extra roots on the part of the stem that ends up under the soil. So a seedling with a long stem can be planted a little deeper, after removing the lower leaves.
Basil in the lower layer
Basil covers part of the open soil, gives a quick harvest of leaves, and goes well with the same dishes as tomatoes. Plant 2–3 small basil plants around the edge of the bucket, not right against the tomato stem.
Good options:
- sweet basil — a classic with tomatoes;
- Genovese basil — large leaves for sauce;
- purple basil — adds color;
- Greek basil — a compact option for a container.
When the basil grows to 6–8 in (15–20 cm), pinch the top above a pair of leaves. This will help it make side shoots and grow fuller. It is better to remove flower stalks too.
Watering and feeding
A 5 gal bucket dries out quickly in summer. If the top 1–2 in (2.5–5 cm) of soil are dry, it is time to water. Water deeply, until water comes out of the drainage holes.
Container vegetables need more frequent watering than plants in the ground because the soil volume is limited, and it loses moisture faster.
At the beginning, add a gentle organic fertilizer. When the tomato starts blooming and setting fruit, feed it every 2–3 weeks with a liquid vegetable fertilizer. Do not overdo nitrogen, or you will get a lot of green growth and not many tomatoes.
Where to place the tomato tower
Tomatoes need 6–8 hours of direct sun a day. If the patio heats up a lot after lunch, choose a spot with morning sun and light protection during the hottest hours.
Place the container by a wall or near a railing so the wind does not shake the support. At the same time, try not to push it into a closed corner, because tomatoes need air circulation. Good air movement helps lower the risk of fungal problems in tomatoes.
Harvesting
Harvesting is my favorite part. Basil can be cut once the plant has made a few pairs of leaves. It is better to cut a little and often than to wait until it stretches out and starts flowering.
Compact tomatoes usually produce a harvest 50–75 days after transplanting, depending on the variety. Pick the fruits when they are fully colored and slightly soft, but still hold their shape.
If the weather is very hot, you can pick tomatoes a little earlier and let them ripen in the kitchen. This lowers the risk of the fruits cracking.
A tomato tower with basil on the patio gave Lindy and me a way to test the idea on a small scale: how much sun this spot gets, how fast the container dries out, and whether it is convenient to harvest on the way to the kitchen. If the format works in one bucket, it is easy to repeat it again.
3. Window rail trellis for snap peas and sugar peas
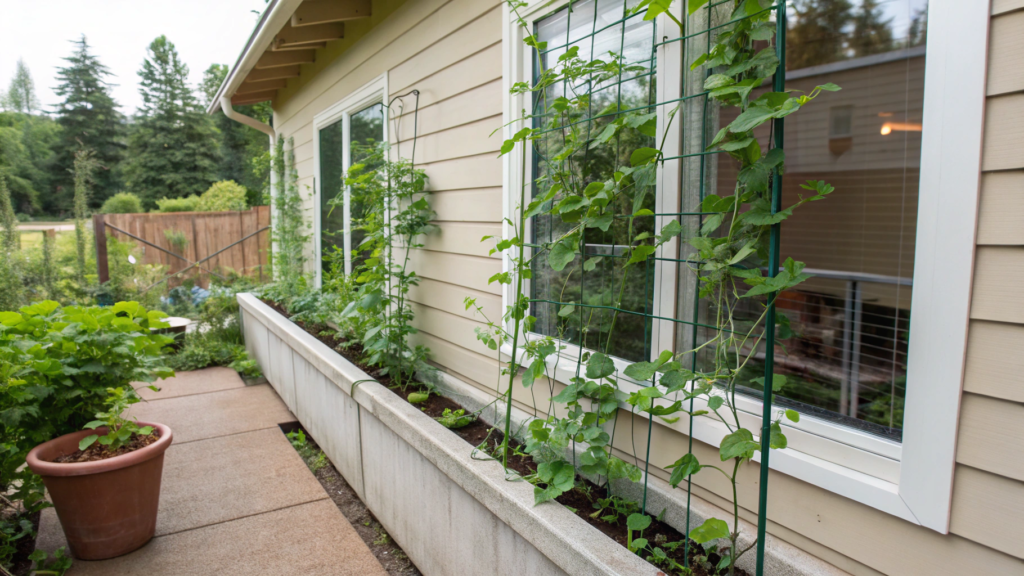
Snap peas and snow peas like to grow upward. For a small space, this is a convenient crop: peas grab on with tendrils, climb up a support quickly, and give pods you can eat right from the plant.
I quickly fell in love with crops that do not need a wide garden bed. Peas are exactly like that. Give them a vertical support, and a narrow edge of the patio already becomes an edible wall.
For a patio, it is better to choose compact or medium-height varieties: ‘Sugar Ann’, ‘Cascadia’, ‘Sugar Sprint’, or ‘Oregon Sugar Pod II’. They do not need a huge structure and hold on more easily to a narrow support.
Container and trellis
A good container size is 24–30 in long, 8–12 in wide, and 8–10 in deep (60–76 × 20–30 × 20–25 cm). The soil needs to be light: container mix, a little compost, and drainage holes in the bottom.
For the trellis, put two stakes at the edges of the box and stretch garden netting for climbing plants or twine between them. If there is a railing nearby, you can attach the netting to it with soft garden ties.
If the patio is windy, do not make the support too high. Better 3–4 ft (90–120 cm) and sturdy, than a pretty tall trellis that you later have to catch off the floor.
How to sow peas
Both types of peas are better sown straight into the container, because they do not like extra transplanting. Direct sowing is easier for you and for the plants.
Plant the seeds about 1 in deep (2.5 cm), leaving 2–3 in (5–7.5 cm) between plants along the trellis. Oregon State University Extension recommends planting seeds 1 in deep and leaving 2–4 in between plants, so this range works well for our container planting.
After sowing, water the soil well and keep it evenly moist. Peas react quickly to drying out, especially during flowering and pod formation.
Sun and care
Peas are a cool-season crop. They do best in spring or fall. On a patio, 4–6 hours of sun is usually enough. In hot weather, it is better to move the container to a spot with light shade after lunch.
Care for this crop is pretty simple:
- guide young shoots toward the netting;
- water when the top layer of soil has dried out;
- do not overfeed with nitrogen;
- remove yellowing leaves;
- harvest pods often.
With nitrogen fertilizers, it is better to be careful: too much nitrogen can make peas grow a lot of leaves, but flower less and produce fewer pods.
When to harvest pods
Snap peas are harvested when the pods have become plump and juicy. Snow peas are picked earlier, while the pod is still flat and tender.
Do not wait too long. If you harvest every 1–2 days, the plant usually keeps producing new pods longer. For Lindy and me, part of the peas rarely made it to the kitchen, because they are too good to eat right by the container.
A pea trellis quickly gives the feeling of a real garden, even on a narrow patio. The plants grow upward, the pods are easy to pick while standing, and the harvest comes early enough, when plantings in other containers are still just getting started. Step outside, check the soil, pick a couple of pods for lunch — and the patio is no longer just a place with pots, but part of the kitchen.
4. Two tier shelving garden for peppers and baby eggplant
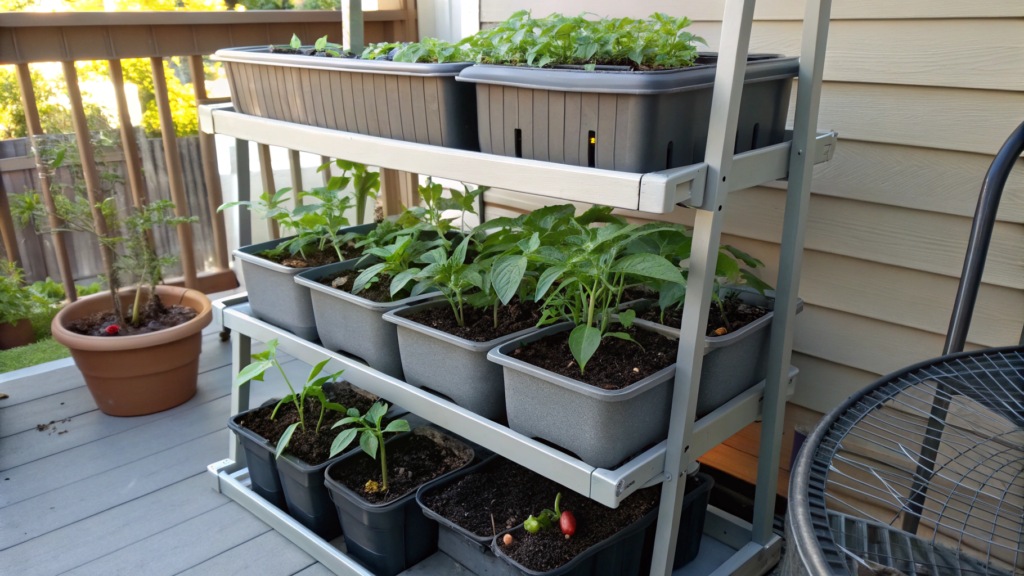
Two tier shelving garden for peppers and baby eggplant is a two-tier patio shelf where peppers grow on the upper level, and baby eggplants grow on the lower level — or the other way around, if the sun hits your space from a different angle. Here we use height, not just the floor, and for a small patio, that matters.
Peppers and baby eggplant work well for this setup because you can grow them in separate containers and move them when needed. You just need to choose the right varieties.
For the upper tier, you can use:
- sweet peppers of compact varieties;
- mini peppers for snacks and salads;
- hot peppers like jalapeño or cayenne;
- dwarf eggplants like ‘Patio Baby’ or ‘Fairy Tale’.
On the lower tier, it is better to plant things that will not be fully covered by shade. If the upper shelf is too wide, the lower level may not get enough light.
Shelf
Choose a sturdy two-tier shelf about 30–36 in wide (76–91 cm) and 12–18 in deep (30–45 cm). Metal, wood, or strong plastic is better than a flimsy decorative stand that looks pretty for the first five minutes.
Check three things:
- the shelf can hold the weight of wet containers;
- there is at least 18–24 in (45–60 cm) between the tiers;
- water can drain without constantly soaking the lower plants.
For this setup, 2–3 gal pots (7.5–11 L) are convenient for peppers, and 3–5 gal pots (11–19 L) for baby eggplants. If the plant is larger, it is better to give it a bigger separate container. Fabric grow bags for vegetables will work well for plants on the lower tier.
Sunny spot
Peppers and eggplants love full sun. Peppers need a warm season, 6–8 hours of direct light a day, and evenly moist soil, especially during flowering and fruit formation.
So I would first put the empty shelf in place and watch the sun move for one day. Actually check where the light is in the morning, where it is after lunch, and which tier goes into shade.
Yes, it will take a little time. But then you will not have to move a suffering eggplant to another spot later.
If the upper tier gets more sun, put the peppers there. If the lower tier is open and not shaded, you can place baby eggplant there. If needed, turn the pots every few days so the bushes do not lean to one side.
Watering and feeding
Containers on a shelf dry out faster than plants in the ground. Especially the upper tier, because it gets more sun and wind. Check the soil with your finger; if the top 1–2 in (2.5–5 cm) are dry, it is time to water.
For planting, use container potting mix, a little compost, and a gentle organic fertilizer. When the plants start flowering, you can feed them with a liquid vegetable fertilizer every 2–3 weeks.
Do not overwater eggplants. They like moisture, but not wet soil. Eggplants need warm weather, good sun, and steady moisture, but with poor drainage, the plants suffer quickly.
Harvesting
Peppers can be picked green, or you can wait until they fully color — it depends on the variety and your taste. If you harvest some of the fruits earlier, the plant often keeps setting new ones more actively.
It is better not to leave baby eggplant on the plant too long. Pick the fruits when they reach the size listed for the variety, the skin is shiny, and the fruit still feels firm. Overgrown eggplants quickly become seedy and coarse. And that is a shame, because small eggplants are valued exactly for their soft tenderness.
A two-tier shelf helps use height, not just the floor. The main thing is to place the pots so the upper tier does not shade the lower one all day. Then even a small patio area gives more value without extra containers sitting in the walkway.
5. Fabric grow bag potato corner for patio harvests
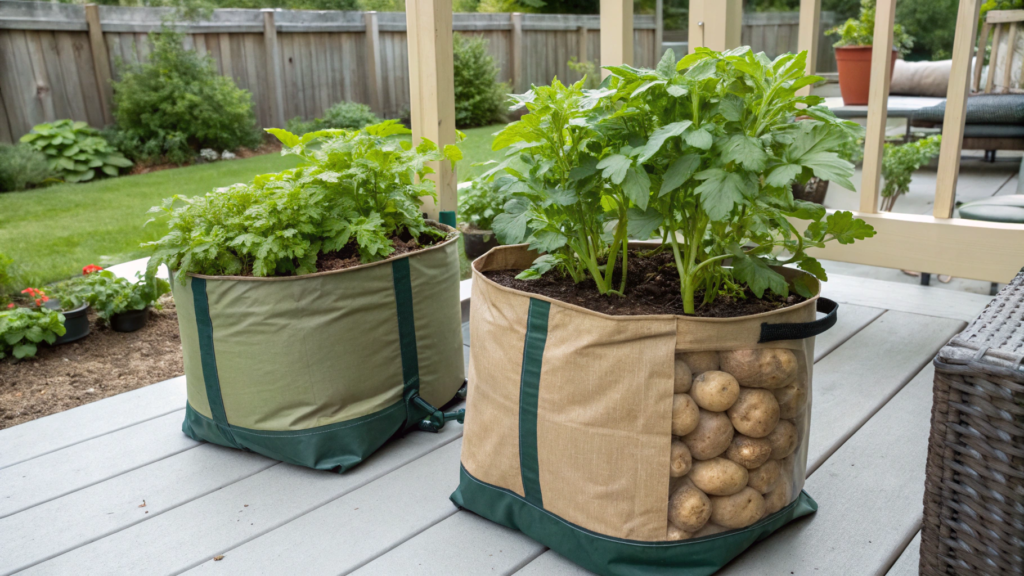
Potatoes used to feel like a crop for a big garden to me. You know, long rows, soil, hilling, that whole farm picture. And then it turned out that a few fabric grow bags in the right spot can give a very real harvest for the kitchen. Not for the whole year, of course, but enough for dinner.
For potatoes, it is better to use 10–15 gal fabric grow bags (38–57 L). In them, drainage already works through the material: extra water leaves through the bottom and sides, so additional holes are usually not needed. Potatoes like even moisture, but they do not like sitting in wet, heavy soil.
Fabric helps the roots breathe, but these bags dry out faster in the heat. Especially on a stone or concrete patio. So place them somewhere that is easy to water, not in a far corner.
I used fabric potato grow bags with a flap: iPower 10 Gallon Potato Grow Bags with Flap and Handles. The flap is not necessary, but it is interesting to check how the tubers are sitting without turning the whole bag over.
How to plant potatoes in a bag
Start with seed potatoes, not store-bought tubers from a bag. Seed potatoes are usually checked for disease, so there are fewer surprises. If the tubers are large, you can cut them into pieces, leaving 1–2 “eyes” on each piece. Let the cut sides dry for a day or two before planting.
You can do it like this:
- pour 4–6 in (10–15 cm) of potting mix into the bottom of the bag;
- place 3–4 pieces of seed potato with the eyes facing up;
- cover with another 3–4 in (7–10 cm) of soil;
- water well;
- when the shoots reach 6–8 in (15–20 cm), add more soil around the stems.
This gradual adding of soil is similar to hilling in a regular garden bed. University of Minnesota Extension recommends hilling potatoes when the plants reach about 6–8 in, to protect the tubers from light and encourage harvest development.
Soil, water, and placement
For bags, you need a light potting mix, a little compost, and good drainage. Do not fill the bag with heavy garden soil. In a container, it compacts, does not let air through well, and holds too much water.
Potatoes need about 6 hours of sun a day. If the patio is very hot, it is better to place the bags so they get morning sun, but do not overheat all day on hot paving.
Watering should stay even. If the soil dries out and then suddenly gets soaked, the tubers can grow unevenly. Potatoes especially need steady moisture while the tubers are forming.
How to know when it is time to harvest
You can carefully check for new potatoes after flowering, if the variety flowers. But the main harvest is better collected when the tops start to yellow and die back. Stop watering for a few days so the soil gets drier, and then simply dump the contents of the bag onto a tarp or into a wheelbarrow.
This is why I love potatoes in bags. You do not need to dig a bed and accidentally cut the tubers with a shovel. You just turn the bag over and see the whole result at once. It feels a little like treasure hunting, except the treasure later goes into the oven with olive oil and salt.
How to place the bags on the patio
It is better to place the bags in a group by a wall, fence, or railing, instead of spreading them all over the patio. Potato foliage gets bulky over time, and if you put the bags in a walkway, they will quickly start getting in the way.
Place 2–3 bags together, leaving a little air between them. This makes it easier to water, add soil, and check the leaves. If you have enough space, you can plant the bags 2–3 weeks apart so you do not get the whole harvest on one day.
Potatoes in bags, of course, do not always look like patio decoration. But they are very practical: you use a spot that often sits empty, get a real harvest from a container, and have better control over the soil, moisture, and planting depth.
6. Vertical pocket planter for strawberries and lettuce
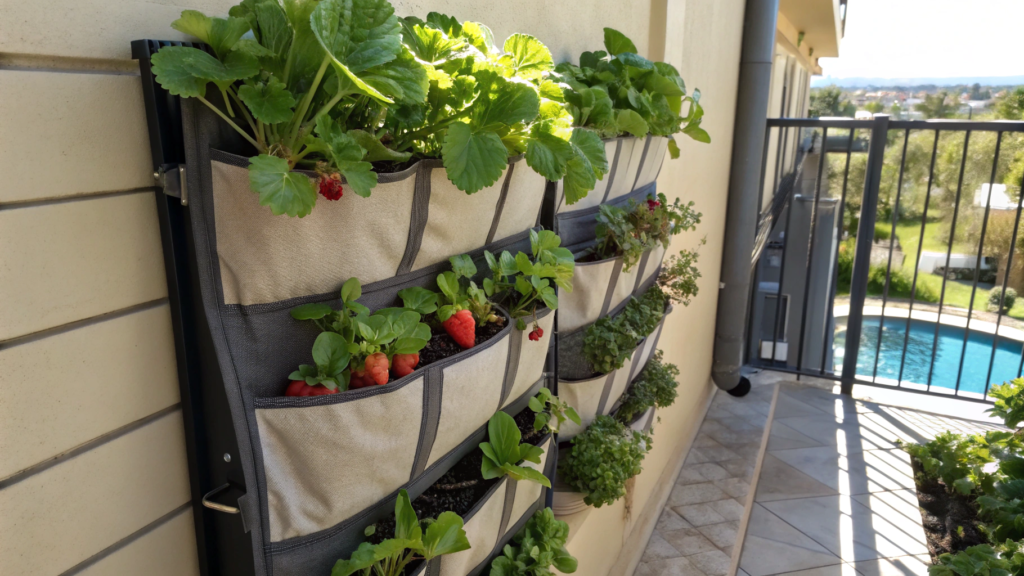
Vertical pocket planter for strawberries and lettuce is a vertical fabric organizer with pockets where you can grow strawberries, leaf lettuce, and tender greens on a wall, fence, or railing. For a patio, this is especially convenient, because it is often better to move the planting upward and use a wall that used to just sit there warming in the sun.
What to plant in the pockets
For a vertical pocket, it is better to choose plants with a shallow root system. Strawberries and lettuce work better here than tomatoes or peppers. They do not need a huge amount of soil, but they do need regular watering.
Good options:
- day-neutral strawberries — for example ‘Albion’, ‘Seascape’, or ‘Evie 2’;
- leaf lettuce — soft varieties that can be cut leaf by leaf;
- arugula — if you want a little sharpness;
- baby-leaf spinach — for the cool season;
- small herbs — parsley, cilantro, thyme.
For one organizer, strawberries in the upper and middle pockets are enough, and lettuce and greens can go in the lower ones. This makes watering and harvesting easier.
Choosing an organizer
Choose a vertical fabric pocket planter with thick fabric and strong fasteners. The size can vary, but for a patio, it is convenient to start with a model that has 7–12 pockets. Large panels look tempting, but after watering, they get heavy. Very heavy.
Before planting, check where the water will drain. In fabric pockets, drainage happens through the material, so the water should not run onto furniture, a wooden deck, or neighbors below. If the patio has a sensitive surface, it is better to hang the organizer above a tray or an area where extra water will not cause damage.
Soil and planting
Use a light container potting mix. Garden soil is usually too heavy for this format: it compacts, does not breathe well, and can pull the pockets downward.
Add soil to each pocket, plant one plant, and gently firm it around the roots. Do not pack the pocket too tightly. Roots need air.
For strawberries, it is important to plant them so the crown of the plant stays above the soil. If you bury it too deep, the plant can rot. If you plant it too high, the roots will dry out. The crown of a strawberry plant should sit at the soil surface level.
Sunlight and watering
Strawberries need more sun than lettuce. Ideally, they get 6+ hours of light. Lettuce, on the other hand, is often grateful for light shade after lunch, especially in hot weather.
That is why I plant strawberries in the upper pockets and lettuce lower down. The top gets more light and dries out faster, while the lower pockets are usually cooler. It is not perfect for every climate, but for a patio, it works very well.
Watering needs special attention. The pockets are small, there is not much soil, and they dry out faster than a regular pot. Check the moisture with your finger every day in hot weather. If the top layer is dry, water slowly so the water has time to move through the whole pocket instead of just running out along the edge.
How to harvest
Lettuce can be cut from the outer leaves, leaving the center to keep growing. Harvest strawberries when the berries are fully colored. Do not wait too long, because a soft berry on a vertical wall quickly becomes very attractive to birds, ants, or someone else who did not ask permission.
If the lettuce leaves start to taste bitter or the plant bolts, remove it and plant new greens. You can replace just one pocket instead of taking apart the whole planting.
A vertical planter with strawberries and lettuce will not replace a garden bed, but it helps use a wall, fence, or railing in a useful way. Where nothing used to grow, you can now keep a few pockets of greens and berries close to the kitchen.
7. Self watering tote box for cucumbers with string trellis
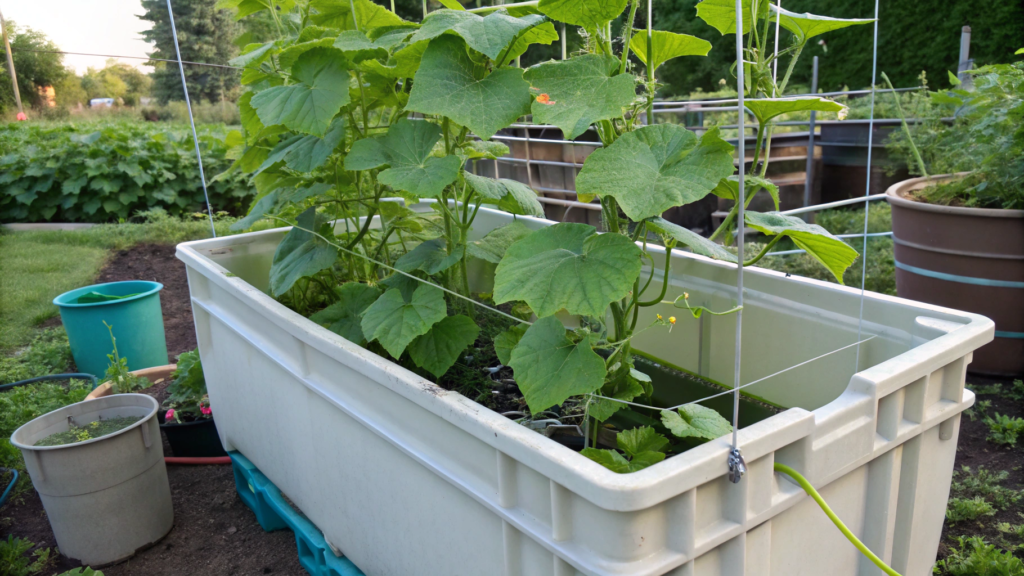
Self watering tote box for cucumbers with string trellis is a container made from a large plastic tote, with a water reservoir at the bottom, where cucumbers grow upward on a string trellis.
Lindy and I have seen more than once how container cucumbers can look beautiful in the morning, and by evening they are standing there with drooping leaves. Cucumbers show very quickly when the water has run out.
The benefit of self-watering
Cucumbers like even soil moisture. If the soil dries out and then suddenly gets soaked, the plant can drop flowers, produce crooked fruits, or turn bitter. In a self-watering tote, water stays in the lower reservoir and gradually moves up to the roots through the soil or a wick.
For this planting, a plastic tote with a lid, about 18–27 gal (68–102 L), will work. It is better to choose a sturdy container with a lid, not the most fragile one. The lid can become the planting surface, while the inside leaves room for water.
The main thing is not to choose a clear tote if it will stand in the sun. Light inside the reservoir quickly encourages algae. We do not need that.
How to build the tote
Here is how it looks: the water reservoir is at the bottom, the potting mix is on top, and between them there is a platform that separates the soil from the water. For moisture to move up to the roots, you need wicks or several “soil columns” that pass through the platform and touch the water below.
Basic setup:
- make a lower reservoir in the tote, 3–4 in high (7–10 cm);
- place a sturdy platform with holes inside;
- thread several fabric wicks through the platform: the lower end should touch the water, and the upper end should go into the potting mix;
- add a fill tube made from PVC pipe, 1–1.5 in wide (2.5–4 cm);
- make an overflow hole on the side, slightly below the level of the platform;
- add a light container potting mix on top.
The overflow hole matters. Without it, after rain or too generous watering, the water can rise above the reservoir, and the lower part of the soil will become wet. Cucumbers need steady moisture, but the roots still need air.
Planting cucumbers
For one 18–27 gal tote, I would plant 2 cucumber plants, or 3 at most if the variety is compact. It is better to choose container varieties or smaller cucumbers: ‘Spacemaster’, ‘Patio Snacker’, ‘Bush Champion’, ‘Picklebush’.
Plant seedlings or seeds closer to the back of the tote, where the trellis will be. Leave about 10–12 in (25–30 cm) between plants. Right after planting, water the top layer of soil well, and fill the reservoir through the tube.
String trellis
Cucumbers can be trained up a string trellis so they do not lie on the patio or take up the whole walkway. To do this, place a simple frame behind the tote: two posts and a top crossbar. From the crossbar, drop twine down to each plant.
Jute garden twine will work, for example Tenn Well Garden Twine 656 Feet. It is convenient for tying and does not look like plastic netting, if the look of the patio matters to you.
When the vines grow, gently guide them around the twine without tightening the stems. Cucumbers grab on with tendrils, but in the beginning they often need help.
Sunlight, watering, and feeding
Place the tote where it gets 6–8 hours of sun. If the patio is very hot, morning and early daytime sun is preferable, rather than full heat until evening.
The reservoir does not remove the need to check the water. In hot weather, cucumbers can drink a lot, especially when they start fruiting. Check the tube every few days. If the water goes down quickly, that is normal. It means the plant is working.
At planting, add compost and a gentle organic fertilizer, and after the first flowers appear, feed with a liquid vegetable fertilizer every 2–3 weeks. Do not overfeed with nitrogen, or you will get huge leaves and fewer fruits.
Harvesting
Harvest cucumbers young, while they are firm, juicy, and not overgrown. For most small varieties, this is about 4–6 in (10–15 cm), but it is better to check the description of the specific variety.
Do not leave overgrown cucumbers on the vine. The plant gets the signal that the seeds are already maturing, and it can slow down new production. Lindy tries to check cucumbers almost every day, because they can hide under the leaves and then suddenly be too large for a tender flavor.
A self-watering tote with cucumbers gives the roots more stable moisture, lifts the vines upward, and helps the patio look tidier. It is much better than running to the cucumbers with a watering can twice a day.
8. Milk crate root zone setup for carrots and radishes
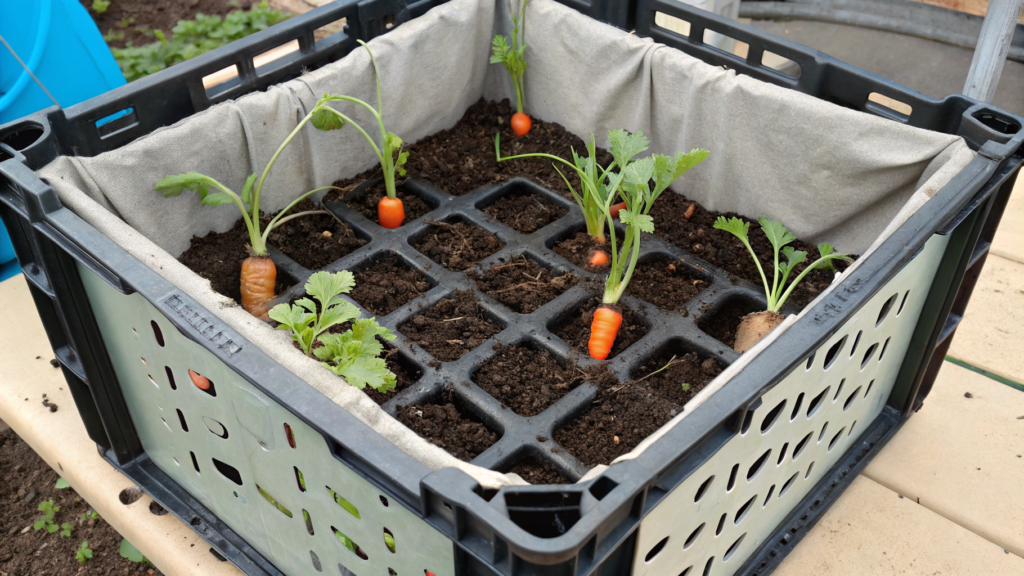
This format works very well for a patio because the crate is compact, you can move it, and the harvest grows not upward and not sideways, but downward — into the space we usually do not even think about using.
A regular milk crate is strong, light, and holds its shape well. But by itself, it is full of holes, so it needs a fabric liner or thick burlap inside.
For carrots, depth matters. It is better if there is at least 10–12 in of loose soil inside (25–30 cm). Radishes need less, but since we are making one shared crate, it is better to give the roots normal depth right away.
Soil without clumps
For this idea, soil matters more than almost anything else. You need a light, loose mix, without stones, wood chips, or large pieces of bark. I would mix container potting mix with compost and a little perlite if the mix is heavy.
Do not pack the soil too tightly. It should stay loose so carrots can grow straight and not run into dense clumps.
How to sow carrots and radishes
Carrots and radishes are better sown straight into the crate. They do not like transplanting, especially carrots.
You can do it like this:
- fill the crate with loose soil almost to the top;
- moisten the soil well before sowing;
- sow carrots shallowly, about ¼ in (0.6 cm);
- sow radishes a little deeper — about ½ in (1.2 cm);
- leave 3–4 in (7–10 cm) between rows;
- after germination, thin the carrots, leaving room for the roots.
Radishes can be sown along the edges or between the carrot rows. They grow faster and free up space earlier. You have already eaten the radishes, while the carrots keep sizing up calmly.
Water and sunlight
Root crops need even moisture. If the soil dries out and then suddenly gets soaked, radishes can become tough, and carrots can crack or grow crooked. In a fabric liner, extra water leaves through the material, but the crate itself still needs to be checked more often in hot weather.
Place the crate where it gets 5–6 hours of sun. In spring, you can give it more light. And in summer, if the patio heats up a lot, it is better to find a spot with morning sun and light shade after lunch.
Harvest time
Radishes are usually ready quickly — often in 25–35 days, depending on the variety. Do not leave them too long. Overgrown radishes become rough, a little bitter, and hollow inside. Lindy and I tried to check them often because radishes do not like waiting.
Carrots take more time. Many varieties are ready in 60–75 days, but closer to that timing, you can gently check one root crop. If the top near the soil surface is already wide enough, start harvesting selectively.
The point of this planting is control: you are not guessing what is happening underground, but giving carrots and radishes loose soil, the right depth, and the right moisture from the start. For a small garden, this is a very useful practice: creating the right root zone for the plant.
9. Patio salsa station with tomatoes jalapenos cilantro and onions
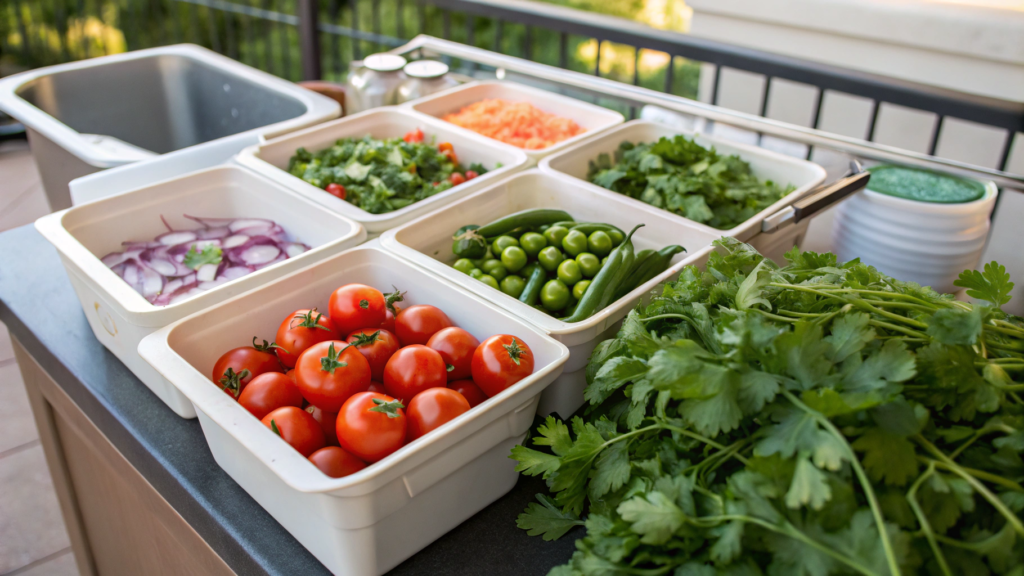
Here we are talking about a set of containers gathered in one spot on the patio, where tomatoes, jalapeños, cilantro, and onions grow close together. In other words, everything for fresh salsa is collected in one place, closer to the kitchen and to watering.
This kind of planting usually includes:
- 1 tomato in a separate large container;
- 1–2 jalapeño plants;
- cilantro in a smaller container;
- green onions or onions for greens near the cilantro or separately.
You do not need to plant everything in one shared box. These crops have different growth speeds and different root zones. The tomato needs the largest volume, the pepper needs steady warmth and good light, cilantro does better in a cooler spot, and onions do not need as much attention as all the other plants.
Choosing containers
For the tomato, you need a container of at least 5 gal (about 19 L). For jalapeño, 3–5 gal (11–19 L) will work, and for cilantro and onions, containers 8–10 in deep (20–25 cm) are enough. You can take matching pots in different sizes and place them as a group. I think this is a good idea.
For the tomato, place a metal tomato support right away.
The soil needs to be light, nutritious, and made for containers. I would add a little compost and not fill the pots with heavy garden soil. In containers, it quickly becomes dense, and vegetables do not need that.
What goes where
Tomatoes and jalapeños are better kept where there are 6–8 hours of sun. Tomatoes need full sun and even moisture, especially during active growth and fruiting.
You need to be a little more careful with cilantro. On a hot patio, it bolts quickly, so it often does better where there is morning sun and light shade after lunch. Onions are not as picky, but they also need a bright spot.
If you place the containers as a group, try to make sure the tomato does not completely cover the cilantro. Tall plants go in the back or by the wall, and lower ones go closer to the edge. This affects whether the greens grow normally or just survive in the shade.
Watering without swings
All four crops like moisture, but not swampy soil. Tomatoes and peppers dry out quickly in the heat, especially in containers. Cilantro also shows its unhappiness quickly when it dries out, and onion greens become tougher.
Check the top 1–2 in of soil (2.5–5 cm). If they are dry, it is time to water. It is better to water deeply than to pour a little every hour. For peppers, this is especially important. Peppers need well-drained soil and steady moisture, otherwise the plant produces worse.
Cilantro is convenient to sow in batches every 2–3 weeks, because it does not stay in perfect shape all summer. You cut one container, and the second one takes over.
Harvesting
Tomatoes are best picked when they are fully colored and slightly soft. Jalapeños can be harvested green, when the fruits have reached size and feel firm. If you leave them longer, some varieties will start turning red, and the flavor will become a little different.
Cilantro is best cut young, while the leaves are tender. Green onions can be harvested selectively, without pulling out the whole row at once. I like this kind of harvest exactly because it is not one big “harvest day,” but constant access to fresh herbs for food.
In this kind of salsa station, you are not just growing four crops side by side, but bringing one culinary group together. In the end, there is less running between containers, watering is easier, care is simpler, and you always have what actually goes into summer dishes close at hand.
10. Microgreens tray rack for fast indoor to patio harvesting
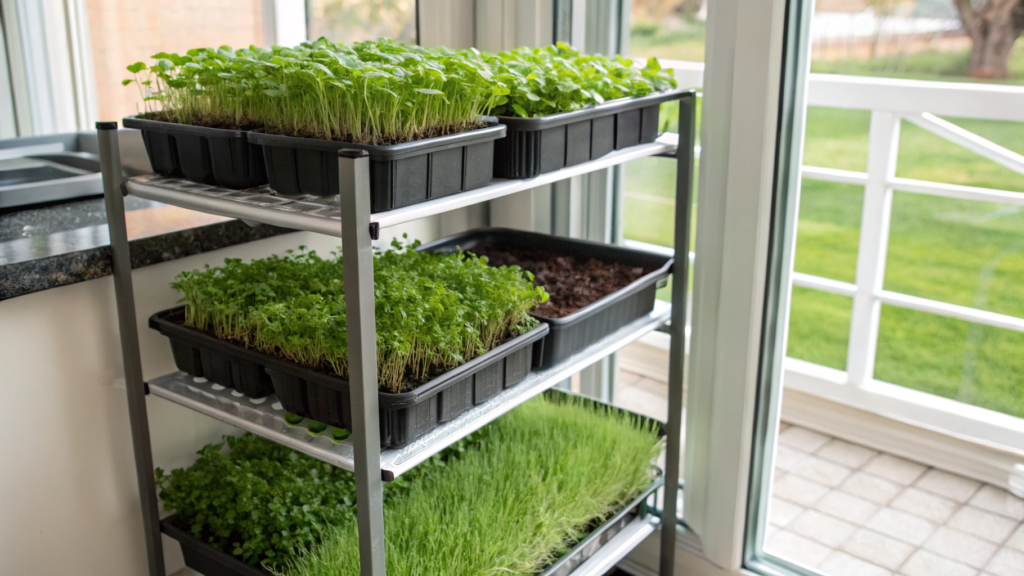
Microgreens can be grown indoors, by a window, or on a protected patio. This is a very fast way to get fresh greens almost all year round. Sometimes the first cut can be done in just 7–14 days, depending on the crop.
For microgreens, it is better to choose crops that sprout quickly and give tender stems with leaves. Good options:
- radish — fast, with a little sharpness;
- broccoli — mild flavor, good for sandwiches and salads;
- peas — give juicy shoots;
- sunflower — dense, crunchy sprouts;
- mustard — sharper than salad greens;
- arugula — small, but with a bright flavor.
I would not mix all the seeds in one tray if you are just starting. They grow at different speeds. It is better to do one tray — one crop. This makes it easier to understand when to water, when to remove the cover, and when to cut.
Trays and rack
For a patio or kitchen, it is convenient to use flat trays 1–2 in deep (2.5–5 cm). A deep container is not needed here: microgreens are harvested early, before a large root system forms.
It is better to use a set of two trays: the upper one with drainage holes, and the lower one without holes, so it can collect extra water. This makes bottom watering easier and helps avoid keeping the roots in constantly wet mix. If you use a tray with no drainage at all, you will have to water very carefully, because extra water simply has nowhere to go.
If you grow several batches at once, you need to place the trays on a small rack. A seedling and microgreens rack will work, for example TOREVSIOR 3 Tier Seed Starter Tray Rack. The main thing is that the trays are easy to take out, water, and move closer to the light.
If the rack stands on the patio, choose a place without strong wind and direct hot sun all day. Microgreens are tender; they do not like weather tests.
Soil, seeds, and sowing
For microgreens, you can use a light potting mix, coconut coir, or special mats. I usually choose a thin layer of potting mix because it holds moisture well and forgives small watering mistakes.
- pour 1–1.5 in (2.5–4 cm) of moist mix into the tray;
- spread the seeds evenly over the surface;
- gently press them with your palm or a small board;
- for larger seeds, like peas and sunflower, you can add a thin layer of soil on top;
- cover the tray with a lid or a second tray for the first few days.
Sunlight and watering
After germination, the trays need to be placed in bright light. This can be a sunny window, a protected spot on the patio, or a simple grow light. If there is not enough light, the sprouts will quickly stretch, become thin, and fall over.
It is better to water gently. A strong stream of water can press the sprouts to the surface or wash away the soil in the tray. I prefer bottom watering: pour a little water into the lower tray, wait until the mix absorbs moisture through the drainage holes, and drain the extra. This way, the microgreens fall over less, the soil surface does not get washed out, and the risk of mold is lower.
For microgreens, clean trays, quality seeds, and good moisture control are important, because the crop grows densely and quickly.
When to cut
Most microgreens can be cut when the sprouts reach about 2–3 in (5–7.5 cm), and the leaves have opened. Radish is often ready quickly, while peas and sunflower may need a little more time.
Cut with garden scissors just above the soil level. Do not pull the sprouts by hand: it is easy to lift the soil and roots with them. After cutting, it is better to rinse the microgreens, dry them, and use them right away. They are good in salads, with eggs, in sandwiches, soups, rice bowls — almost anywhere you can add fresh flavor.
This kind of rack gives a fast harvest in small batches. While the plants in one tray are sprouting, the second is already ready to cut, and the third has just been sown. And fresh greens are always close at hand.
A productive patio
The most useful patio planting is the one that is easy to water in the morning, check on the way to the kitchen, and quickly use the harvest in lunches and dinners.
I like to watch a planting like this for a few weeks. How fast does the soil dry out? Is it too hot by the wall? Is it convenient to harvest when your hands are already busy with scissors or a cup of coffee? And it becomes clear right away what can stay as it is, and what needs to be changed.
If you have any ideas, write them in the comments. I am interested in reading and learning something new.