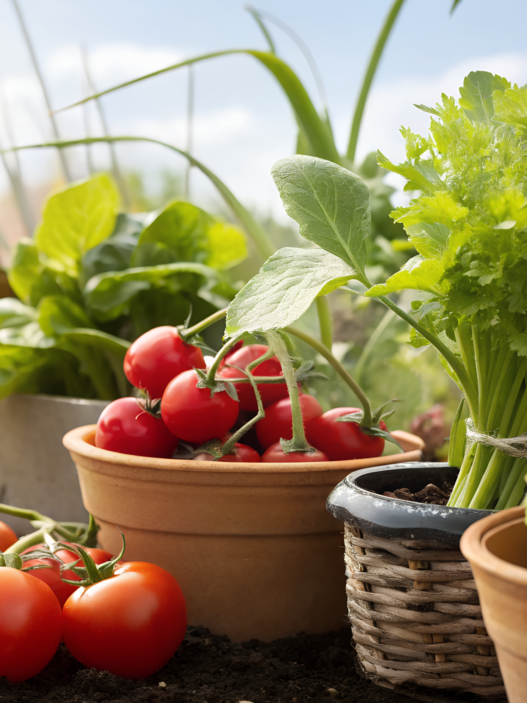

Not everyone has big garden beds, lots of time, or the confidence that gardening is even their thing. In that case, vegetables that grow well in containers can be a great way to get started with gardening. Plants are easier to manage in containers: you can move them closer to the sun, tuck them away from wind… Because these simple little things can help you get a good harvest.
We started this way too, and we fell in love with container planting. For beginners, it’s a good way to test yourself without a big risk.
Here we’ll talk about 10 crops that work well in pots, buckets, window boxes, and grow bags. Each crop has its own little details: container depth, light, watering, variety, and harvest timing. That’s exactly what we’ll talk about.
1. Patio Cherry Tomatoes That Ripen Reliably

Patio cherry tomatoes are a wonderful option for beginners. You don’t need a separate garden bed, and you get pretty quick results.
For containers, it’s better to choose not just any cherry tomatoes, but compact varieties. Look for words on the seed packet like “patio,” “dwarf,” “bush,” “compact,” or “determinate.” Good options for beginners: Tiny Tim, Patio Choice Yellow, Tumbling Tom, Red Robin, Sweetheart of the Patio.
1. Why Cherry Tomatoes
Small tomatoes usually need less time to ripen and turn red, unlike a large tomato that can stay green for a long time.
In a container, it’s easier to create the right conditions. You can place the pot where there is more sun, move it away from strong wind, or bring it indoors if the nights get cold. Tomatoes usually need 6–8 hours of direct sun a day. If there is less light, the plant may grow and flower, but the fruit often ripens more slowly.
In strong heat, it’s better to place the container where it gets bright sun in the morning and light protection from overheating in the afternoon. Very high temperatures can interfere with normal fruit color, so in a hot climate this really matters.
2. Container and Soil
For one compact cherry tomato plant, use a container of at least 5 gallons (about 19 L). If the variety is not very dwarf, 7–10 gallons (26–38 L) is better. The smaller the pot, the faster the soil dries out.
The container needs drainage holes, enough depth, and stability. A plant with fruit gets heavier than it looks on planting day. If your patio gets very hot, you can use a self-watering container. That’s convenient if pots dry out quickly.
Regular garden soil in a container gets compacted quickly, lets in less air, and can hold too much water. So it’s better to use potting mix, add a little compost, and if the mix is dense, add a little perlite. Add fertilizer according to the directions. Too much nitrogen can give you lots of leaves and very little fruit. Familiar situation.
3. Planting, Support, and Watering
Tomatoes can be planted deeper than they grew in the seedling cup. The buried part of the stem can grow extra roots, and that is especially useful for container planting.
- Fill the container with soil.
- Remove the lower leaves if they will touch the soil.
- Plant the tomato a little deeper than usual.
- Water it well.
- Put in a small cage, stake, or support right away.
Don’t wait until the plant starts leaning over. Later, the branches will already have fruit, the leaves will get in the way, and setting up support carefully will be much harder.
Watering is simple: check the soil with your finger. If the top 1–2 inches (2.5–5 cm) are dry, it’s time to water. Water at the base until water starts coming out of the drainage holes. Even watering helps prevent fruit from cracking.
4. Feeding and Ripening
In a container, nutrients wash out faster than in a garden bed, so tomatoes need feeding. But no need to overdo it. Once the plant settles in and starts growing actively, you can feed it every 2–3 weeks with a gentle tomato or vegetable fertilizer.
If the plant is growing fast but has few flowers, slow down with nitrogen. If the lower leaves are yellowing, the plant looks weak, and the fruit is not setting well, it may not have enough nutrients, or the watering may be uneven. One yellow leaf is not a disaster. Plants don’t always have to look like the picture.
To help cherry tomatoes ripen steadily, choose early compact varieties, keep the container in the sun, water without letting it dry out too much, and pick ripe fruit often. At the end of the season, you can pick fruit that has just started changing color and let it ripen indoors at room temperature.
5. What to Plant Nearby
If the container is large, you can plant basil, low marigolds, or a little lettuce around the edge early in the season. But don’t overcrowd the pot. The tomato needs enough space.
Basil and cherry tomatoes are convenient, right? You step outside in the evening, pick a handful of tomatoes, a couple of basil leaves, add salt and olive oil — and a tasty, fragrant salad is already ready for dinner.
For a beginner container garden, patio cherry tomatoes are almost a perfect start. You see progress quickly, mistakes can usually be fixed, and you don’t have to think about what to do with the harvest. Picked, washed, eaten. Or not even washed, if it’s your yard and you know for sure nothing extra got on them. Your choice!
2. Pepper Plants That Stay Compact but Productive
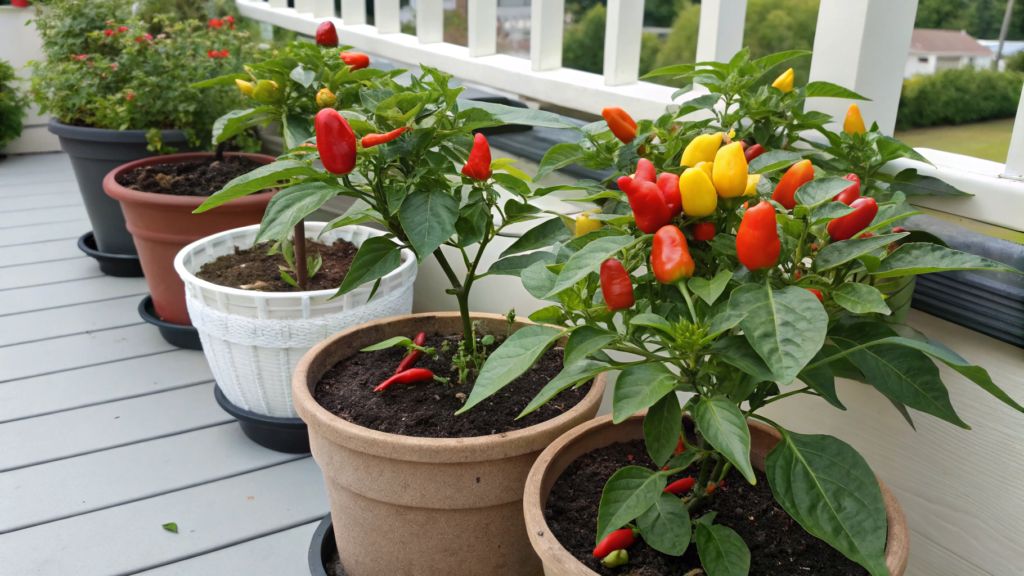
To grow peppers in containers, you need to choose the right varieties. The ones that grow well in a pot, keep their shape, and still give you a decent harvest.
Peppers change the flavor of almost any food. One sweet pepper in eggs, a few small hot peppers in sauce, a handful of mini peppers on the grill — and dinner already looks and tastes completely different.
For container growing, it’s better to choose compact and early varieties, like Lunchbox Pepper, Mini Bell, Mohawk Patio, Redskin, Basket of Fire, Jingle Bells. If you don’t like spicy food, choose sweet mini peppers. If you like hot dishes, you can plant one compact hot pepper variety.
1. Why Compact Peppers
Peppers often behave very neatly in containers. The plant doesn’t spread all over the patio, the fruit stays close to the stems, and many varieties can even grow in buckets and grow bags.
The main thing is not to choose varieties that are too large if you don’t have much space. Large bell peppers can also grow in a container, but they need more time, more nutrients, and more steady watering. Small sweet peppers or compact hot pepper varieties usually give a harvest faster, which is easier for a beginner to understand.
Peppers need 6–8 hours of sun a day. They love warmth, but they don’t love stress. Dry soil, temperatures above 90°F (32°C), and nights that are too cold or too warm can weaken pepper growth. Peppers love summer, but not when the pot is sitting on hot concrete and you forgot to water it.
2. Container and Soil
For one compact pepper plant, a container of at least 3–5 gallons (11–19 L) works well. If the variety is larger or your summer is hot, it’s better to use 5 gallons (about 19 L).
The container definitely needs drainage holes, enough depth, and stability. Peppers are not as heavy as tomatoes, but a plant with fruit can still lean over, especially after wind or heavy rain.
It’s better not to use regular garden soil, because in a pot it quickly gets dense, lets in less air, and can hold moisture. It’s better to use container potting mix, add a little compost, and if the mix is heavy, add a little perlite. For a hot patio, fabric grow bags like VIVOSUN 5-Pack 5 Gallon Grow Bags are convenient. They are light, easy to move, and the roots usually breathe better in them.
3. Planting and the First Weeks
Move peppers outside only when the nights are already consistently warm. If the seedlings grew indoors or in a greenhouse, first get them used to the outdoors gradually: bring them to a protected spot for a few days, then increase their time in the sun.
Plant peppers at about the same depth they grew in the cup. Unlike tomatoes, they don’t need to be buried deeply. After planting, water the soil well and put the pot in a warm sunny spot.
In the first weeks, don’t expect fast growth from the plant. Peppers can “slow down” a little, especially if the nights are cool. Then steady warmth comes — and they start growing.
4. Watering, Feeding, and Support
Peppers need even watering. Not a swamp, but not dried-out soil either. Check the top 1–2 inches (2.5–5 cm) of soil. If it’s dry, water at the base until extra water comes out from the bottom.
If watering is uneven, the plant can drop flowers or produce small fruit. Especially in a small container. So it’s better to put the pot somewhere you see it every day and don’t forget about it.
You can feed every 2–3 weeks with a gentle vegetable fertilizer. Don’t overfeed with nitrogen: it can make the plant grow lots of leaves, but fewer peppers. When flowers and small fruit appear, the plant needs steady feeding more than a sudden push.
Compact peppers often don’t need a large cage, but a small stake can help. Especially if the variety gives a lot of fruit or stands in a windy spot.
5. How to Harvest
Many peppers can be eaten both green and fully colored. Green ones are usually less sweet, while ripe red, orange, or yellow peppers are tastier and softer. But if the plant is small and has a lot of fruit, sometimes it’s better to pick some peppers earlier so the plant doesn’t slow down its growth.
Cut peppers with scissors or pruners instead of pulling them off by hand. Pepper branches can be brittle. One sharp pull — and you can accidentally remove not only the fruit, but half the branch too.
Compact peppers don’t need much space, but they are useful in so many dishes. And every time you pick a pepper from the branch, you get that nice feeling that this is your own harvest, grown by you right on the patio.
3. Cut and Come Again Lettuce for Endless Bowls
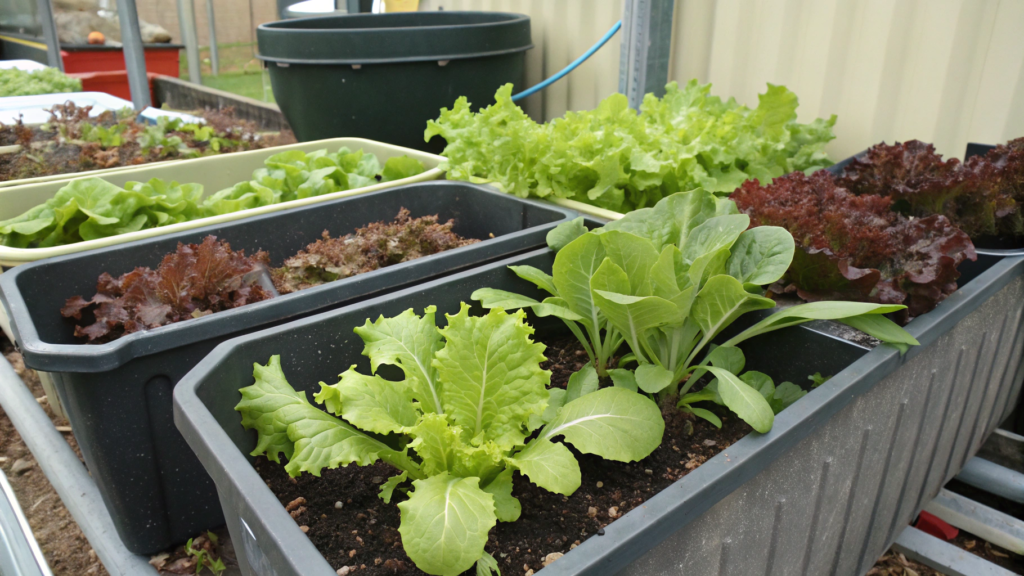
I like the cut and come again format because you don’t have to wait for a big, dense head of lettuce to grow. You grow several plants, take the outer leaves little by little, and leave the center to keep growing. Very convenient, especially when space is limited.
For containers, it’s better to choose leaf lettuce varieties, not heading types. Good options include Black Seeded Simpson, Red Salad Bowl, Green Salad Bowl, Oak Leaf, Buttercrunch, and Romaine baby leaf.
1. Why Leaf Lettuce
Lettuce doesn’t need a huge deep pot like tomatoes or peppers. It has shallow roots, grows quickly, and is easy to care for. It’s a good option for a patio, balcony, or porch. You can even use a simple wide window box if there is enough light.
For lettuce, even moisture and not-too-strong heat matter more. It likes cool weather and often does better in spring or fall. You can grow it in summer too, but it handles morning sun and light protection in the afternoon much better.
If lettuce gets too hot, it can quickly bolt. The leaves become tougher, and the flavor gets sharper.
2. Container and Soil
For leaf lettuce, a container 6–8 inches (15–20 cm) deep works well. It can be a wide pot, a balcony box, a wooden box, a plastic container with holes, or a grow bag. Don’t forget about good drainage.
Lettuce is easier to grow not as single plants in tiny pots, but in a wide container. That way, you get more leaves from a small space. Leave about 4–6 inches (10–15 cm) between plants if you want to harvest young leaves gradually.
Use a light, loose container potting mix. Regular garden soil can get compacted, especially after a few waterings. I would add a little compost, but not turn it into a heavy wet mix. Lettuce needs moisture, but the roots should not sit in a soggy clump.
3. Sowing and First Sprouts
Lettuce is easiest to sow directly in the container. The seeds are small, so don’t bury them deep. Usually, it’s enough to cover them with a thin layer of soil, about 1/8–1/4 inch (3–6 mm), and gently moisten it.
After sowing, keep the soil moist, but don’t flood it with water. For example, I water these seeds with a gentle stream or a spray bottle so the seeds don’t wash into one corner. Yes, that has happened too.
When the seedlings grow a bit, thin them out if they are too crowded, because crowding slows growth. You don’t have to throw away the tiny sprouts. Add them to a sandwich or salad. And yes, that is harvest too.
4. Watering, Light, and Care
If the soil keeps drying out, the leaves can become tougher and bitter. Check the top layer with your finger: if it’s dry, water. Lettuce needs steady moisture. In hot weather, containers dry out faster than it seems.
Lettuce should get a few hours of soft sun. In spring, it can stand in a more open spot, but in summer it needs only morning sun and protection from strong midday heat. In full shade, it will stretch and grow weaker.
Feeding should be moderate. If the soil is good and you added compost, lettuce often grows normally. If the leaves are pale and growth is weak, you can use a liquid fertilizer for greens in a weak concentration, but don’t overdo it. We don’t need giant watery leaves. We need tender greens for normal food.
5. How to Cut It Properly
The main rule: don’t pull out the whole plant. Take the outer leaves and leave the center. That is where the lettuce will keep growing. You can start when the leaves reach about 3–4 inches (7–10 cm), if you want tender greens for bowls and sandwiches.
Cut with garden scissors or gently pinch the leaves at the base. Don’t cut the whole plant down to bare soil. It’s better to take a little from different plants, so the container can keep feeding you longer.
When lettuce starts stretching upward and sending up a flower stalk, the flavor usually changes. The leaves become tougher and can turn bitter. At that point, I usually remove the old plants and sow a new batch. Lettuce grows well in waves: sow a little now, then a little more in 2 weeks — and you have fresh greens on the table for several weeks.
In a small garden, leaf lettuce doesn’t take up much space and fits easily into the rhythm of a normal kitchen. Cut a handful, add it to eggs, soup, a sandwich, or a big bowl with whatever was left from yesterday’s dinner. Convenient and practical, right?
4. Spinach That Doesn’t Bolt as Fast in Partial Shade
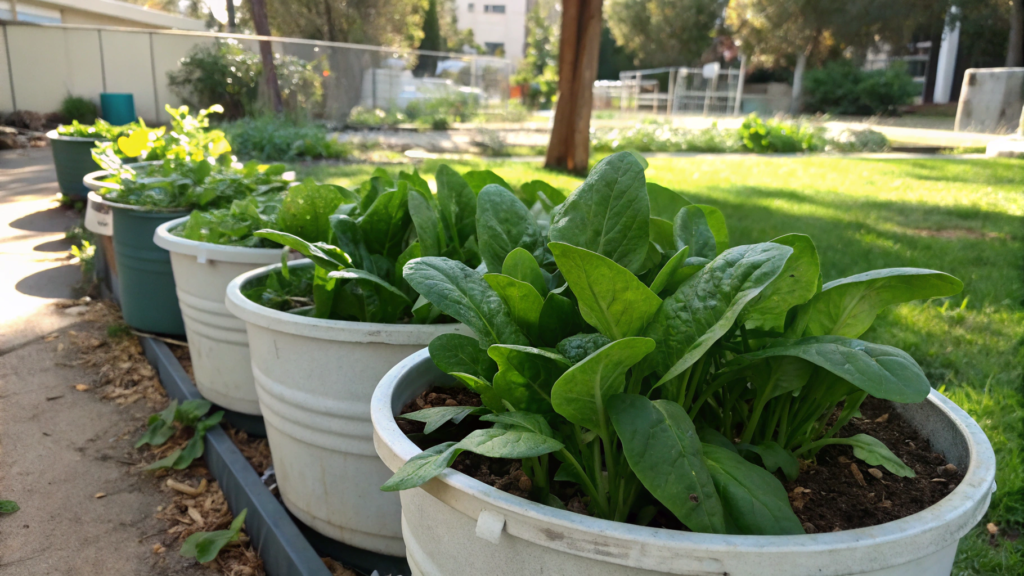
Spinach in containers grows well in cool weather and in spots where the sun doesn’t bake it all day. It grows quickly, gives you tender leaves, and doesn’t need a huge pot. But once it gets too hot, spinach can suddenly bolt.
That’s why our spinach always grows where it gets sun in the morning and light shade shows up in the afternoon. That kind of partial shade helps protect the leaves from overheating.
For container planting, it’s better to choose varieties known for slower bolting: Tyee, Space, Bloomsdale Long Standing, Melody, Seaside. There is no such thing as spinach that never bolts. If the heat gets strong, the plant will still go to seed. But the right variety and the right spot can give you more time to harvest.
1. Spinach and Partial Shade
Spinach grows well in spring and fall, but in summer it can get tired of the heat quickly. When the days get longer and temperatures rise, the plant is more likely to send up a flower stalk. After that, the leaves usually get tougher, and the flavor gets sharper.
Partial shade helps slow that process a little. Especially if the container gets morning sun and then sits in partial shade later. That gives spinach a better chance to last longer.
2. Container and Soil
Spinach doesn’t need a very deep container. A depth of 6–8 inches (15–20 cm) is usually enough. It’s better to choose a wide box or a shallow container so you can sow a few short rows and harvest leaves gradually.
The container needs drainage holes. Spinach likes even moisture, but it doesn’t like sitting in wet, heavy soil. If water stays around the roots, the plant weakens quickly.
Use a light, loose container potting mix. You can add a little compost to help the leaves grow more actively. But don’t make the mix too dense. In containers, this often happens: the top is dry, the inside is wet, and the roots feel bad.
For this kind of setup, a long box like Bloem Dura Cotta Window Box Planter is convenient. You can sow spinach in short rows and cut young leaves as they grow.
3. Sowing and First Leaves
Spinach is easiest to sow directly in the container. Plant the seeds about 1/2 inch (about 1.2 cm) deep. After thinning, leave about 3–4 inches (7–10 cm) between plants if you want to harvest young leaves.
After sowing, keep the soil moist. If the top layer dries out, seedlings may come up poorly. I sometimes cover a fresh sowing with a thin layer of mulch or simply watch it more closely during the first few days.
When the seedlings grow a bit, thin them out. If spinach grows too densely, the leaves get smaller, and air moves poorly between plants. You can add the tiny sprouts to a salad or sandwich.
4. Watering, Light, and Care
Like many plants, spinach needs steady moisture. Check the top layer with your finger: if it’s dry, water at the base.
You already get the idea: the best spot for spinach is where it gets a few hours of soft light. In spring, it can stand in a sunnier spot, but closer to the heat, it’s better to move the container into partial shade. That is one of the advantages of pots: unlike garden beds, you can always move them to the right spot.
If spinach leaves are pale and growth is weak, you can use a liquid fertilizer for greens in a weak concentration. Just don’t overdo it. We don’t need huge loose leaves. We need tender greens that are nice to eat fresh.
5. Harvesting
Spinach is best harvested young. For salads, pick leaves when they are about 2–4 inches (5–10 cm) long. These leaves are tender, easy to wash, and work well in bowls, omelets, soups, and warm dishes.
Cut the outer leaves and leave the center to keep growing. You can take a little from different plants so the container doesn’t get bare all at once. If the leaves get very large, dense, and dark, they are still edible, but they are better for hot dishes: omelets, soup, sautéed vegetables, or pasta, rather than a fresh salad.
When a flower stalk starts rising from the center, the plant is already bolting. In that case, I usually cut what I can still use and sow a new batch in a cooler spot.
5. Radishes That Succeed in Shallow Pots
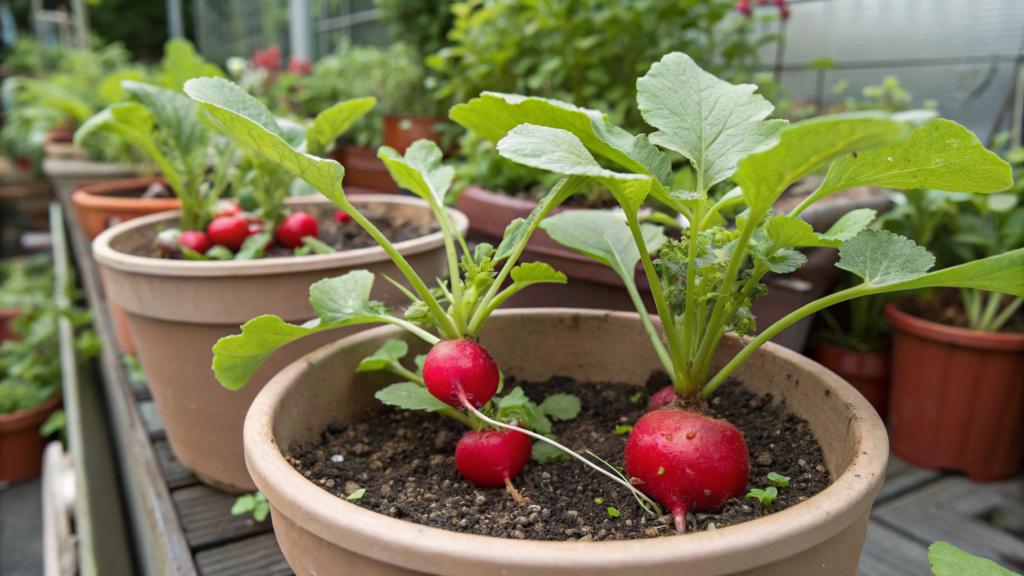
Radishes in shallow containers are almost instant joy for a small garden. Compared with tomatoes, peppers, and cucumbers, radishes in shallow containers grow fast: you sow them, wait a few weeks, pull up the first bright little root — and you already have something crunchy to eat.
For containers, it’s better to choose quick round varieties that don’t need much depth. Good options include Cherry Belle, Champion, Rover, French Breakfast, Easter Egg, and Celesta. Long daikons and large winter radishes are better left for deeper garden beds or bigger containers.
1. Why Radishes Grow Well in Shallow Containers
A regular round radish has a small root, so it doesn’t need a huge pot. A container 6 inches (about 15 cm) deep is usually enough for most round varieties. If the variety is longer, it’s better to use a depth of 8–10 inches (20–25 cm), so the roots don’t hit the bottom.
Radishes like cool weather and grow quickly in spring or fall. In hot weather, they are more likely to bolt, get too sharp, turn tough, or simply refuse to form a proper root. So the best spot for a radish container is where it gets morning sun and protection from strong afternoon heat, especially if the container sits on a patio or balcony. In mild spring weather, radishes can grow in a more open spot too.
2. Container and Soil
For radishes, a wide container is more convenient. That way, you can sow a few short rows and get a real handful of harvest, not three radishes for the whole family. Although even those are exciting. Just not for long.
Don’t forget drainage holes in the container and loose soil. If the soil is dense, the roots can turn out crooked, small, or rough. Use a light container potting mix and add a little compost. Just skip fresh manure and heavy nitrogen feeding. Too much nitrogen can give radishes lots of pretty tops, while underground there is a tiny disappointment.
3. Sowing
Radishes are best sown directly in the container. They don’t like transplanting, and there’s no real point anyway: this crop is fast and simple. Sow it and let it grow right where it is.
Plant the seeds about 1/2 inch (about 1.2 cm) deep. Leave about 1 inch (2.5 cm) between seeds and 3–4 inches (7–10 cm) between rows. If you sow more thickly, be sure to thin them later.
If the seedlings stand too close together, the roots won’t be able to round out properly. You’ll have tops, you’ll have greens, but the radish itself will stay thin and sad. So don’t forget to thin the seedlings, and the young leaves can go into a salad if they are clean and tender.
4. Watering and Care
Don’t let the soil dry out, or the roots can become tough and too sharp. If the container dries out and then gets a sudden heavy watering, radishes can crack. So it’s better to water a little at a time, but regularly.
Check the top layer of soil with your finger. If it’s dry, water carefully at the base. In shallow containers, soil dries out faster than it seems, especially in sun and wind.
Feeding usually isn’t needed if the soil is decent and has a little compost. Sometimes we try too hard with fertilizer, while radishes just need loose soil, moisture, and a normal temperature.
5. Harvesting Radishes
Radishes are better harvested on time, not when they become huge. Most quick varieties are ready about 22–35 days after sowing, but look at the size of the root, not only at the seed packet.
When the top of the radish starts showing above the soil, you can gently check the size. If the root is already normal for that variety, pull it. Overgrown radishes often become tough, hollow, or too sharp.
Sow radishes in small batches every 1–2 weeks during the cool season. Then you won’t have one big radish harvest day, but several good harvests in a row.
With radishes, it always feels like this: yesterday it was just a container with soil, then green seedlings, and now little red balls are already popping out of the ground. Pull them, rinse them, sprinkle with salt — and wow, they are so good with fresh bread and butter. Or just sliced into a salad. So good, right?
6. Carrots Bred for Containers and Window Boxes

Carrots are not the fastest crop in a container garden. You sow them, wait, wait a little more, and then wait again. But it really is nice when you pull your first little carrot out of a box. Don’t you think?
For container planting, it’s better to choose short carrot varieties that don’t need a lot of depth. Good options include Parisian, Little Finger, Short ‘n Sweet, Thumbelina, Romeo, and Oxheart. If you have a deep container, you can try longer varieties too, but for beginners, short carrots are usually easier and more reliable.
1. Short Carrot Varieties
Carrots form their roots underground, so they need loose soil that is deep enough. If the root hits a dense clump, a small stone, or the bottom of the container, the carrot can grow crooked, split, or short.
Short varieties lower that risk. They don’t need to grow deep down, so they do well in window boxes and containers. For carrots like Parisian, you can use a container about 8 inches (20 cm) deep. For varieties like Little Finger or Short ‘n Sweet, it’s better to choose 10–12 inches (25–30 cm).
Carrots like cool weather. It’s best to sow them in spring or closer to fall, when there is no strong heat. In hot weather, soil in a container dries out quickly, and carrots don’t like that. Growth can slow down.
2. Container and Soil
For carrots, it’s not only the depth of the container that matters, but also loose soil. The mix should not have stones, dense clumps, roots from old plants, or heavy garden soil. All of that gets in the carrot’s way underground.
Use a light container potting mix and add a little sifted compost. If the compost is chunky, with bits of sticks, it’s better not to use it. For carrots, the smoother the mix, the better the shape of the roots.
The container definitely needs drainage holes. The soil should be moist, but not wet. For short carrots, you can use a deep window box or a rectangular container if the depth fits the variety you chose.
3. Sowing and Thinning
Carrots are best sown directly in the container. They don’t like transplanting: if you disturb the young root, the carrot often grows crooked later. So it’s easier to sow them right where they will grow.
Carrot seeds are small. Sow them about 1/4 inch (6 mm) deep, gently cover them with a thin layer of soil, and moisten well. Until they sprout, it’s important to keep the top layer moist. If it dries out, the seeds may sprout poorly and unevenly.
When the seedlings grow a bit, you need to thin them. Leave about 2 inches (5 cm) between plants, and a little more for larger varieties. If carrots grow too close together, the roots simply have no room to grow. In the end, you get a lot of green tops above the soil and thin little tails below.
4. Watering and Care
The container should not dry out into a hard crust. But you don’t need to flood it every day “just to be safe” either. Take care of steady moisture, especially while the seeds are sprouting and while the roots are just starting to form.
Check the top layer of soil with your finger. If it’s dry, water carefully so you don’t wash the seeds around. While the seeds are still tiny, gentle watering is very important. One strong stream of water — and the whole neat planting can shift to the edge of the box.
Use fertilizers moderately. Don’t give too much nitrogen: it can make carrots grow lots of tops, while the roots stay weaker. If the soil is good, with a little compost, that is often enough for a normal start.
5. Harvesting Carrots
Many short varieties are ready in about 55–75 days, but timing depends on the variety, the weather, and the depth of the container.
Look at the carrot “shoulders” near the soil surface. If the top of the root already looks wide enough for the variety you planted, you can carefully check one. Don’t pull everything out of the container right away.
Small carrots can be harvested earlier as baby carrots. They will be tender, sweet, and good for fresh salads. Larger ones are better not left too long in a hot container: they can get rougher.
Your container carrots may not look as perfect as the ones from the supermarket. But nothing compares to the moment when you pull on the tops and bring up a real root. Your own. Grown by your own care. And somehow, that kind of carrot always tastes better.
7. Dwarf Cucumbers That Climb a Balcony Trellis

Regular cucumbers can quickly stretch out, lie on the ground around the pot, and start getting in the way of nearby plants. Compact varieties are easier to keep in order, especially if you give them support right away.
When cucumbers grow upward, the leaves get better airflow, the fruit is easier to find, and the container stays neater. For containers, it’s better to choose dwarf, bush, or compact varieties. Good options include Spacemaster, Bush Champion, Patio Snacker, Picklebush, Salad Bush, and Bush Pickle. If your balcony is small, especially look for varieties labeled “bush,” “patio,” “compact,” or “container.”
1. Dwarf Cucumbers for a Balcony
Cucumbers like to grow actively. Even compact varieties don’t always stay as a perfectly tiny plant, so support helps keep them in order.
Dwarf varieties usually produce shorter vines and work better for containers. They don’t need a large garden bed, but they can still give you a good harvest if they get enough sun, water, and nutrients.
Cucumbers need 6–8 hours of sun a day. In a very hot spot, the container can overheat, so sometimes it’s better for the plant to get bright morning sun instead of sitting in the heat all day. Cucumbers like warmth, but not dried-out soil in a container.
2. Container and Soil
Plan for at least 5 gallons (about 19 L) for one cucumber plant. If you want to plant two plants in one wide container, choose a larger size — around 10 gallons (about 38 L) or more. Cucumbers drink a lot, and a tight pot will dry out too quickly.
The container needs drainage holes, depth, and stability. If you place the trellis directly in the pot, the container needs to be heavy enough so the whole setup doesn’t fall over in the wind. On a balcony, that is not a small detail. One good gust of wind — and everything is on its side.
Use a light, nutrient-rich container potting mix. Add compost, but don’t make the mix heavy and wet. Cucumbers need moisture, but the roots should not sit in a swamp.
3. Seeds or Seedlings
Cucumbers can be sown directly in the container once it’s warm, or you can plant seedlings. If your season is short, seedlings help you gain time. But cucumbers don’t like having their roots disturbed too much, so transplant carefully.
Plant seeds about 1 inch (2.5 cm) deep. In one container, it’s better to leave one strong plant, or two at most if the container is large. Don’t try to plant five cucumbers in one pot “just in case.” You’ll understand quickly that it was a bad idea.
If you grow seedlings, plant them at the same depth they grew in the cup. After planting, water well and guide the plant toward the trellis right away. Young vines are easier to train onto support than adult ones are to untangle later.
4. Watering, Feeding, and Trellis
Cucumbers are very sensitive to drying out. If the soil suddenly gets dry, the fruit can become bitter, crooked, or simply stop filling out properly. Check the top 1–2 inches (2.5–5 cm) of soil. If it’s dry, water at the base.
In hot weather, containers with cucumbers sometimes need watering every day. Not blindly by schedule, but by the soil. Wind, sun, pot size, and container material all affect how fast it dries out.
You can feed every 2–3 weeks with a liquid vegetable fertilizer, but it’s better to dilute it weaker than you would for plants in garden beds. When flowers and the first small fruit appear, cucumbers need steady feeding, not one strong feeding all at once.
Gently guide the vines onto the trellis. You can lightly tie them with soft garden tape, but don’t tighten it around the stem. A cucumber should not be hanging in a noose. It just needs direction.
5. Harvesting Cucumbers
Cucumbers are best harvested young and often. Don’t wait until they become huge. Large cucumbers are usually rougher, and the seeds inside are bigger.
Look at the size listed for the variety. For small container cucumbers, this is often 4–6 inches (10–15 cm), but it can vary. Cut the fruit with scissors or pruners instead of pulling by hand. Cucumber vines are easy to damage.
The more often you pick ready fruit, the more willingly the plant keeps setting new ones. In this case, regular harvesting is good for the crop.
A container with dwarf cucumbers makes a small space feel more alive. You move the leaves aside and… find the first crunchy cucumber. Isn’t that a little wonderful? Slice it for dinner, add salt, dill, yogurt, or sour cream — and that’s it. Sounds delicious.
8. Scallions and Bunching Onions for Continuous Snips
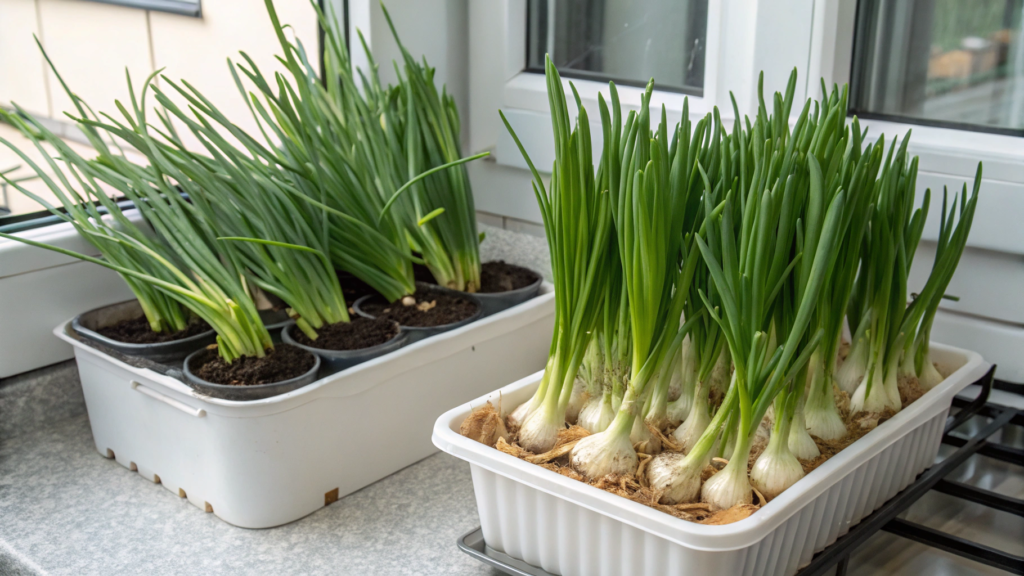
Scallions and bunching onions in containers always turn out to be very useful in the kitchen. They don’t take up much space, don’t need a deep garden bed, and give you that fast result.
Eggs, soup, potatoes, rice, salad, flatbreads, fried vegetables — you can add a little fresh onion on top almost anywhere, and the food immediately tastes brighter and fresher, without a trip to the store.
Scallions are usually harvested young, before the plant starts forming a large bulb. Bunching onions, also called Welsh onions, are especially useful for the green tops: they don’t make a large regular bulb, but they grow back well after cutting. Good container options include Evergreen Hardy White, Tokyo Long White, Parade, Ishikura, and White Lisbon.
1. Scallions and Bunching Onions for Containers
These plants don’t need a huge pot. They have a compact root system, grow upright, and don’t spread out to the sides. That makes them convenient for a patio, balcony, windowsill, or a narrow box by the door.
You are not waiting for one large bulb. You are growing lots of green stalks for regular snipping. That’s why these plantings work well in long boxes: cut a little from one side, let the other part grow, then come back again.
They do need sun, but they are usually more tolerant of light partial shade than tomatoes, peppers, or cucumbers. The greens grow best with about 6 hours of sun a day, but a few hours of soft light can still give you a decent result.
2. Container and Soil
For scallions and bunching onions, a container 6–8 inches (15–20 cm) deep works well. You can use a long box, a wide shallow pot, or a grow bag. The main thing is to have drainage holes. Onions don’t like sitting in wet soil.
Use a light, loose container potting mix. Add a little compost so the green tops grow more actively, but don’t make the mix heavy. If the soil is dense, water will sit there, and the roots will start to suffer.
3. Sowing and Planting
Scallions can be grown from seeds, small planting onions, or store-bought stalks with roots. Bunching onions are often grown from seeds or by dividing a mature plant. Seeds take more patience, but they give you a lot of plants at once. Small planting onions and stalks with roots give you greens faster.
If you sow seeds, plant them about 1/4 inch (6 mm) deep. After they sprout, you can leave about 1 inch (2.5 cm) between plants if you plan to cut young green tops. For thicker stalks, leave a little more space.
If you plant store-bought stalks with roots, leave the lower white part about 1–2 inches (2.5–5 cm) long, plant it in the soil, and water it well. It’s a simple way to get a second round of greens from something that usually goes to compost. Not an endless trick, but it works.
4. Watering and Care
Scallions and bunching onions need even moisture, especially in a container. If the soil keeps drying out, the greens get tougher and grow more slowly. If onions sit in soggy soil, the roots can start to rot.
Check the top layer of soil with your finger. If it’s dry, water at the base. In hot weather, narrow containers dry out quickly, so it’s better to place the box somewhere you see it every day.
If you cut the green tops regularly, the plants use energy to grow back. Once every 3–4 weeks, you can use a liquid fertilizer for greens in a weak concentration or add a little compost on top. But don’t overfeed. We need firm fresh stalks, not watery greens that fall over with the first wind.
5. How to Snip So They Grow Back
The main thing: don’t pull out the whole plant if you want continuous snips. Cut the green tops with garden scissors, leaving about 1–2 inches (2.5–5 cm) above the soil. That way, the plant can start growing again.
You can cut a little from different plants or work in sections: one side of the container today, another side a few days later. That way, you don’t end up with all the greens cut at once and an empty container.
Over time, the plants can weaken, especially with frequent cutting. That’s normal. Sow a new batch every few weeks or keep two small containers: one you cut from actively, and one that is growing back.
Scallions and bunching onions don’t promise huge baskets of harvest, but almost every day you have a useful addition to food. A little green top on soup, potatoes, eggs, or rice — and the dish tastes fresher and better. A small thing, but when it grows right by the door or on the windowsill, you start using it all the time.
9. Compact Bush Beans for Buckets and Grow Bags
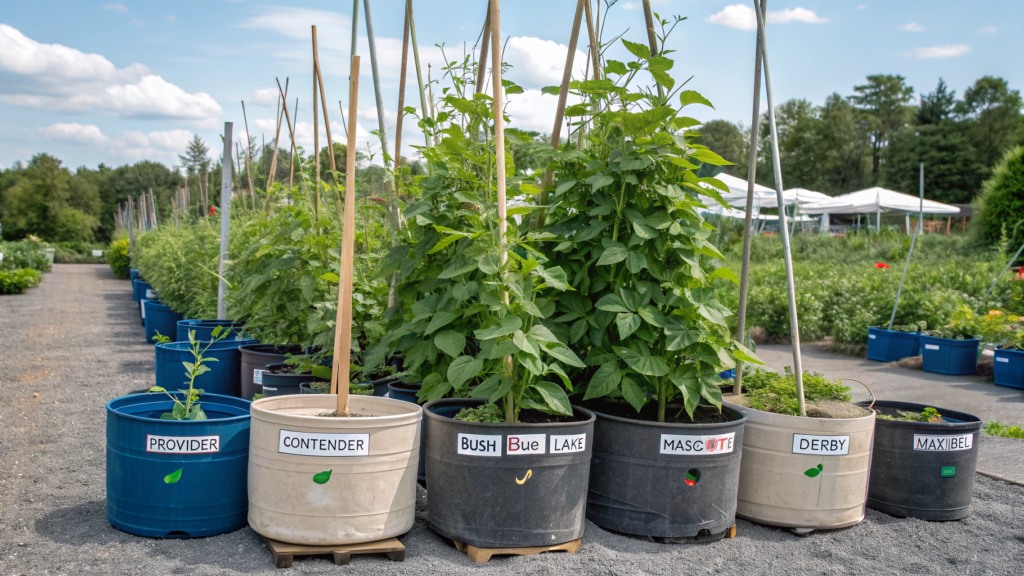
Bush beans in containers grow fairly quickly, don’t need a tall trellis, and work well in buckets, large pots, and grow bags.
For containers, choose bush varieties, not pole beans. Good options include Provider, Contender, Bush Blue Lake, Mascotte, Derby, and Maxibel. If space is really limited, it’s especially useful to look for varieties labeled “bush,” “compact,” or “container.”
1. Bush Beans for Containers
Bush beans grow more neatly than pole beans. They don’t need a tall structure, a long net, or a separate spot by the fence. The plants usually stay in a compact bush shape, so they are easier to grow on a patio, near a path, or on the sunny edge of a balcony.
Beans need 6–8 hours of sun a day. They can grow in partial shade, but they usually produce fewer pods. Put the container in the brightest spot you have.
Many bush bean varieties start producing in about 50–60 days after sowing.
2. Container and Soil
For bush beans, a 5-gallon bucket or grow bag works well (about 19 L). You can plant several plants in one container if you don’t crowd them. If the grow bag is wider, the beans will have even more room.
The container needs drainage holes, but you already know that by now. Beans like even moisture, but they don’t like wet, heavy soil. If water sits around the roots, the plants weaken quickly.
Use a light, loose container potting mix. Add a little compost, but don’t overfeed with nitrogen. Beans are legumes, and with the help of bacteria on their roots, they can fix nitrogen from the air, so they don’t need the same nitrogen push as some other crops. Too much nitrogen — and you may get lots of leaves, but fewer pods.
3. Sowing Without Transplanting
Beans are best sown directly in the container. They don’t like having their roots disturbed, and they usually sprout quickly if the soil is already warm. Don’t rush to sow them in cold soil. The seeds can rot.
Plant the seeds about 1 inch (2.5 cm) deep. Leave about 4–6 inches (10–15 cm) between plants. If you are sowing in a round container, you can place the seeds in a circle, leaving the center a little more open for air and watering.
After sowing, moisten the soil well and keep it lightly moist until sprouts appear. Don’t flood it. Beans like moisture, but cold wet soil is bad for them.
4. Watering and Care
Bush beans need steady moisture, especially during flowering and pod formation. If the container dries out, the plant may drop flowers or produce less.
Check the top 1–2 inches (2.5–5 cm) of soil. If it’s dry, water at the base. Try not to wet the leaves in the evening, especially if the plants are close together. Extra moisture on the leaves and poor airflow often lead to problems.
Bush beans usually don’t need a large support, but a small stake can sometimes help if the plants lean from wind or heavy pods. Especially in grow bags that stand in an open spot.
Feeding should be moderate. If the soil is good and has compost, that is often enough.
5. When to Harvest Pods
Bush beans are best harvested young and often. The pods usually taste better when they are still smooth and tender, and the seeds inside have not grown large yet. If you leave the pods on too long, they get tougher, and the plant may start flowering less.
Pick or cut the beans carefully so you don’t break the branches. I prefer to hold the stem with one hand and remove the pod with the other. The plants may look sturdy, but the branches can break easily.
Harvest pods regularly. Walk by in the morning with a small bowl, pick the ready pods — and in a couple of days, there will be more to look for among the leaves. That’s one of the nice parts of growing beans.
10. Microgreens for Fast Wins in Any Sunny Spot
For microgreens, people most often grow radishes, broccoli, peas, sunflower, arugula, kale, mustard, basil, and cilantro. It’s easiest to start with radish, broccoli, or peas: they sprout quickly, are easy to see in the tray, and don’t need complicated care.
And it feels really good to know you grew them yourself.
1. Microgreens
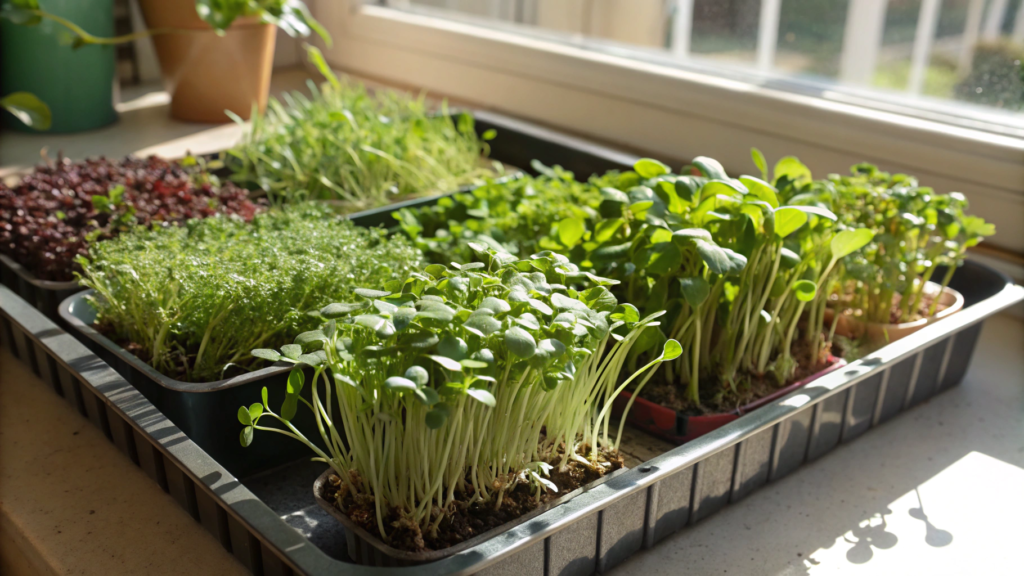
Microgreens don’t need a deep container. They only grow for a few days or a couple of weeks, so a shallow tray is enough. This is not a plant that needs to send roots a foot down. It needs to sprout quickly, grow a stem and first leaves — and then you cut it.
For most types, a container 1–2 inches (2.5–5 cm) deep is enough. You can put it on a windowsill, a table by the window, a shelf with a light, or a sunny kitchen corner. If there is not enough light, the sprouts will stretch and fall over, so light matters.
Microgreens are usually cut when the first true leaves appear, or when the sprouts reach about 2–4 inches (5–10 cm), depending on the crop. With radishes, that can happen pretty quickly; with peas, it takes a little longer. But either way, this is not a months-long story.
2. Container and Soil
For microgreens, a shallow tray with drainage holes works well, or without them if you water very carefully. But holes make it easier.
You need very little soil. Take a light container potting mix and add a layer about 1 inch (2.5 cm) deep. You don’t need to fill a deep pot all the way up. Microgreens won’t use that much space, and then you’ll just be carrying around extra soil.
For a start, a set of trays like Bootstrap Farmer 1020 Trays is convenient, especially if you want to grow microgreens regularly. But for a first try, a clean food container can work too, if you make drainage or are very careful with water.
3. Sowing in a Dense Layer
Microgreens are sown much more densely than regular vegetables. Here we are not giving every plant room for an “adult life.” We are simply growing tender stems and leaves for cutting.
Scatter the seeds over the soil surface in a dense, but not completely solid, layer. The seeds should not sit in piles on top of each other. Larger seeds like peas or sunflower are better soaked ahead of time for 6–12 hours so they sprout faster and more evenly.
After sowing, gently press the seeds into the soil and moisten them with a spray bottle. Many types can be covered with a lid or a second tray for the first 2–3 days to hold moisture until they sprout. As soon as the sprouts come up, move them into the light.
4. Light, Watering, and Cleanliness
Microgreens need bright light, but not necessarily direct sun all day. On a hot window, tender sprouts can dry out quickly. A bright spot without strong overheating is better, or a simple grow light if your home is dark.
Water carefully. The top layer should be moist, but not wet. If you have a tray with holes, you can bottom-water: pour a little water into the lower tray, let the soil absorb moisture, and drain the extra.
Use a clean container, fresh soil, and good seeds meant for sprouting or microgreens. If the planting smells bad, gets moldy, or turns slimy, don’t eat it. Microgreens are great, but not at any cost.
5. How to Cut and Use Them
Cut microgreens with garden scissors just above the soil level. This is usually done after 7–14 days, but timing depends on the crop, temperature, and light. Radishes and broccoli are often ready faster; peas and sunflower may take longer.
After cutting, microgreens are best used fresh. Add them to toast, eggs, soups, rice, salads, sandwiches, and roasted vegetables. Of course, they are not the main dish. Microgreens simply make regular food fresher and brighter.
Most types of microgreens don’t regrow well after cutting, so it’s easier to sow a new tray. To have greens all the time, start a small sowing every 5–7 days. One tray is ready for harvest, the second is still growing, and the third is just sprouting. A working system for the kitchen.
If you’re still nervous about starting tomatoes and cucumbers, this is different: sow, water, wait a little — and you’re already cutting greens for breakfast. Tempting? A small harvest, but your own.
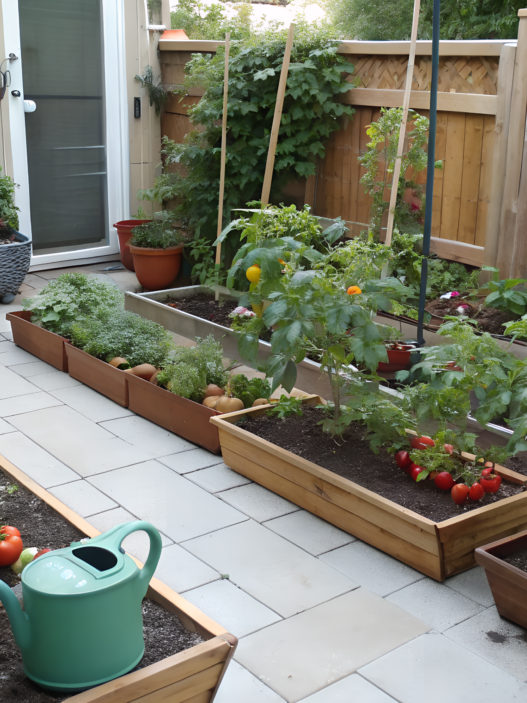
What to Plant First
Choose one crop that fits your space, and don’t try to turn a small balcony into a big garden bed. You can start with one box of lettuce, a bucket of bush beans, or a couple of pots with cherry tomatoes by the door.
Containers give you room to experiment. One season will show you that the radishes were too hot. Another — that basil next to tomatoes disappears faster than you expected. And then suddenly you’ll discover that you already have a set of crops that really settles in on your balcony or patio.
If you’ve already grown vegetables in containers, write in the comments what worked best. And if something was a total failure, write that too. Sometimes someone else’s badly grown carrot helps more than a perfect harvest photo.