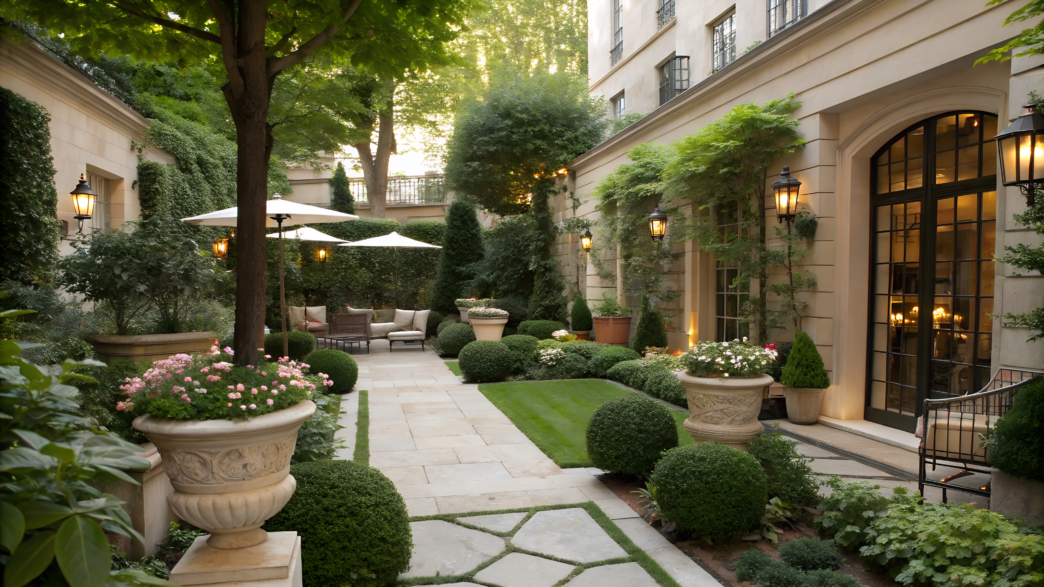
A small patio doesn’t always mean small possibilities. Lindy and I have lived and worked with properties of all sizes, and we’ve seen it over and over again: even a few square feet can become a place that feels like the quiet courtyard of a small boutique hotel. Not because of expensive furniture, but because of a thoughtful layout, living plants, pleasant lighting, and details you actually use.
We’ve tried a lot of different ideas ourselves. That’s why I put together these 10 small patio ideas that can make your space more beautiful, more comfortable, and more useful without a big budget or major renovations. We still use many of these ideas today and keep improving them a little over time.
1. The Two Zone Layout: Lounge Plus Micro Kitchen Herb Station
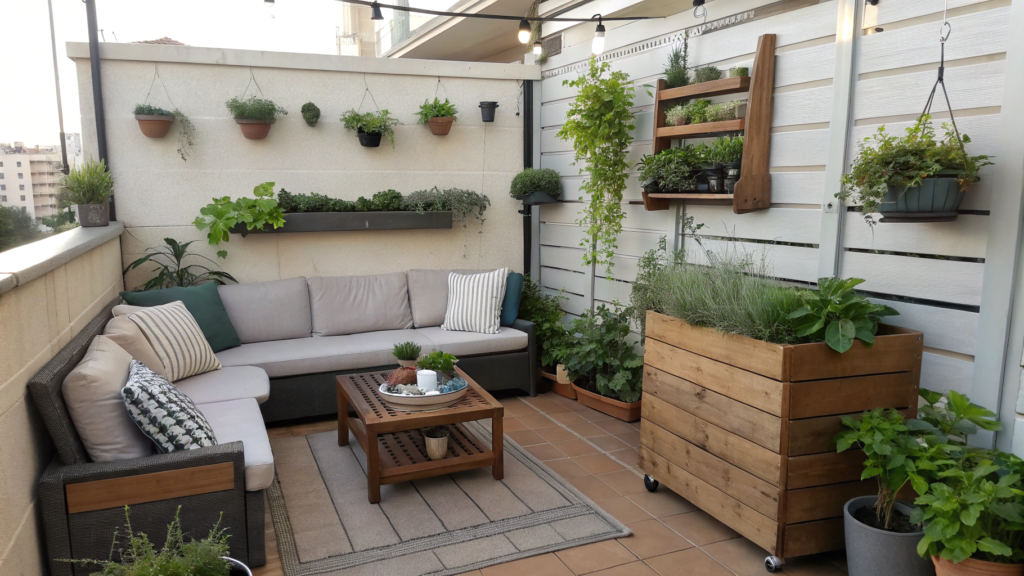
A small patio can fill up with pots very quickly. We made the same mistake ourselves, I won’t deny it. Did it look nice? In some ways, yes. Was it practical? Definitely not.
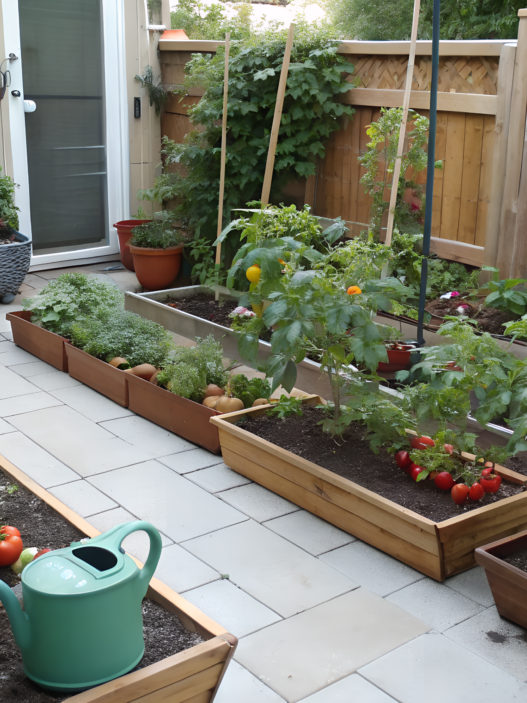
In the end, I started dividing small patios into two areas: a place where you can sit and relax, and a place where you grow the things you actually use in the kitchen.
Lounge Area
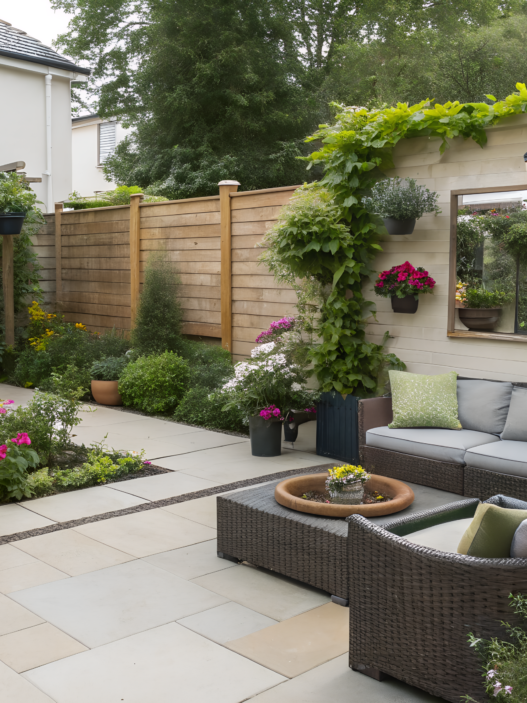
Leave about 60–70% of the space for a proper seating area. It can be a chair, a small bench, a narrow table, or a couple of cushions if your patio is really tiny. The important thing is that you can actually sit there, not just squeeze sideways between pots.
The remaining 30–40% can be used for plants, herbs, and a small spot for garden essentials.
On a small patio, one chair, one table, and one tall container nearby are often enough. In that container, you can grow bay laurel, standard rosemary, a dwarf olive tree, or a tall ornamental grass.
If you have enough space, add an outdoor rug. It immediately makes the area feel less like a concrete pad outside the door and more like a small outdoor room.
Herb Corner
It’s best to place your herbs close to the kitchen door. If you have to walk all the way across the yard just to grab some basil, I promise you’ll do it much less often.
Right outside our door, we usually grow basil, thyme, rosemary, oregano, and chives. I can be stirring a pot of soup, step outside, snip a handful of herbs, and be back in the kitchen in less than a minute.
For most culinary herbs, a container that’s 10–12 in (25–30 cm) deep is enough. If space is limited, I’d choose narrow rectangular planters instead of round pots. They’re easier to place along a wall, railing, or the edge of the patio, and they don’t take up the middle of the walkway.
It’s also handy to keep a small pair of scissors, a watering can, and a few towels nearby. You can keep everything on a metal rolling garden cart, such as the SONGMICS Rolling Utility Cart on Amazon. You can roll it out of the way whenever you need to sweep or make room for guests.
Boutique Hotel Details
That boutique hotel feeling often comes from repeating small details. If your table is made of wood, add something else in a similar wood tone nearby: a wooden storage box, a small plant stand, or even the wooden handles of garden tools left within easy reach. If your pots are terracotta, add a cushion or throw in a warm clay-colored shade. If you have a black metal table, black planter hooks will already feel like part of the same design.
Here are a few simple combinations:
- Wooden bench + wooden storage box for garden supplies
- Black metal table + black planter holders
- Terracotta containers + sand or cream-colored cushions
- Light ceramic planter + a linen table runner or a light-colored cushion
Research in biophilic design suggests that having plants near seating areas may help reduce stress and encourage people to spend more time outdoors. That makes perfect sense even without the scientific terms.
When your chair sits next to rosemary and basil grows by the kitchen door, your patio starts to have a real purpose. It’s a place where you can sit for a while, snip herbs for dinner, enjoy a cup of tea, and take care of all those little everyday things, like checking your pots after watering.
2. The Apartment Container Orchard With Dwarf Fig and Basil
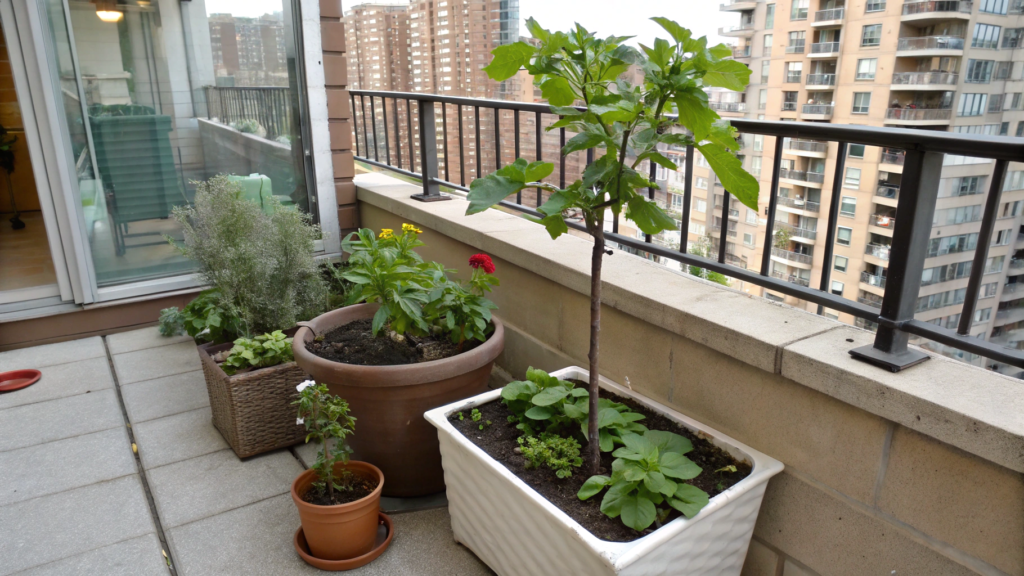
I don’t think anyone would argue with the idea of a small fruit orchard in containers. Even if that “orchard” sits on an apartment patio and consists of a dwarf fig, a couple of basil pots, and maybe one low flower container nearby.
Dwarf fig
A dwarf fig looks beautiful, gives you large leaves, doesn’t need a huge amount of space, and grows well in a container if you give it sun, proper drainage, and don’t forget about water.
For it, a pot around 15–20 gal (57–76 l) will work well. Of course, this is no longer a cute little pot, but figs need space for their roots. Otherwise, the plant quickly starts to struggle: the leaves get smaller, growth slows down, and you may wait a very long time for fruit.
Good drainage is a must, with proper holes at the bottom. For a heavy container, it’s convenient to get a plant caddy for large pots right away. You’ll thank yourself later when you need to turn the tree toward the sun or move it before cleaning.
Good varieties for containers: Petite Negra, Little Miss Figgy, Brown Turkey. The last one can get large, but with proper pruning, you can keep it at the size you need.
Basil at the base
I wouldn’t plant too many different plants under the fig. There is already a limited amount of soil in the container. But basil nearby, or in a separate low pot at the base, is a great idea.
First, it loves warmth. Second, it immediately makes this corner feel more like a kitchen space, not just a decorative one. Basil is always in demand at our house with Lindy. We love adding it to salads.
It’s better to plant 2–3 basil plants in a separate wide container about 8–10 in (20–25 cm) deep. This way, you won’t disturb the fig roots every time you replace annual herbs.
I place the basil container slightly in front of the fig so it’s easy to cut. You don’t need to reach through branches or move the pot. Just step outside, snip a few tops, and go right back to the kitchen.
Small fruit corner
To make this container “orchard” look like part of a beautiful patio, not a random group of pots, follow these rules:
- one large container with a dwarf fig;
- one wide, low pot with basil;
- one small accent nearby: calendula, nasturtium, alyssum, or thyme;
- one repeating detail: terracotta, wood, black metal, or light ceramic.
Don’t overlook nasturtium. It’s edible, blooms brightly, and spills beautifully over the edge of the pot. In short, it’s a lovely plant for small spaces.
Figs need about 6–8 hours of sun a day, especially if you want fruit, not just beautiful leaves. Basil loves sun too, but in hot climates, it often needs a little protection in the second half of the day. If your patio heats up a lot, place the basil so the fig gives its leaves a bit of shade after lunch.
When a fig grows on your patio, you start going out there not just to check the pots. You go out to see whether a new fig has started swelling, touch a leaf, cut some basil, call Lindy over, and say, “Looks like the fig might actually make us happy this year.”
3. The Budget Gravel Rug That Instantly Defines a Garden Room
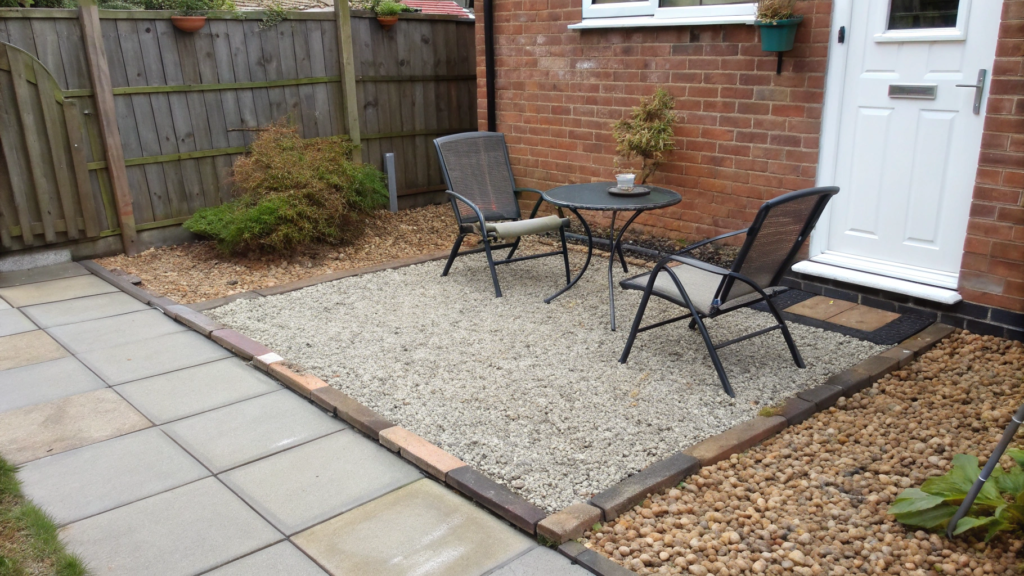
Sometimes a small patio doesn’t need new furniture or an expensive pergola. It just needs a simple base underfoot. Something so the chairs don’t sit randomly on bare concrete or worn-down dirt.
Lindy and I have done this many times. First, a small patch of gravel appeared. Then two chairs and a table moved onto it. And every time, it felt like the patio got bigger, even though its size, of course, did not change.
Gravel instead of an outdoor rug
Outdoor rugs are beautiful, but unfortunately, they don’t last very long. Sun, rain, garden soil, accidentally spilled tea… After one season, the rug already looks pretty sad.
Gravel is simpler. It doesn’t mind rain, it doesn’t fade as noticeably, and you don’t have to bring it into the house before every bit of bad weather.
For a small patio, an area around 6×8 ft (1.8 × 2.4 m) is enough. That gives you space for two chairs and a small table. If space is really tight, you can also make it 5×6 ft (1.5 × 1.8 m) — enough for one chair, a stool, and a couple of pots along the edges.
It’s convenient to use small gravel around ⅜–½ in (10–12 mm). It’s easier to walk on, it doesn’t look too large in a small space, and it doesn’t shift under your feet quite as much.
Laying the gravel
First, I simply place the furniture directly on the ground, without gravel. That makes it clear whether there is enough room to walk between the chairs, pull out a chair, or add a small table.
Then you can mark out the area. We usually do it like this:
- remove about 2–3 in (5–8 cm) of the top layer of soil;
- level the area with a rake;
- lay down landscape fabric so weeds don’t grow through the gravel;
- add about 2 in (5 cm) of small gravel;
- put the furniture back and check whether there is enough space around the chairs.
If the gravel will sit next to grass, a garden bed, or regular soil, it’s better to add flexible garden edging. Otherwise, after a couple of weeks, the little stones will start spreading all over the area.
What to place around the edges
I wouldn’t fill a gravel area like this with a lot of decor. It already makes the patio look nicer on its own. Usually, a few things are enough:
- two chairs or one chair with a small bench;
- a low table for cups and plates;
- one large container with rosemary, lavender, or a dwarf tree;
- a couple of lanterns or a simple string light if you often sit outside in the evening.
It’s better to place plants around the edges, not in the center. Leave the middle open for your feet, a chair, the dog, a basket of greens — all the things that somehow always end up nearby when you finally sit down to rest.
It’s nice to plant something fragrant nearby, like lavender, thyme, or rosemary. Even a short time around plants may help ease tension and improve your mood. It’s a small joy, but I hold on to those little joys with both hands.
4. The Vertical Salad Wall Using Stackable Planters
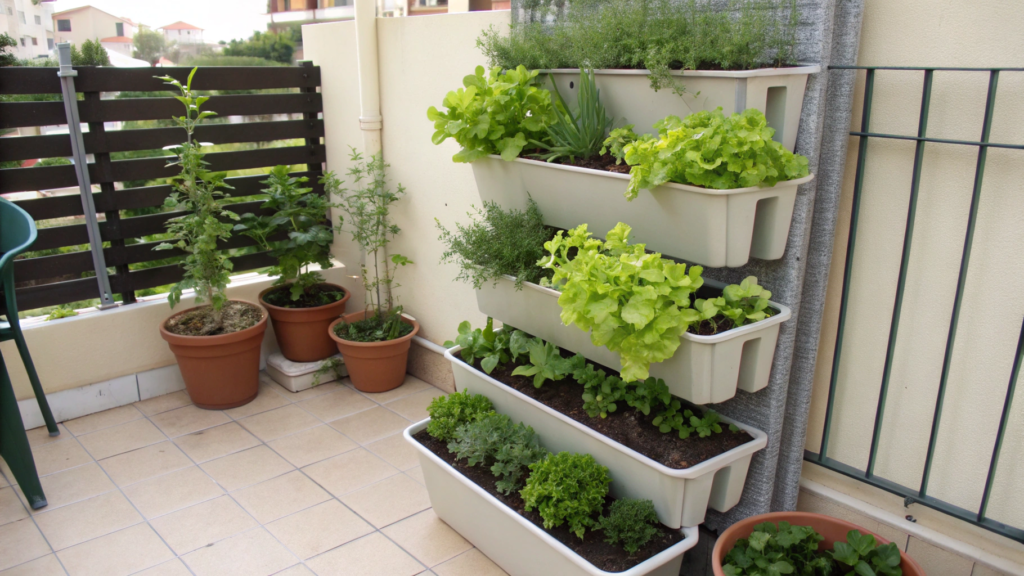
No matter what greenhouse and raised bed enthusiasts tell me, I still think a vertical salad wall is one of the best ideas for a small patio.
It takes up very little space, you don’t have to bend down to pick leaves, and fresh salad is literally within arm’s reach.
What to grow
Don’t try to grow everything this way. Vertical planters are best for crops that grow quickly and that you actually eat on a regular basis.
At our house, Lindy and I usually grow:
- leaf lettuce;
- arugula;
- spinach;
- kale for baby leaves;
- Swiss chard;
- cilantro;
- parsley.
I like mixing different shades of green. Dark kale next to light lettuce looks beautiful, even if you’re not thinking about the visual side of it at all.
Why I love stackable planters
For me, it’s not even about saving space. I simply like having all the greens in one place. It makes watering easier, harvesting easier, and you’re much less likely to forget that it’s time to sow another batch of lettuce.
For a small family, three to five tiers are usually enough. If you choose a model with separate pockets or sections, you can grow different crops without worrying that one will completely take over the others.
For a project like this, stackable herb planters, such as the Mr. Stacky 5 Tier Vertical Planter on Amazon, work really well. You can place them against a sunny wall or next to your seating area so fresh greens are always within easy reach.
Harvest a little at a time
Instead of cutting the whole lettuce plant, I remove only the outer leaves and leave the center to keep growing. This method is often called “cut and come again,” and it really does let you harvest greens from the same plant for several weeks.
Regularly harvesting the outer leaves helps many leafy crops stay productive longer. For a small home garden, it’s much more practical than waiting for the whole crop to mature at once.
If you sow a few new seeds into empty pockets every 7–10 days, you’ll have fresh leaves almost without interruption.
A vertical salad wall doesn’t just save space. It also gives your patio that look you often see in small boutique hotels, where greenery climbs upward and the whole space feels more lived-in.
I love the moment when I step out onto the patio with a small pair of scissors and come back a minute later with a handful of fresh greens. It’s one of those little habits that makes you use your garden every single day.
5. The Chef Style Cut and Come Again Greens Inspired by Yotam Ottolenghi
One type of lettuce gets boring fast. You sow a beautiful row of leaf lettuce, it grows up nicely, you add it to dinner a couple of times… and then you look at it and think: well, yes, salad again.
But a mix of greens is a completely different story. Especially if you look at it like a chef, not like a regular person who is just trying to grow “something green.”
I mean the approach of Yotam Ottolenghi: lots of fresh greens, different flavors, a little sharpness, a little softness, something crunchy, something aromatic. You don’t have to cook complicated dishes. You can simply grow a container of leaves on a small patio that will really, really diversify an ordinary dinner.
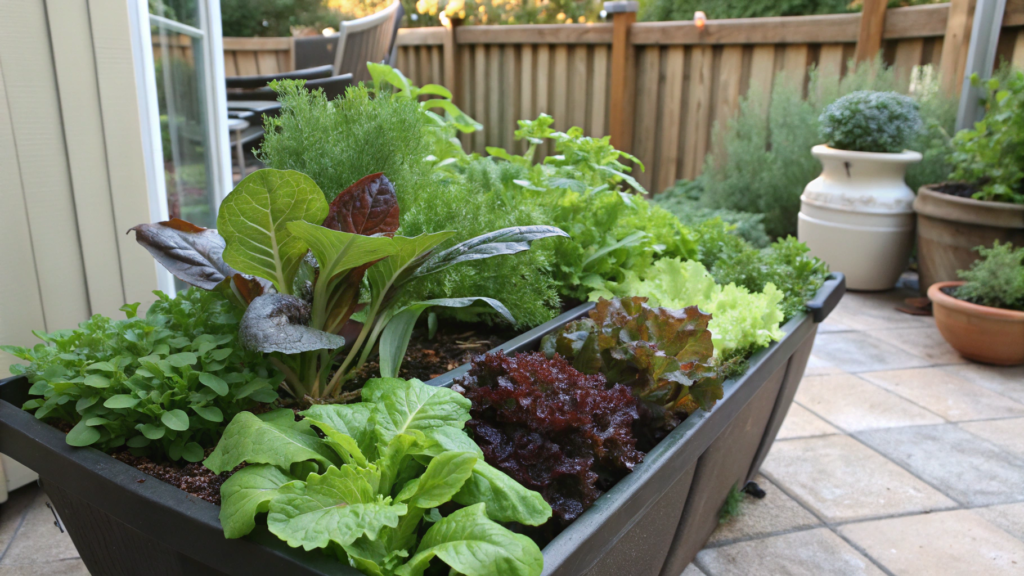
Mix of greens
I wouldn’t plant one large container with only romaine or only spinach. It’s better to create a small mix where each plant gives you something of its own.
For example:
- arugula — sharpness;
- romaine — crunch;
- oak leaf lettuce — soft leaves;
- young Swiss chard — colorful stems and a denser leaf;
- mustard greens — a noticeable flavor;
- cilantro or parsley — fresh aroma.
Even if you take only 3–4 crops, the salad will already be completely different. I usually put together a container the same way I would put together a plate: first soft leaves like oak leaf lettuce or baby spinach, then something crunchy like romaine, and between them a little arugula, mustard greens, or parsley. Then what you bring in from the patio is not just greens “for volume,” but almost a ready-made dinner mix.
For this kind of container, you need a depth of at least 8–10 in (20–25 cm). If you’re planting chard or kale, it’s better to use 10–12 in (25–30 cm). Roots need space, and soil in shallow pots dries out too quickly. Especially on a patio, where stone or concrete heats up during the day and then holds that heat for a long time.
There must be holes in the bottom. Without drainage, this whole beautiful salad idea can end with wet, sour soil and damaged roots. In containers, I usually add a light potting mix for vegetables and a little compost, not heavy garden soil. In pots, it often compacts, doesn’t let water move through well, and then turns into a brick. What we need is living, loose soil so the roots can breathe.
Harvesting a little at a time
The easiest way to harvest these greens is not to wait for a “big harvest.” I take small scissors and cut the outer leaves from different plants.
A little arugula, a few romaine leaves, a couple of young Swiss chard leaves, a sprig of parsley. You already have a salad, even though you only stepped out onto the patio for two minutes.
The main thing is not to cut the plant down to nothing. I try not to remove more than about one third of the leaves at a time. I leave the center so the plant can keep growing.
For these daily harvests, I use garden scissors for greens. Large pruners are awkward on tender leaves, and kitchen scissors somehow end up in the house, in the greenhouse, or who knows where. That happens at our house all the time.
To keep the greens from running out too quickly, sow new seeds every 10–14 days. Not the whole container at once, just a couple of empty spots. That way, some plants are already giving leaves, others are just growing, and the patio doesn’t give you the whole harvest in one week.
Edible flowers
If you’ve looked through Yotam Ottolenghi’s books or recipes, you’ve probably noticed that he often uses fresh greens and edible flowers. Not just for decoration, but to add a little color and a light peppery note to the dish.
On a small patio, nasturtium, calendula, and viola take up almost no space, but even a simple bowl of salad immediately looks more interesting.
Just make sure you use flowers grown specifically for food, without chemical treatments. I usually grow them myself from seed, so I know for sure that I can safely add a few petals straight to dinner.
When Lindy and I gather greens like this for dinner, they rarely look the same two days in a row. Sometimes there is more arugula, sometimes more soft lettuce, sometimes a few calendula petals on top. That is exactly what makes home-cooked food feel so alive and appealing.
6. The Secret Soil Blend That Makes Pots Grow Twice as Fast
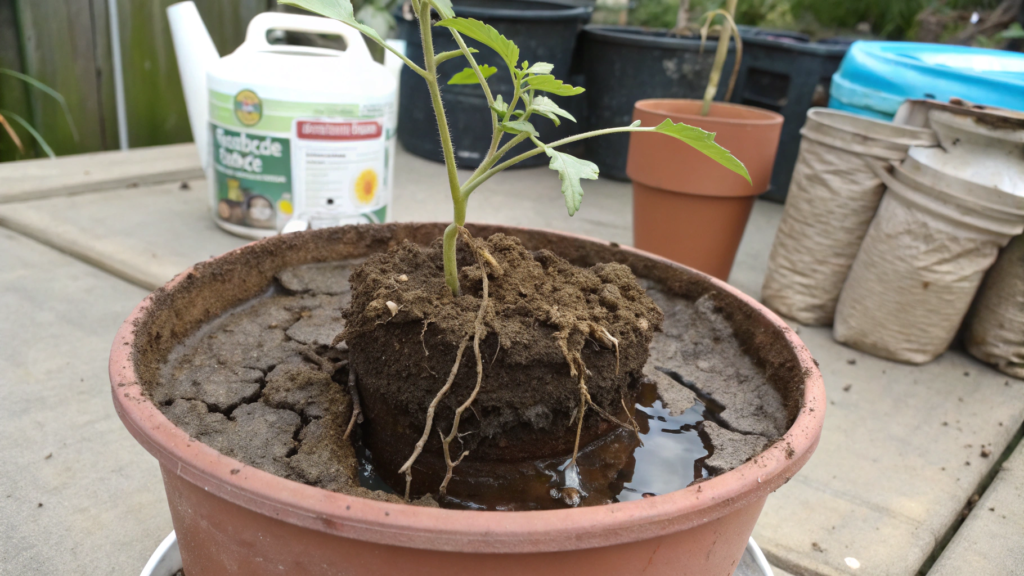
I would love to say there is one magic mix that makes plants grow twice as fast. But after all the years Lindy and I have grown vegetables in containers, I’ve come to a very different conclusion: if the soil in the container is bad, no fertilizer will fully fix it later.
A lot of people buy the first universal potting soil they see, fill the pot to the top, and think that’s it. A month later, the soil gets dense, water either runs straight through it or sits on top for too long, and the plant almost stops growing.
A good mix
For containers, I almost never use only store-bought soil. I usually mix:
- about 60% quality potting mix for container plants;
- about 30% compost;
- about 10% perlite or pumice for air around the roots.
If the compost is very heavy or wet, you can add a little less. There is no need to measure everything down to the cup. The mix should feel loose. When you scoop it up with your hand, it should stay soft, not turn into a dense clump.
If you’re preparing several containers at once, garden perlite, such as Espoma Organic Perlite on Amazon, is useful. It makes the soil lighter and helps it stay loose longer.
Why air matters as much as water
I used to think that if a plant was growing poorly, it needed more water. So I watered more often. It turned out that roots need more than water. They need air too.
When soil is too dense, there is almost no free space between its particles. Roots have a harder time developing, and after watering, they stay in a wet environment for longer. That’s why a loose mix almost always does better than heavy garden soil, especially in containers.
Every pot needs drainage holes at the bottom. A layer of rocks or broken brick at the bottom does not replace them. In fact, research shows that this kind of layer often makes water movement through the container worse. It’s better to fill the whole pot with a good soil mix from the start.
Feed a little through the season
Even good soil gradually loses nutrients. When planting, I usually add a slow-release organic fertilizer, and then about every 3–4 weeks, I feed the plants with a liquid fertilizer.
This is especially important for tomatoes, peppers, eggplants, and greens that we keep cutting. After rain or a deep watering, some nutrients leave through the drainage holes with the water. That’s why I prefer to feed plants a little at a time, but regularly, instead of giving one big feeding “for the whole summer.”
Most container gardening recommendations suggest using light potting mixes, not regular garden soil. If a plant spends the whole season in one container, the soil becomes its entire home. And I think it’s better to make that home good from the beginning than spend all summer trying to fix the results with extra watering and fertilizer.
7. The Townhouse Sunset Corner With Heat Loving Pots
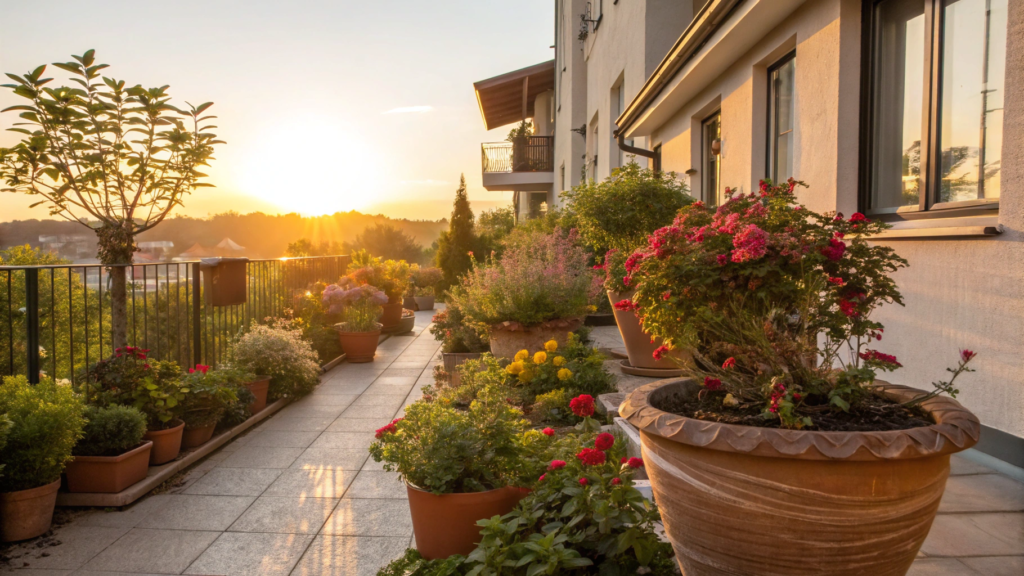
There are garden corners that many people try to avoid. Lindy and I have a spot like that too. In summer, it’s better not to walk there barefoot. But plants that love heat feel absolutely wonderful there.
Instead of fighting the sun, we decided to use it to our advantage.
Which plants love hot patios
Not every plant can handle several hours of harsh sun. But some crops feel almost made for those conditions.
I most often choose:
- lavender;
- rosemary;
- thyme;
- sage;
- dwarf olive trees;
- agave or other compact succulents.
Purslane, lantana, and pelargonium also look great. By the way, they keep blooming even when many other plants are already starting to give up.
I usually use one tall container with a small tree and several lower pots around it. This creates a natural grouping, and each plant still gets its own share of sun.
Containers matter too
Once, we planted rosemary in a small black plastic pot. In summer, it heated up much more than we wanted, and we had to water the plant noticeably more often.
Since then, I try to choose containers of at least 15–20 gal (57–76 l) for larger plants, and I avoid thin dark plastic in the sunniest spots whenever possible.
I prefer:
- terracotta pots;
- light ceramic containers;
- thick-walled composite planters.
They heat up more slowly and protect the roots a little better from sudden temperature changes. If the container is very heavy, put it on a plant caddy for large pots right away. A year from now, you probably won’t want to lift it by hand if you decide to move things around a little.
Make it cozy in the evening
During the day, this corner can feel too hot. But in the evening, the heat stored during the day stays there for quite a while. Even when the air gets cooler, it feels nice to sit near the wall with a cup of tea or a glass of homemade lemonade.
We usually add a small bench or two chairs. A few solar lanterns, the scent of lavender, rosemary right within reach… You can feel it, right? It already sounds cozy.
Every patio has its tricky spots. Somewhere, there is shade almost all day. Somewhere, the sun beats down until evening. Over time, Lindy and I stopped seeing that as a flaw. Now the hottest corners simply go to plants that like exactly those conditions. And caring for them turned out to be much easier than constantly trying to change the space itself.
8. The Small Patio Garden Furniture Plan With Storage Benches
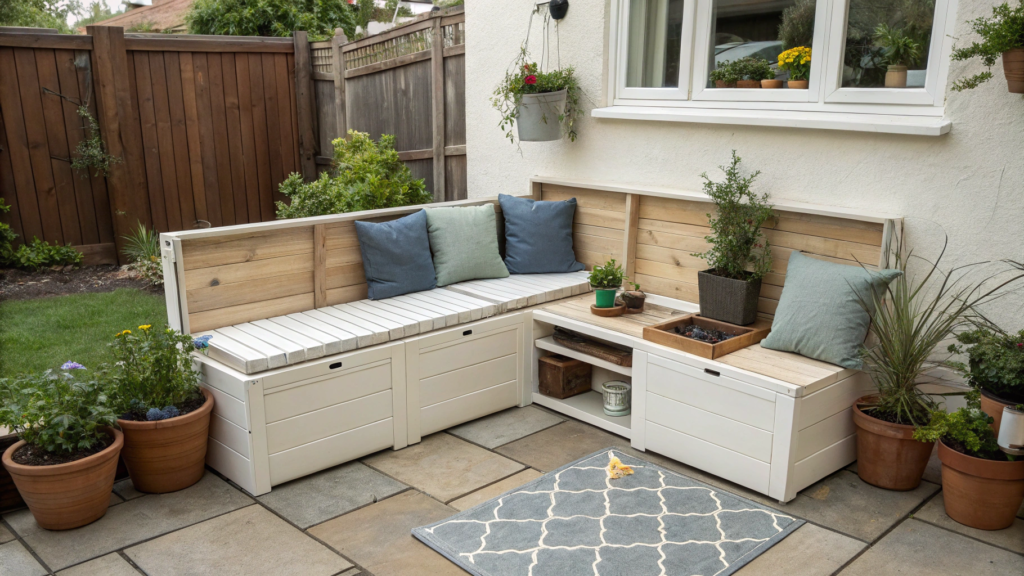
In permaculture, there is a really good idea: every element should serve more than one function. And a bench on a small patio is a great example.
It can be a place to sit, a storage box, and even an extra surface if more guests show up for dinner than you planned.
Storage
I think everyone knows the situation when garden odds and ends end up wherever they land. Gloves in one place, pruners in another, and the bag of fertilizer somehow keeps moving around. Before every trip to the garden, you have to look for the things you need first.
Now almost everything lives inside one bench.
Here’s what you can put in there:
- hand trowel;
- garden gloves;
- pruners;
- small watering can;
- extra plant labels;
- twine;
- a bag of soil or compost;
- a few empty pots.
But don’t turn the bench into a storage dump. If you have to move ten things every time you need your gloves, the system falls apart quickly.
For a small patio, an outdoor bench with storage works really well. There is enough room inside for most garden supplies, and the bench itself doesn’t look bulky.
Walkway first, furniture second
You have to be very careful with furniture and its size. In the store, a bench can seem compact. At home, it suddenly takes up half the space.
I usually check where we actually walk first: from the door to the plants, from the bench to the table, from the watering can to the containers. Only then do I place the furniture. For a small patio, most of the time you only need:
- one bench with storage;
- one small table;
- one extra chair, if there is room;
- 2–3 large containers instead of a scatter of tiny pots.
It’s better to leave at least 24–30 in (60–75 cm) between furniture and large pots. This is not a “design rule,” just a normal distance so you can walk through with a watering can, open the bench lid, and not bump your knee on the rosemary every time you sit down.
Room for plants
This is a common mistake: you get excited buying furniture and forget to leave enough room for your plants. In the end, all that remains is a strip a few inches wide.
I would place the largest containers first. Then add the furniture. Not the other way around.
Try simply walking across the patio with a cup in your hand. Open the bench lid. Move the chair. If you don’t have to turn sideways anywhere or move pots around, you got it right.
It makes sense to leave at least 24–30 in (60–75 cm) of open walkway between furniture and large containers. This makes it much easier to water plants, clean up leaves, and just move around freely.
I think a comfortable small patio should not be filled down to the last free inch. When everything has its place and the most needed tools are always close by, taking care of the plants becomes much easier.
9. The Low Light Patio Garden Design With Ferns and LEDs
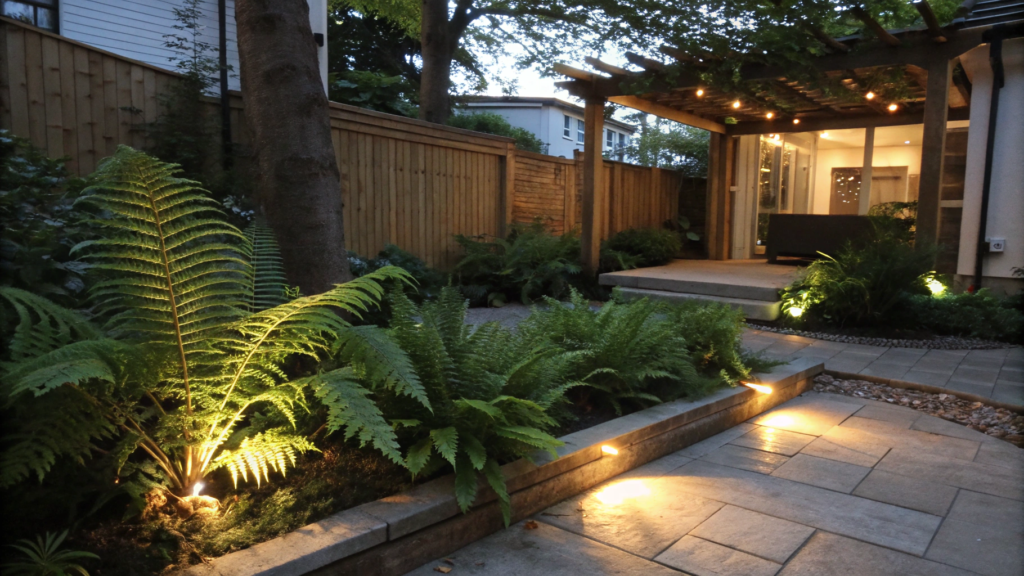
Not every patio gets a lot of sun from morning to evening. Or maybe the sun shows up for just an hour or two, and then hides behind the house again.
Many people, myself included, used to see these spots as bad places for a garden. You want to grow tomatoes, lavender, rosemary… right? But then it became clear that a shady corner doesn’t need to be changed. You just need to stop planting things there that don’t like it.
Choose the right plants
Ferns didn’t appear in our garden right away. For some reason, I thought they were too “woodsy” for a regular patio. Now it’s funny to remember that, because they turned out to be some of the easiest plants to care for.
If the sun only shows up for a few hours a day, it’s better to choose:
- ferns;
- hostas;
- heucheras;
- brunnera;
- Japanese sedge;
- caladiums, if the climate is warm enough.
You don’t have to buy a lot of plants at once. Sometimes two large ferns along the edges and one hosta next to the bench are already enough to make the patio look completely different.
For ferns, it’s better to use containers 10–12 in (25–30 cm) deep. The soil should stay loose and hold moisture, so I usually add a little compost and fine bark to the mix. It helps the soil keep from drying out too quickly in summer.
Evening lighting
When it starts to get dark, ferns look completely different, and you don’t need bright light for that.
It’s best to place one small light at the base of the largest fern. The light points upward, so the leaves cast beautiful shadows on the wall or fence. That alone is enough to make the corner look completely different in the evening.
If the patio is bigger, you can add one more small light on the other side and a string light above the seating area. For projects like this, garden lights, such as GIGALUMI Solar Path Lights on Amazon, work well. They give soft warm light and don’t require running wires.
Don’t try to make it as bright as daytime. Usually, 2–3 small light sources look better than one very bright spotlight. Then the plants stay the main focus, not the lighting itself.
Care
A shady patio often needs less care than a sunny one. The soil dries out more slowly, the leaves don’t get burned, and you have to water less often. But you still shouldn’t forget about the plants completely.
Every few weeks, I go through the ferns and simply remove old or dry leaves. It takes about five minutes, but the plants immediately look neater. In spring, you can add a little compost on top, and that is usually enough for most of the season.
Over the years, Lindy and I have simply seen that ferns grow much better in the shadiest corners of the property than many “sun-loving” plants we once tried to place there. So just choose plants that like those conditions from the beginning, and that shady corner can look beautiful from spring through late fall.
10. The Wind Proof Planting Plan for High Floor Balconies
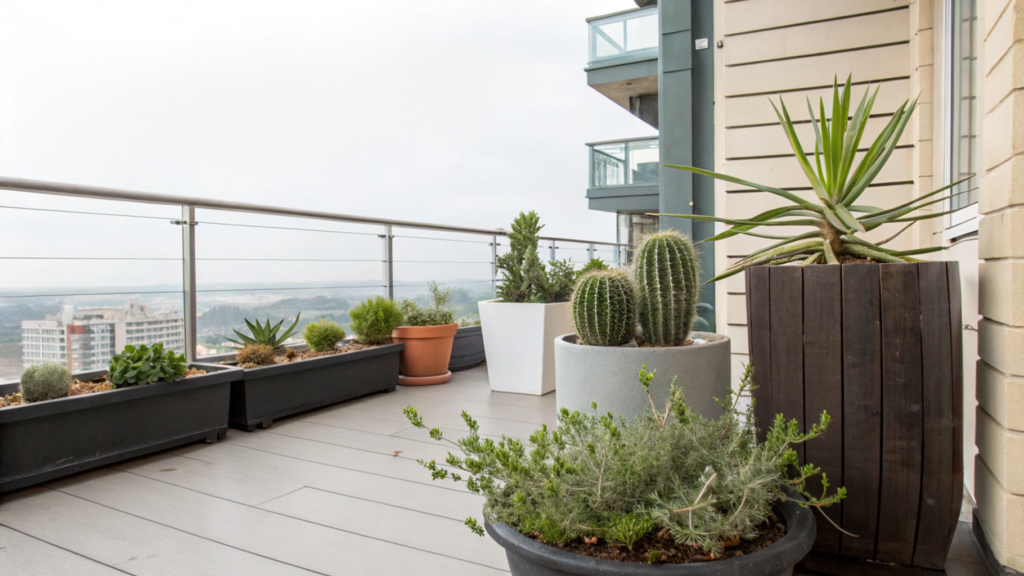
Wind dries out the soil, rocks tall plants, breaks tender stems, and sometimes can make a real mess in just one day. Of course, wind is not the same in every space, but the principle is always the same: don’t fight it. It’s better to choose plants right away and arrange them so they have an easier time growing in those conditions.
Heavy containers
On a windy balcony, you first need to think about what can actually stay in place. A light pot can look fine in the store, but on a high floor, a strong gust of wind can move it easily. Especially when the soil has dried out and the container itself has become lighter.
So it’s better to start with heavy, stable containers.
- For large plants, choose pots around 15–20 gal (57–76 l). They hold more soil, dry out more slowly, and are harder to tip over.
- It’s better to choose low, wide containers instead of tall, narrow planters. The lower the center of gravity, the better the plant handles wind gusts.
- On open balconies, I’d be careful with thin plastic. It’s light, and that is only convenient until the first strong wind.
- If the container is still light, you can place a few heavy stones or bricks at the bottom, and then add soil. Just don’t block the drainage holes.
- Young tall plants are better tied to a support with soft garden tape at first. Not tightly, just enough so the stem doesn’t swing back and forth all day.
- Place the heaviest pots closer to the wall or in a corner, not right at the edge of the balcony.
Choose plants with strong leaves
Not all plants handle wind the same way. If the balcony is open, I would start with crops that are already used to tougher conditions. For example:
- lavender;
- rosemary;
- thyme;
- sage;
- dwarf conifers;
- sedges;
- sedums.
Large leaves, like bananas, cannas, or some coleus varieties, can quickly lose their appearance in strong wind. It’s better to keep them for more protected spots.
Plant placement
I place the tallest containers closer to the wall or in the most protected corner. They partly shield the smaller plants, so the wind no longer moves across the whole balcony with the same force.
In front of them, you can place medium-height containers, and the lowest plants can go closer to the edge of the seating area.
It becomes something like a small living screen. It looks natural, and the plants have an easier time.
If the balcony is completely open, a balcony wind screen can sometimes help. It doesn’t block the wind completely, but it does soften the strongest gusts.
Research shows that constant strong wind increases water loss through leaves and dries out soil in containers faster. So on those days, I always check the soil with my hand first, and only then grab the watering can. Sometimes the plant really does need water, and sometimes the top layer looks dry while the soil inside is still moist enough.
The beauty of small patios
A small patio will never feel like a limit if you treat it like a real part of the home, not just a place where pots sit. Sometimes all it takes is moving a couple of containers, planting the right plants, adding soft lighting, or bringing in a comfortable bench — and the space gets that feeling of a small boutique hotel, just without strangers and a room bill.
I always want to peek at how other people arrange their small gardens. If you have an interesting idea for a small patio or balcony, please share it in the comments. Maybe your tip will help someone turn a few free square feet into their favorite place at home.