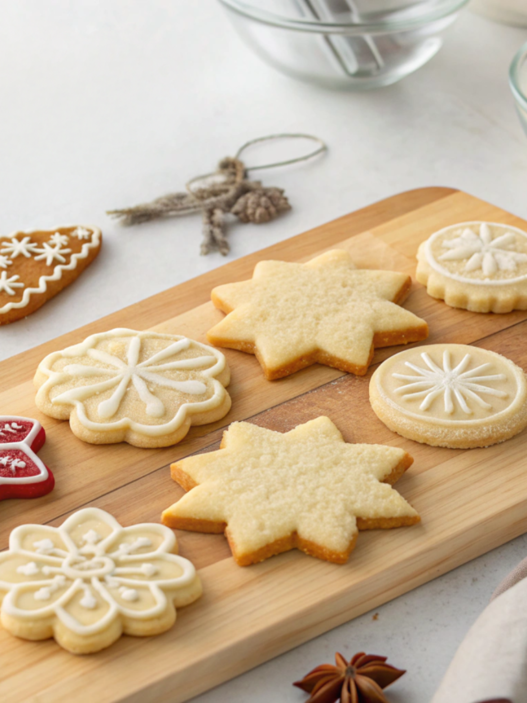

I enjoy decorating sugar cookies almost as much as I enjoy eating them. A few bowls of icing, food coloring, sprinkles all over the table — that’s usually what our kitchen looks like.
At the same time, I definitely don’t always want to spend several hours on detailed decorating. Sometimes I make something really simple, and sometimes I let myself spend a little more time on it. In this article, I’ve collected 10 decorating sugar cookie ideas for both kinds of days.
But the most important thing for me is that the cookies always taste good.
1. Royal icing sugar cookies that look like they’re from a bakery
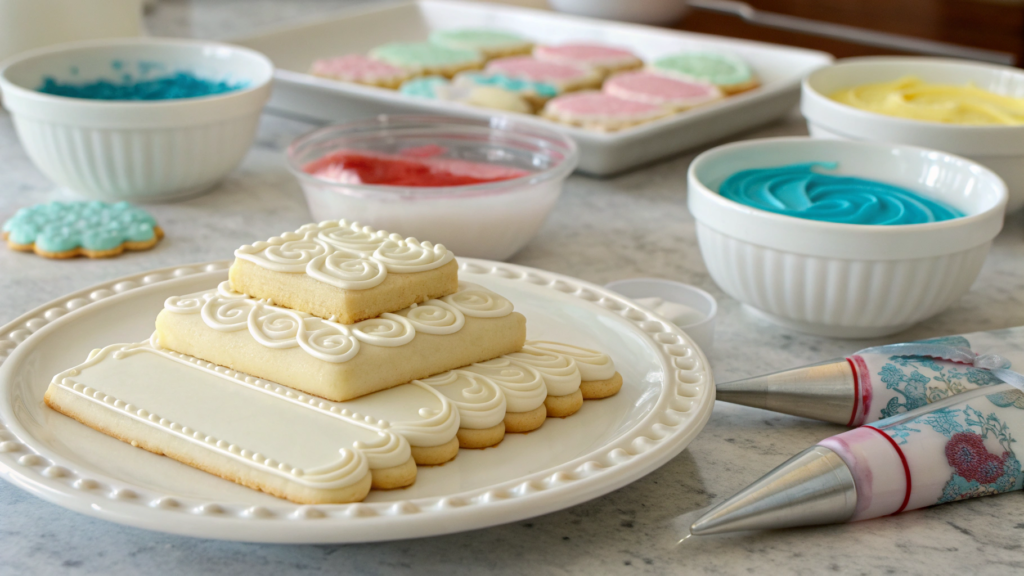
There’s a big difference between a simply decorated cookie and a sugar cookie with royal icing that looks like it just came from a good bakery. You don’t need complicated designs here. The even shape of the cookie itself, smooth icing, and a neat edge matter much more.
For Lindy and me, evenings like this usually end with several bowls of colored icing and piping bags all over the table. But the technique itself is pretty simple if you pay attention to the consistency from the very beginning.
Ingredients
For 20–24 cookies, you’ll need
The cookies
- 1 cup unsalted butter, at room temperature (226 g);
- 1 cup sugar (200 g);
- 1 large egg;
- 2 teaspoons vanilla extract;
- 2¾ cups all-purpose flour (about 345 g);
- ½ teaspoon baking powder;
- ½ teaspoon salt.
The royal icing
- 4 cups powdered sugar (about 480 g);
- 3 tablespoons meringue powder;
- 5–6 tablespoons water;
- ½ teaspoon vanilla extract;
- gel food coloring.
Making the icing, I usually use meringue powder, such as Wilton Meringue Powder. It’s convenient because you don’t have to separate fresh egg whites, and it’s easier to get the icing to the right consistency.
How to bake the cookies
Beat the butter and sugar for about 2 minutes, add the egg and vanilla, then mix in the flour, baking powder, and salt. Roll the dough to ¼ inch (6 mm) thick and cut out the cookies. If the dough has softened, chill the cutouts for 15 minutes so the edges hold their shape better.
Bake at 350°F (175°C) for 8–10 minutes. The cookies should stay pale, with just a light golden color around the edges. Then let them cool completely. You definitely don’t want to put icing on warm cookies.
How to make the icing and decorate the cookies
- Mix the powdered sugar with the meringue powder, add 5 tablespoons of water and the vanilla. Beat on low speed for a few minutes. A high speed will whip too much air into the icing, and then you’ll be dealing with bubbles on the cookies.
- Check the consistency. At first, the icing should be fairly thick. If it’s too stiff, add water gradually, literally ½ teaspoon at a time. I wouldn’t rush this part. A couple of extra drops are easy to fix, but icing that’s too thin starts running over the edges.
- Keep some of the icing thick for outlining. Add a little water to another portion for flooding. Drag a spoon through the surface. For flood icing, the line should disappear in about 10–15 seconds. That’s a good guideline for icing that can spread into a smooth layer without becoming watery.
- Now divide the icing between bowls and add gel food coloring. While you’re working with one color, keep the other bowls covered. Royal icing dries quickly when exposed to air, and even a thin crust can later create lumps in the piping bag.
- Use the thicker icing to pipe an outline around the edge of the cookie. I hold the tip slightly above the surface and let the thin line fall onto the cookie on its own. The line comes out much smoother than when you drag the tip directly across the surface.
- Almost immediately, fill the center with the thinner icing. Use a toothpick to push it into any empty spots and pop bubbles. You can gently rock the cookie from side to side, and the small marks will gradually disappear.
- To add a design, place a few dots or thin lines on the fresh flood icing using another color, then drag a toothpick through them. This works for small hearts, swirls, or a simple marble pattern.
For a design that needs to stay crisp and sit slightly above the surface, the order is different. Let the base layer dry completely first, then add dots, lines, or lettering on top with thicker icing. If you do it right away, the new color will simply blend into the layer underneath.
I’d practice first on two or three cookies. Check the icing consistency, the size of the opening in the piping bag, and how quickly the icing spreads. After just a few tries, you can usually tell whether it needs a couple more drops of water or whether it’s already right.
When the design is finished
I leave the decorated cookies out for 6–8 hours, though overnight is usually the easiest. Don’t stack them too soon. Even if the surface looks dry, the cookie underneath can press into the design on the one above it.
The cookies can be made with the simplest recipe and have no complicated designs at all. But smooth royal icing, a clean edge, and a few neat details completely change them. Those little things are what create that “straight from the bakery” look.
2. Soft vanilla sugar cookies with swirled pastel icing
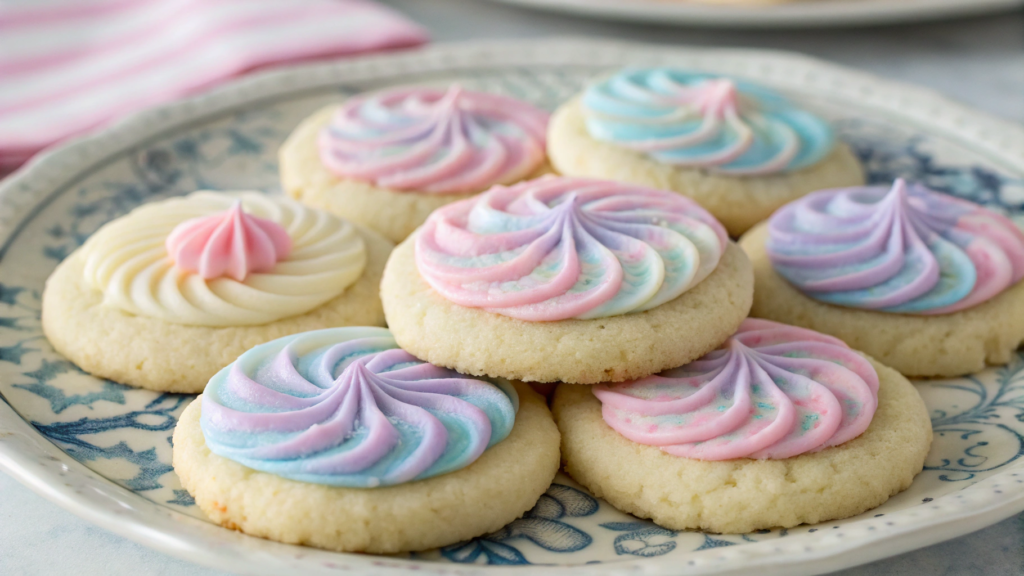
Soft vanilla sugar cookies come out slightly puffy, tender in the middle, and with a light buttery vanilla flavor. I really like this kind of texture, when the cookie doesn’t crumble after the first bite and stays a little soft inside.
When decorating them, you don’t have to make the same lines on every cookie. Pink can blend slightly into lavender, blue can stay as a separate swipe, and the next cookie can end up with a completely different pattern.
Lindy and I usually choose two or three colors. Pink, lavender, and blue blend beautifully together, but you can also use just two shades and keep things simple.
Ingredients
For 18–20 cookies, you’ll need
The cookies
- ½ cup unsalted butter, at room temperature (113 g);
- ¾ cup sugar (150 g);
- 1 large egg;
- 2 teaspoons vanilla extract;
- 1½ cups all-purpose flour (about 190 g);
- ½ teaspoon baking powder;
- ¼ teaspoon baking soda;
- ¼ teaspoon salt.
The icing
- ½ cup unsalted butter, at room temperature (113 g);
- 2 cups powdered sugar (about 240 g);
- 1½–2 tablespoons milk;
- 1 teaspoon vanilla extract;
- gel food coloring in two or three pastel shades.
Gel food coloring works well for these shades. You only need a tiny amount, so the icing doesn’t become runny.
How to bake the cookies
Beat the butter and sugar for about 2 minutes, then add the egg and vanilla. In a separate bowl, mix the flour, baking powder, baking soda, and salt, then stir the dry mixture into the butter mixture. There’s no need to mix the dough for long after adding the flour.
Roll the dough into balls using about 1½ tablespoons of dough for each one, place them on a baking sheet, and press them down lightly with your palm. Bake at 350°F (175°C) for 8–10 minutes. The edges should be set, while the centers can still be slightly soft.
After baking, leave the cookies on the baking sheet for a few more minutes, then let them cool completely before adding the icing. Even a little residual warmth is enough to start softening buttercream.
How to make pastel swirls
- Make the base. Beat the butter for about 2 minutes, then gradually add the powdered sugar, vanilla, and 1½ tablespoons of milk. If the icing is too thick, add a little more milk.
- Divide the icing. Leave one portion white and color the others in pastel shades. It’s best to add gel food coloring with the tip of a toothpick — you only need a tiny amount for a soft color.
- Add the colors. Place small swipes of two or three shades next to each other on the surface of the cookie. There’s no need to mix them together in the bowl first.
- Make the swirls. Drag a small spatula or the back of a spoon through the neighboring colors. Two or three strokes are usually enough. If you keep mixing, the separate shades will quickly disappear.
- Adjust the pattern. If one color takes over too much, add a small swipe of another shade and lightly drag the spatula through it once more. A little unevenness in the pattern looks natural here.
After decorating
Buttercream icing won’t harden like royal icing. I usually let the cookies sit for 30–60 minutes so the top can set a little, then transfer them to a container. If you’re stacking several layers, it’s better to place a sheet of parchment paper between them.
The pastel swirls don’t need to be repeated exactly. One cookie might have a wide pink stripe, another might have the colors more deeply intertwined, and another might show mostly one pale shade. Each cookie turns out a little different, but together they look really lovely.
3. Marble icing technique anyone can master
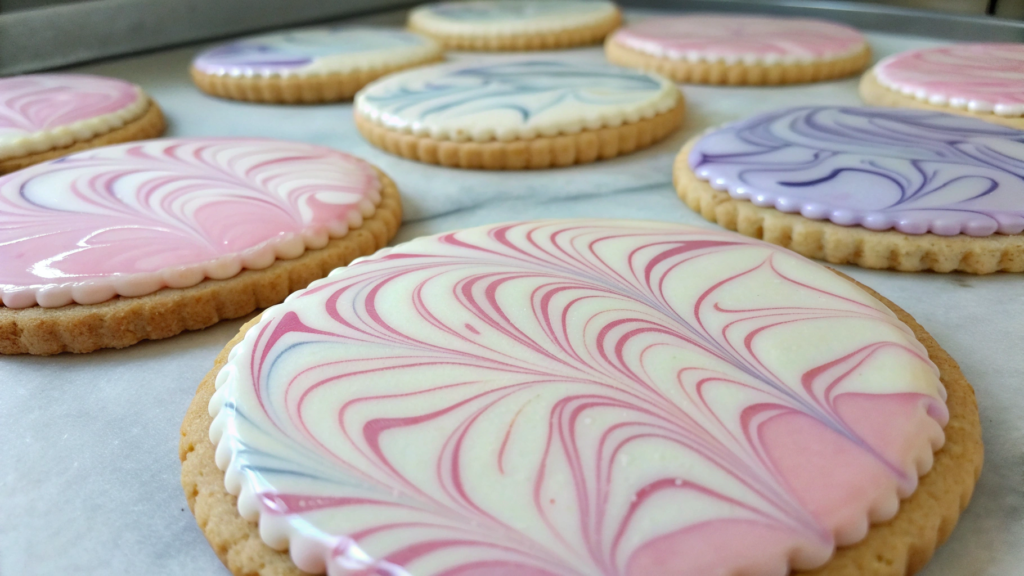
With marble icing sugar cookies, no two tops ever turn out exactly the same. The color stretches across the light icing in thin lines, gathers into wider swirls in some spots, and sometimes two shades overlap slightly. So I don’t even try to plan a design for every cookie ahead of time.
For me, it’s easier to stick with just two colors. For example, pink and lavender, blue and purple, or peach and pink. You can add a third shade too, but only a little so the surface doesn’t become too busy.
Ingredients
For 20–24 cookies, you’ll need
The cookies
- 1 cup unsalted butter, at room temperature (226 g);
- 1 cup sugar (200 g);
- 1 large egg;
- 2 teaspoons vanilla extract;
- 2¾ cups all-purpose flour (about 345 g);
- ½ teaspoon baking powder;
- ½ teaspoon salt.
The marble icing
- 3 cups powdered sugar (about 360 g);
- 4–5 tablespoons milk;
- 1 tablespoon light corn syrup;
- ½ teaspoon vanilla extract;
- gel food coloring in two or three colors.
Gel food coloring lets you add a rich color with just a drop and barely changes the consistency of the icing.
How to bake the cookies
Beat the butter and sugar for about 2 minutes, add the egg and vanilla, then mix in the flour, baking powder, and salt. Roll the dough to ¼ inch (6 mm) thick and cut out round or oval cookies. If the dough gets too soft, chill the cutouts for about 15 minutes.
Bake at 350°F (175°C) for 8–10 minutes, until the edges just start to turn lightly golden. Let the cookies cool completely before adding the icing.
How to make marble icing
- Mix the base. Combine the powdered sugar, 4 tablespoons of milk, corn syrup, and vanilla. Stir until smooth. The icing should slowly fall from the spoon in a wide ribbon. If it’s too thick, add the remaining milk 1 teaspoon at a time.
- Add the first color. Pour the icing into a wide, shallow bowl. Add a few small drops of one food coloring to the surface.
- Add the second shade. Place it between the first drops. If you’re using a third color, add only a little or the pattern can quickly become too busy.
- Make the veins. Drag a toothpick through the drops in a few long lines. Two or three strokes are enough. The colors should stretch slightly through the white icing instead of blending into it completely.
- Dip the cookie. Hold it by the edges and lower the top side into the icing. Press it down lightly, lift it straight up, and let the excess icing drip back into the bowl.
- Check the pattern. If part of the edge is still bare, carefully add a little icing with a toothpick. It’s better not to touch the surface anymore — the swirls will gradually smooth out on their own.
- Refresh the colors. After a few cookies, the shades in the bowl will start blending together more. Add a few fresh drops of food coloring and lightly drag a toothpick through them again. This will give the next cookies more defined veins.
Final step
I arrange the cookies in a single layer and leave them for about 4–6 hours, until the icing no longer sticks to a finger. If you need to stack the cookies in a container, place parchment paper between the layers and don’t press down on the top row.
Once dry, the icing becomes smooth and slightly glossy, while the colored swirls stay defined. There’s no need to add anything else to these cookies. The marble pattern already gives them all the visual interest they need, especially when you use two or three shades from the same color palette.
4. Sprinkle-loaded sugar cookies for every celebration

Sugar cookies with sprinkles are usually one of the first things people notice on the table. They’re bright, soft, smell like vanilla, and have colorful bits both inside and on top. We’ve made batches like this for birthdays and for big get-togethers at home. The most colorful ones usually disappeared first.
It’s easy to match the sprinkles to the occasion. For Christmas, I use red, green, and white. For birthdays, I pick a few of the birthday person’s favorite colors, and sometimes I just mix leftovers from a few different jars. They turn out a little different every time, even though the recipe stays the same.
Ingredients
For 18–20 cookies, you’ll need
The cookies
- ½ cup unsalted butter, at room temperature (113 g);
- ¾ cup sugar (150 g);
- 1 large egg;
- 2 teaspoons vanilla extract;
- 1¾ cups all-purpose flour (about 220 g);
- ½ teaspoon baking powder;
- ¼ teaspoon salt;
- ½ cup rainbow sprinkles.
The icing
- 1½ cups powdered sugar (about 180 g);
- 2–3 tablespoons milk;
- ½ teaspoon vanilla extract;
- about ⅓ cup sprinkles for the top.
For the dough, it’s better to use long, soft sprinkles rather than hard sugar balls. Rainbow sprinkles keep their color after baking and don’t add too much of a hard crunch.
How to bake the cookies
Beat the butter and sugar for about 2 minutes, then add the egg and vanilla. In a separate bowl, mix the flour, baking powder, and salt, then combine the two mixtures. At the very end, fold in ½ cup of sprinkles with just a few strokes of a spatula. The longer you mix after that, the more the colors will start bleeding into the dough.
Roll the dough into balls using about 1½ tablespoons for each one and press them down lightly before baking. Bake at 350°F (175°C) for 9–11 minutes. I take the baking sheet out when the edges are set but the centers are still soft. Let the cookies cool completely before adding the icing.
How to decorate
- Make the icing. Mix the powdered sugar with 2 tablespoons of milk and the vanilla. If it doesn’t spread easily with a spoon, add a little more milk.
- Cover the cookies. Add a small layer of icing on top and spread it with the back of a spoon almost to the edge. You don’t need a thick layer here — there’s already plenty of sweetness.
- Add the sprinkles. Do this right after adding the icing, while it’s still sticky. That way, the colorful pieces will stay in place and won’t fall off every time you move the cookies.
- Make a few variations. You can cover one cookie completely with sprinkles, leave them only in the center of another, and make a small colorful stripe along the side of a third. Even one sprinkle mix can look different this way.
I leave the finished cookies in a single layer for about 1–2 hours. During that time, the icing on top dries a little and the sprinkles hold firmly in place. It’s better not to check the surface with your finger right away, because it can leave a very noticeable mark on the white icing. I usually just lightly touch the edge of one cookie.
Once the top is no longer sticky, you can transfer the cookies to an airtight container. If you have a large batch and need to stack several layers, place sheets of parchment paper between them. At room temperature, these cookies stay soft for about 3–4 days.
I don’t think they need anything else on top. The color is already there both inside the cookies and on the surface, and the vanilla icing brings everything together. In the end, you get a simple celebration sugar cookie that doesn’t need complicated patterns or several hours of decorating.
5. Easy Christmas sugar cookie decorating

Before Christmas, our kitchen is already busy enough without cookies. Something is baking, something needs to be prepped for the next day, and gift boxes start showing up on the table… So I definitely don’t always decorate Christmas sugar cookies with delicate piping.
For this batch, I use Christmas trees, stars, circles, and snowflakes, and I stick to three colors for decorating — white, red, and green. That’s more than enough. A few cookies can be bright, a few completely white, and some can simply get icing and sprinkles. On a large platter, the different designs and colors look good together and instantly make everything feel Christmasy.
Ingredients
For 20–24 cookies, you’ll need
The cookies
- 1 cup unsalted butter, at room temperature (226 g);
- 1 cup sugar (200 g);
- 1 large egg;
- 2 teaspoons vanilla extract;
- 2¾ cups all-purpose flour (about 345 g);
- ½ teaspoon baking powder;
- ½ teaspoon salt.
The icing and decorating
- 3 cups powdered sugar (about 360 g);
- 4–5 tablespoons milk;
- 1 tablespoon light corn syrup;
- ½ teaspoon vanilla extract;
- red and green gel food coloring;
- white, red, and green sugar sprinkles.
How to bake the cookies
Beat the butter and sugar for about 2 minutes, add the egg and vanilla, then mix in the flour, baking powder, and salt. Roll the dough to ¼ inch (6 mm) thick and cut out the shapes. If the cutouts are soft, chill them for about 15 minutes so the Christmas trees and stars keep their edges in the oven.
Bake at 350°F (175°C) for 8–10 minutes. As soon as the edges start to turn lightly golden, you can take the baking sheet out. Let the cookies cool completely before adding the icing.
How to decorate the cookies quickly
- Mix the icing. Combine the powdered sugar, 4 tablespoons of milk, corn syrup, and vanilla. It should spread easily with a spoon but not run over the edge. If it’s too thick, add a little more milk.
- Divide the three colors. Leave most of the icing white, then color two smaller portions red and green. I wouldn’t make equal amounts of each color — you’ll usually use the most white icing.
- Cover the base. Spoon the icing onto the cookies and spread it almost to the edge. Make a Christmas tree green, a circle or snowflake white, and cover a few cookies completely with red icing.
- Add simple details. Sprinkle a few colorful dots over a green Christmas tree like ornaments. Add two or three red stripes to a white cookie. On a round cookie, make a few green dots and immediately drag a toothpick through them.
- Use the sprinkles. Add them right after the icing. I wouldn’t cover every cookie completely. A small border of sugar crystals or a few stars on top looks neater.
- Alternate the designs. You don’t need to repeat the same design twenty times. Make a few Christmas trees, a few white snowflakes, some red circles, and a couple of cookies with just sprinkles. The decorating goes faster, and you get more variety on the platter.
Final step
I arrange the cookies in a single layer and leave them for 2–3 hours so the icing on top can dry well. If you’re decorating them in the evening, you can simply leave them overnight and put the gift boxes together the next day.
Store them in a tightly sealed container. Place parchment paper between the layers, especially if there are larger sprinkles on top. At room temperature, the cookies keep well for about 4–5 days.
You really don’t need complicated decorating here. A Christmas tree with a few sugar “ornaments,” a white snowflake, and a red cookie with a couple of stripes already look festive. A few simple designs in one box look much more interesting than the same pattern on every cookie.
6. Sugar cookies with glossy 3-ingredient icing
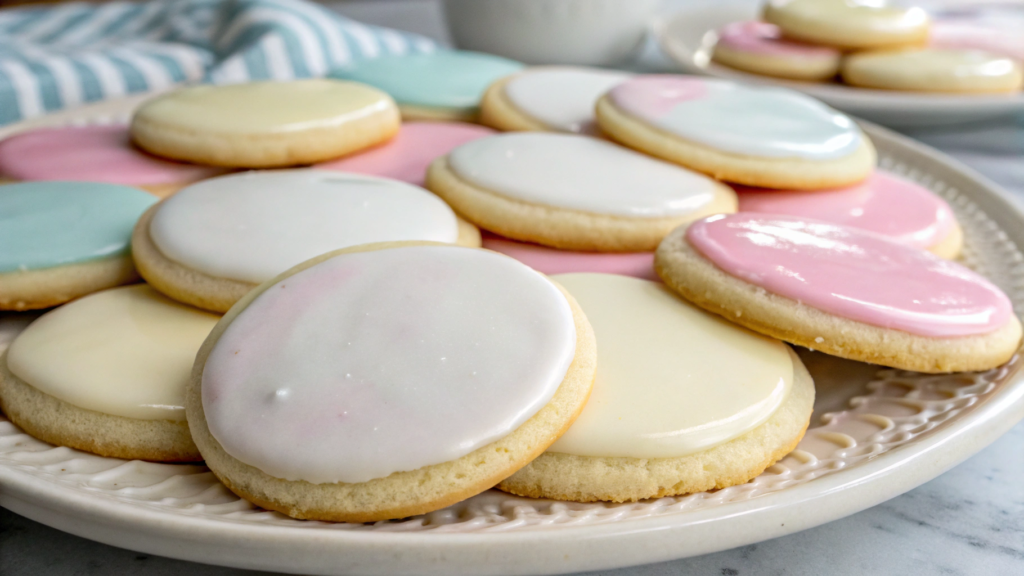
This icing needs just three ingredients — powdered sugar, milk, and light corn syrup. No egg whites, meringue powder, or butter. You can mix everything with a spoon in a small bowl, and once it dries, the surface stays smooth and noticeably glossy. Quick and easy, right?
The sugar cookies themselves are buttery, sweet, and slightly soft in the middle, with a thin glossy layer on top. You can leave the icing white or divide it into a few small portions and add just a little color.
Ingredients
For 20–24 cookies, you’ll need
The cookies
- 1 cup unsalted butter, at room temperature (226 g);
- ¾ cup sugar (150 g);
- 1 large egg;
- 2 teaspoons vanilla extract;
- 2½ cups all-purpose flour (about 315 g);
- ½ teaspoon baking powder;
- ½ teaspoon salt.
The 3-ingredient icing
- 2 cups powdered sugar (about 240 g);
- 2–3 tablespoons milk;
- 1 tablespoon light corn syrup.
You can add a few drops of gel food coloring if you like. Light corn syrup Karo Light Corn Syrup helps create a smooth, glossy icing surface.
How to bake the cookies
- Prepare the butter. It should be soft but not melted. If you press it with your finger, it should leave a small indentation. Butter that’s too warm will make the dough softer, and the shapes will spread more in the oven.
- Beat the butter and sugar for about 2 minutes. Add the egg and vanilla, then mix again until smooth.
- Add the flour. Mix it separately with the baking powder and salt, then gradually stir it into the butter mixture. Once the dough comes together, there’s no need to keep kneading it.
- Roll out the dough to about ¼ inch (6 mm) thick. I roll it between two sheets of parchment paper so I don’t have to keep adding flour, which can make the cookies drier.
- Cut out the shapes and transfer them to a baking sheet. If the dough has softened, put the whole baking sheet in the refrigerator for about 15–20 minutes. This short chill helps the edges stay neat.
Bake the cookies at 350°F (175°C) for about 8–10 minutes. I mainly watch the edges. They should be set but not dark golden. If the cookies bake too long, they’ll be noticeably drier once they cool.
After baking, let them sit on the baking sheet for about 5 minutes, then transfer them to a wire rack. Before adding the icing, the cookies should cool completely, including the centers.
How to make glossy icing
- Mix the three ingredients. Combine the powdered sugar, 2 tablespoons of milk, and corn syrup. Stir until there are no lumps left.
- Check the consistency. Lift the spoon over the bowl. The icing should fall in a slow, wide ribbon and gradually blend back into the surface. If it’s too thick, add milk ½ teaspoon at a time.
- Add color. For a light shade, you only need a tiny amount of gel food coloring. I pick it up with the tip of a toothpick so I don’t accidentally make the color too strong.
- Place a little icing in the center and spread it almost to the edge with the back of a small spoon. You can also carefully dip the top of the cookie into the icing and let the excess drip off.
- Remove any bubbles. If you see an air bubble on the surface, pop it right away with a toothpick. After a few minutes, the icing will start to set, and any mark will stay visible.
After decorating
After adding the icing, I leave the cookies for about 4–6 hours. For the first half hour, I try not to move them — while the icing is still liquid, even a slight tilt can shift it toward one edge.
Once it dries completely, the surface becomes smooth and develops that glossy finish the corn syrup is there for. Then you can transfer the cookies to a container. I place parchment paper between the layers so the tops don’t rub against each other.
I wouldn’t add anything else on top here. The smooth, glossy icing looks beautiful on its own, especially if you make a few similar shades. Soft pink, peach, and almost white, for example, look really gentle and pretty together.
7. Neon sugar cookie icing for fun parties
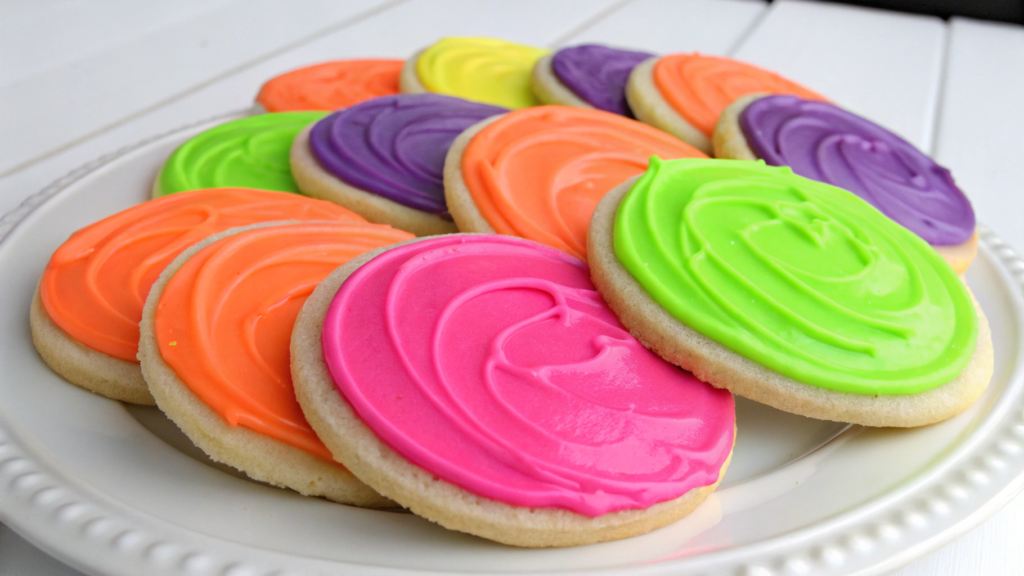
Sugar cookies with neon icing have a completely different feel from soft pastel versions. Here, it’s better to go with bright pink, lime green, orange, and purple without trying to tone them down. I’d make a batch like this for a birthday, a summer party, or a kids’ celebration where bold colors definitely won’t feel out of place.
And you don’t need to use five shades at once. Even bright pink and green together will already stand out on a party table.
Ingredients
For 20–24 cookies, you’ll need
The cookies
- 1 cup unsalted butter, at room temperature (226 g);
- 1 cup sugar (200 g);
- 1 large egg;
- 2 teaspoons vanilla extract;
- 2¾ cups all-purpose flour (about 345 g);
- ½ teaspoon baking powder;
- ½ teaspoon salt.
The bright icing
- ½ cup unsalted butter, at room temperature (113 g);
- 2½ cups powdered sugar (about 300 g);
- 2–3 tablespoons milk;
- 1 teaspoon vanilla extract;
- neon gel food coloring in three or four colors.
For truly saturated shades, concentrated coloring works best. Neon gel food coloring gives you bright color without adding a lot of extra liquid to the icing.
How to bake the cookies
Beat the butter and sugar for about 2 minutes, add the egg and vanilla, then mix in the flour, baking powder, and salt. Roll the dough to ¼ inch (6 mm) thick and cut out circles, stars, or other large shapes. If the dough softens, chill the cutouts for about 15 minutes.
Bake at 350°F (175°C) for 8–10 minutes. The edges should be set, but it’s better to keep the cookies pale — the bright colors will stand out more against that surface. Let them cool completely before adding the icing.
How to make neon icing
- Beat the butter. Mix it for about 2 minutes until smooth and soft. Then gradually beat in the powdered sugar.
- Add the milk and vanilla. Start with 2 tablespoons of milk. The icing should spread easily with a spoon or small spatula while still holding the lines you add.
- Divide the icing between bowls. You can leave one small portion white and color the rest. Add the food coloring gradually. You’ll need more for bright pink or green than you would for pastel shades.
- Add the main color. Cover each cookie with one shade, leaving a little texture from the spatula. The surface doesn’t need to be perfectly smooth here.
- Add contrasting details. Make green dots on pink icing, orange stripes on purple, or a few pink swipes on lime green. You can use a piping bag with a small opening or simply add the icing with the tip of a spoon.
- Keep some white. A few white dots or a thin white line between two bright colors help keep them visually separate. This is especially noticeable when pink, orange, and red sit next to each other.
If I’m making a big batch, I wouldn’t come up with a separate design for every cookie. It’s easier to choose three simple patterns and repeat them in different colors. Lindy and I usually do this together. It makes the decorating go faster.
After decorating
Buttercream needs a little time to firm up on top. I leave the cookies for about 30–60 minutes, then transfer them to a container. If the kitchen is hot, it’s better to keep them in the refrigerator, especially if you’re making them ahead of time.
I really like simple lines, dots, and bold swipes of color here. With shades this bright, you don’t need anything else. The cookies already look colorful and festive, and extra decorating would only take away from that.
8. Sugar cookies with smooth egg-free icing
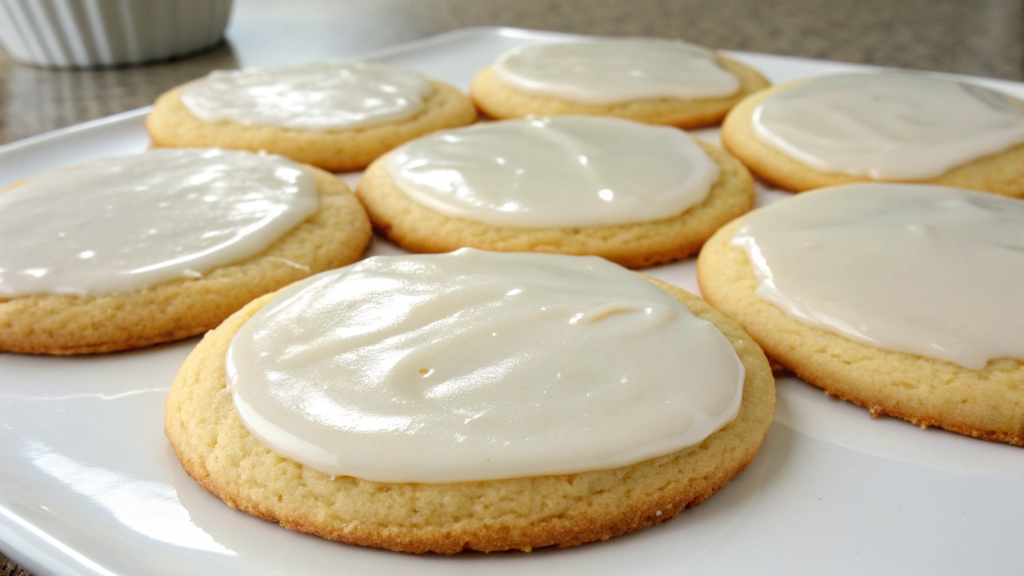
Eggs aren’t necessary in cookie icing at all. Egg-free icing can still turn out smooth, firm enough once dry, and lightly glossy. You also don’t need to whip anything here. Everything is mixed with a spoon in one bowl.
Ingredients
For 20–24 cookies, you’ll need
The cookies
- 1 cup unsalted butter, at room temperature (226 g);
- 1 cup sugar (200 g);
- 1 large egg;
- 2 teaspoons vanilla extract;
- 2¾ cups all-purpose flour (about 345 g);
- ½ teaspoon baking powder;
- ½ teaspoon salt.
The egg-free icing
- 2½ cups powdered sugar (about 300 g);
- 2 tablespoons milk;
- 2 tablespoons light corn syrup;
- ½ teaspoon vanilla extract;
- gel food coloring, optional.
Light corn syrup helps the icing spread evenly and keeps a slight shine after it dries.
How to bake the cookies
Beat the butter and sugar for about 2 minutes, add the egg and vanilla, then mix in the flour, baking powder, and salt. Roll the dough to about ¼ inch (6 mm) thick and cut out the shapes. If the dough gets soft, chill them for 15 minutes.
Bake at 350°F (175°C) for 8–10 minutes. Take the baking sheet out when the edges are set but have barely changed color. After 5 minutes, transfer the cookies to a wire rack and let them cool completely before adding the icing.
How to make egg-free icing
- Sift the powdered sugar. It really helps here. Small lumps will show up clearly on the smooth surface and keep the icing from spreading evenly.
- Add the liquid ingredients. Pour in the milk, corn syrup, and vanilla, then gently stir with a spoon until smooth. There’s no need to mix too aggressively or you’ll create lots of bubbles.
- Check the consistency. Lift the spoon and let the icing fall back into the bowl. The line on the surface should gradually disappear in about 10–15 seconds. If the icing is too thick, add milk ½ teaspoon at a time.
- Add the color. Divide the icing between small bowls and tint it with gel food coloring. For lighter shades, I add the color little by little, literally with the tip of a toothpick.
- Add a small amount of icing to the center of the cookie and spread it toward the edges with the back of a spoon or a toothpick. Don’t add too much at once or the icing will start running down the sides.
- Remove the bubbles. If any appear, pop them with a toothpick within the first few minutes. After that, the surface will start drying and any corrections will stay visible.
I leave these cookies uncovered for 4–6 hours. For the first couple of hours, the surface is still easy to damage even if it already looks dry on top. And if I need to pack them into a box, I usually leave them until the next morning.
It’s really simple here — mix everything in one bowl, cover the cookies, and let them dry. After a few hours, the surface becomes smooth, even, and lightly glossy. I usually stop there because the cookies already look nice enough to put on the table without any extra decorating.
9. Sugar cookies with drip icing

You don’t always have the time or patience for careful cookie decorating. With drip icing, you don’t need to pipe a perfect outline, wait between layers, or spend hours with a piping bag. Spread the icing on top, gently push it toward the edge — and you’re done.
One cookie might have two drips, another four, and one might have a drip that runs a little longer than the rest. That looks completely natural with this technique, and even better than trying to make every cookie identical. It’s best to use round cookies or cookies shaped like large hearts. Small corners and thin star points only make it harder for the icing to drip evenly.
Ingredients
For 20–24 cookies, you’ll need
The cookies
- 1 cup unsalted butter, at room temperature (226 g);
- 1 cup sugar (200 g);
- 1 large egg;
- 2 teaspoons vanilla extract;
- 2¾ cups all-purpose flour (about 345 g);
- ½ teaspoon baking powder;
- ½ teaspoon salt.
The icing
- 2 cups powdered sugar (about 240 g);
- 3–4 tablespoons milk;
- 1 tablespoon light corn syrup;
- ½ teaspoon vanilla extract;
- gel food coloring, optional.
How to bake the cookies
Beat the butter and sugar for about 2 minutes, add the egg and vanilla, then mix in the flour, baking powder, and salt. Roll the dough to ¼ inch (6 mm) thick and cut out fairly large cookies. If the cutouts get soft, chill them for about 15 minutes.
Bake at 350°F (175°C) for 8–10 minutes. The edges should be set, but there’s no need to let the cookies brown much. After baking, leave them on the baking sheet for a few minutes, then transfer them to a wire rack. Let them cool completely before adding the icing.
How to make neat drips
- Mix the icing. Combine the powdered sugar, 3 tablespoons of milk, corn syrup, and vanilla. Stir with a spoon until smooth.
- Check the consistency. The icing should slowly slide off the spoon rather than pour in a stream. If it barely moves, add milk ½ teaspoon at a time. Icing that’s too thin will run straight down the sides of the cookie.
- Add the top layer. Place the icing in the center and spread it almost to the edge. Leave a few millimeters uncovered so you can decide where you want the drips first.
- Make the first drip. Gently push a little icing toward the very edge with a spatula or the back of a spoon. As soon as it starts moving down the side, stop and see how far the drop goes.
- Add a few more. Space them unevenly around the cookie. You can let a little more icing run in one spot and make a much shorter drip next to it.
- Fill in the edge. Once the drips are in place, carefully connect the icing between them with the main layer on top. You can smooth the surface slightly with a spoon.
I still keep an eye on the cookies for the first few minutes. Sometimes one drip wants to run farther than the others. If that happens, you can catch it with a toothpick at the bottom edge while the icing is still fresh.
After decorating
Leave the cookies in a single layer for about 3–4 hours. Moving them right after decorating is tricky because the icing is still shifting, and even one tilt of the baking sheet can make the neat drips noticeably longer.
Once the surface has dried, you can transfer the cookies to a container. I place parchment paper between the layers and try to keep the iced edges from pressing against each other.
This version lets you be a little lazy. You don’t have to fix every edge or make the drips identical across the whole batch. A couple of short drips are enough to give each cookie a finished look, and if one turns out a little longer than the others, I definitely wouldn’t redo it.
10. One-bowl sugar cookies you can decorate immediately
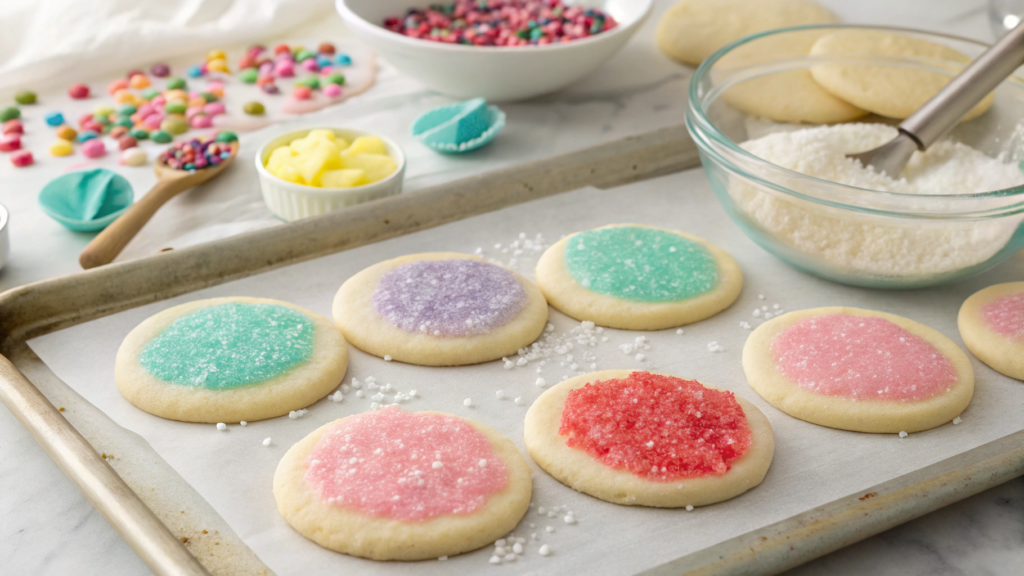
One-bowl sugar cookies have one big everyday advantage — you don’t end up with a mountain of dishes afterward. The butter, sugar, egg, and flour all go into the same large bowl one after another, the dough doesn’t need to chill for an hour, and you can shape the cookies right away.
I make the cookies round, slightly thick, and decorate them before baking. Colored sugar, large sugar crystals, or a few small candy decorations are gently pressed into the surface of the dough and stay in place after baking. If you want to add icing, you can do that too, but only after the cookies have cooled.
Ingredients
For 18–20 cookies, you’ll need
The cookies
- ½ cup unsalted butter, at room temperature (113 g);
- ¾ cup sugar (150 g);
- 1 large egg;
- 1½ teaspoons vanilla extract;
- 1¾ cups all-purpose flour (about 220 g);
- ½ teaspoon baking powder;
- ¼ teaspoon baking soda;
- ¼ teaspoon salt.
For decorating
- ¼ cup colored sugar or large sugar crystals;
- a small amount of sprinkles, optional.
How to make the cookies
- Mix the butter and sugar. Stir them together right in a large bowl until smooth. There’s no need to beat the mixture with a mixer for a long time.
- Add the egg and vanilla. Mix until everything is smooth again.
- Add the dry ingredients. Add the flour, baking powder, baking soda, and salt to the same bowl. First, gently mix the top layer of flour together, then stir it into the butter mixture. Stop as soon as you no longer see any dry flour.
- Shape the cookies. Use about 1½ tablespoons of dough for each one, roll into balls, and press them down lightly with your palm. A thickness of about ½ inch (1.3 cm) will give you a softer center.
- Decorate right away. Pour the colored sugar onto a small plate and press the top of each cookie into it. You can mix two colors or make a few batches with different sprinkles. Press larger decorations in slightly with your finger so they don’t fall off after baking.
- Bake for 9–11 minutes at 350°F (175°C). The edges should be set while the centers stay pale. Let the cookies sit on the hot baking sheet for another 5 minutes, then transfer them to a wire rack.
Once completely cool, store the cookies in an airtight container. Without icing, you can stack them in layers without any problem. At room temperature, they stay soft for about 3–4 days.
The whole idea here is that there’s no separate waiting stage between mixing the dough and decorating it. Roll the dough into balls, decorate them with colored sugar or sugar crystals, and put the baking sheet straight into the oven. One bowl, minimal cleanup — and the cookies come out of the oven already decorated.
Final touches
You may have noticed that the same batch of sugar cookies can look completely different every time. Use a different shade of icing or change a small detail on top, and you already have a completely different cookie on the table. At home, you can decorate them exactly the way you like.
If you decide to try one of these versions, tell me in the comments which one you chose and how it turned out.
And if you have your own favorite way to decorate sugar cookies, write about that too. I’d love to read it — and I may just borrow one of your ideas for our next batch of favorite cookies.